Skyline QAPortal
The Skyline QAPortal connector allows you to manage regression tests, group them together, and see the results in DataMiner. This way, you can also enable alarm monitoring and trending of the results of your regression tests.
About
Version Info
| Range | Features | Based on | System Impact |
|---|---|---|---|
| 1.0.0.x [SLC Main] | - Manage regression tests - Run tests with different inputs |
- | - |
System Info
| Range | DCF Integration | Cassandra Compliant | Linked Components | Exported Components |
|---|---|---|---|---|
| 1.0.0.x | No | Yes | SLC-AS-SkylineQAPortalExampleTest | - |
Configuration
Connections
This connector uses a virtual connection and does not require any input during element creation.
Initialization
There is an option to push the results to the Skyline QA Portal. This will give Skyline Communications visibility on your test results. To enable this:
Make sure you have a mail server configured on your DMS, so the results can be mailed to the portal
Configure the API Key and the Client ID on the Settings page of the Skyline QAPortal element.
Enable the option Forward Results to Portal.
The API key and client ID will need to be provided by Skyline. The client ID defines your organization, and the API key is the secret that allows you to push results to the Skyline portal. Keep these secret, as otherwise anyone could push results in your name.
How to Use
The connector will automatically detect any regression tests available in your DMS. Regression tests are added in the form of an automation script.
If a regression test requires input parameters, you can add them on the Input Parameters page. The connector is designed so that you can add the same test multiple times with different inputs. This way, you can make your regression tests generic and reusable.
Tip
To get you started with regression tests, an example script is available: SLC-AS-SkylineQAPortalExampleTest.
Adding a Regression Test
To add a regression test, go to the General page, right-click the Regression Tests table, and select Add new test.
If you have just added a new regression test, you may need to use the Refresh Tests button to see it in the dropdown box.
Adding Input Parameters
If your regression test has input parameters, configure these in the Input column of the Regression Tests table.
If you have not yet defined any input group (i.e., the dropdown is empty), create a new input group:
After you have clicked the pencil icon in the Input column of the Regression Tests table, click ....
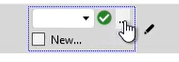
Select New and click the green check mark icon.
This will create a new group Input Group in the Input Parameters table.
Go to the General > Input Parameters page.
Use the pencil icons in the Value column of the Input Parameters table to configure a value for the parameters in the group.
Note
You can also use the right-click menu of the Input Parameters table to create or remove input groups.
Grouping Your Tests
To group a set of tests so that you can execute them at once, use the Group column in the Regression Tests table.
If the tests need to be executed in a specific order, use the Exec Order column to define the order. The test that is lowest in the order will be executed first. If any tests in the same group have the same position in the order, they will be executed at the same time.
Running Your Tests
You can run the regression tests by using the Run button in the Regression Tests table or in the Groups table.
Once the tests are finished, you will find the results on the Results Cases and the Results Performance pages.