DataMiner Failover on Amazon Web Services
Important
This setup is deprecated. We recommend using DataMiner as a Service (DaaS) instead.
Tip
For a less complicated setup, we recommend using Swarming with Node Recovery instead of setting up Failover.
When you set up a DataMiner Failover configuration, you need to assign virtual IP addresses to the corporate and acquisition networks of the active DMA. Switching from the active to the passive DMA requires that those virtual IP addresses are reassigned. This is done seamlessly by DataMiner.
If you use Amazon Web Services (AWS) for your system database, you need to assign secondary private IPv4 addresses to the network interfaces of your EC2 instances. You also need to transfer those addresses between your instances whenever a switch in DataMiner occurs.
Prerequisites
The EC2 instances must be in the same availability zone. If your instances are in different zones, you should use Failover with DNS instead.
The EC2 Instance Metadata Service (IMDS) must be reachable, and the following best practices must be followed:
- IMDSv2 enabled with
HttpTokens=required. - No local firewall blocking 169.254.169.254.
- IMDSv2 enabled with
The EC2 instances must have a specific IAM role assigned, which has a policy attached similar to the following example:
{
  "Version": "2012-10-17",
  "Statement": [
      {
          "Sid": "AllowENIManagement",
          "Effect": "Allow",
          "Action": [
              "ec2:AssignPrivateIpAddresses",
              "ec2:UnassignPrivateIpAddresses",
              "ec2:DescribeNetworkInterfaces",
              "ec2:ModifyNetworkInterfaceAttribute"
          ],
          "Resource": "*"
      }
  ]
}
Setting up Failover
-
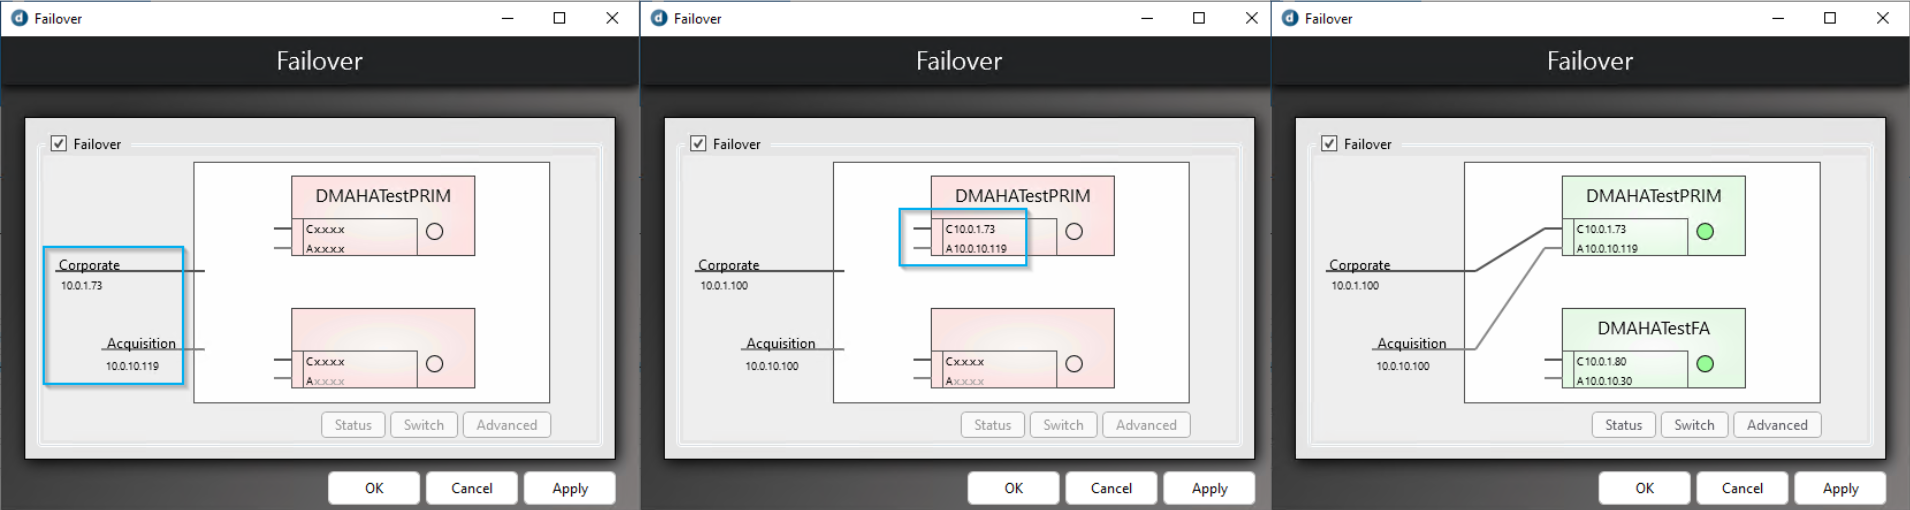
When you configure Failover, by default the IP addresses from the DMA on which you are configuring Failover are selected as the virtual IPs. Since these addresses are already assigned as primary addresses in AWS, you need to assign these back to the DMA and modify the virtual IPs according to your addressing scheme.
Open this image in a new tab to view the full resolution.
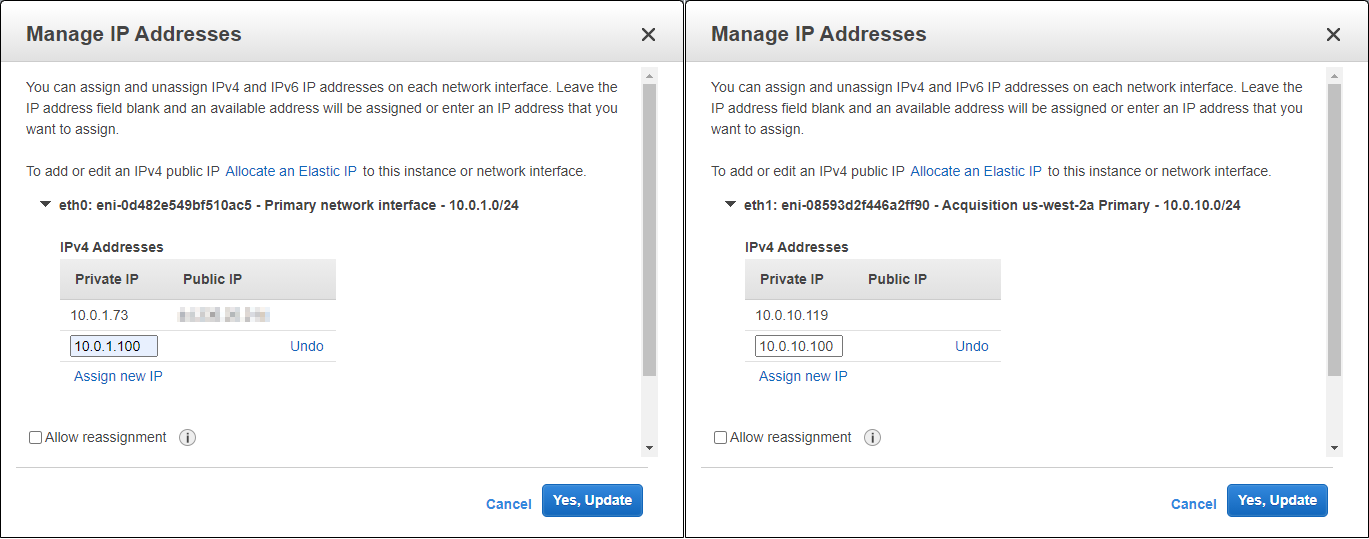
In the AWS Management Console, go to the EC2 section and, under Network & Security, select Network Interfaces. Locate the network interfaces of your active DMA and add the virtual IPs.
Installing the AWS Tools
Install the AWS Tools for Windows PowerShell on both Failover DMAs.
Open PowerShell in an administrative window.
Execute the following command:
Install-Module -Name AWSPowerShell
Tip
For more information, see AWSPowerShell 4.1.7.0.
Configuring DataMiner
In order for DataMiner to be able to acquire the virtual IP addresses, these addresses need to be re-assigned in AWS first. To accomplish this, DataMiner can execute a script before it acquires the virtual IP.
Using the template below, create 2 scripts, one for the active DMA and one for the passive DMA, and fill in the variables.
If you do not have an acquisition network, you can remove the acquisition section.
Save the script under the name VIPAcquired.ps1 in the
C:\Skyline DataMiner\Toolsfolder on the correct DMA.
#----------------------------------AWS-----------------------------------#
$AWS_REGION = "";

#-----------------------------CORPORATE----------------------------------#
$VIP_CORPORATE = "";
$NETWORK_INTERFACE_ID_CORPORATE = "";

Register-EC2PrivateIpAddress -NetworkInterfaceId
$NETWORK_INTERFACE_ID_CORPORATE -PrivateIpAddress $VIP_CORPORATE -
AllowReassignment 1 -Region $AWS_REGION

#----------------------------ACQUISITION---------------------------------#
$VIP_ACQUISITION = "";
$NETWORK_INTERFACE_ID_ACQUISITION = "";

Register-EC2PrivateIpAddress -NetworkInterfaceId
$NETWORK_INTERFACE_ID_ACQUISITION -PrivateIpAddress $VIP_ACQUISITION -
AllowReassignment 1 -Region $AWS_REGION