Using flows in a low-code app
In this tutorial, you will learn how to create a flow, and use it to make a timeline load only the items within the timeline viewport or to reuse a panel using data coming from multiple components.
Note
This tutorial uses DataMiner web version 10.5.2.
Prerequisites
- DataMiner server 10.4.0/10.3.9 or higher and DataMiner web 10.5.2 or higher.
Overview
- Step 1: Install and open the Flows app
- Step 2: Make the timeline load only items inside the viewport
- Step 3: Reuse a panel
Step 1: Install and open the Flows app
Go to the Tutorial - Flows package in the Catalog.
Deploy the package to your DataMiner System by clicking the Deploy button.
Make sure the prerequisites mentioned above are met, as otherwise the deployment will fail.
Go to
http(s)://[DMA name]/root, and open the Flows app.
You can now start exploring the app or directly move on to the next step by editing the app.
The app contains three different pages:
- An overview page of the two operators you will be using today.
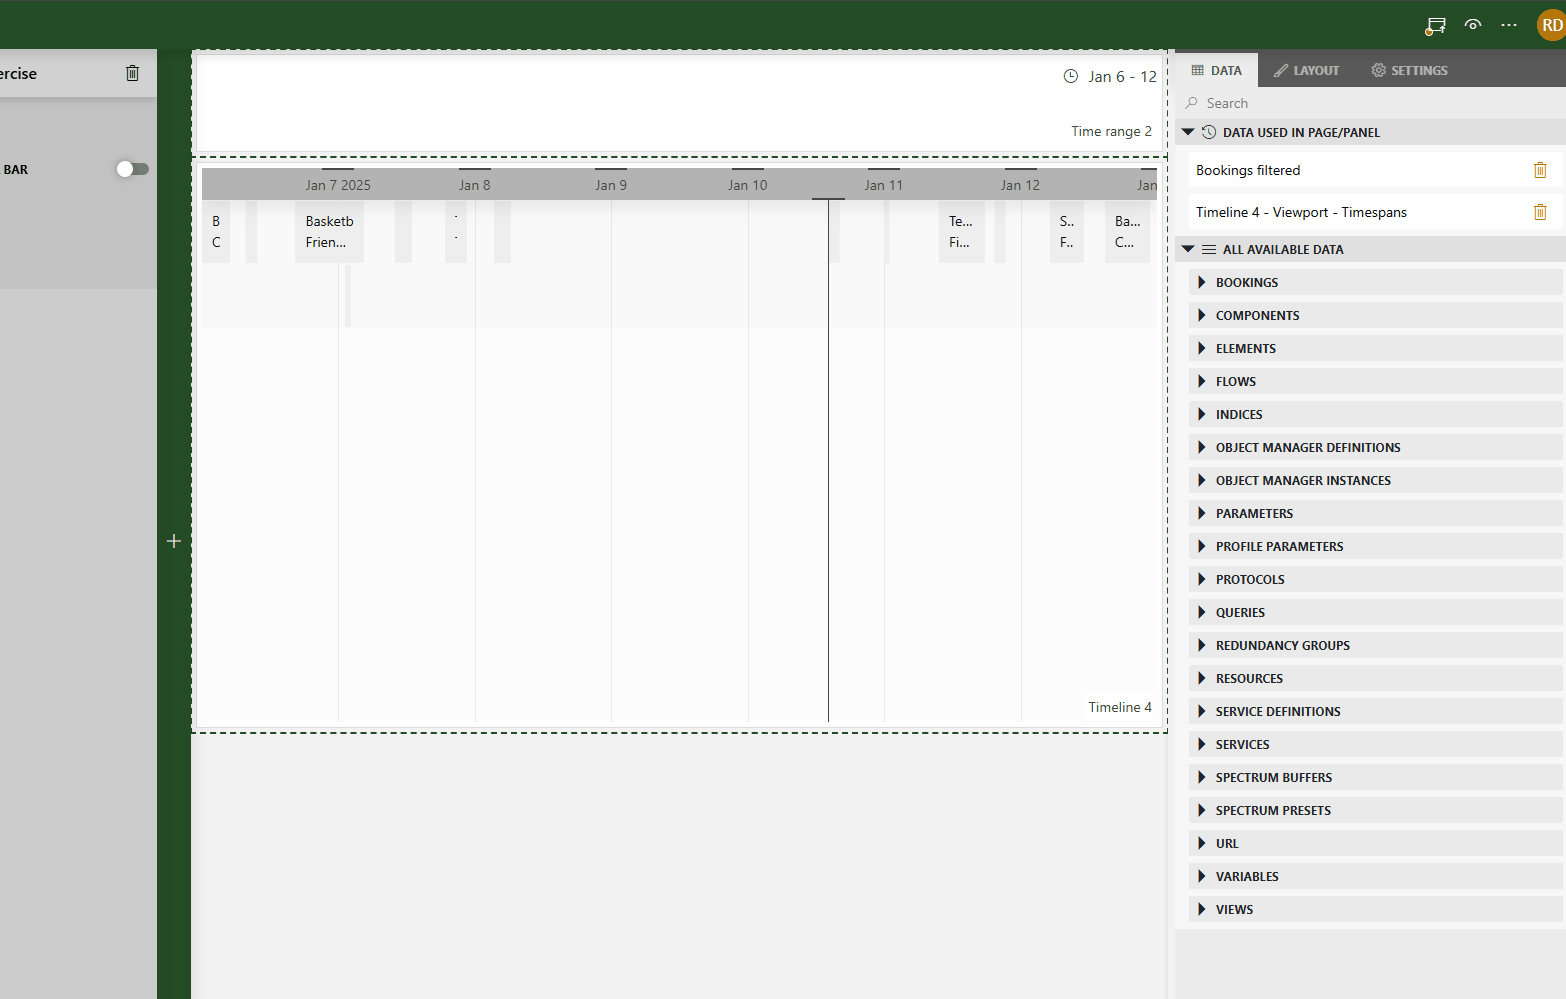
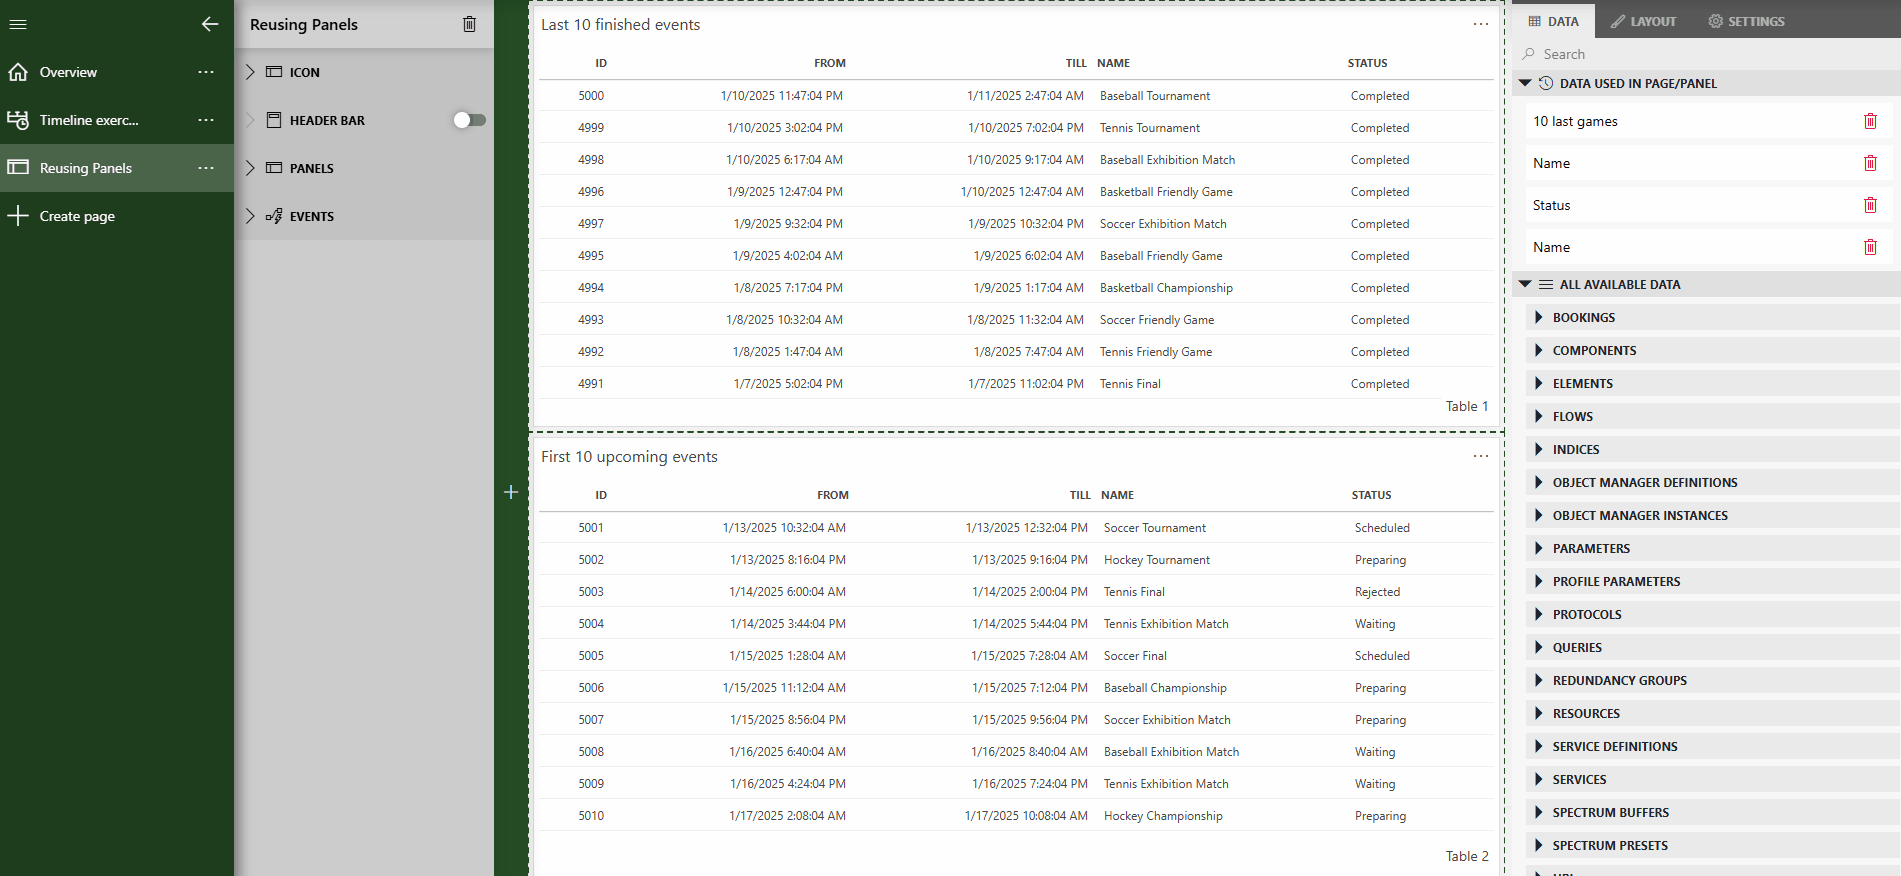
- A timeline exercise where you will only fetch the items inside the viewport instead of all data (50000 rows).
- A panel reuse exercise where you will reuse a single panel for two component data outputs.
Step 2: Make the timeline load only items inside the viewport
In this step, you will modify the timeline to fetch only the items that are within the viewport. This optimization significantly speeds up the initial load of the timeline. Flows are essential for ensuring the app does not start fetching the new data multiple times every time a user zooms out.
In edit mode, go to the Timeline exercise page of the app.
In the Data pane on the right, expand the Flows item and click the "+" icon to start creating a new flow.
Specify a name for the flow in the Name box.
In the Data tab on the left, expand Components > Timeline, and drag the Viewport timespan item to the pane in the middle.
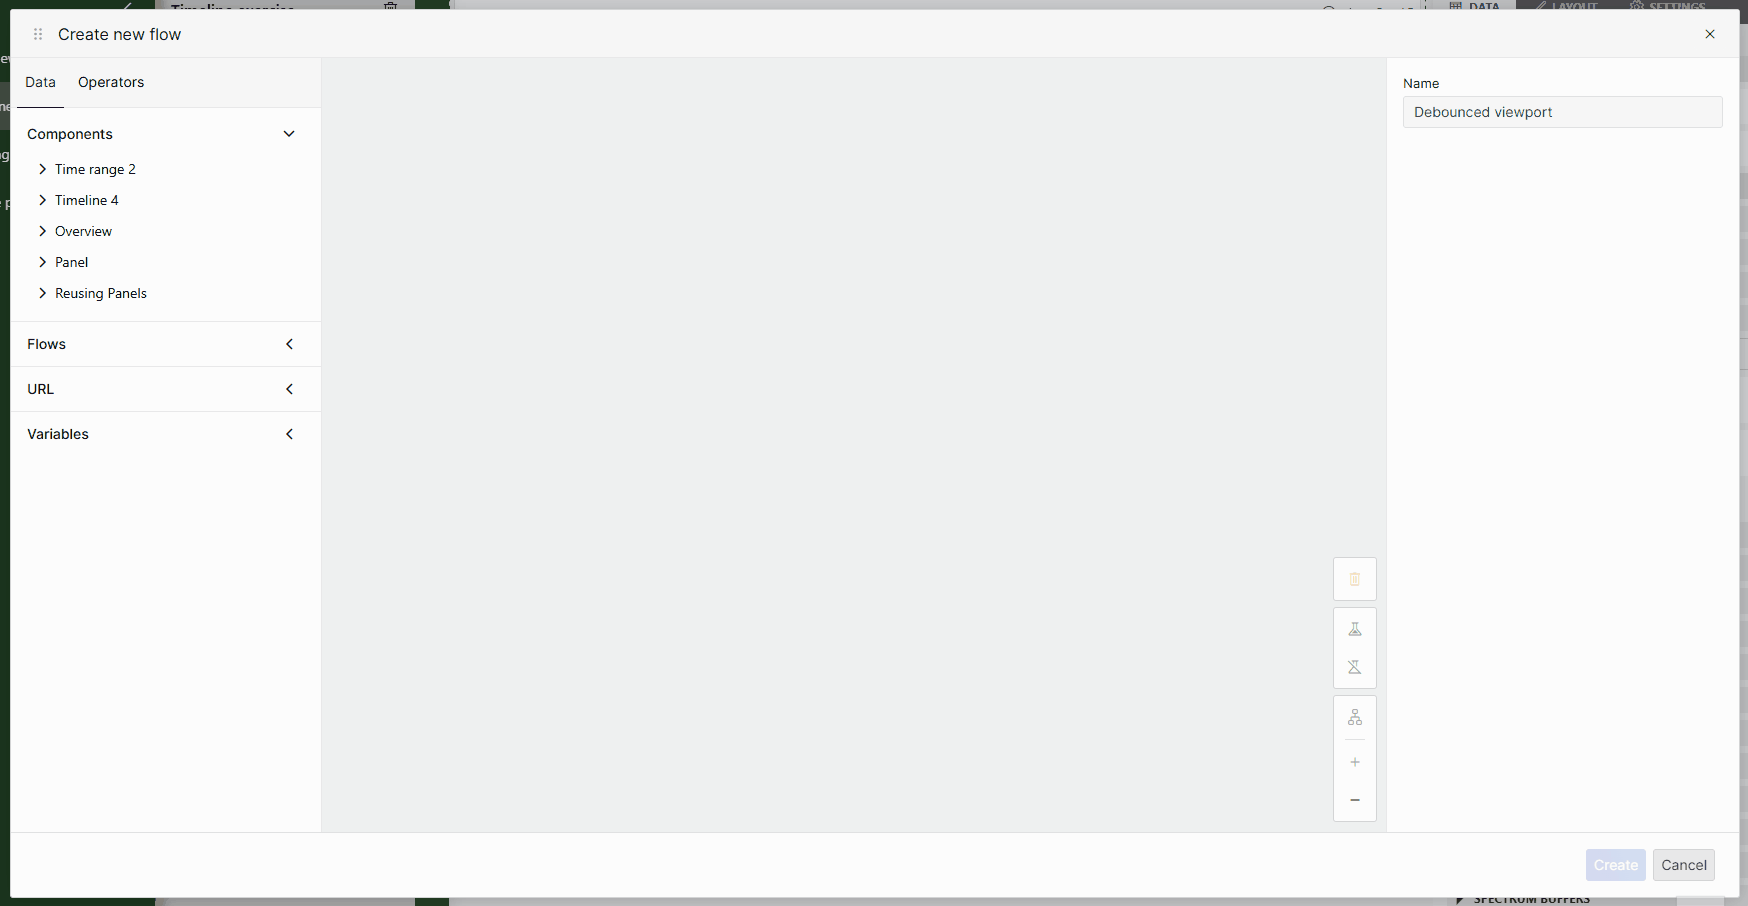
Switch to the Operators tab in the sidebar on the left, and drag the Debounce operator to the pane in the middle.
Select the operator you have just added, and change the time value in the Duration box to 500 ms.
Connect the Viewport source to the Debounce operator by connecting the bottom of the Viewport block with the top of the Debounce block.
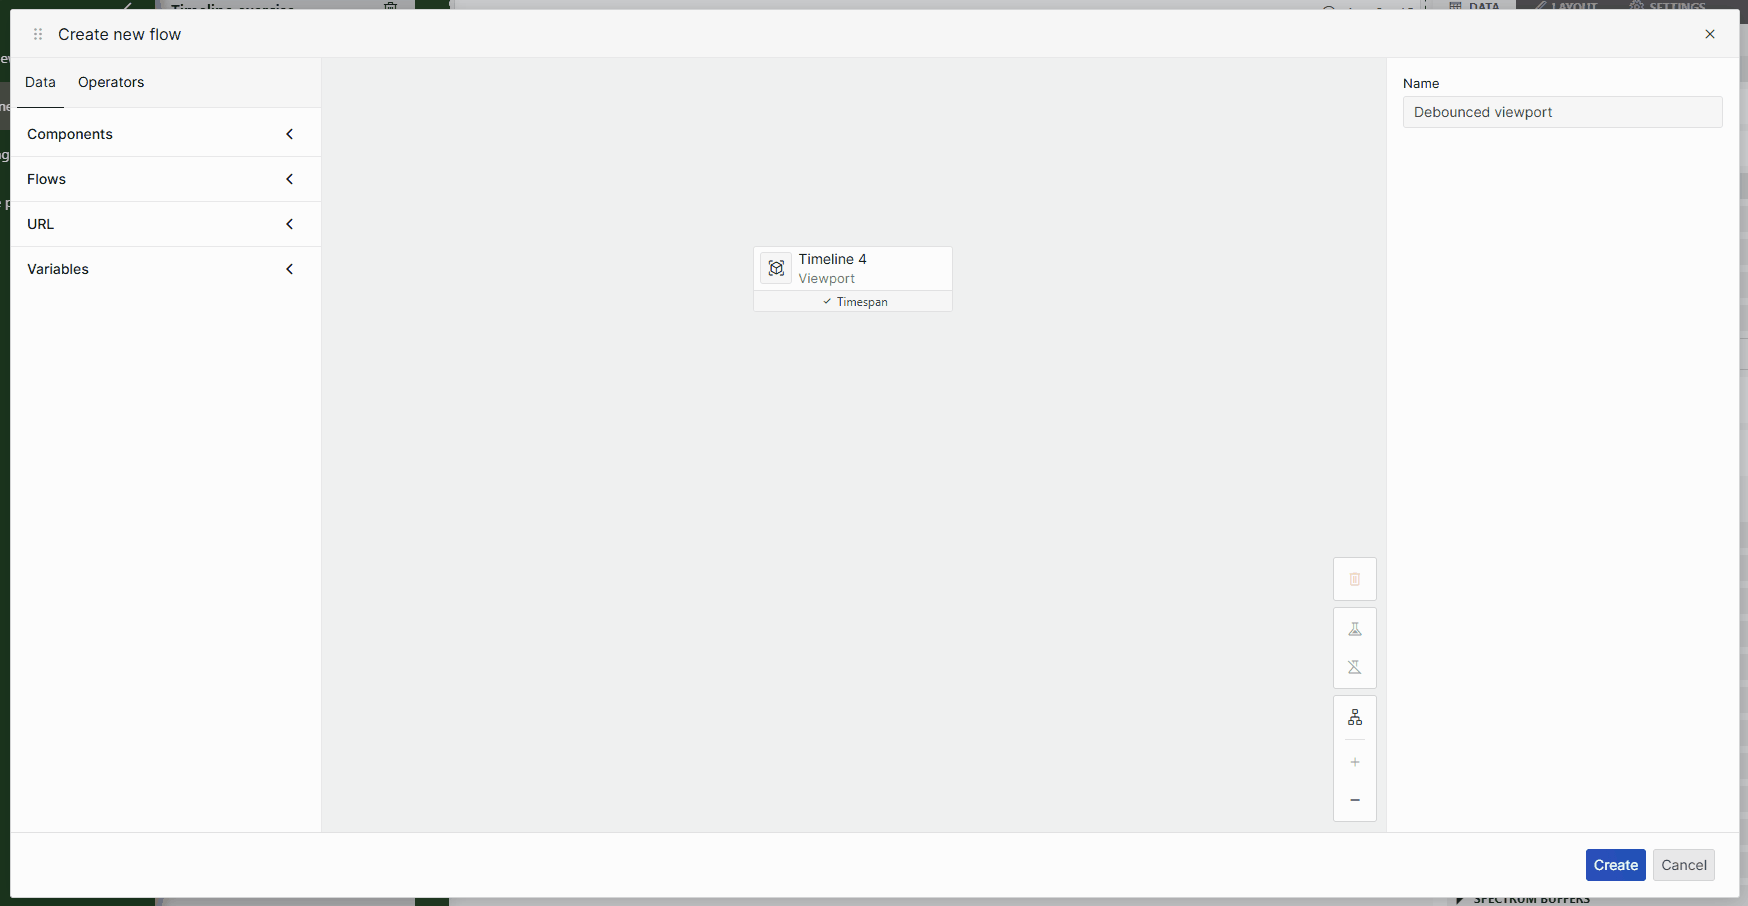
Save the flow by clicking the Create button.
You now have a flow, but it still needs to be plugged into the query populating the timeline component.
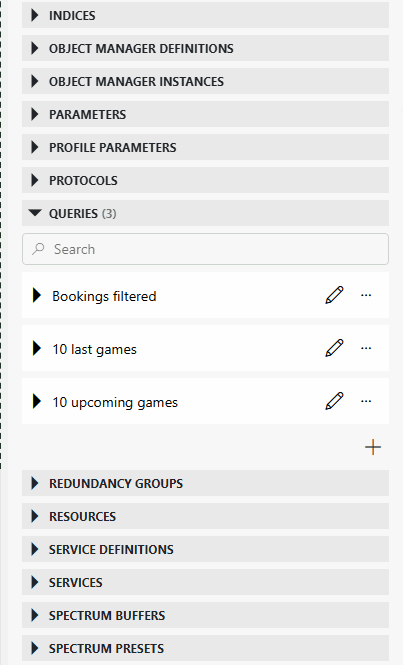
In the Data pane on the right, expand the Queries item, and click the pencil icon next to the Bookings filtered query in order to start editing it.
Add a Filter operator to the query and configure it as follows:
- Column: From.
- Filter method: greater than or equals.
- Value: Click the link icon and link the value to the From property of the flow you have just created.
Add another Filter operator and configure it as follows:
- Column: Till.
- Filter method: less than or equals.
- Value: Click the link icon and link the value to the To property of the flow you have just created.
Now only the items in the viewport will be fetched for the timeline, and when you zoom out, a debounce of 500 ms will be applied so that the app does not fetch the data multiple times while you are still scrolling.
Step 3: Reuse a panel
In this second step, you will reuse a panel to handle a selection from two different components. Before the introduction of flows in DataMiner web 10.5.2, this was only possible by copying the entire panel and changing the used data for each panel. With flows, you can use a Merge operator instead. However, note that the query used in both components needs to be the same or have the same node keys.
In the Flows app, actions have already been configured to open the panel on double-click of both tables, so all you need to do now is configure this panel to handle both selections.
Go to the Reusing Panels page of the app.
Select a row in each of the tables.
This will make both component selections available within the flow editor.
Create a new flow in the same way as before and give it a name.
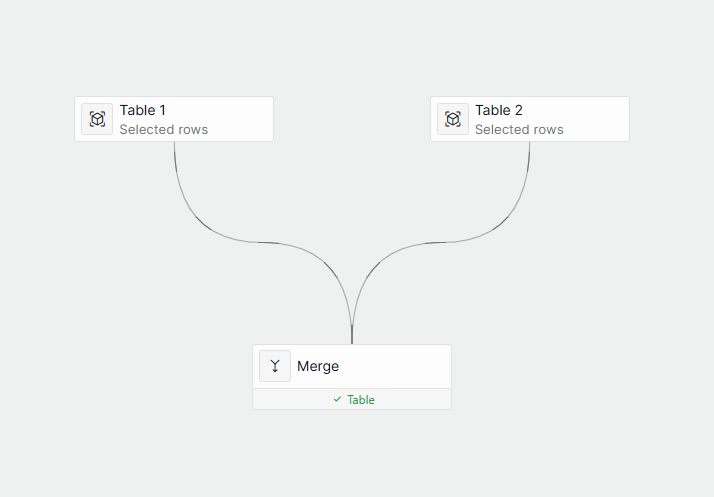
In the Data pane on the left, expand the Components > Table > Selected rows nodes and drag the Table items to the flow.
Switch to the Operators tab and add the Merge operator to the center of the editor.
Link both Table blocks to the Merge block, and click Create to save your flow.
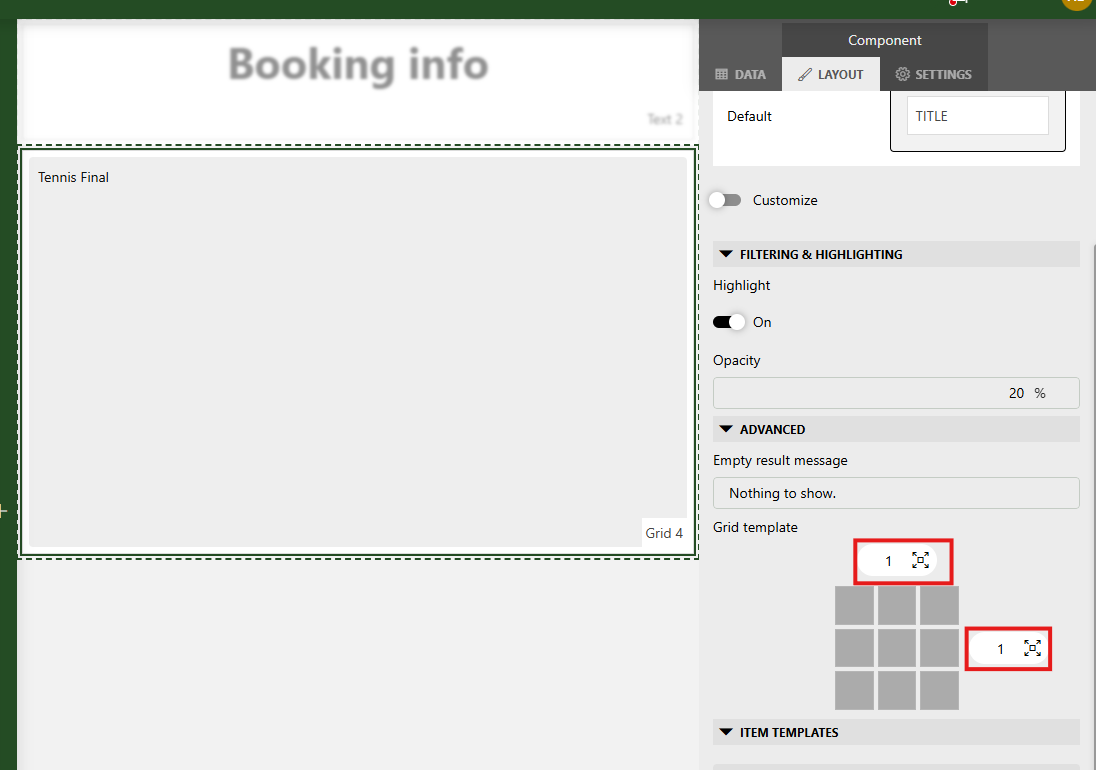
In the pane on the left, expand the Panels node and click the pencil icon to edit the panel.
The panel already contains a grid component, but this will now need to be changed to use the newly created flow.
In the Data pane on the right, under Data used in component, use the garbage can icon to remove the Tables data.
Expand the Flows item in the Data pane, and drag the flow you have created earlier to the grid component.
Set the grid to use the entire width of the component by selecting the component and applying the following configuration in the Layout pane on the right:
Done! You can now reuse this panel to open details for both tables by double-clicking a table entry.
