Getting started with Site Manager
SiteManager DxM installation
The DxM is by default included in the DaaS image of DataMiner 10.5.10. If your DaaS system is using an older DataMiner version, you will need to upgrade DataMiner and deploy the SiteManager DxM.
For a self-managed DataMiner System, the SiteManager DxM must run on the same machine as the DataMiner Agent from which you want to connect to remote data sources. The DxM requires DataMiner 10.5.10/10.6.0 or higher and Windows 10 or Windows Server 2019 (build 17134) or higher. You can deploy it from the Admin app.
When the DxM has been installed, in the Windows services overview, you should see two services:
- DataMiner SiteManager: This is the SiteManager DxM that interacts with DataMiner and the zrok-agent process.
- zrok-agent: This is the zrok Agent service with which the SiteManager DxM communicates for creating the communication tunnels.
On-premises setup
To allow DataMiner to access an on-premises data source via the Site Manager, the following steps are needed:
On a machine in your on-premises network, run the DataMiner SiteManager setup script by using the following command, where you replace the placeholders with the account token and a site name.
iex "& { $(iwr https://raw.githubusercontent.com/SkylineCommunications/dataminer-sitemanager-setup/main/Setup-DataMinerSiteManager.ps1 -UseBasicParsing) } -Command install -AccountToken '<AccountToken>' -SiteName '<SiteName>'"You can find the account token in the Site Manager logging in DataMiner Cube, via Apps > System Center > Logging > Site Manager (DxM). This log file should contain a line mentioning a token as follows:
Your account token is aWsTbeKpwARK. You can now get started configuring your site(s). Learn more at https://aka.dataminer.services/SiteManagerGettingStarted.". Copy this token.The site name should be a concise description of the site from which you are exposing data sources. When a connection is configured during the creation or editing of an element in DataMiner Cube, this description will be shown in the Site dropdown.
Note
- The minimum OS version required by the script is Windows 10 or Windows Server 2019 build 17134.
- You must run the script as administrator.
- The machine where you install this script must be able to access the data sources you want to expose. It does not have to be the machine where the data sources are running.
- In case PowerShell's execution policy prevents the execution, specify an execution policy (e.g.,
-ExecutionPolicy Bypass). For more information regarding PowerShell's execution policy, refer to About execution policies. - Updating a site name is not straightforward. To update a site name, you will need to uninstall (as mentioned below) and then run the script again. Also, if data sources have been configured to set up a connection with this site, the configuration of these data sources will also need to be updated.
To uninstall, you can use the following command:
iex "& { $(iwr https://raw.githubusercontent.com/SkylineCommunications/dataminer-sitemanager-setup/main/Setup-DataMinerSiteManager.ps1 -UseBasicParsing) } -Command uninstall"After a successful installation, you can start exposing your data sources so Site Manager can set up a tunnel for each data source it needs to communicate with.
If you are using a new PowerShell shell, execute the following command first:
$env:USERPROFILE = "C:\Windows\System32\config\systemprofile".Alternatively, if you are using a new command prompt, make sure to first execute the following command:
set USERPROFILE=c:\Windows\System32\config\systemprofile.For each data source you wish to expose, execute the following commands in the order below:
zrok reserve private --backend-mode <backendMode> <endpoint>In the command above,
<backendMode>is either tcpTunnel or udpTunnel, and<endpoint>specifies the endpoint you want to expose.For example, when integrating equipment with an on-premises IP address of 10.13.1.102 using an SNMP connection, use:
zrok reserve private --backend-mode udpTunnel 10.13.1.102:161SNMP uses UDP on port 161, so
<backendMode>specifies udpTunnel and<endpoint>contains 161.Hostnames are also supported. For example, when integrating equipment reachable via its hostname with an HTTPS connection, use:
zrok reserve private --backend-mode tcpTunnel vb440.lab.hq.slc:443HTTPS uses TCP and port 443, so
<backendMode>specifies tcpTunnel and<endpoint>contains 443.When executing this command, you should see the following output:
your reserved share token is '2dxzh484zn3'. Copy the token and execute the next command.zrok share reserved <token>In the command above,
<token>is the token value shown in the output of the previous command.
Getting an overview of shared resources
To get an overview of the endpoints that have been shared, type the following command:
zrok agent status
This will result in an overview similar to the following example:
TOKEN         RESERVED  SHARE MODE  BACKEND MODE  TARGET
02x31uu2yacbh  true      private     tcpTunnel     127.0.0.1:8080
1 shares in agent
Alternatively, you can also obtain an overview in the browser by navigating to the web frontend of the zrok Agent. To know on which port the web frontend is running, perform the following command:
zrok agent version
In addition to the version, the output will also show the endpoint of the web frontend, e.g., 127.0.0.1:8888.
Navigating to this endpoint in the browser should show a similar overview as the status command.
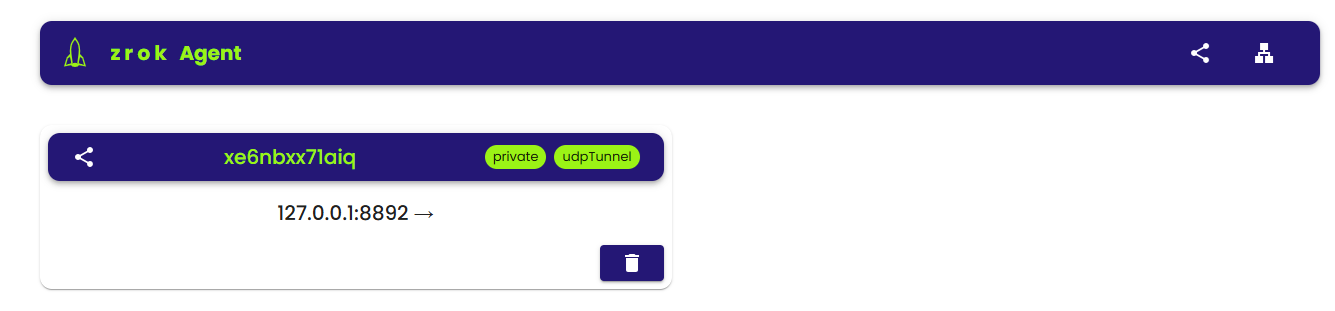
zrok Agent web UI
Stopping the sharing of an endpoint
In case you no longer want to expose a specific endpoint:
Execute the following command, replacing
<shareToken>with the share token for this specific endpoint (e.g.,02x31uu2yacbh):zrok release <shareToken>This will release the share from the zrok controller.
Execute the following command:
zrok agent release share <shareToken>This will release the share from the zrok Agent.
Creating an element that communicates with a data source through a tunnel
Once a data source has been shared, you are ready to connect to it from a DaaS system.
In DataMiner Cube, add a new element.
When you configure an element connection for the element that should communicate with a data source on a remote site (through a secure tunnel), select the site in the Site dropdown.
The site name that appears in the Site dropdown corresponds with the description specified during execution of the on-premises installation script.
Fill in the IP or hostname of the exposed data source.
Important
If, during on-premises setup, you specified the endpoint to be shared (in the zrok reserve command) using the IP address, then to access the data source in DataMiner you will also need to specify the IP address. Similarly, if you used the hostname, you will also need to specify the hostname in DataMiner Cube.
A tunnel will only be created as long as at least one element is actively connecting to this endpoint. For example, if you have an element that sets up a connection to a data source on a remote site, the tunnel will only be created when the element is started. As soon as the element is stopped or deleted, the tunnel will be torn down.
In case multiple elements on the same DataMiner Agent connect to the same remote endpoint, only a single tunnel will be set up and this tunnel will be shared by the elements on that DataMiner Agent. The tunnel will only be torn down when all elements that connect to this remote endpoint are either stopped or deleted.