Ordering DataMiner credits
To create and maintain a DaaS instance, your organization must have sufficient DataMiner credits. To order DataMiner credits for the first time, follow the procedure below.
Note
If you have already created a SaaS subscription as detailed below, and you want to order additional credits, you do not have to create a new SaaS subscription. Instead, go to your SaaS subscription in the Azure portal, and click Open SaaS Account on publisher's site to be redirected to the Purchase credits page.
Go to the Microsoft Marketplace DataMiner page.
Click Get It Now for the DataMiner credit plan.

In the dialog, click Get it now to be redirected to the Azure portal.

Create a SaaS subscription resource in Azure:
Provide a resource name for the SaaS subscription resource.
Assign the resource to a resource group.
Click Review + subscribe.

At the bottom of the window, click Subscribe.

Click Configure account now.
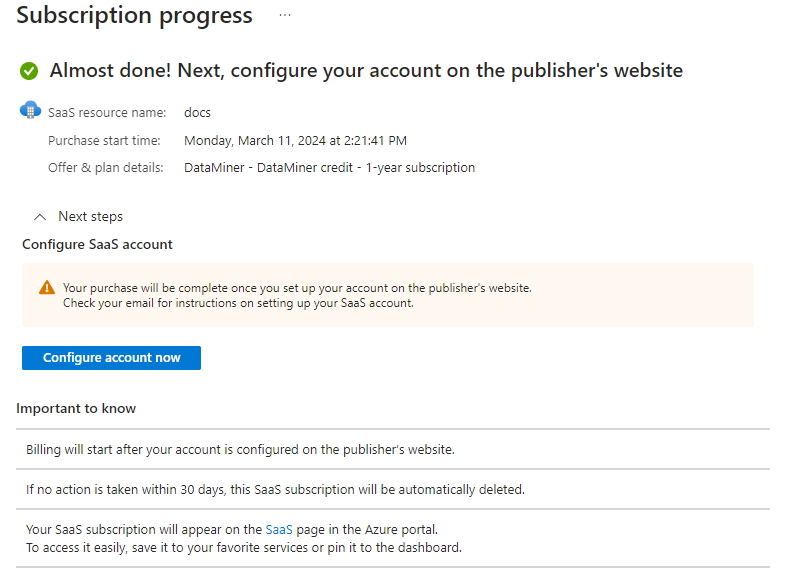
This will redirect you to the DataMiner marketplace landing page.
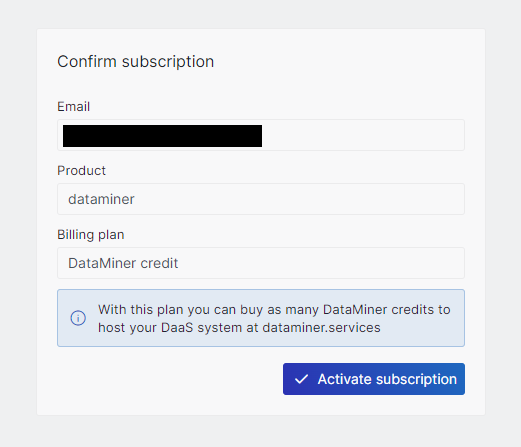
Click Activate Subscription.
This will activate your subscription and may take a couple of minutes.
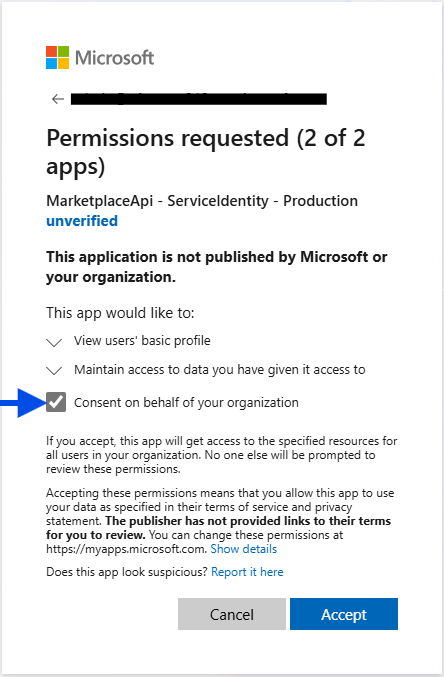
If this is the first time you activate the subscription, you will need to accept the permission requests when prompted:
Click Next.

Select the checkbox indicating consent and click Accept.
Once your subscription has been activated, fill in your Organization ID.
Use the slider to indicate how many credits you wish to purchase for the organization.
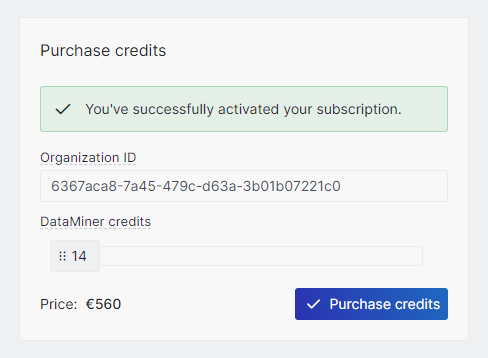
Click Purchase credits and click Confirm to confirm your purchase.