Setting up complete quality control in CI/CD for connector deployment
This tutorial is divided in two parts:
The first part will show how to set up a GitHub development environment. This is optional. If you already have a GitHub and SonarCloud organization, you can skip this and start immediately from part 2.
If you are a Skyline employee, use https://github.com/SkylineCommunicationsSandbox and skip part 1.
The second part will show how to create a new connector solution on GitHub and utilize the CI/CD workflows from your development environment to publish it to the Catalog.
Total expected duration: 30 minutes.
Overview
- Part 1: Setting up your development environment in GitHub
- Part 2: Creating a connector and publishing it to the Catalog
Prerequisites
- A GitHub account
- A staging DataMiner Agent that is accessible from your pipeline and that uses DataMiner version 10.3.0/10.3.2 or higher
- Microsoft Visual Studio 2022
- Git (sometimes already included with VS2022)
- Runtime .NET SDK 8.0 (download) (sometimes already included with VS2022)
- DataMiner Integration Studio
Note
Both SonarCloud and GitHub require paid licenses to fully support private GitHub repositories.
For real-world scenarios, you will likely need at least a paid SonarCloud license to work with private GitHub repositories. A free GitHub version can still be used for private repositories, but this will slightly alter how you work with the product.
Part 1: Setting up your development environment in GitHub
In this part, you will learn how to set up an organization in GitHub and SonarCloud so that you and your development team can collaboratively develop DataMiner artifacts while maintaining high-quality standards. This tutorial sets up the framework to achieve the same quality standards that developers at Skyline Communications adhere to. It will also add starter workflows provided by Skyline to improve efficiency. Additionally, you will learn how to set up SonarCloud, a mandatory static analysis tool used in all GitHub workflows provided by Skyline.
Expected duration: 20 minutes.
Tip
See also: Kata #49: Set up your development environment in GitHub on DataMiner Dojo 
Step 1: Create a GitHub Organization
Follow the instructions specified in the GitHub documentation.
Step 2: Create a SonarCloud organization and link it with GitHub
Follow the instructions specified in the SonarCloud documentation.
Step 3: Set up starter workflows for your organization
Optionally, create a GitHub user specifically for bot activities, e.g., CICDOrganization.
Use a shared mailbox from your organization if possible. If this is not possible, for example because of 2FA, you can use a personal GitHub account with rights to create repositories.
Add the user to your organization and ensure that they have sufficient rights to create new repositories.
Go to User Settings > Developer Settings > Personal Access Tokens to create a personal access token (classic) for your GitHub user.
Make sure the token has the following scopes:
- repo
- workflow
- admin:org/write:org
- admin:org/read:org
Tip
For more details, refer to the GitHub documentation.
Fork the Skyline-Starter-Workflows repository into your organization.
Add a new secret to the fork:
Go to the settings of your fork and select Secrets and variables > Actions.
Add a new secret called
PATand use the previously created personal access token as the value.
Go to the Actions tab, verify the workflow content, and enable the workflow.

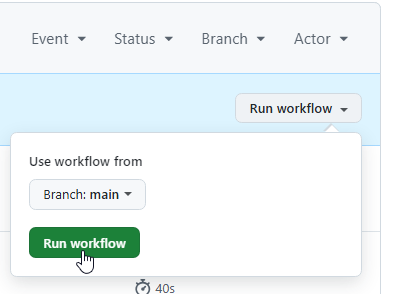
Go to the workflow and trigger an initial run manually.
After this, the workflow will automatically run daily to check for upstream changes.
Step 4: Adjust permissions for GITHUB_TOKEN
Some workflows provided by Skyline will automatically create files containing the information needed when you upload an artifact to the Catalog. These files retrieve data from the GitHub UI. To create an auto-generated file, the GITHUB_TOKEN in workflows must have write permissions.
Enable this at the organization level by setting the workflow permissions to Read and write permissions.
For more information, refer to the GitHub documentation.
Note
The GITHUB_TOKEN only has access to the currently running workflow. It also does not trigger new workflow runs when used to push new files, which helps prevent endless loops of CI/CD flows.
Step 5: Optionally add organization-wide secrets
Some Skyline-provided workflows require tokens and secrets to access services like SonarCloud or the Catalog. Instead of adding secrets to every repository, you can add them organization-wide.
Unless you have a paid GitHub subscription, these secrets will only be available for public repositories.
On your GitHub organization page, select the Settings tab.
Under Security, expand Secrets and variables and select Actions.
On the Actions secrets and variables page, add a new organization secret such as
SONAR_TOKEN, as explained under GitHub secrets and tokens.
Part 2: Creating a connector and publishing it to the Catalog
In this second part, you will learn how to develop, (pre-)release, and optionally deploy connectors with a CI/CD pipeline in GitHub. These processes follow the same quality standards that developers within Skyline Communications adhere to.
This CI/CD pipeline will ensure strict quality standards, provide you with a private item registered in the Catalog, and give you the ability to deploy the item automatically.
Expected duration: 10 minutes.
Step 1: Create a Visual Studio project
Open Visual Studio, and select Create a new project.
Select the DataMiner Connector Solution template, and click Next.
Specify a solution name, for example SLC-C-MyDataSourceTest, and click Next.
We recommend adhering to Skyline's naming conventions, though this is not mandatory.
Follow the wizard for any additional information requirements.
Click Create.
Step 2: Create a GitHub repository
In the menu bar of Visual Studio, select GIT > Create GIT Repository.
Create a new GitHub repository:
Select a name, specify your GitHub account, and mark yourself as the owner.
When you have entered all the information, click Create and Push.
Go to the newly created GitHub repository on https://github.com/.
Tip
In Visual Studio 2022, you can open the GIT menu and select GitHub/View Pull Requests to quickly access the correct repository.
If your repository does not follow Skyline's naming conventions, specify the artifact type:
Go to the Code tab.
Click the cogwheel next to About.
Under Topics, add a topic called Connector
Tip
For more information, refer to the GitHubToCatalogYaml readme.
Step 3: Add the starter workflow
Go to the starter workflow:
For public repositories or paid GitHub subscriptions:
On your GitHub page, go to the Actions tab and select the DataMiner workflow called DataMiner CICD Connector
For private repositories on a free GitHub subscription:
On your GitHub page, go to the Actions tab and select Set up workflow yourself.
Copy the content of the workflow file and paste it into your new workflow file.
Open a new browser window or tab, go to https://sonarcloud.io/projects/create, and create a project for the correct organization.
Enter the ID of the project as shown in the SonarCloud project URL as the
sonarCloudProjectName.Open a new browser window or tab, and create and add the necessary GitHub secrets that you see in the workflow.
Go back to your pipeline file and click Commit Changes.
Commit the changes directly to the master branch.
Go to the Actions tab.
You should see your new workflow running. It will run for every Git push.
You should now see your CI jobs complete successfully, ensuring that quality standards are met.
Step 4: Release a private item in the Catalog
On the Code tab for your repository on GitHub, on the right, click Create a new release.
Click Choose a tag and enter the version, for example
1.0.0.1-beta1.You can use any version you want. For a pre-release, usually a suffix is added, which can contain any text, e.g., "-beta1" in the example above.
Enter a description of your release.
If this is a pre-release, select Set as a pre-release.
Click Publish release.
Go to the Actions tab.
You should now see your new workflow running in this tab. Your CI and CD jobs should complete successfully, ensuring quality standards are met and uploading the item to the Catalog UI as a private item.
Go to https://catalog.dataminer.services/, make sure your organization is selected in the upper-right corner, and look up your artifact.
Note
If you see the following errors: Push .githubtocatalog/auto-generated-catalog Process completed with exit code 128. or remote: Permission to MyOrg/MyRepo.git denied to github-actionsbot, you will need to either set write permissions for the GITHUB_TOKEN in your specific repository, or, if you are an organization admin, you can enable this for the organization by setting the workflow permissions to Read and write permissions.