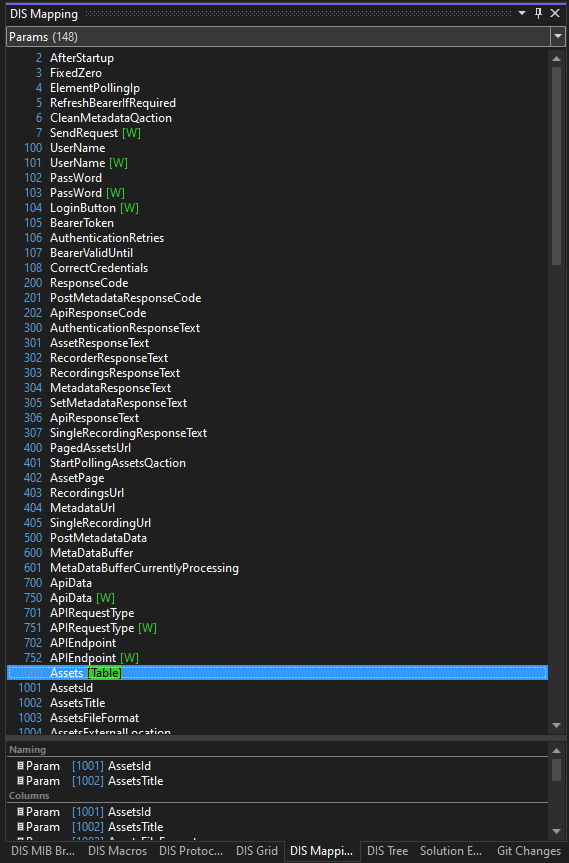
DIS Mapping
If you click Tool Windows > DIS Mapping, the DIS Mapping window will appear.
This tool window allows you to visualize relationships between items in the protocol you are working on.
By default, the DIS Mapping window will open undocked. Dock it just as you would dock any other tool window in Visual Studio.
In the topmost selection box, select the type of items of which you want to see a list. Next to each type, you will see the number of items of that type in the current protocol.
In the list box underneath the selection box, which lists all items of the selected type, select an item by clicking its ID.
The lowest list box lists all items that have a link to the item selected in the list box above.
If, for example, you select an Action, then
the Outgoing list will show all items to which the selected Action contains a link,
the Incoming list will show all items that contain a link to the selected Action, and
the Conditions list will show all items referred to in the Action’s <Condition> element.

Clicking or double-clicking items in the DIS Mapping window
| If... | then... |
|---|---|
| you click anywhere on a line in the topmost list box, except on the name of the item, | the lowest list box will list all items that are in some way linked to the item you selected in the topmost list box. |
| you click the name of an item in the topmost list box (notice that the name turns into a hyperlink!), | the cursor in the file tab containing the protocol code will jump to the tag that defines the item you selected in the topmost list box. |
| you double-click an item in the lowest list box, | the item you double-clicked will be selected in the topmost list box. Note: The selection box at the top of the DIS Mapping window will be set to the type of the item you double-clicked. |
| you click the type of an item in the lowest list box (notice that the type turns into a hyperlink!), | the cursor in the file tab containing the protocol code will jump to the tag that defines the item you selected in the lowest list box. |