Creating unit tests
Suppose you are working on a protocol, and you are creating a precompile QAction that contains functionality that will be used by other QActions. To ensure that the functionality provided by this precompile QAction is correct, you want to create unit tests.
In the examples below, a precompile QAction with ID 1 is created that, among other things, provides a PathRewriter class. The PathRewriter class defines a method Rewrite for which a unit test is needed.
Using GitHub Copilot, there are multiple ways to generate unit tests:
- Type
@Testfollowed by a target or prompt (see below) in the Copilot Chat window. - From the editor, right-click and select Copilot Actions > Generate Tests from the context menu.
- In a new Copilot Chat thread, select Write unit tests from the Copilot Chat icebreaker suggestions.
You can choose between two prompting methods to create unit tests using Copilot: freeform or structured syntax:
- Freeform: With freeform prompts, you describe in text for what a test needs to be created. E.g.,
@Test class PathRewriter - Structured syntax: With structured syntax, you use the following syntax to specify for what tests need to be generated:
@Test #<target>.#<target>then denotes for example a class (e.g.,#PathRewriter) or a git diff (#git_changes).
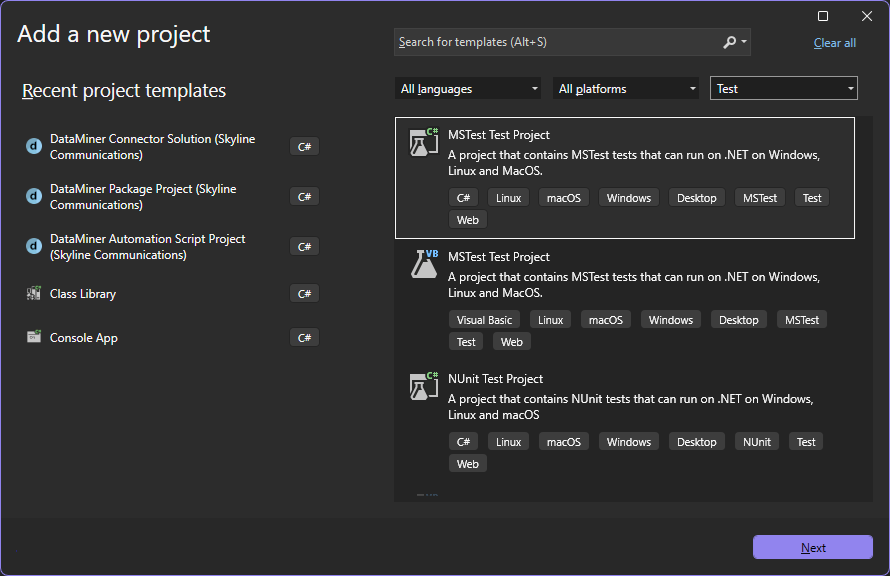
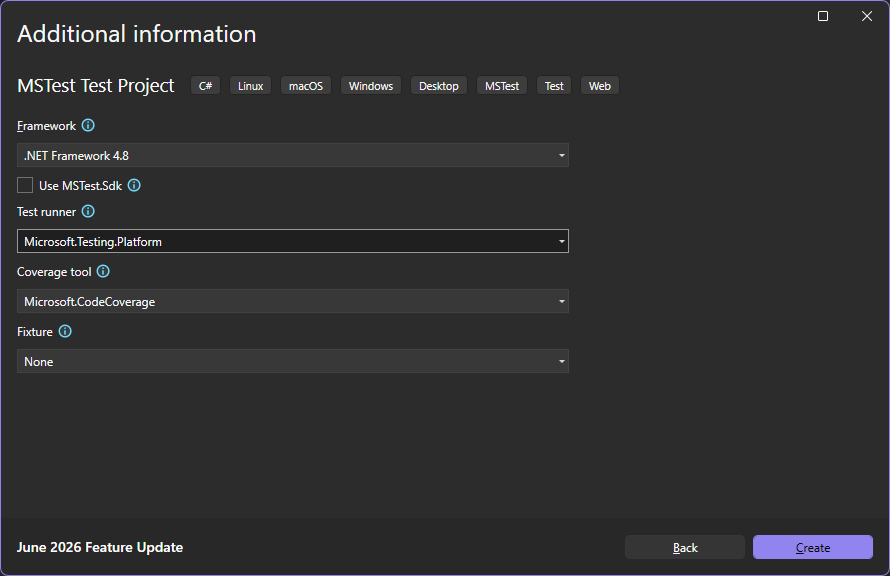
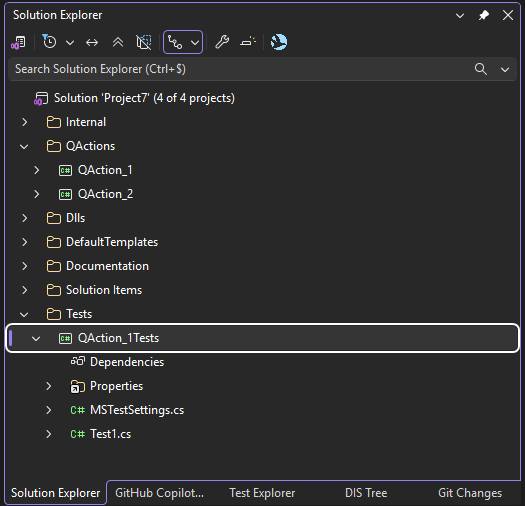
Test attributes
The PathRewriterTests class is annotated with a TestClass attribute. This attribute indicates that this class contains test methods. The RewriteTest method is annotated with the TestMethod attribute to indicate that it is a test method.
These attributes are defined by the MSTest framework (in the namespace Microsoft.VisualStudio.TestTools.UnitTesting). Other useful attributes are:
- AssemblyInitializeAttribute and AssemblyCleanupAttribute: These identify the method that contains code to be executed before or after all tests in the assembly have run, respectively.
- ClassInitializeAttribute and ClassCleanupAttribute: These identify the method that contains code to be executed before or after all tests in this test class have run, respectively.
- TestInitializeAttribute and TestCleanupAttribute: These identify the method that contains code that must be executed before or after each test in this test class, respectively.
- IgnoreAttribute: Used to indicate that a specific test should not run.
- DescriptionAttribute: Used to provide a description for the test.
- TestCategoryAttribute: Specifies a category for the unit test.
- TimeoutAttribute: Provides a timeout for the test.
- DataTestMethodAttribute: Used to specify a data-driven test where data can be specified inline.
- DataRowAttribute: Defines inline data for a test method.
- RetryAttribute: Used to set a retry count on a test method in case of failure.
- OSConditionAttribute: Used to ignore a test class or a test method, with an optional message.
- CIConditionAttribute: Used to control whether a test class or method will run or be ignored when the test executes in a CI environment.
For more information about these attributes and a complete overview of all attributes that can be used, see Microsoft.VisualStudio.TestTools.UnitTesting Namespace.
Implementing a test method
At this point, Visual Studio has created the test class and method, but it is up to you to implement the test method.
To implement a test method, typically the triple A (AAA) pattern is used. This means that the method body consists of three separate parts:
- Arrange: Setting up everything you need to perform the tests.
- Act: Performing the action that you want to test.
- Assert: Verifying whether the result is what you expected.
In the example below, the Arrange step consists of creating an instance of the class, the Act step is invoking the Rewrite method on that instance, and the Assert step is verifying whether the actual output matches the expected output.
[TestMethod()]
public void Rewrite_PathWithItemsToAbbreviate_ReturnsAbbreviatedPath()
{
    // Arrange
    PathRewriter pathRewriter = new PathRewriter();
    string path = @"Visios\Customers\Skyline\Protocols\Test";
    string expected = @"V\C\Skyline\P\Test";

    // Act
    string result = pathRewriter.Rewrite(path);

    // Assert
    Assert.AreEqual(expected, result);
}
The Assert class defines multiple methods such as AreEqual, IsFalse, IsTrue, etc. that can be used to make assertions. For more information on the Assert class, see Assert Class.
Note that the pattern used for the test method name consists of three parts separated by an underscore. The parts define the following:
- The name of the method that is being tested.
- The condition or scenario you want to test.
- The expected result.
This allows you to know what is tested, the tested scenario, and the expected result, just from the test method name.
Testing whether an exception is thrown
When writing unit tests, you typically want to provide tests for different scenarios. For example, you could also want to write an additional test to verify whether an ArgumentNullException is thrown in case the Rewrite method is invoked with a null reference as parameter value.
This can be done as follows:
[TestMethod()]
public void Rewrite_NullPath_ThrowsArgumentNullException()
{
    // Arrange
    PathRewriter pathRewriter = new PathRewriter();

    // Act & Assert
    Assert.ThrowsExactly<ArgumentNullException>(() => pathRewriter.Rewrite(null));
}
Note
The Assert class provides different methods for verifying that an exception was thrown such as Throws<T>, ThrowsExactly<T>, ThrowsAsync<T>, ThrowsExactlyAsync<T>.
Testing with different input data
In some cases, you may want to execute the same test but with different input. In such cases, the DataRowAttribute attribute can be used:
[DataTestMethod()]
[DataRow("pattern 1")]
[DataRow("pattern 2")]
public void ValidatePattern_ValidInput_ReturnsTrue(string input)
{
// Arrange
var myClass = new MyClass();

// Act
    bool isValid = myClass.ValidatePattern(input);
    // Assert
    Assert.IsTrue(isValid);
}
Test Explorer
Once the unit test has been implemented, it is ready for execution. Execution can be triggered via the Test Explorer, which gives an overview of all your tests in the solution. To open the Test Explorer in Visual Studio, in the menu bar, go to Test > Windows > Test Explorer.
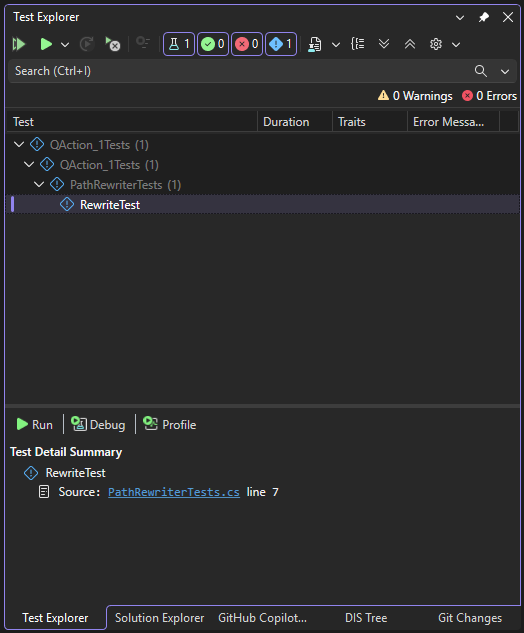
From the Test Explorer, you can easily run a specific test, run all tests, create a playlist of tests, etc. After a successful execution, everything should be green.
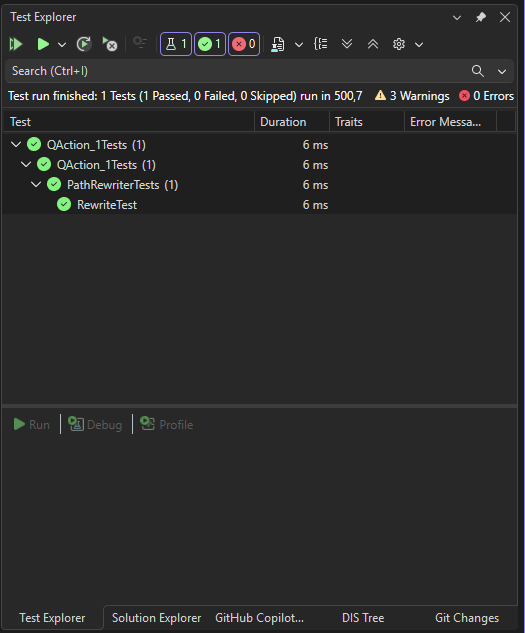
In case a test fails, a red X will be displayed. Clicking the line that represents the test in the Test Explorer will provide more information about what failed.
For more information on the Test Explorer, see:
- Run unit tests with Test Explorer
- Debug and analyze unit tests with Test Explorer
- Visual Studio Test Explorer FAQ
Useful links
For more information, see: