Working with the DataMiner Objects Tool
To access the DataMiner Objects Tool:
Go to
http(s)://[DMA name]/root.Select DataMiner Objects Tool to start using the tool.
The DataMiner Objects Tool user interface
The UI of the DataMiner Objects Tool app consists of the following main components:
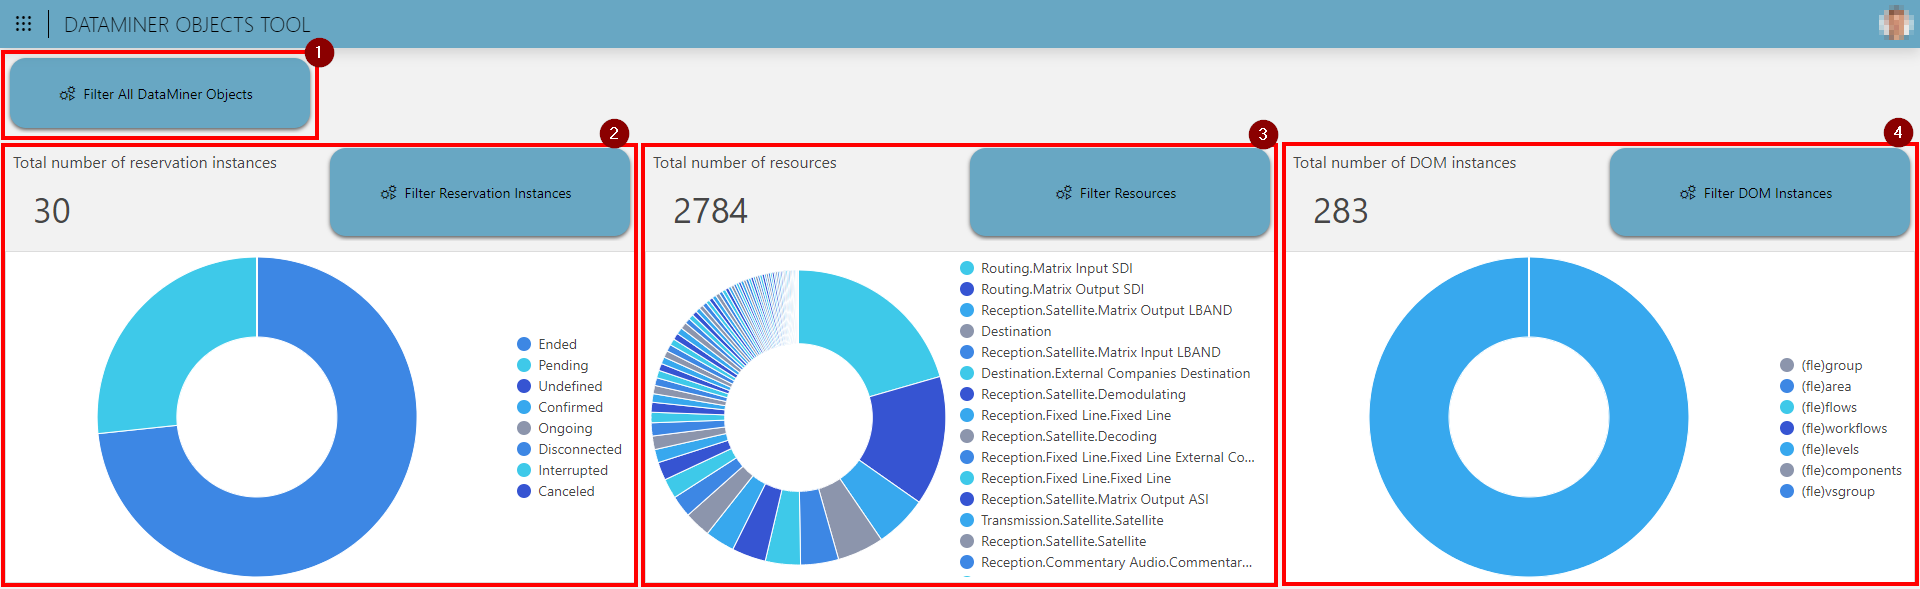
All functionality of the tool is accessible via the Filter All DataMiner Objects button (1). Clicking the button launches the DataMiner Objects Tool interactive automation script, which gives an overview of each supported DataMiner object type. You can then select one of the types to open a new dialog where filters can be defined.
There are three more buttons available in the app. Each button is related to a common DataMiner object type, being resources, reservation (i.e., booking) instances, and DOM instances. For each of these types, the app shows some high-level statistics for the system.
For reservation instances (2), the app shows the total number of reservation instances in the system along with a pie chart that groups the reservation instances by state. The button next to these stats launches the same DataMiner Objects Tool script, but immediately opens the dialog to filter reservation instances.
For resources (3), the app shows the total number of resources in the system along with a pie chart that groups the resources by resource pool. The button next to these stats launches the same DataMiner Objects Tool script, but immediately opens the dialog to filter resources.
For DOM instances (4), the app shows the total number of DOM instances in the system along with a pie chart that groups the DOM instances by module. The button next to these stats launches the same DataMiner Objects Tool script, but immediately opens the dialog to filter DOM instances.
Configuring filters
To configure a filter:
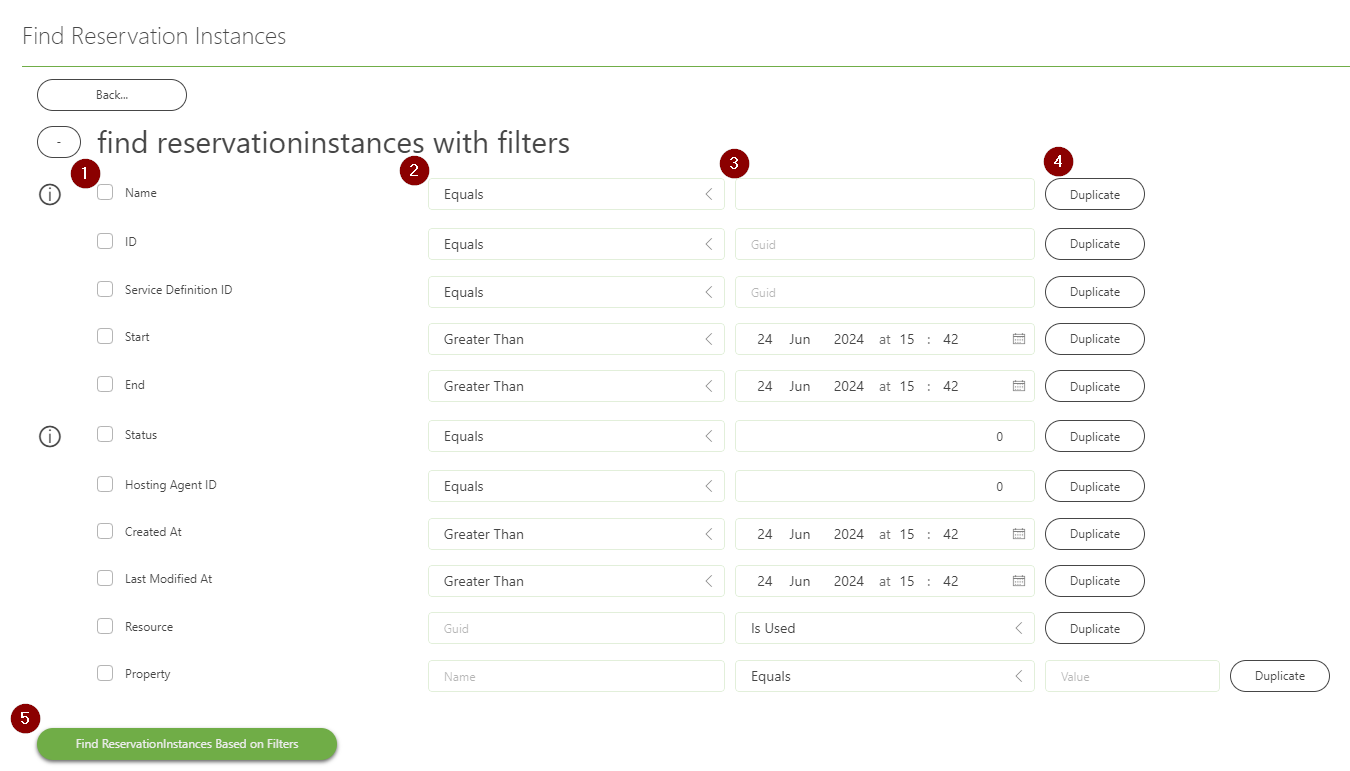
Include or exclude filters by selecting or clearing the checkbox next to an item property name.
Select the filter type in the dropdown boxes. Different properties allow different filter types depending on their possible values.
Fill in the filter value. Depending on the property you filter on, this can be a string, integer, GUID, or datetime.
If you want to add more filters, use the Duplicate button.
There is no limit to the number of filters you can include.
Click the button at the bottom of the window to execute the query with the included filters.
Important
All included filters will be combined with an AND operation. There is currently no way of adding OR filters.
Fine-tuning results
Once the items have been retrieved based on the filters you have configured, you can manually fine-tune the selection:
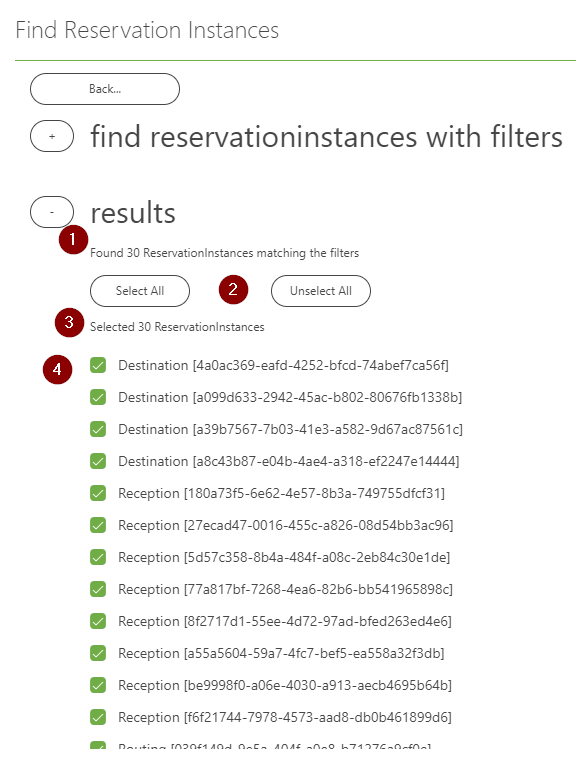
The number of matching items (1) is displayed to give a quick view on how many items in the system match the filters.
Buttons are available to select all or unselect all items (2).
The number of selected items (3) is also displayed, so you can see how many are included in your current selection.
In the scrollable checkbox list at the bottom (4), you can select individual items or clear the selection to fine-tune the result according to your preferences.
Executing actions on selected objects
After you have manually fine-tuned the results, you can execute the following actions for the selected objects:
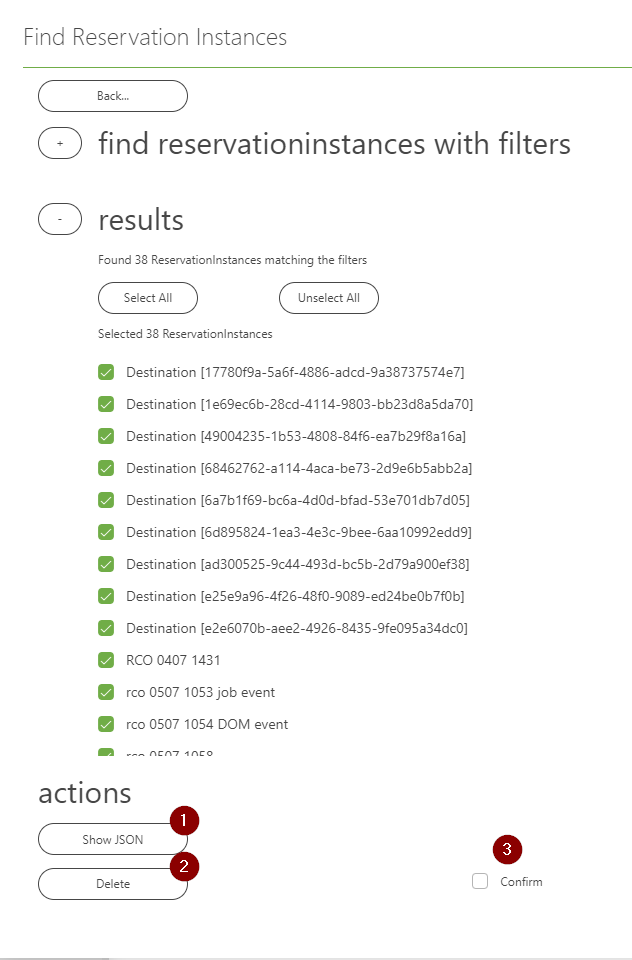
To add a new multiline textbox to the dialog containing all selected objects serialized in JSON format, click Show JSON (1).
This can for instance be used to investigate or debug issues, or to export the objects and import them in other applications.
To delete the selected objects from the system, first select the Confirm checkbox (3), and then click Delete (2). This confirmation is required first because deleting objects can have a large impact on the system.