Room Designer
This page allows you to design a room in detail, including the placement of different racks and zones. It will provide a valuable visual aid when designing rooms.
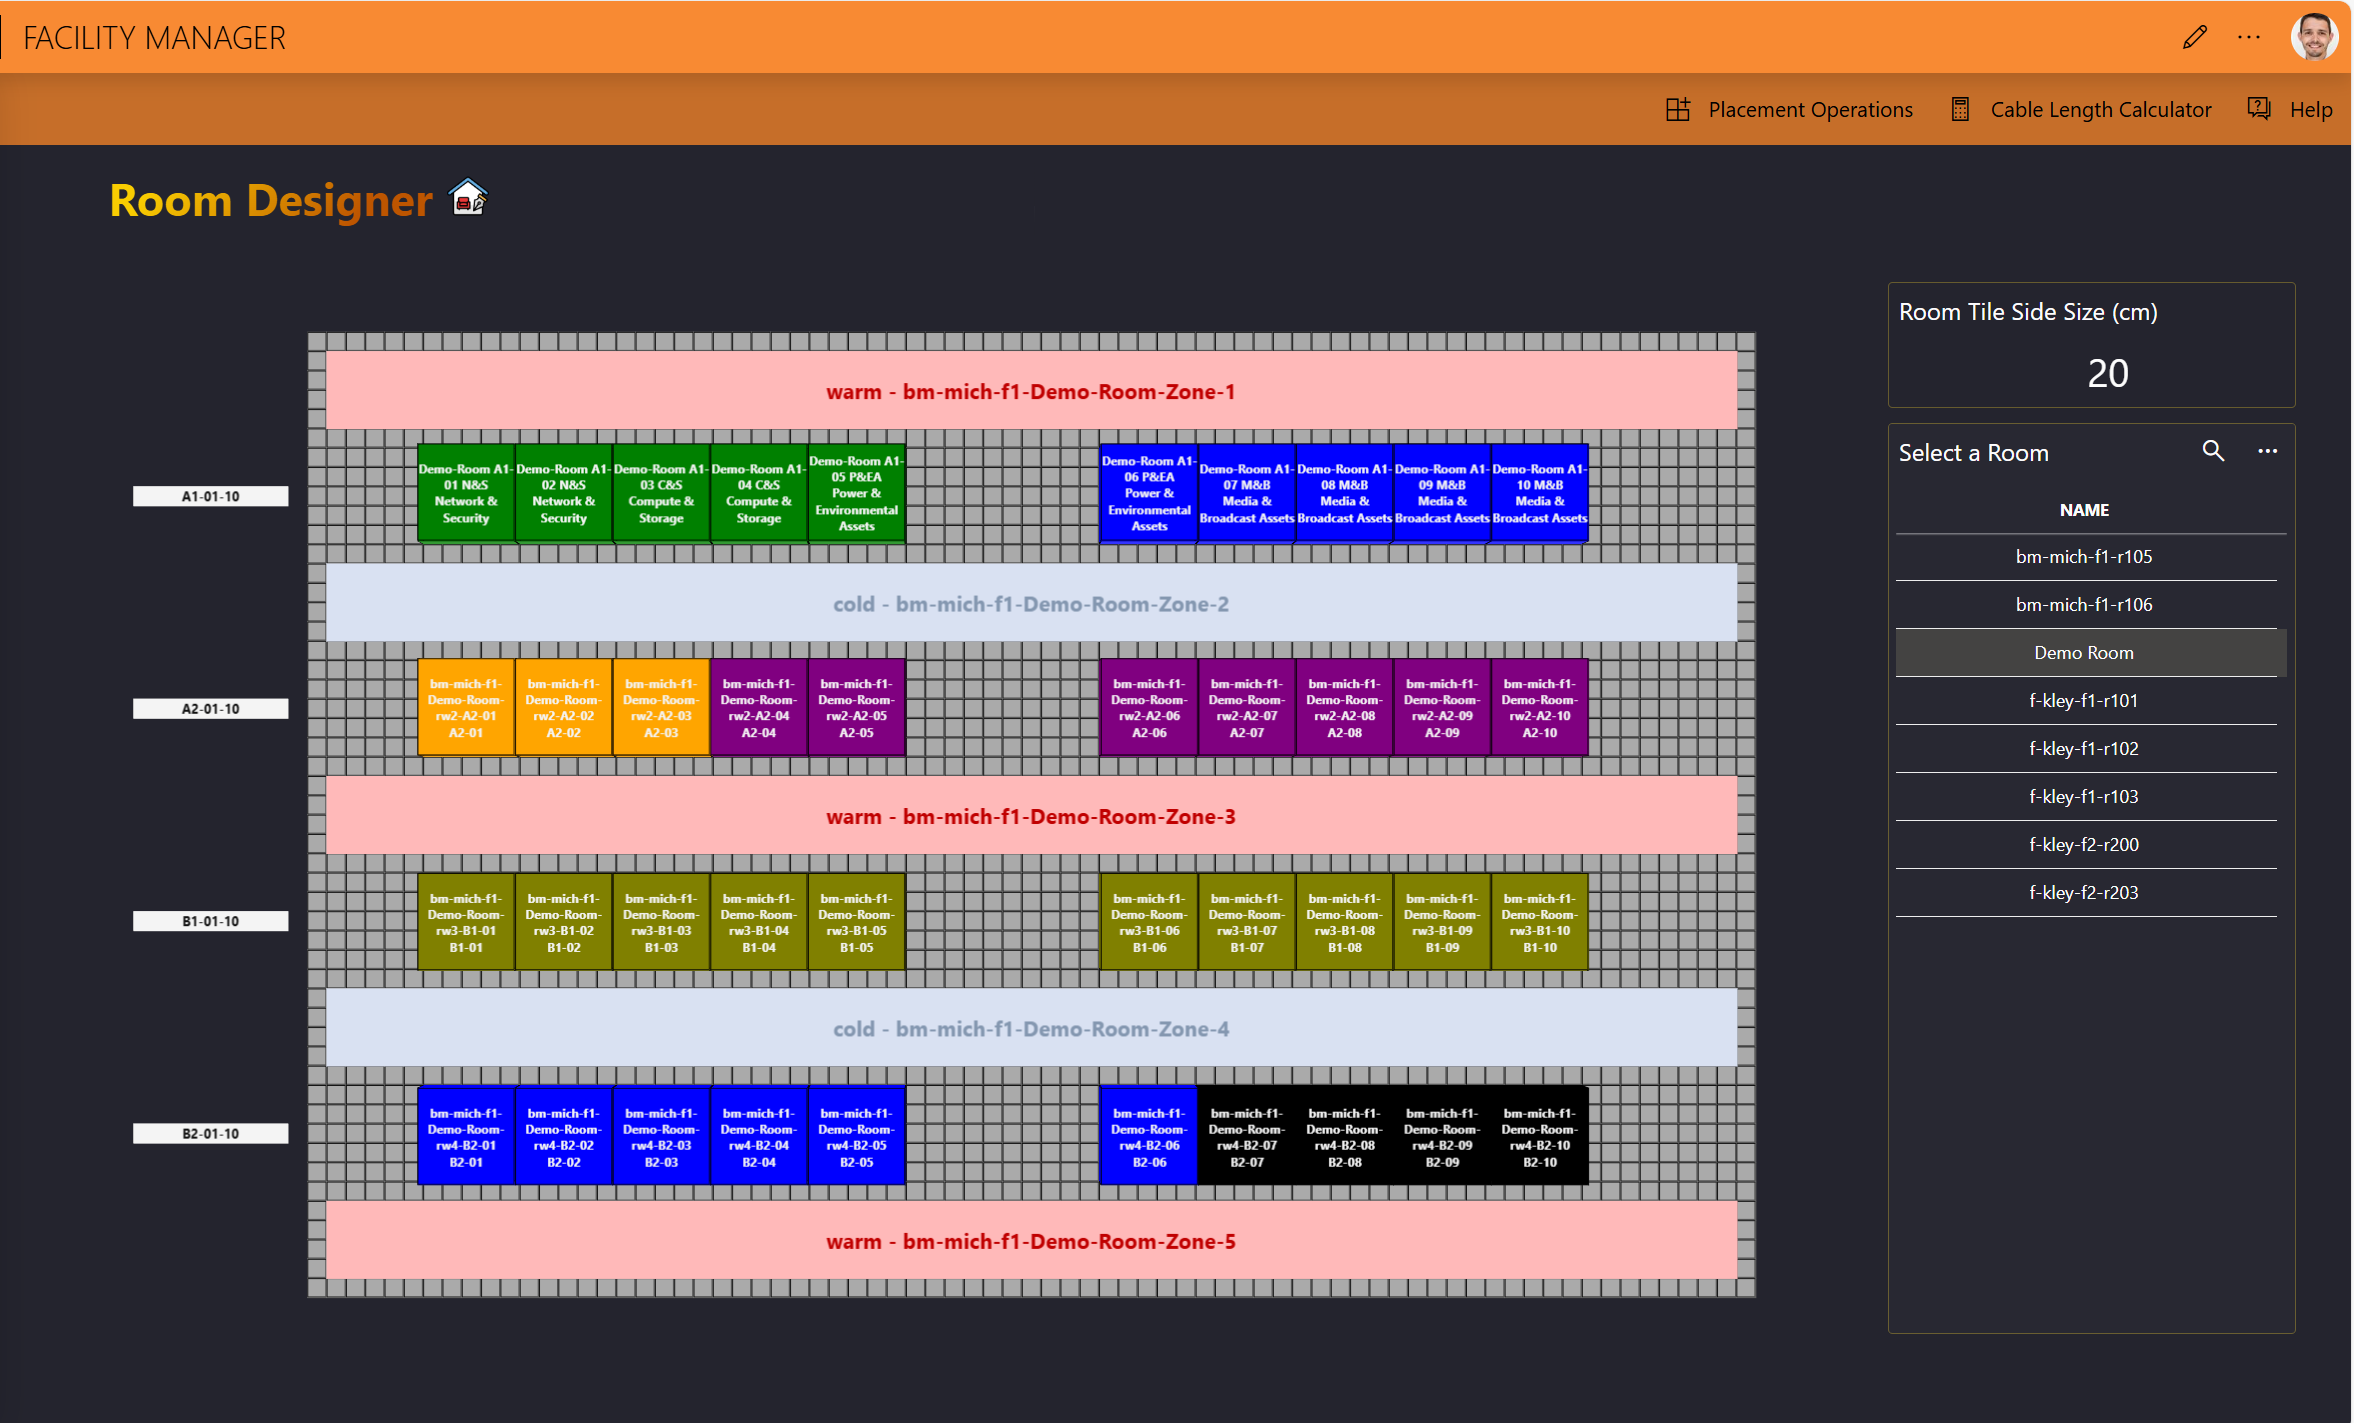
About the Room Designer grid
The designer consists of a grid of at most 4000 tiles. The size of each tile will be adjusted based on the size of the room.
You can adjust the way the grid is displayed by pressing specific keys on the keyboard. Click the Help button in the upper-right corner of the page to view the available keyboard commands.
Adding items to a room in the Room Designer
Select a room in the list on the right.
In the header bar, click Placement Operations.
This will open a panel on the right.
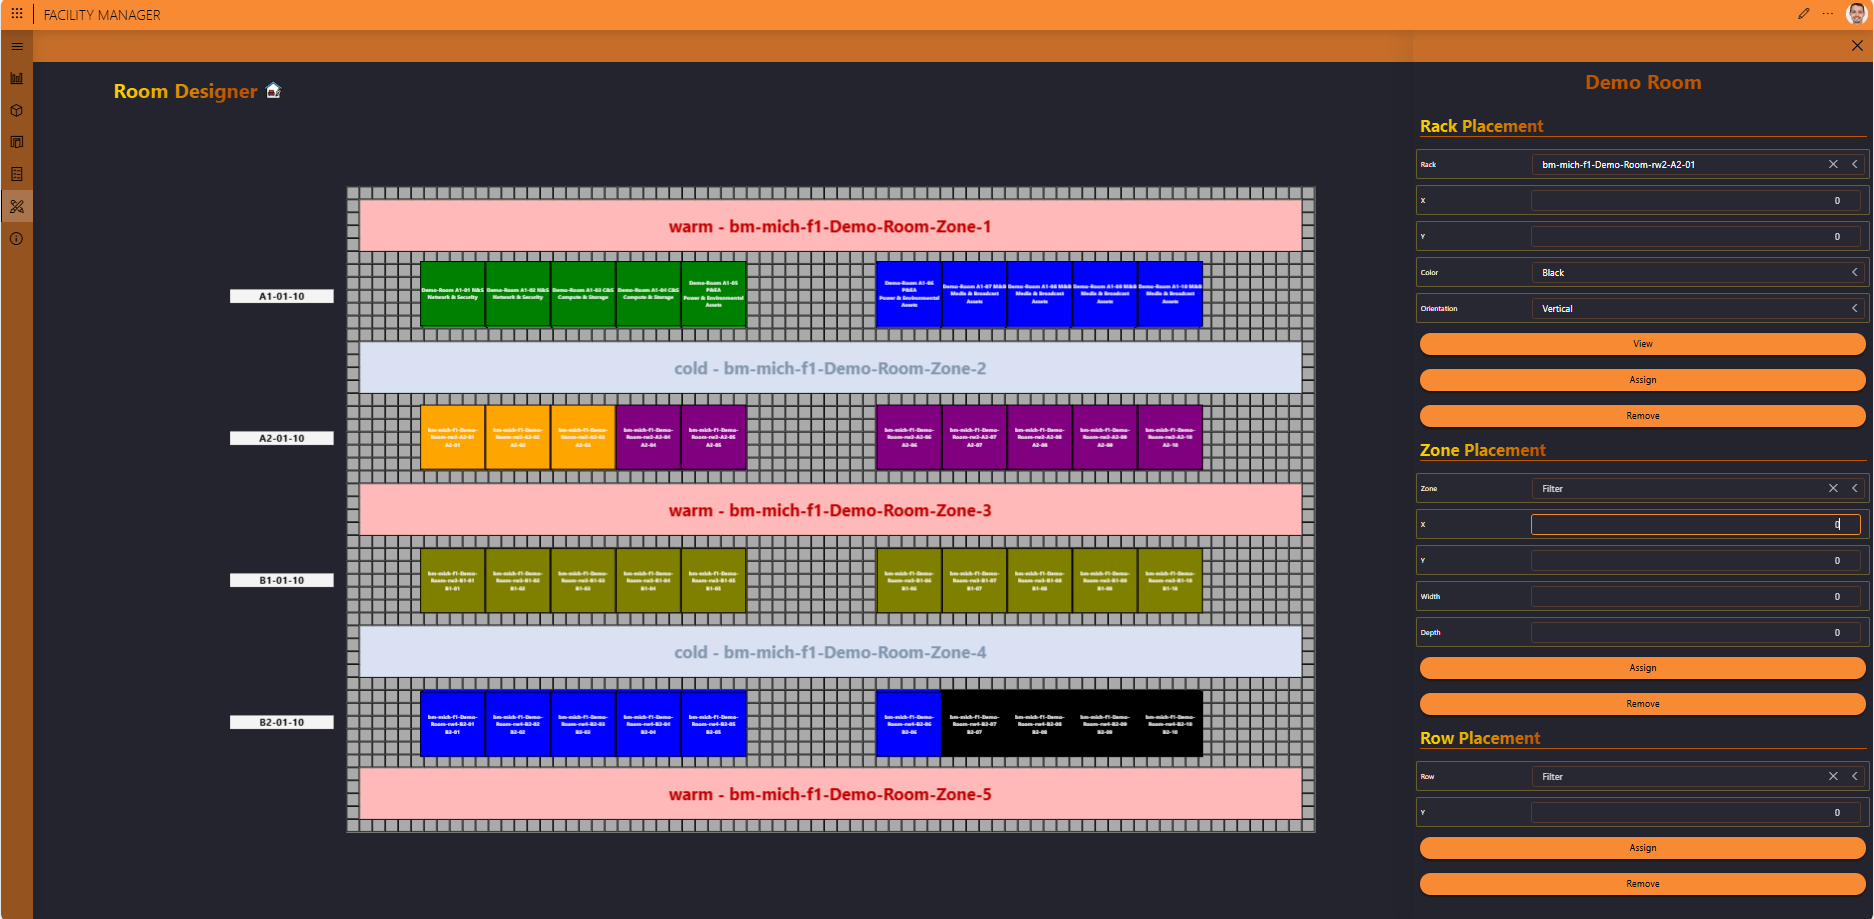
In the Rack Placement section at the top, you can add a rack:
Select the rack.
Make sure that you select a rack that has a height, width, and depth configured, as these are required to be able to display the rack in the Room Designer.
With the View button at the bottom of the section, you can take a look at a detailed view of the rack.
Fill in the X and Y coordinates to indicate the position of the upper-left corner of the rack. Position "0,0" starts at the top left of the grid.
This means you need to make sure the indicated position leaves enough space for the rack to be included in the room. If, for example, you specify the lower-right corner as the rack position, this will result in the following notification because the rack would be positioned outside of the grid:

Optionally, customize the color and orientation (i.e., vertical or horizontal) to adjust how the rack will be displayed.
Click Assign.
In the Zone Placement section, you can add a zone:
Select the zone.
Fill in the X and Y coordinates to indicate the position of the upper-left corner of the zone. Position "0,0" starts at the top left of the grid.
Fill in the width and depth to define the size of zone on the grid.
Click Assign.
In the Row Placement section, you can add a row:
Select the row.
Fill in the Y coordinate for the row.
Click Assign.
A label with the row name will be shown next to the grid at the indicated coordinate.
Removing an item
To remove an item you have added to a room in the Room Designer:
Make sure the room is selected and click Placement Operations.
Select the item in the rack, zone, or row list, and click the appropriate Remove button.
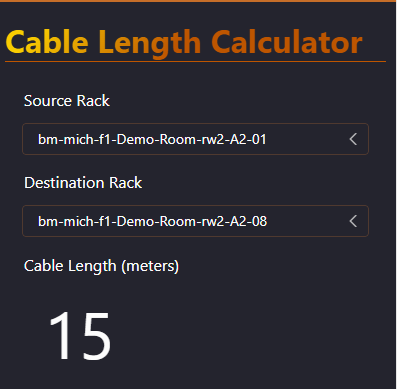
Calculating the cable length
When you have added the necessary racks to a room, you can calculate the length of the cables between the racks:
Make sure the room is selected.
In the header bar, click Cable Length Calculator.
Select the source and destination rack.
The cable length required between the racks will be displayed.