Managing organizations
The Organizations page focuses on your managed organizations. It allows you to switch between two tabs: Overview and List, each offering a different perspective on the available organizations.
You can switch between the Overview and List tabs by clicking Overview or List in the header bar.

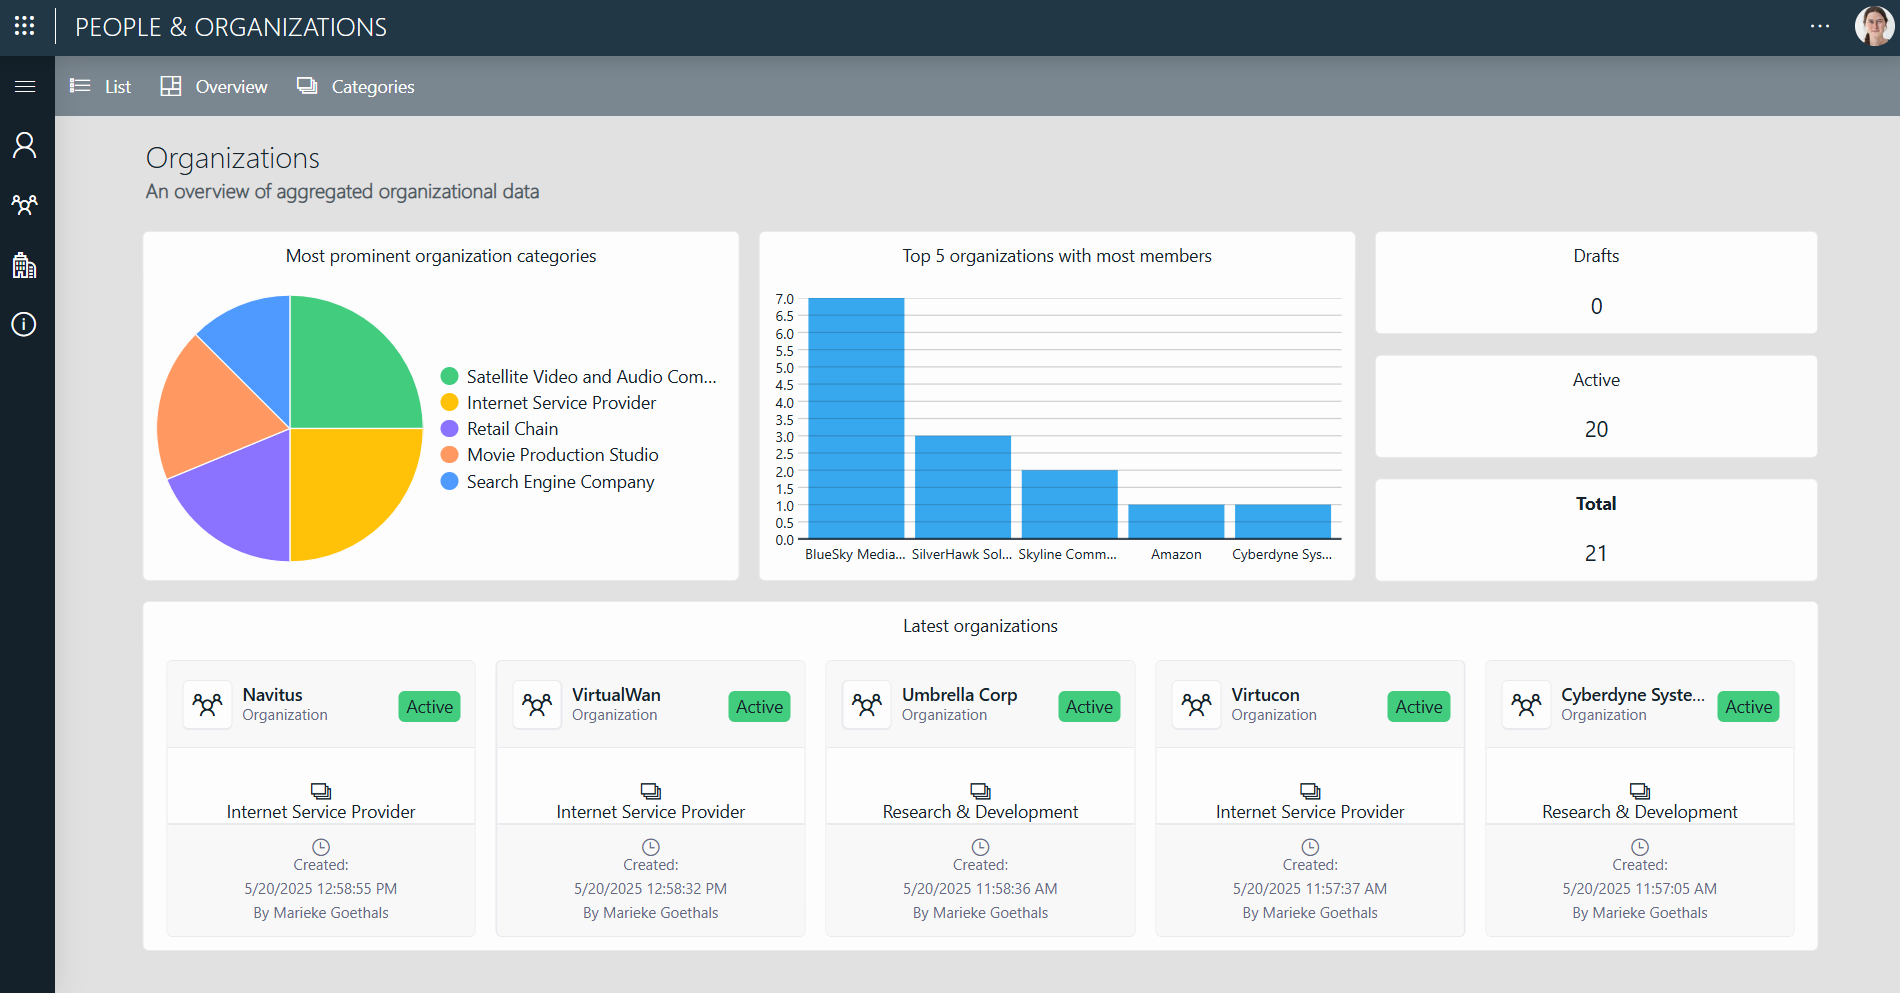
The Overview tab provides a snapshot of key metrics, including the most prominent organization categories, the top 5 organizations with the most members, the number of organizations, active organizations, and drafts, and the five most recently added organizations. This tab gives you a quick view of aggregated organizational data.
The List tab provides an overview of all organizations, along with their state, number of members, and organization category. This tab allows you to access and review organization details in one centralized location. It also provides an efficient way to filter through the list of organizations based on the provided information.
Adding a new organization
To add a new organization:
Navigate to the List tab.
In the header bar, select + New organization.
Provide the necessary organization information.
Select Save in the top-right corner of the panel.
The Organization drafts panel will open. The new organization is now saved as a draft.
If you want to activate your new organization, select the organization in the Drafts panel and click Activate Selected in the top-left corner of the panel, or click Activate All to activate all the current drafts.
If you want to activate your new organization later, close the panel with the "X" in the top-right corner. Later on, when you want to activate the organization, you can open the panel again via the Drafts button in the header bar of the List tab.
To add members to your new organization, see Configuring organization members.
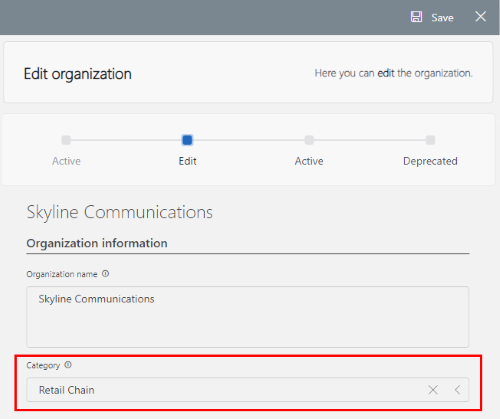
Editing an organization
To edit an existing organization:
Navigate to the List tab.
Locate the organization you want to edit and click the
 button next to the organization's details.
A panel will appear.
Select Edit in the lower-right corner of the panel.
Make the necessary changes to the organization information.
After making your changes, select Activate in the lower-right corner.
Note
Skipping this step will keep the organization in an inactive Edit state.
Select Save in the top-right corner to save your changes.
Configuring organization members
To configure organization members for an existing organization:
Navigate to the List tab.
Locate the organization you want to add members to and click the
 button next to the appropriate organization.
In the panel that appears on the right, click Edit members at the top.
Move contacts to and from the Non-members and Members columns using the ► and ◄ buttons.
If you quickly want to find a specific contact in the lists, click the magnifying glass icon at the top and specify a filter.
When you close the panel, the selected organization members will be shown in the list of members in the Details panel.
Deprecating an organization
To deprecate an existing organization:
Navigate to the List tab.
Select the organization you want to deprecate.
Click Deprecate Selected in the header bar.
An overview of all deprecated organizations will appear. This will include the organization you have just deprecated.
Note
To access this overview of deprecated organizations at a later point, click Deprecated in the header bar of the List tab.
Managing organization categories
On both the Overview and List tabs, you can access the Categories panel by clicking the Categories button in the header bar.

The Categories panel provides an overview of all available organization categories, with options to edit and create new ones.
Assigning a category to organizations streamlines the booking process by making it easier to find and select organizations based on their type.
Adding a new organization category
To add a new organization category:
In the header bar, click Categories to open the Categories panel.
Select + New category.
Enter a name for the new category in the Category field, e.g.
Accounting Firm.Select Save in the top-right corner.
Your new organization category will now appear in the list of categories.
Editing an organization category
To edit an existing organization category:
In the header bar, click Categories to open the Categories panel.
Click the
button next to the category you want to edit.Edit the name of the category and select Save in the top-right corner.
Assigning an organization category
You can view an organization's category in the Organization category column in the List tab.
To assign a category to an organization, enter the appropriate category in the Category field when you create a new organization or edit an existing organization.