Editing a workflow
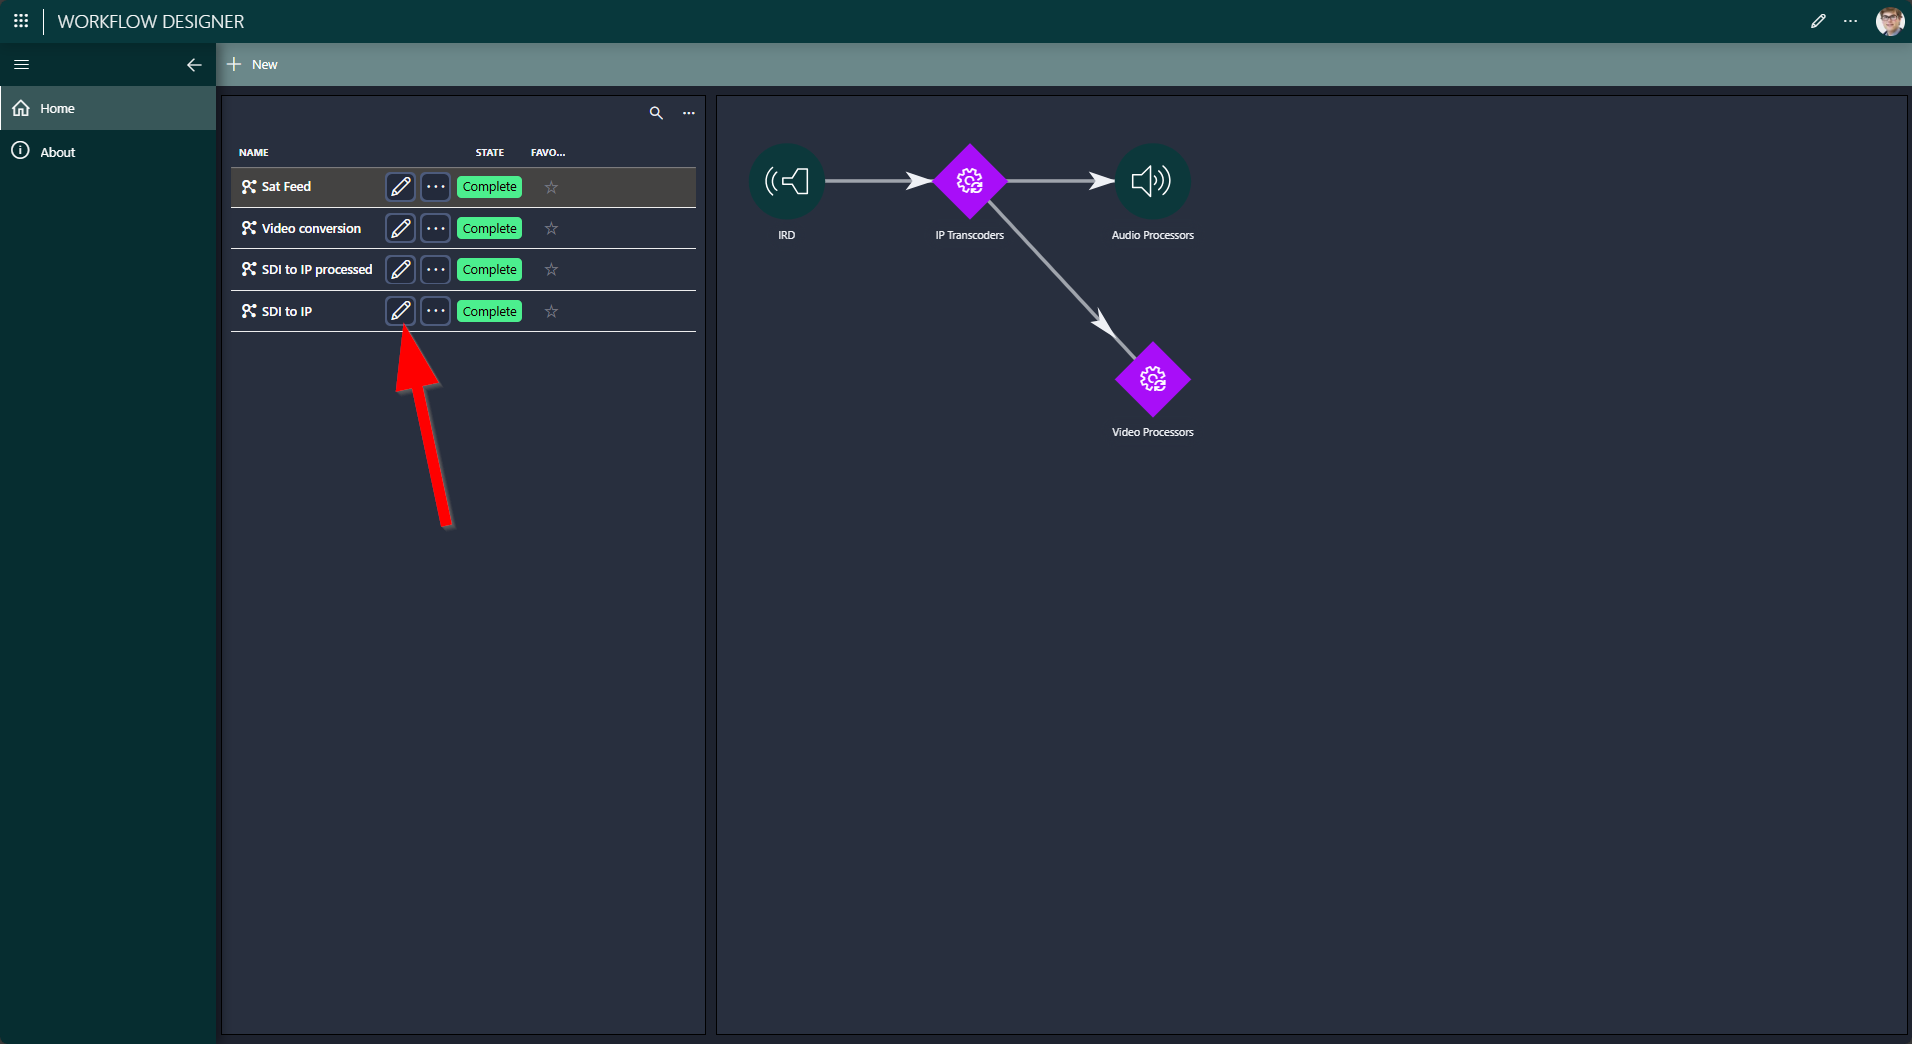
To edit a workflow, click the pencil icon for that workflow on the Home page of the Workflow Designer app. This will open the Edit workflow panel.
This panel consists of two sections:
- Workflow section: Allows you to view and edit the workflow, specify the resources required, specify how they are linked to each other, and provide default configuration settings for resources.
- Nodes section: Lists all the nodes used in the workflow (including linked nodes) and allows you to execute actions on the nodes.
Note
When you have finished configuring a workflow, you can use the Mark as Complete option on the Home page to make the workflow available in the Scheduling app. As long as a workflow is still in the Draft state, it will not be available for scheduling.
Workflow section
In the Workflow section, you can execute the actions listed below. Depending on the selected nodes or connections, different buttons may be enabled.
- Edit the general workflow settings
- Configure the workflow orchestration settings
- Refresh/centralize the workflow in the node-edge component
- Adding nodes to a workflow
- Adding nodes after/before the selected node
- Swapping a node to another pool/resource
- Configure the node orchestration settings
- Edit the general node settings
- Remove node(s)
- Edit node properties
- Add a connection between two nodes
- Remove connection(s)
- Insert a node in the selected connection
- Edit the general connection settings
Editing the general workflow settings
To edit the general workflow settings, click the pencil icon next to the title of the workflow section.

You will then be able to adjust the name and description of the workflow, configure its pre-roll and post-roll time, set its priority, and indicate whether it should be considered a favorite.
Configuring the workflow orchestration settings
To edit the workflow orchestration settings, click the cogwheel next to the title of the workflow section. This opens the Scheduling configuration dialog at the workflow (global) level, which allows you to define the required capabilities, capacities, configurations, and automated actions that apply to the workflow as a whole.

Refreshing/centralizing the nodes in the workflow
It might happen that by zooming or navigating in the workflow you lose track of the nodes in the workflow section. The refresh button allows you to centralize the nodes in the workflow section again.

Adding nodes to a workflow
For a workflow to be useful, it must contain at least one node. Each node indicates something that is required by the workflow.
To add a node, click the Add Pool or Add Resource button:
Add Pool: Select this option if it is not yet known which resource instance in the pool should be used. The resource selection will then need to happen once a job is created from the workflow. As a job has a start and stop time, you can then pick a resource based on availability.
Add Resource: Select this option if you know exactly which resource is required by the workflow. You must still define the pool, to indicate the context in which the resource will be used (resources can be part of multiple resource pools when they can be used for different functions). When a job is created using the workflow, the resource will automatically be added as a node to the job.

Adding nodes after/before the selected node
Once a node is available in the workflow, selecting the node will enable buttons to add other nodes before or after that node in the workflow.

Swapping a node to another pool/resource
If you have already customized a node (e.g., configuration, properties, etc.), but now you need a different pool or resource to be assigned to the node, you can swap it out.
To do so, select the node and click Swap To Pool or Swap to Resource, depending on whether you want to swap it to another pool or resource, and then select the pool or resource to swap to.

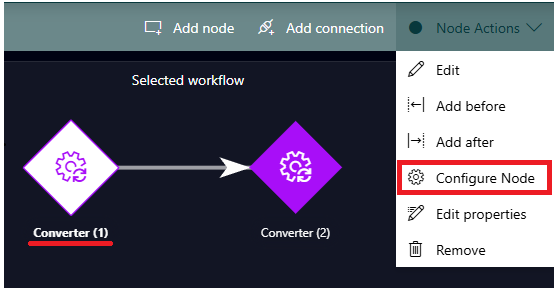
Configuring the node orchestration settings
To edit the node orchestration settings, select the node and click the Configure button. This opens the Scheduling configuration dialog, which allows you to define the required capabilities, capacities, and configurations for the node, as well as automated actions.
Editing the general node settings
To edit the general node settings, select the node and click the Edit button.

Removing nodes
To remove one or more nodes from the workflow, select the nodes (using Ctrl + click to select more than one node) and click the Remove button.

Editing node properties
To edit the properties of a node, select the node and click the Edit Properties button.

Adding a connection between two nodes
To add a connection between two nodes, select the two nodes (using Ctrl + click) and click the Connect button.

Removing connections
To remove one or more connections, select the connections to remove (using Ctrl + click to select more than one connection) and click the Disconnect button.

Inserting a node in the selected connection
To insert a node between two already connected nodes, select the connection and click the Insert Pool or Insert Resource button.

Editing the general connection settings
To edit the general settings of a connection, select the connection and click the Edit button.

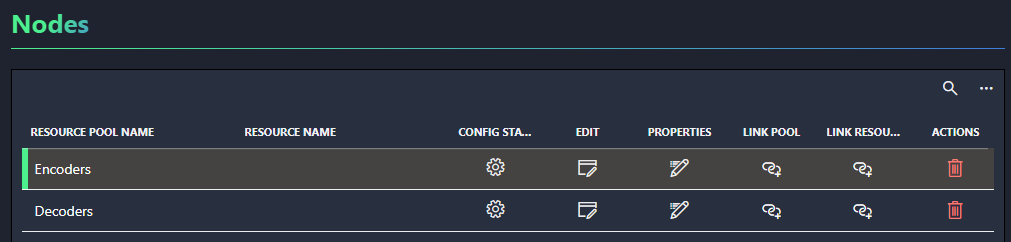
Nodes section
Below the Workflow section, the Nodes section displays a table listing the nodes in the workflow. With the buttons in this table, you can execute actions on the nodes.
| Button | Action |
|---|---|
 |
Configure the node orchestration settings. |
 |
Edit the general node settings. |
 |
Edit node properties. |
 |
Link a pool or resource to the node, depending on the column. |
 |
Remove the node. |