Creating an organization with a team and contacts to use as resources in MediaOps apps
In this tutorial, you will learn how to create an organization, a team, and contacts in the People & Organizations app, to interconnect these, and to make them bookable so that they can be treated as resources in other MediaOps apps.
Expected duration: 15 minutes
Note
The content and screenshots for this tutorial have been created using DataMiner version 10.5.5 and MediaOps version 1.3.1.
Prerequisites
- A DataMiner System using DataMiner 10.5.4 or higher.
- Access to the People & Organizations application.
Overview
- Step 1: Create a new organization
- Step 2: Create a new contact
- Step 3: Create a new team
- Step 4: Add the contact to the team
- Step 5: Make the team bookable
Step 1: Create a new organization
Navigate to the People & Organizations app.
Navigate to the Organizations page.
In the top-right corner, click + New Organization.
Enter the Organization name you want to give to your organization.
Click Save.
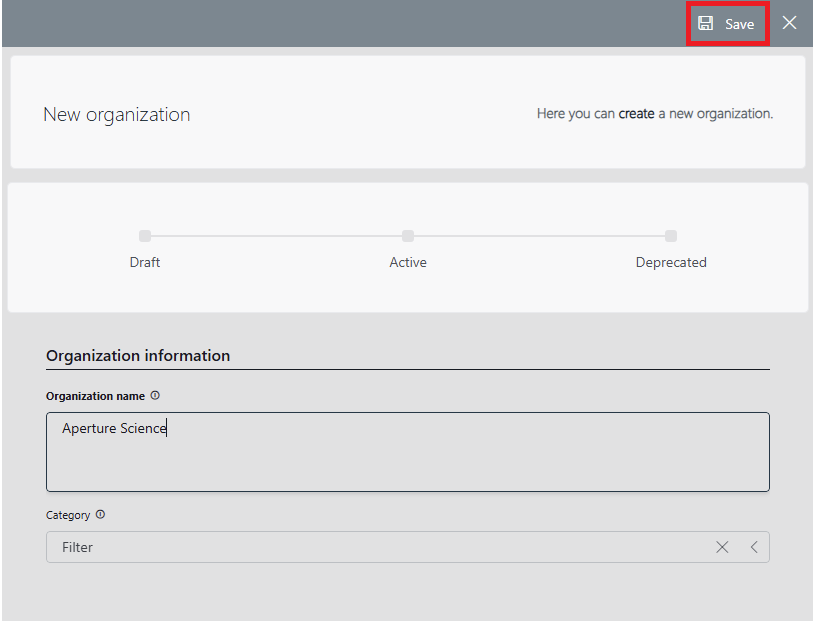
In the new dialog, select your new organization and click Activate Selected to make it available in other MediaOps apps.

Step 2: Create a new contact
Navigate to the People page.
In the top-right corner, click New contact.
Enter the Full name of the contact.
In the Organization box, select the organization you created in the previous step.
Click Save.

In the new panel, select your new contact and click Activate Selected to make it available in other MediaOps apps.
Step 3: Create a new team
Navigate to the Teams page.
In the top-right corner, click + New team.
Enter the Team name you want to give to your team.
Click Save.
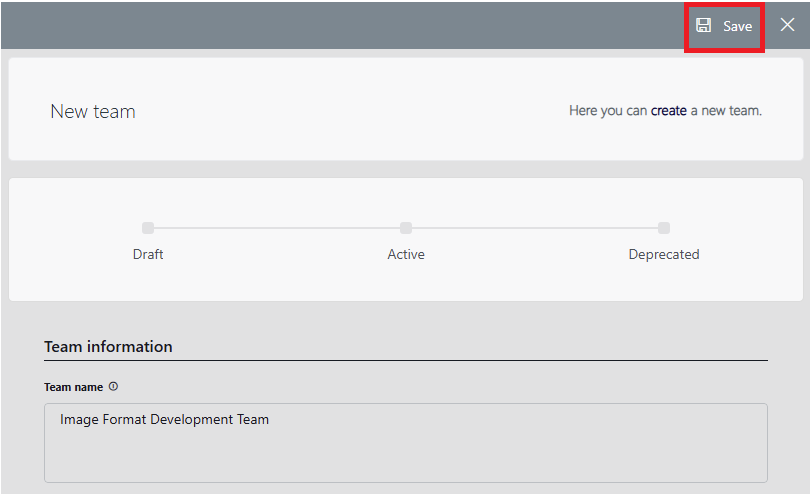
In the new dialog, select your new team and click Activate Selected to make it available in other MediaOps apps.
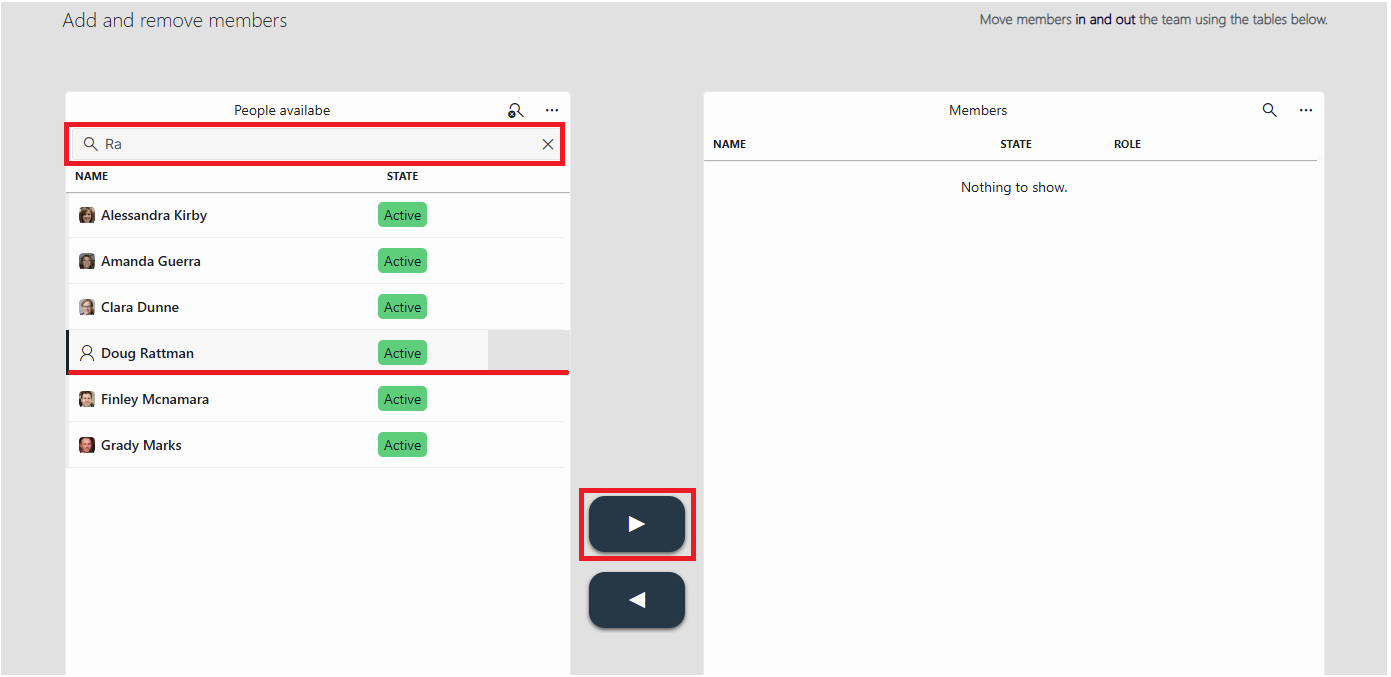
Step 4: Add the contact to the team
In the Teams table, click the button in the Details column for the team you have just created.
Click the Edit members button in the upper left corner of the new panel.
In the list on the left, find and select the contact you created earlier.
Click the arrow button that points to the right to move the person to the team.
Step 5: Make the team bookable
If you closed the panel in the previous step, open it again by clicking the button in the Details column.
Click the Bookable switch in the top-right corner and click OK to confirm.
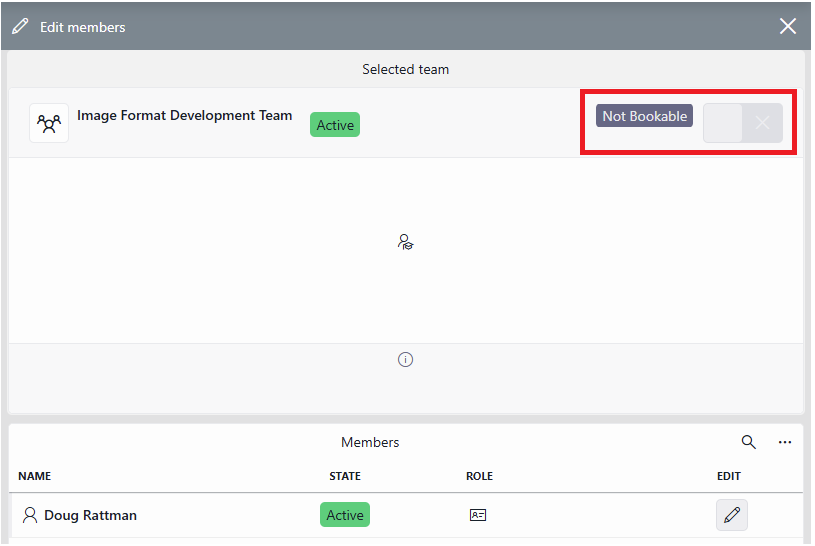
The team and its members should now show up in the Resource Studio app. The team will be available as a resource pool, and its members will show up as resources belonging to that pool.