Managing groups and destinations
Managing groups
Creating a new group
In the Ping Monitoring tool, go to the Groups page.
Click the Create Group button in the header bar.

This will open the Create New Group window.
Specify a name, description, hosting DMA, alarm template, and trend template.
For example:
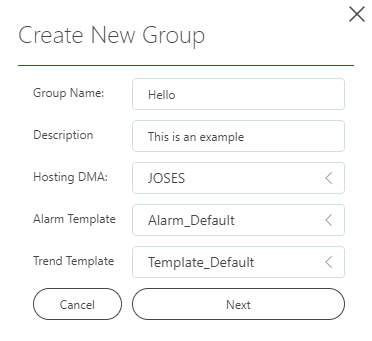
Click Next.
At this point, an element using the Generic Ping connector will be created in DataMiner corresponding with the new group.
Optionally, define the properties of the newly created group.
These properties allow you to add extra identification info for the group. By default, three properties are available, named Property 1, 2, and 3, respectively. However, you can change these property names in DataMiner Cube. For example:
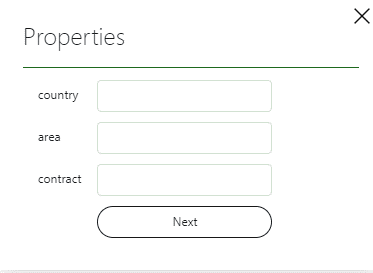
Click Next.
If necessary, specify the default settings for the destinations created in the group.
If the default values are OK for you, you can leave these as they are.
Note
If Protocol is set to ICMP, the Port field is optional, but if Protocol is set to TCP, the Port field must be filled in.
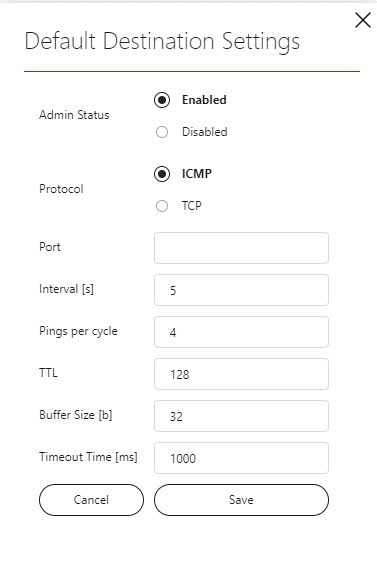
Click Save.
Editing a group
In the Ping Monitoring tool, go to the Groups page.
Either click the pencil icon next to the group you want to edit, or select the group and click the Edit button in the header bar.

If necessary, edit the name and/or description.
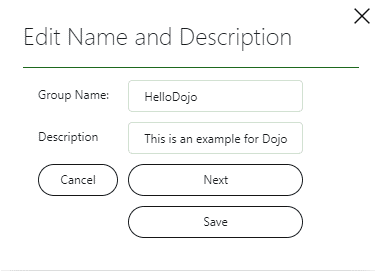
If no further changes are needed, click Save to save your changes and close the window; otherwise, click Next.
If necessary, edit the property values.
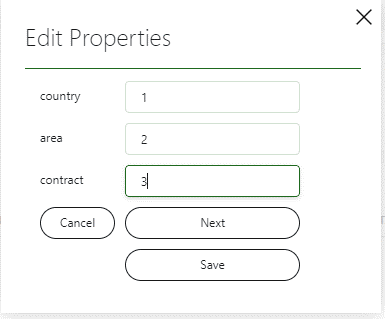
If no further changes are needed, click Save to save your changes and close the window; otherwise, click Next.
If necessary, edit the default destination settings.
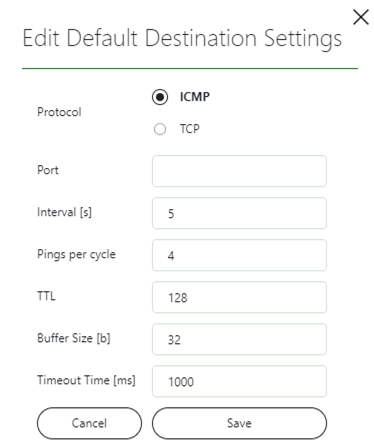
Click Save.
Deleting a group
In the Ping Monitoring tool, go to the Groups page.
Either click the garbage can icon next to the group you want to delete, or select the group and click the Delete button in the header bar.
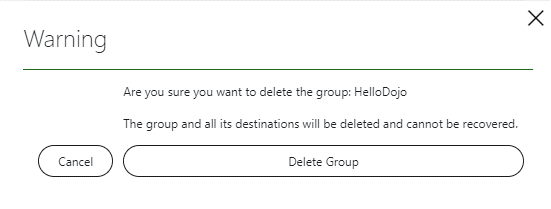
In the confirmation dialog, click Delete Group to permanently delete the group with all the associated destinations.
Managing destinations
Adding a new destination
In the Ping Monitoring tool, go to the Destinations page.
Click the Add Destination button in the header bar.

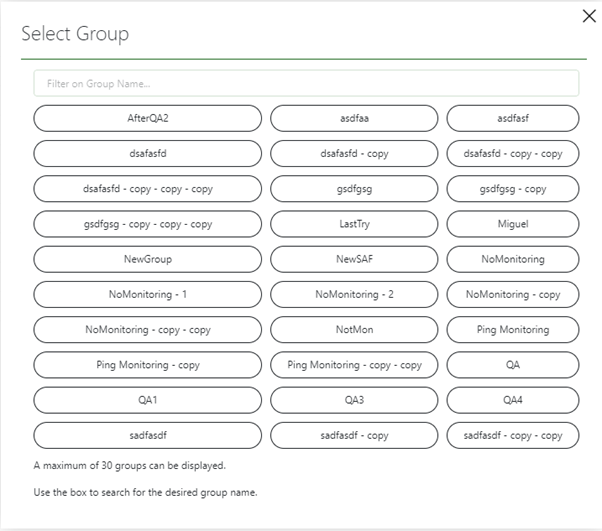
This will open a window with a button for each of the available groups.
Select the group to which you want to add the destination.
Note
If more than 30 groups are available, the UI will only show the first 30 created. To find a group that is not displayed, use the filter box at the top of the window.
Specify the settings for the destination:
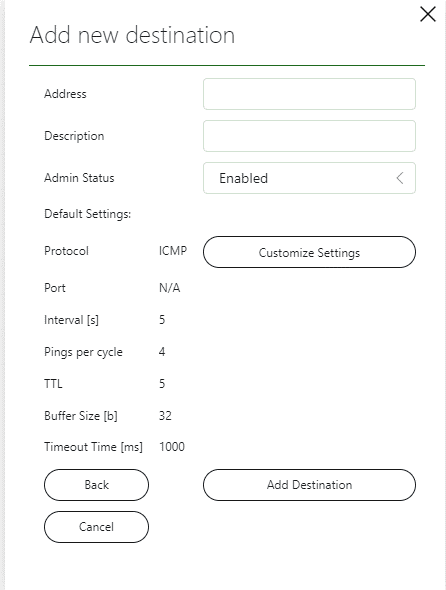
Address: The address of the destination.
Description: A description that will make it easier for users to identify the destination.
Admin Status: Set this to Disabled if you do not want to ping the destination yet. In that case, you can edit the destination later to enable this and start pinging.
Other parameters: For the other parameters, you can choose to use the default values that are filled in automatically, or you can click Customize Settings to modify them. These settings are similar to those for a group.
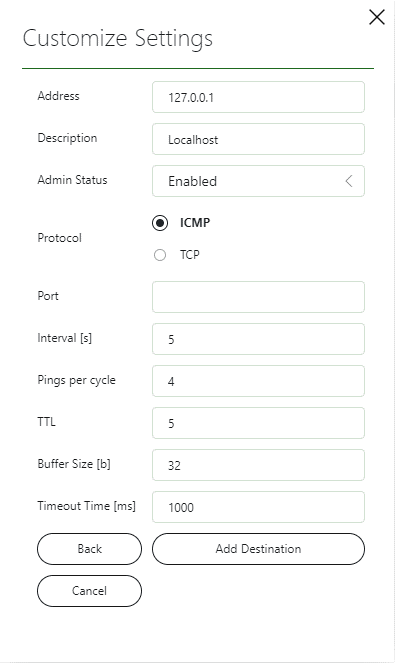
When the destination has been fully configured, click Add Destination.
Editing a destination
In the Ping Monitoring tool, go to the Destinations page.
Either click the pencil icon next to the destination you want to edit, or select the destination and click the Edit button in the header bar.


In the Update Destination window, edit the parameters you want to change.
For example, if Admin Status is Disabled, you can set it to Enabled in order to start pinging a destination.
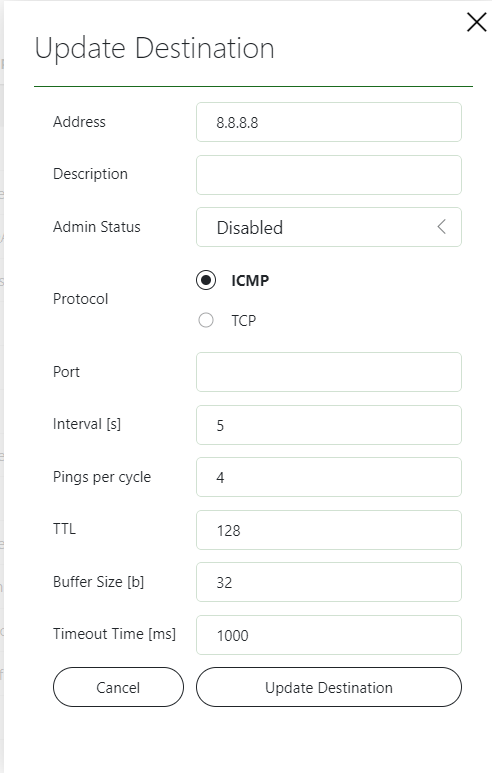
Click Update Destination to save your changes.
Deleting a destination
In the Ping Monitoring tool, go to the Destinations page.
Either click the garbage can icon next to the destination you want to delete, or select the destination and click the Delete button in the header bar.

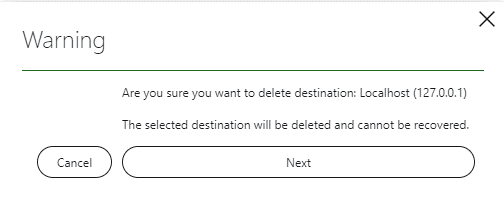
In the confirmation dialog, click Next to permanently delete the destination.
