Exporting elements, services, etc. to a .dmimport file
In the DataMiner Cube Surveyor, you can right-click a view in order to export it, with any elements, services, redundancy groups, documents, SLAs and service templates it contains, to .dmimport format. It is also possible to right-click an element or service directly to export it. The .dmimport package will also contain any related properties, protocols, information templates, trend templates, alarm template and Automation scripts.
Note
- It is not possible to export spectrum analyzer elements or separate DVE child elements.
- Exporting trend data to a .dmimport file is not supported in DataMiner Systems using Storage as a Service (STaaS).
In the Surveyor right-click menu, select Actions > Export.
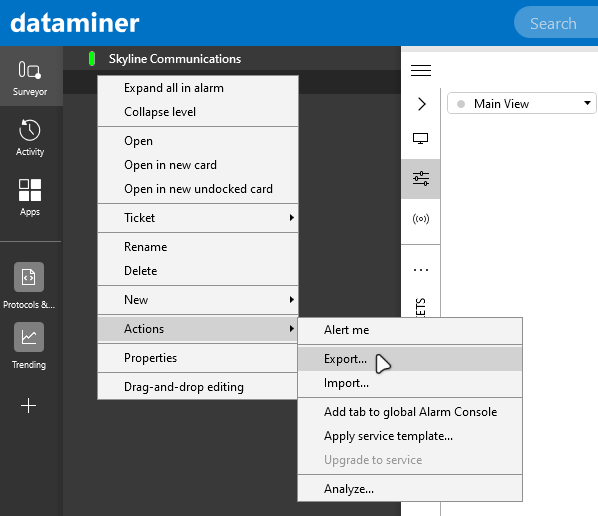
DataMiner Cube version 10.3.10Note
- This option is also available from a card’s header menu.
- If you do not have the Config permission for a particular view, export and import actions will not be available for this view.
- If you export from a list of items on a view card, only the item you right-clicked will be included in the export to a .dmimport file.
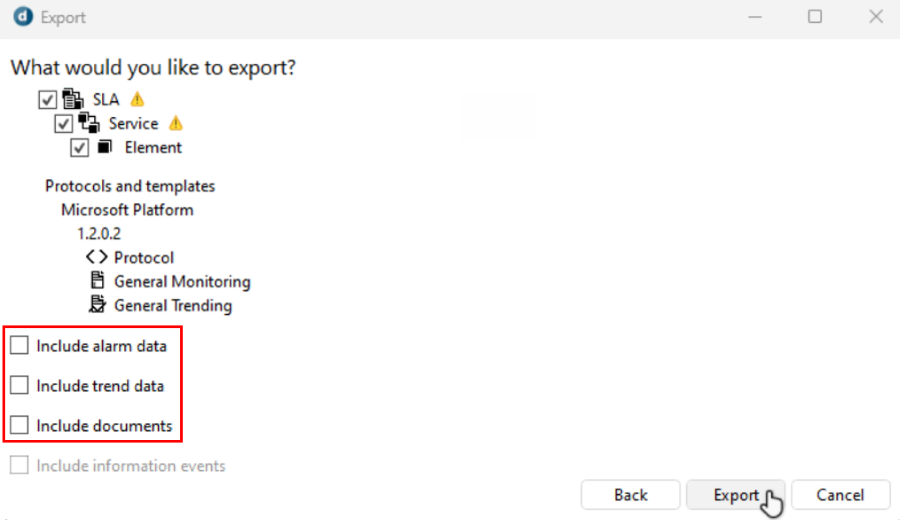
In the Export window, select Export to DataMiner package (*.dmimport).
Clear the selection from any items you do not want to include in the export.
If you have selected to include a redundancy group or service, any elements within it will automatically be included in the export. Similarly, if you have selected an SLA, the SLA service and its service children will automatically be included.
Note
From DataMiner 10.4.9/10.5.0 onwards, if you have selected to include SNMPv3 elements, importing this package on DataMiner Systems prior to DataMiner 10.4.9/10.5.0 will result in the loss of all SNMPv3 credentials, which will need to be re-entered manually. If you used the DataMiner Cube Credentials Library to configure the SNMPv3 credentials, you will always need to re-enter the credentials manually after an import on a different DMS, regardless of your DataMiner version.
Specify which additional information should be included (if any) using the checkboxes below this:
Trend data
Alarm data
Documents
Information events
Note
- Including information events is only possible if alarm data are also exported.
- Including information events can make the export take significantly longer.
Click Export.
DataMiner Cube version 10.3.10In the Save As window, browse to the location where you want to save the export and click Save.
In the Export window, check the progress messages until the export is ready, and click Finish.
Important
If the export fails because of the package size, consider excluding trend and alarm data. Also, try connecting directly to the DMA hosting the item to be exported.
Note
If any invalid items are encountered during the export, these will be skipped and a log entry will be created in the SLNet log file.