Configuring the general database settings
If you choose not to use the recommended Storage as a Service (STaaS) setup but instead choose to host a dedicated clustered storage setup yourself, you can configure the database settings for your DataMiner System's dedicated clustered storage in DataMiner Cube.
Note
If you want an external program to execute queries against a DataMiner database, you will need to use an offload database. For information on offload database settings, see Offload database.
Important
If a DataMiner Agent in a cluster is offline, database configuration changes will not be applied to that DataMiner Agent. From DataMiner 10.3.6/10.4.0 onwards, you will get a warning on the Database page in System Center to make you aware of this. However, this warning will not be triggered for the offline Agent in a Failover setup.
Tip
- See also: Configuring a Cassandra database per DMA and Configuring the SQL database settings.
- Some database settings can also be configured in DB.xml.
Cassandra database
Cassandra cluster database
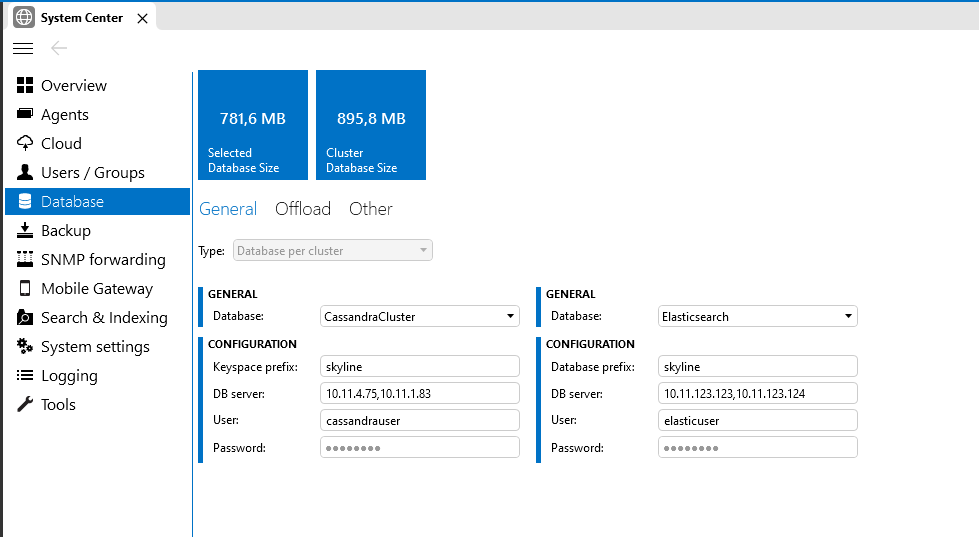
For a Cassandra cluster database (i.e. one Cassandra cluster that is used as the general database for the entire DMS, rather than one Cassandra cluster per DMA), configure the settings as follows:
Go to Apps > System Center > Database.
Note
From DataMiner 10.3.0 [CU15]/10.4.0 [CU3]/10.4.6 onwards, the Database > General page is no longer available if you are using a DaaS system, as it is not possible to customize the database configuration of a DaaS system.
Choose Type: Database per cluster.
Specify the following database settings for the Cassandra nodes:
Database: The type of database, i.e. CassandraCluster.
Keyspace prefix or Name: The prefix that the DataMiner System will use to create the keyspaces.
Note
The prefix has a maximum length of 20 characters. Prior to DataMiner 10.3.0 [CU5]/10.3.8, it has a maximum length of 11 characters.
DB server: The IP addresses or hostnames of the nodes, separated by commas. There is no need to specify a port. Specifying a custom port is not supported, and the default port 9042 will be used whether you specify it or not (see Configuring the IP network ports).
User: Username with which the DMA has to log on to Cassandra.
Password: Password with which the DMA has to log on to Cassandra.
From DataMiner Cube 10.3.0/10.3.3 onwards, you can also specify the database settings for the indexing database.
Database: The type of database, e.g. Elasticsearch/OpenSearch.
Database prefix: The prefix that the DataMiner System will use to create the indices.
DB server: The IP addresses or hostnames of the indexing database nodes, separated by commas. If TLS is enabled, the full URL must be specified, e.g.
https://elastic.mydomain.local. If no port is provided, the default port for the indexing database is used instead (see Configuring the IP network ports).User: The username with which the DMA has to log on to the indexing database (if applicable).
Password: The password with which the DMA has to log on to the indexing database (if applicable).
Tip
See also: Configuring an indexing database
Click Save.
Note
Database configuration changes will not take effect until the Agent is restarted.
Amazon Keyspaces
Important
- An Amazon Keyspaces database requires a separate indexing database.
- For information on how to configure an indexing database, see Configuring an indexing database.
Note
If you do not see the Amazon Keyspaces option, it means that your server is not compatible because it is not running DataMiner version 10.3.0/10.3.3 or higher.
To configure the connection to an Amazon Keyspaces database, proceed as follows:
In DataMiner Cube, go to System Center > Database.
Specify the following database settings:
Type: Database per cluster.
Database: The type of database, i.e. Amazon Keyspaces.
Keyspace prefix: The name all Amazon Keyspaces will be prefixed with. This will be identical for all DMAs in the DMS.
Only alphanumeric characters are supported.
The prefix cannot start with a number.
The prefix has a maximum length of 20 characters. Prior to DataMiner 10.3.0 [CU5]/10.3.8, it has a maximum length of 11 characters.
DB Server: The URL of the global endpoint of the region your Amazon Keyspaces cluster is in. (e.g.
cassandra.eu-north-1.amazonaws.com).User: The username of your Amazon Keyspaces credentials.
Password: The password of your Amazon Keyspaces credentials.
Click Save.
Note
Database configuration changes will not take effect until the Agent is restarted.
Restart the DMS.
The first restart after configuring Amazon Keyspaces can take up to 15 minutes on top of the normal startup time as the keyspaces and tables will be created. In case of trouble, you can find the relevant logging in the SLDBConnection.txt file.
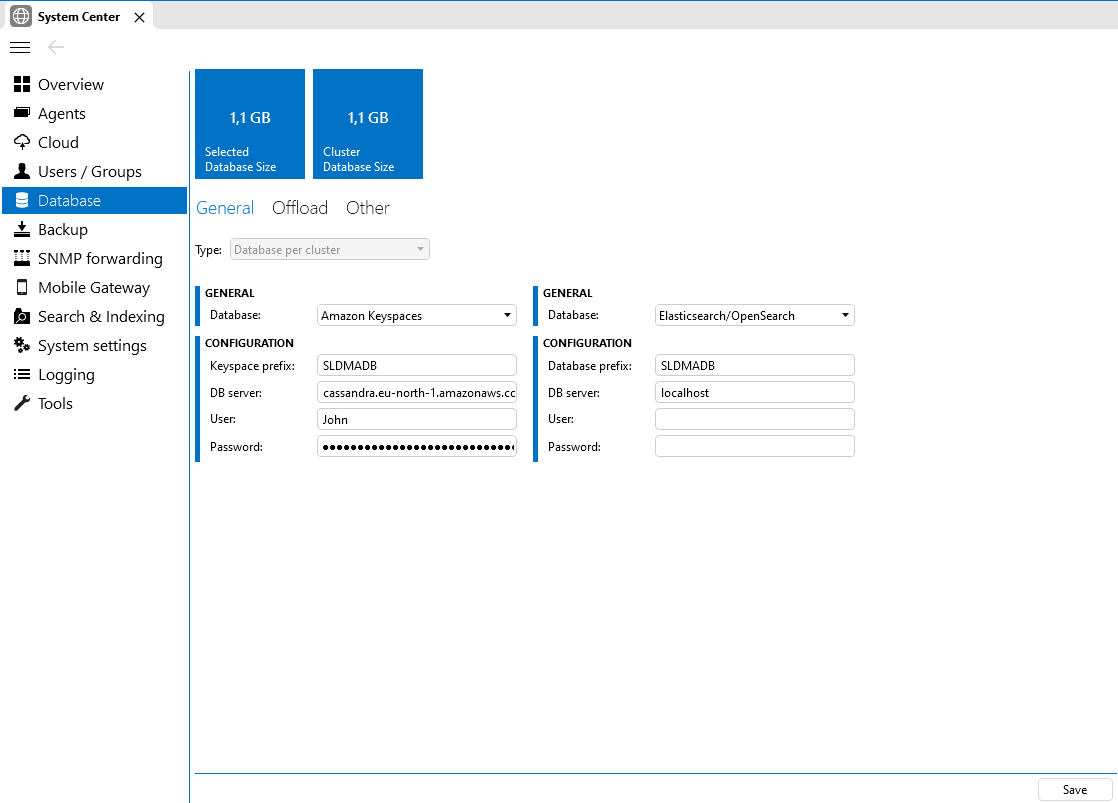
DataMiner 10.3.3 example configuration
Amazon OpenSearch Service
Note
Ensure your server version is compatible with OpenSearch. Cube will display Elasticsearch/OpenSearch instead of Elasticsearch if your server is compatible (i.e. running DataMiner 10.3.0/10.3.3 or higher).
Tip
See also: Amazon OpenSearch Service
In DataMiner Cube, go to System Center > Database.
Specify the following database settings:
Type: Database per cluster.
Database: The type of database, i.e. Elasticsearch/OpenSearch.
Database prefix: The name all indices will be prefixed with. This will be identical for all DMAs in the same cluster.
DB Server: The full URL of your Amazon OpenSearch Service endpoint, e.g.
https://search-mydomain-123456798.eu-north-1.es.amazonaws.com/Important
From DataMiner 10.3.0 [CU4]/10.3.7 onwards, you must append the port
:443to the Amazon OpenSearch Service endpoint URL. For example:https://search-mydomain-123456798.eu-north-1.es.amazonaws.com:443. In earlier DataMiner versions, this is not needed.User: The username of the master user of your domain.
Password: The password of the master user of your domain.
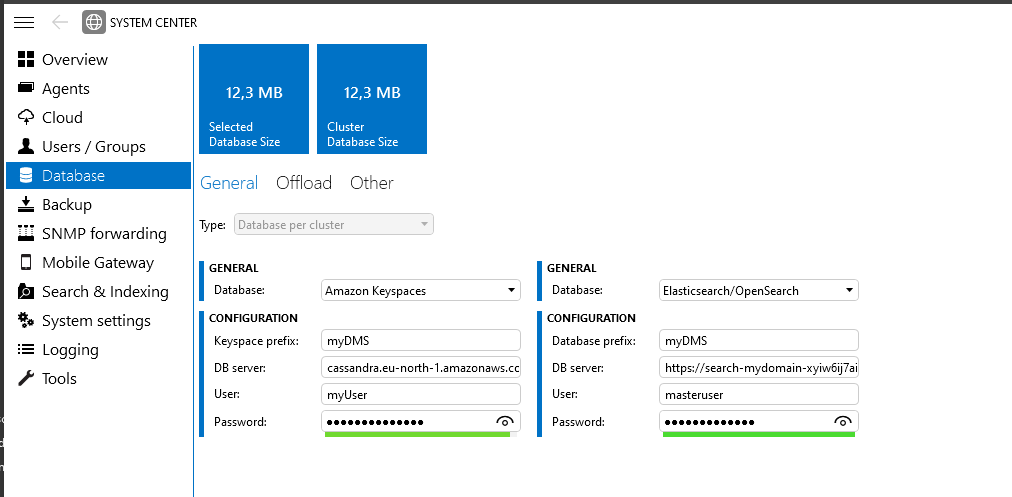
Click Save.
Note
Database configuration changes will not take effect until the Agent is restarted.
Optionally, you can verify that the DMS is using the database.
Open the
OpenSearch Dashboards URLto be redirected to your dashboard.Select the hamburger button and go to Management > Dev Tools.
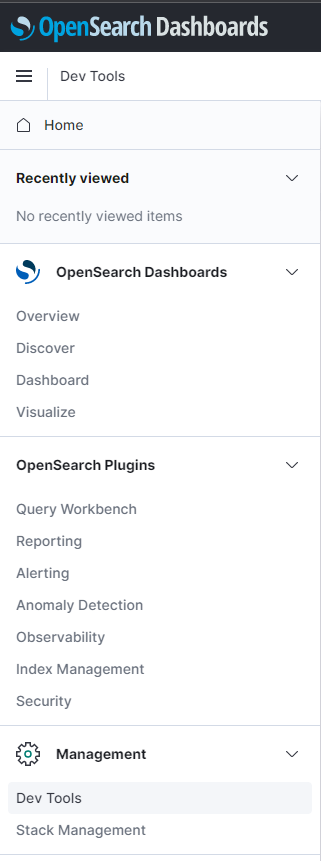
Execute the
GET _cat/indicesquery to check whether the DMS has created the necessary indices.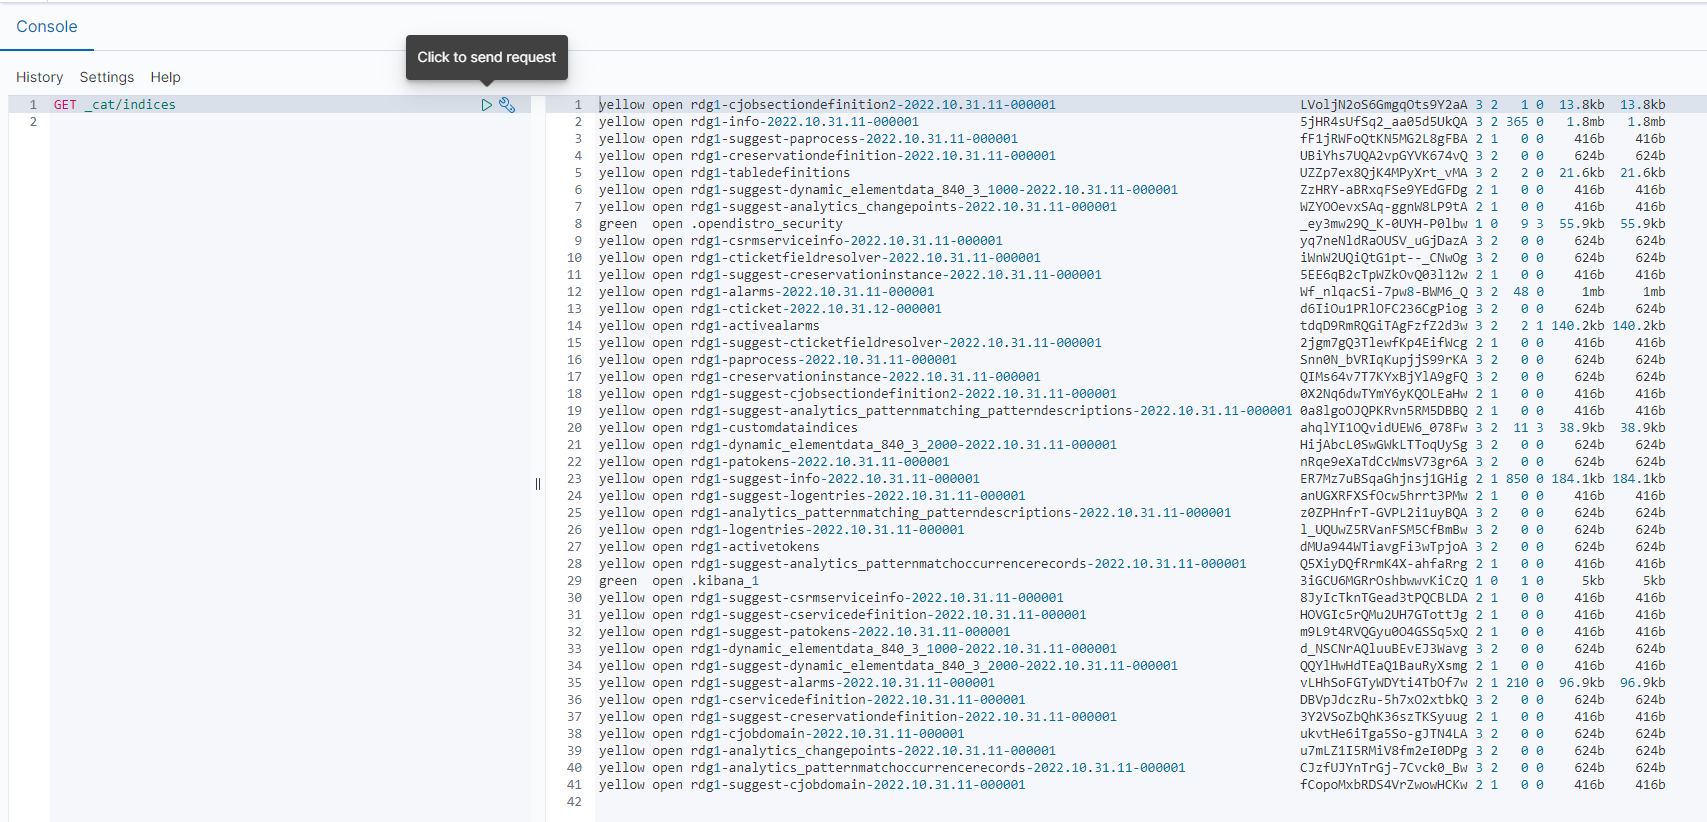
Note
In the example screenshots, the cluster health is set to yellow because only one node is used. Single-node clusters are always displayed in yellow.