Responding to element timeouts using Correlation
In this tutorial, you will learn how to use DataMiner Correlation to take action when an element is in timeout for longer than 5 minutes.
Expected duration: 15 minutes
Note
The content and screenshots for this tutorial were created in DataMiner 10.4.6.
Tip
See also: Kata #31: Master correlation rules on DataMiner Dojo 
Prerequisites
- A DataMiner System that is connected to dataminer.services.
Overview
This tutorial consists of the following steps:
- Step 1: Deploy the 'Correlation KATA Switch Timeout' item from the DataMiner Catalog
- Step 2: Create the Correlation rule
- Step 3: Generate a timeout alarm
- Step 4: Verify whether the rule actions have been executed
Step 1: Deploy the 'Correlation KATA Switch Timeout' item from the DataMiner Catalog
Look up the Correlation_KATA_Switch_Timeout package in the DataMiner Catalog.
Deploy the latest version of the package to your DataMiner Agent by clicking the Deploy button.
Tip
See also: Deploying a Catalog item to your system
When the package has been deployed, the Automation script Correlation KATA switch timeout Script and the element Correlation KATA Switch Timeout - Network Switch will become available in the DataMiner System. You can find the element in the Surveyor under DataMiner Catalog > Correlation KATA > Network Switch Timeout.
Step 2: Create the Correlation rule
In this step, you will create a Correlation rule that will trigger based on alarms from the Correlation KATA Switch Timeout - Network Switch element. If the element is in timeout for longer than 5 minutes, the rule will take action, and an Automation script will generate an information event.
In DataMiner Cube, go to Apps > Modules > Correlation to open the Correlation module.
In the lower left corner, click Add rule to add a new Correlation rule.
In the Name box on the right, specify a name of your choice, e.g.
Correlation tutorial.Under ALARM FILTER, configure a filter so that the Correlation rule will only be applied for alarms from the element Correlation KATA Switch Timeout - Network Switch:
Click Select a filter.
In the dropdown list, select Element.
Click the field to the right of Equal to.
This will open a pane where you can select an element.
In the pane, select Correlation KATA Switch Timeout - Network Switch, click ADD >>, and then click Close.

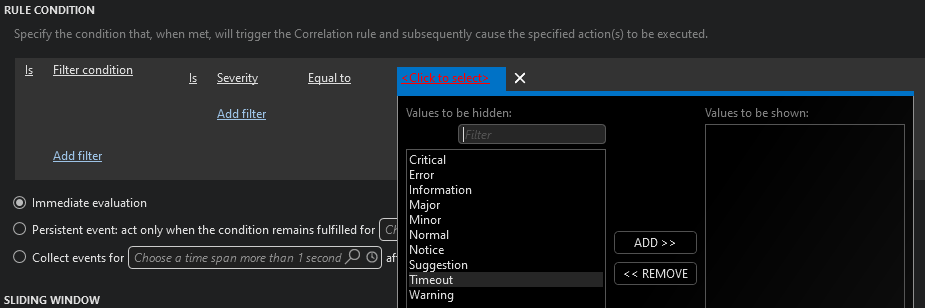
Under RULE CONDITION, add a rule condition that will trigger the rule when the severity is equal to Timeout.
Click Select a filter, and select Filter condition.
To the right, click Select a filter, and then select Severity on the dropdown list.
Click the field to the right of Equal to, select Timeout, click ADD >>, and then click Close.
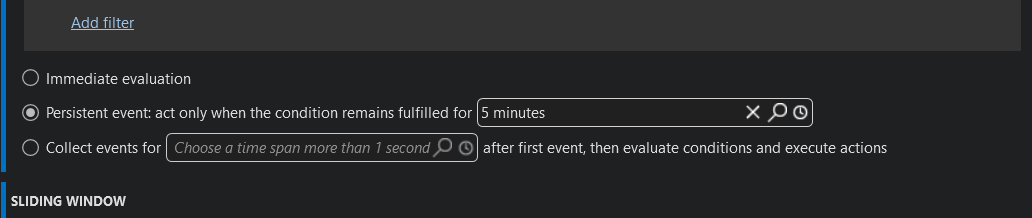
Below the rule condition configuration, select the Persistent event trigger mechanism and fill in 5 minutes.
With this configuration, the Correlation rule will wait until the rule conditions have been met for 5 minutes before acting and executing its actions.
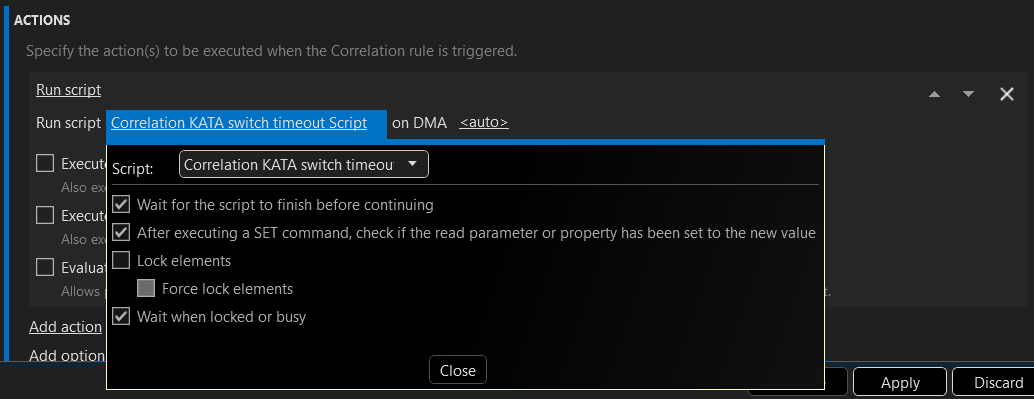
Under RULE CONDITION, configure an action to run a script that will generate an information event:
Click Add action and select Run script.
Next to Run script, click <empty> and select the script Correlation KATA switch timeout Script.
This Automation script will generate an information event when executed.
Note
Generating an information event is just one example of what you can do with this functionality. There are many, many more possibilities. However, when you explore these further outside the scope of this tutorial, make sure to keep the best practices when creating Correlation rules in mind to avoid creating a Correlation rule that could have a negative impact on your system.
Optionally, add another action to send an email to your account when the rule is triggered:
Click Add action and select Send email.
Fill in the To and Subject fields, and optionally fill in a message.

Important
This action will only work if a mail server has been configured. See Configuring outgoing email
Optionally, add other rule actions according to your preference.
At the top of the rule configuration pane, select Enable this rule.
By default, a new Correlation rule is not active, so this step is important to make sure that the rule will actually take action when needed.
In the lower right corner, click Apply to save your changes.
Step 3: Generate a timeout alarm
In the Surveyor, select the element Correlation KATA Switch Timeout - Network Switch.
Click the Create Timeout button and wait 30 seconds (i.e. the default duration DataMiner waits when an element does not respond before generating a timeout alarm).
A timeout alarm will then be generated.
Step 4: Verify whether the rule actions have been executed
Wait for five minutes after the alarm has gone into timeout.
Check whether an information event has been generated in the Alarm Console.
This information event should have been created by the Automation script triggered by the Correlation rule, if you configured everything correctly.
If you added the Send email action to the Correlation rule, check whether you have received an email.