Creating a scripted connector
This tutorial will teach you how to create your first scripted connector with Python.
Using example code, you will create a scripted connector that connects to the Amsterdam Internet Exchange (AMS) and collects traffic data from some of its available locations. This will give you real-life data illustrating how the Data Sources module works.
The content and screenshots for this tutorial were created in DataMiner version 10.4.2.
Expected duration: 15 minutes.
Tip
See also: Kata #18: Creating a scripted connector on DataMiner Dojo 
Prerequisites
A DataMiner System using DataMiner 10.4.0/10.4.2 or higher that is connected to dataminer.services.
Depending on your DataMiner version, you may need to enable the DataAPI soft-launch option.
Note
If you use a DaaS system, these prerequisites are automatically met.
Overview
Step 1: Set up your system
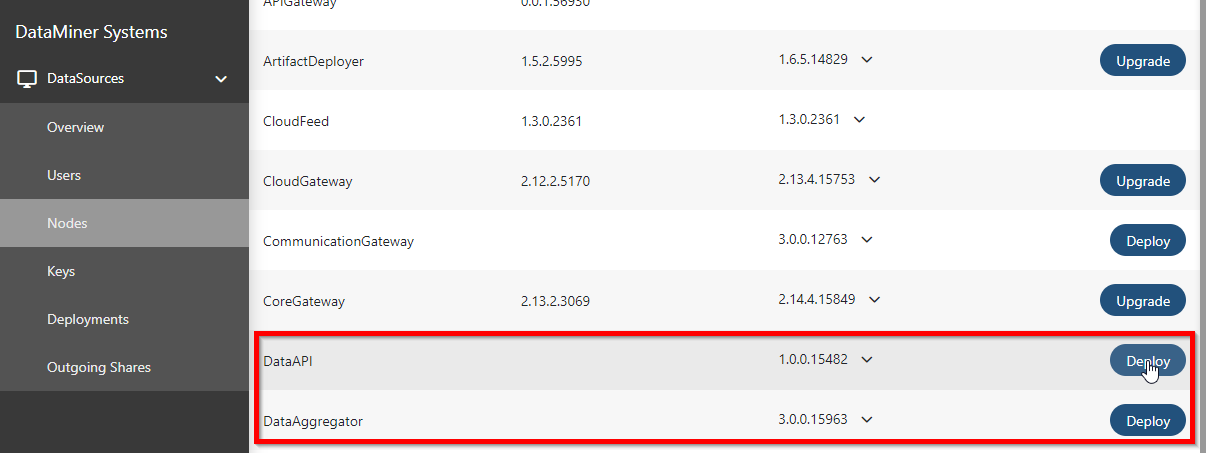
Navigate to https://admin.dataminer.services/ and deploy the latest version of the DataAPI and DataAggregator DxMs.

Tip
See also: Installing the necessary DxMs
Step 2: Create a scripted connector
Open the Data Sources module:
In DataMiner Cube, click Apps in the sidebar to the left and select Data Sources, or
Navigate to
https://<dmaip>/data-sources/using any modern browser.
Click Create Data Source.

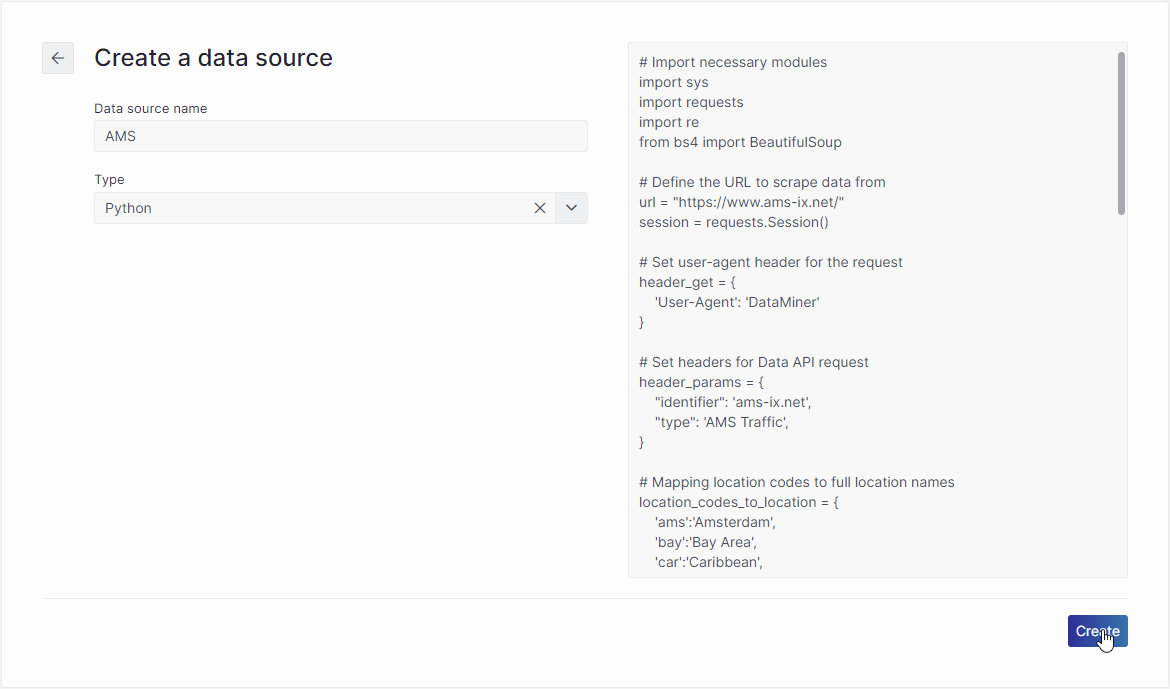
Configure the Data source name field with an identifiable name (e.g. AMS) and ensure the Type is set to Python.

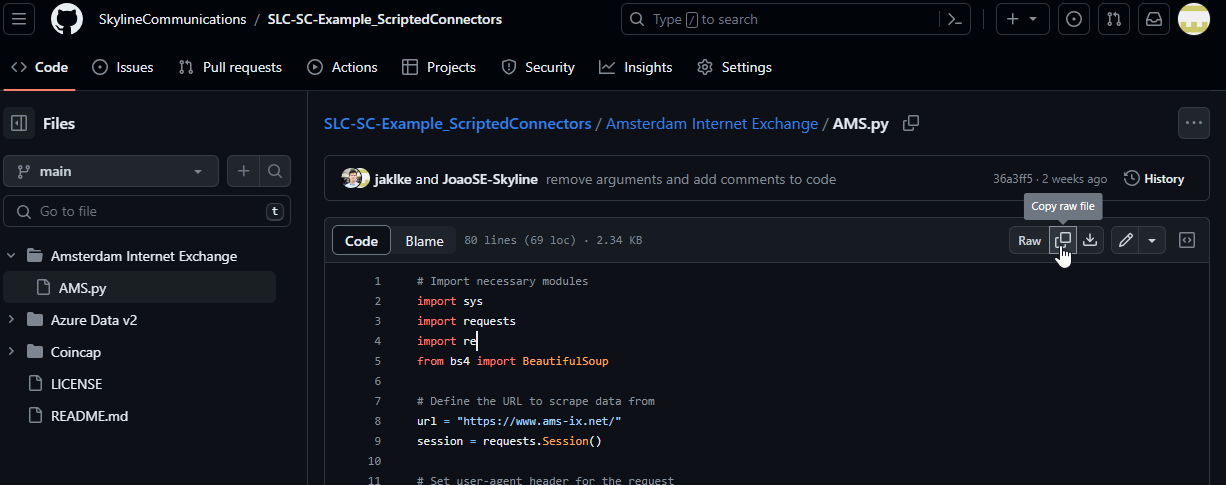
Go to the SLC-SC-Example_ScriptedConnectors GitHub repository and copy the Amsterdam Internet Exchange Python example.
In the Data Sources module, paste the example code in the code editor window and click the Create button.
The scripted connector you have just created will now be automatically configured to run every minute. It will collect traffic data and send it to DataMiner via the Data API.
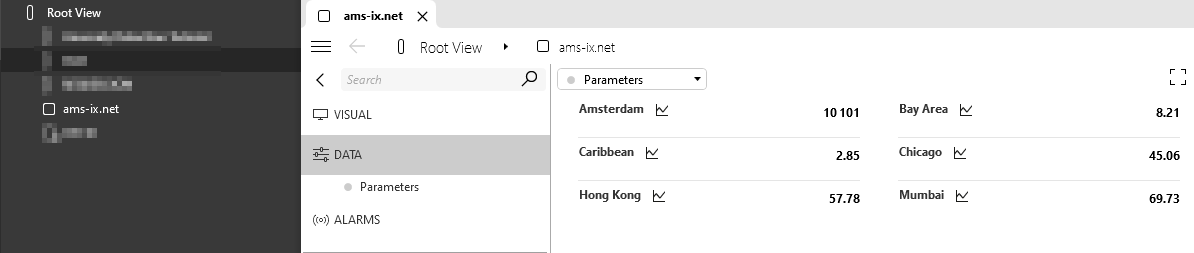
When the scripted connector is first executed, an element named ams-ix.net will automatically be created.
Step 3: View your data source
Open DataMiner Cube and locate the newly created element in the Surveyor.
Verify that the element is being populated with data.