Registering a new connector in the Catalog
This tutorial demonstrates how to add a new Catalog item using the Catalog API, using an example connector.
For ease of use, Postman will be used to execute the register API calls. You can also integrate these into your own workflow afterwards, e.g by using them in a GitHub action.
While the tutorial uses the example of a connector, registering a different type of Catalog item is very similar.
Expected duration: 10 minutes
Note
If you are interested in reusing Skyline's pre-made pipelines, which include quality-of-life features and a robust quality gate, refer to the From code to product tutorial. Alternatively, if you would prefer not to use Postman and HTTPS directly, you can try our platform-independent tooling.
Prerequisites
An organization key or account with the Owner role in order to access/create organization keys.
Overview
- Step 1: Register the Catalog item URL
- Step 2: Configure the authentication header
- Step 3: Register the Catalog item body
- Step 4: Register the Catalog item
Step 1: Register the Catalog item URL
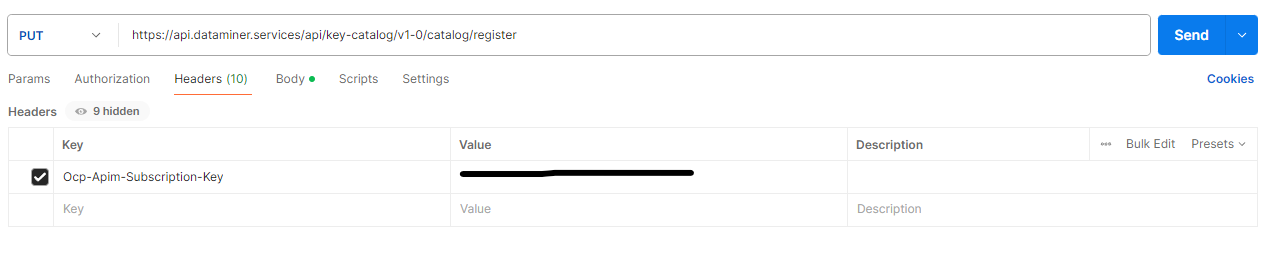
Add a new request using an HTTP method of type PUT and the following URL: https://api.dataminer.services/api/key-catalog/v2-0/catalogs/register

Step 2: Configure the authentication header
The Catalog item register API call is authenticated using an organization key, which you can obtain in the Admin App. This key identifies your organization and will make sure your Catalog item is registered under the correct organization.
Important
You need to have the Owner role in order to access/create organization keys. See Changing the role of a dataminer.services user for information on how to change a role for a user.
In the Admin app, under Organization in the sidebar on the left, select the Keys page.
At the top of the page, click New Key.
Configure the key with a label of your choice and the permission Register catalog items.
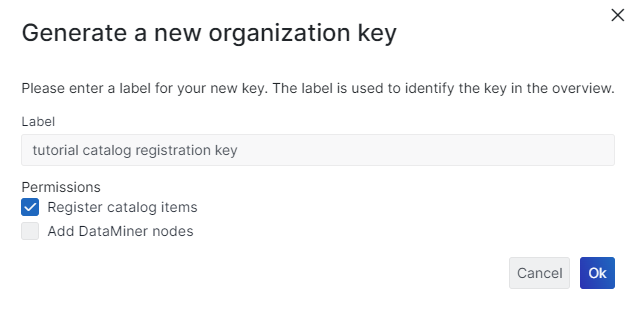
Copy the key and use it as the value in the Ocp-Apim-Subscription-Key header.
Step 3: Register the Catalog item body
Create a .zip file containing the following items:

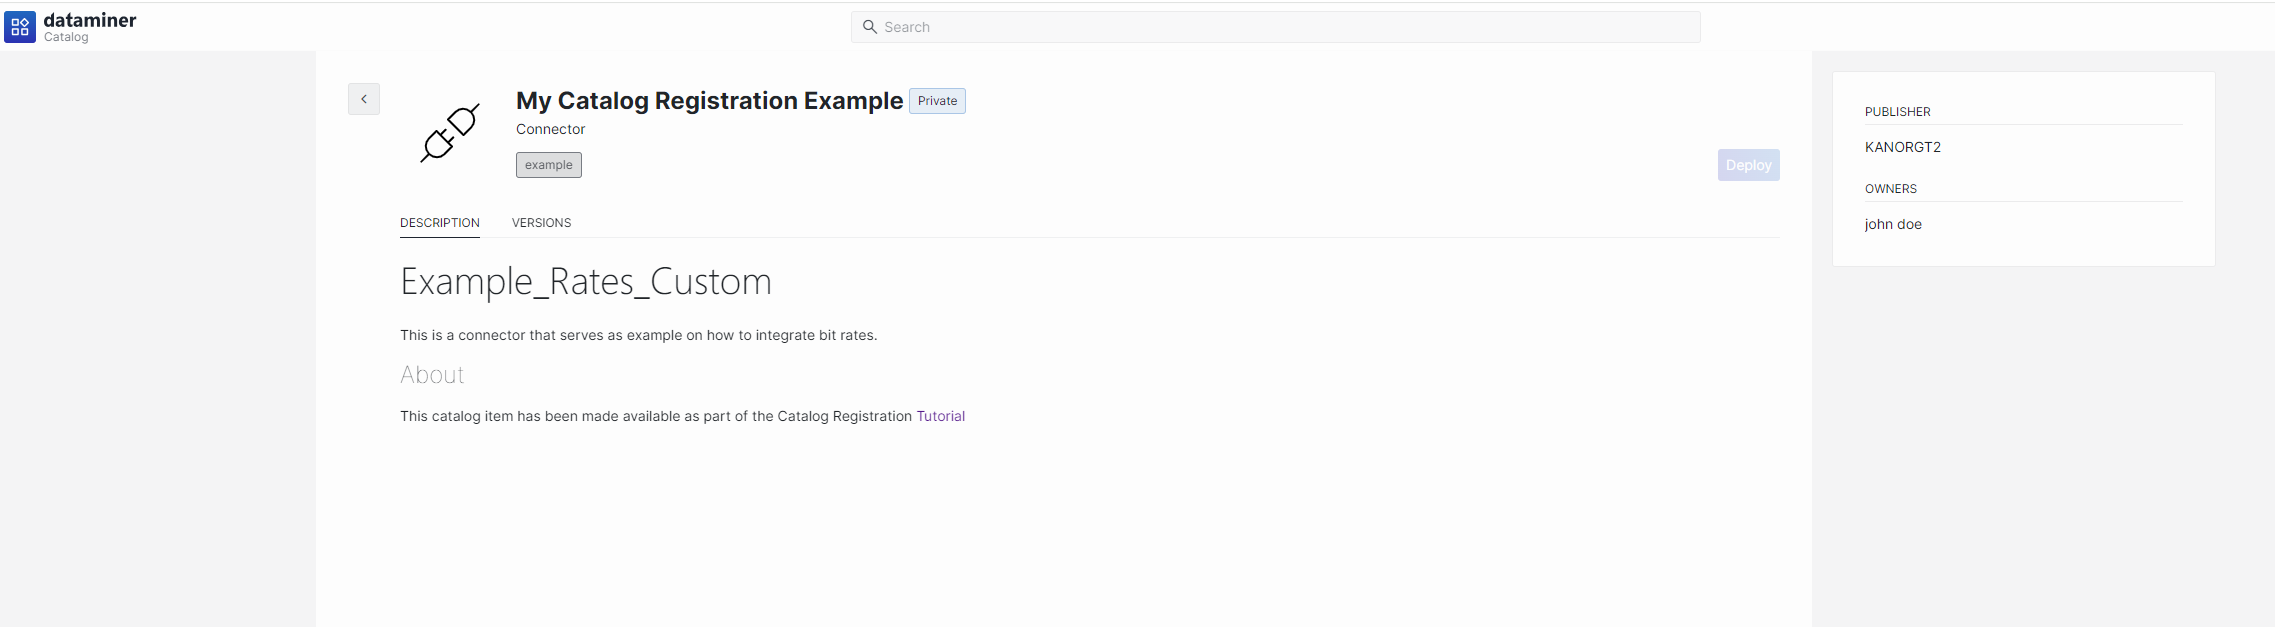
A README.md file. This README.md will be shown in the description tab in the Catalog.
Copy the snippet below, changing the content as you see fit using your favorite editor, and save the file as
README.md.# Example_Rates_Custom This is a connector that serves as an example for how to integrate bit rates. ## About This Catalog item has been made available as part of the [Catalog registration tutorial](https://docs.dataminer.services/tutorials/Tutorials.html)Tip
Optionally, if you want to use images in the readme, an images folder containing those images.
A manifest.yml file describing the properties of the Catalog item.
Copy the snippet below, changing the fields as you see fit using your favorite editor, and save the file as
manifest.yml.Note
Make sure to obtain a new GUID to uniquely store and identify the Catalog item. To do so, you can for instance navigate to GUID generator and create a new GUID using the format hyphens, or you can use your own preferred method.
type: 'connector'

id: '1742495c-9231-4eeb-a56e-1fec8189246e'

title: 'My Catalog Registration Example'

short_description: 'Example connector showing how to calculate bitrates and other rates on any changing numeric data.'

source_code_url: 'https://github.com/SkylineCommunications/SLC-C-Example_Rates-Custom'

owners:
  - name: 'john doe'
    email: 'john.doe@skyline.be'
tags:
  - 'example'
Add the zip file as the value of the body of the request as shown below.
The body of the request needs to be in the multipart/form-data format with a key of type File with the name file.

Step 4: Register the Catalog item
Execute the call.
When the item has been registered correctly, you will receive an HTTP Status 200 OK response, with the Catalog ID in the body of the response.
You can now search for the Catalog item in the Catalog or navigate immediately to https://catalog.dataminer.services/details/{YourCatalogId}.
Note
After the first registration, you can make changes to the manifest or README.md and execute the PUT request again. This will update the registered data as long as you use the same Catalog ID.