Using a pre-installed DataMiner Virtual Hard Disk
You can download a virtual hard disk with DataMiner pre-installed to immediately get started. The virtual hard disk is available in VHD, VHDX, and VMDK format. The pre-installed DataMiner VM is hardened out of the box for improved security.
When you configure this setup, you will be able to choose between different data storage setups:
STaaS, i.e. the recommended setup.
Self-managed dedicated clustered storage: A setup where you host and manage the Cassandra and OpenSearch clusters required by DataMiner yourself on dedicated servers (not recommended). If you choose this setup, you will need to make sure these database clusters are fully installed before you run the procedures below, so that DataMiner will be able to connect to them.
A development setup where both Cassandra and OpenSearch run locally on Windows Subsystem for Linux (WSL). Such a setup should only be used for single-Agent development environments, and this will also require additional resources on the local machine. To convert such a setup to a staging or production setup, you will need to either migrate to Storage as a Service (STaaS) or switch to using Cassandra and OpenSearch clusters on separate servers (not recommended), and then decommission WSL.
Once you have downloaded the pre-installed virtual hard disk from DataMiner Dojo, you will need to follow the steps below to use it:
Note
- If you are not familiar with virtualization, we suggest installing DataMiner using the DataMiner Installer instead.
- The VMDK hard disk is compatible with desktop hypervisors such as VMWare Workstation. If you use the hard disk in a VMware vSphere ESXi environment, an error mentioning Unsupported and/or invalid disk type can be shown. For information on how to resolve this issue, refer to A virtual machine fails to power on with the error: Unsupported and/or invalid disk type.
Creating the VM
When you have downloaded the virtual hard disk, you can start to create a VM in your chosen virtualization environment. Below you can find the steps to follow in Hyper-V:
Start creating your VM by following the official Hyper-V guide.
Specify a name for your VM and store the machine in a location of your own choice, making sure your disk has enough space.
Choose Virtual Machine Generation 2.
Assign (at least) 8192 MB startup memory.
Optionally, you can choose to use dynamic memory.
Important
If you intend to run the databases locally on the same server using WSL, assign at least 12288 MB RAM, as the WSL storage container will take about 4 GB to run.
Connect to a virtual switch that has internet access (either the default switch or a custom one).
Note
If you choose the default virtual switch, you will only be able to use remote access through dataminer.services to access the system outside of the virtual machine environment.
Connect the virtual hard disk that you have just downloaded.
Important
If you intend to use the locally hosted Cassandra and OpenSearch clusters running on WSL, make sure to enable nested virtualization on your host PC for the VM you created before starting the VM. To do so, run the following command on your host PC in an elevated Powershell prompt:
Set-VMProcessor -VMName <VMName> -ExposeVirtualizationExtensions $true
Connecting and starting the VM
When you have created the VM, double-click the entry and then click Start to boot the VM.
You will see that the VM will boot in the OOBE setup screen.
Choose the region and keyboard settings and select a strong password for the built-in Administrator account.
When you have set the password, the VM will restart.
When the login screen is shown, log in to the VM.
Verify in the network configuration that the network interface uses a static IP instead of DHCP, because DataMiner requires a static IP.
For more details, refer to Change TCP/IP Settings under Essential Network Settings and Tasks in Windows.
Configuring DataMiner
As soon as you log in to the VM, a window will be shown where you can configure your DataMiner System.
Important
The configuration wizard takes care of the automatic license and data storage configuration. However, if you do not want a default installation, you may not want to use this automatic configuration:
- If you need to install DataMiner offline, the license and data storage configuration will need to be done manually:
- For the license, see Permanent license.
- For the data storage configuration, please refer to Configuring dedicated clustered storage.
- The procedure below will deploy DataMiner in subscription mode with a Community Edition license. To immediately install DataMiner with a perpetual license, you will need to configure the license and data storage manually, similar to an offline installation. To switch to a perpetual license after the initial installation, see Switching from subscription mode to perpetual license. To switch to an offline demo license, see Switching from subscription mode to an offline demo license.
- If you intend to restore a backup coming from another machine because of e.g. a hardware migration or during disaster recovery, skip the configuration below and follow the steps under Restoring a backup onto the virtual hard disk.
- If you are installing a Failover Agent, skip the configuration below, and follow the steps under Configuring the new DataMiner Agent as a new Agent in a Failover pair. These steps are the same as for an installation using the DataMiner Installer.
Note
If you have accidentally closed the configuration window, you can run it manually from C:\Skyline DataMiner\Tools\FirstStartupChoice\FirstStartupChoice.ps1. Make sure to run it with administrator privileges.
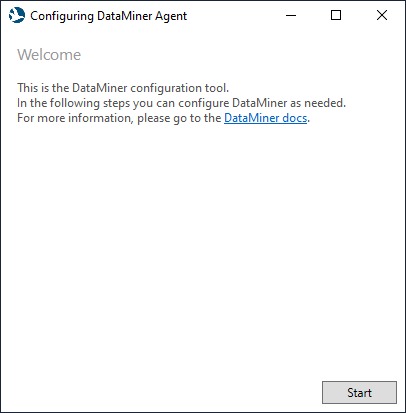
Follow the below steps to configure your DataMiner Agent:
Click Start to get started.
Select the desired database type, and click Next.
These are the available database types:
Storage as a Service (STaaS) (recommended).
Self-hosted - External Storage: A regular dedicated clustered storage setup. If you select this option, you will also need to fill in the connection details for both Cassandra and OpenSearch.
Note
Make sure these clusters are active and reachable from the VM you are setting up. You are responsible for the management of these external database clusters.
Self-hosted - Local storage: A clustered storage setup where both Cassandra and OpenSearch run locally on WSL.
Important
This option should only be used for testing and staging environments. Do not select this option for production systems. Furthermore, make sure the necessary resources will be available for the WSL storage container. See Creating the VM.
Fill in the required details to connect your DataMiner Agent to dataminer.services and click Next:
- Organization API Key: Provide an organization key that has the necessary permissions to add DataMiner Systems in your organization. For more information on how you can add a new organization key to your organization on dataminer.services, see Managing dataminer.services keys.
- System Name: This name will be used to identify the DataMiner System in various dataminer.services applications.
- System URL: This URL will grant you remote access to your DataMiner System web applications. You can choose to either disable or enable this remote access feature at any time.
- Admin Email: This email address must be associated with a dataminer.services account that is a member of your organization. It will become the owner of the DMS on dataminer.services.
- STaaS Region: If you have selected to use STaaS for data storage, select the region where your data should be hosted.
Verify the selected configuration and click Configure
When the configuration is complete, click Finish
DataMiner will automatically start up, get licensed, and connect to dataminer.services. DataMiner Cube will also be installed, so you can connect to DataMiner locally.
Log in to DataMiner Cube using the previously configured Administrator account.
Logging in automatically with the built-in Administrator account is not possible, so you will need to fill in the username and password.
Important
For security reasons, we strongly recommend creating a second user and disabling the built-in administrator account once the setup is complete. See Managing users.
WSL management
If you selected the option Self-hosted - Local storage, which is not recommended and should only be done for testing and staging environments, that means you are running a WSL container for the Cassandra and OpenSearch storage nodes used by DataMiner. If you selected a different storage option, the information below is not relevant for you.
If you want to manage the configuration of Cassandra or OpenSearch for this setup, you should connect to the container. To do so, you will need to open a command prompt using the user account used for the installation (by default the Administrator account) and run the wsl command. This way, you should automatically be logged in and connected to the WSL container.
Note
WSL always runs under a specific user. It is not possible to reach a WSL container from another user account.
Cassandra
Cassandra is installed with the following default credentials:
- cassandra
- DataMiner123!
When Cassandra is running, you can change the password as follows:
Use the following command:
cqlsh -u cassandra -p DataMiner123!Enter the following query:
alter role cassandra with password = 'MyNewPassword123!';Exit cqlsh using the
exitcommand.
OpenSearch
The OpenSearch admin user has the following default credentials:
- admin
- DataMiner123!
You can change the admin password by following these steps:
First go to the correct directory with this command:
cd /usr/share/opensearch/plugins/opensearch-security/toolsRun the following command:
OPENSEARCH_JAVA_HOME=/usr/share/opensearch/jdk ./hash.shSpecify a (strong) password and confirm with ENTER.
A hashed password will be generated. You can copy your
<HashedPassword>.Update the user account file:
sudo vi /etc/opensearch/opensearch-security/internal_users.ymlUpdate the hash in the admin user account with your hashed password.