Change Element States Offline
This tool can be used to change element states while a DMA is not running.
This can be particularly useful to stop all or multiple elements in case a DMA fails to start up and the cause appears to be element-related. After you have stopped the elements, you can then start the DMA and start the elements one by one in order to pinpoint the element causing the problem.
To change element states using this tool:
Make sure the DMA where you want to change element states is stopped.
On the DMA, go to the folder
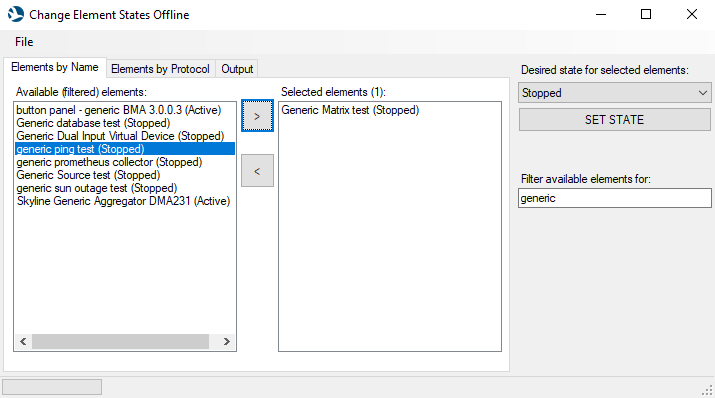
C:\Skyline DataMiner\Tools\Change Element States Offline(from DataMiner 10.4.9/10.5.0 onwards) orC:\Skyline DataMiner\Tools(prior to DataMiner 10.4.9/10.5.0), and run Change Element States Offline.exe.By default, the Elements by Name tab is displayed, where you can see all the elements on the DMA, listed by name. The state of an element is displayed in parentheses next to the name. There is also an Elements by Protocol tab, with a tree structure that allows you to drill down to elements using specific protocol and protocol version.
From DataMiner 10.5.0/10.5.3 onwards, if you want to see service elements as well, enable the Show advanced elements option on the right. Prior to DataMiner 10.5.0/10.5.3, service elements are included in the list by default.
Indicate for which elements the state should change:
In the Elements by Name tab, move the elements for which you want to change the state from the column on the left to the column on the right using the arrow buttons in between the columns. To quickly select all elements in a column, press Ctrl + A. To filter the displayed elements, add a filter value in the box on the right.
In the Elements by Protocol tab, select the checkboxes in front of the elements for which you want to change the state. If you select the checkbox in front of a protocol or protocol version, the state of all elements using that protocol or protocol version will be changed. To search for specific items in the tree view, add a search term in the box on the right.
To reload the displayed elements, so that any recent changes are taken into account, use the Reload from Disk or Reload from Database option in the file menu.
Set the target state by selecting the target state in the dropdown box on the right and clicking SET STATE. By default, Stopped is selected.
When you have done this, the tool will update all Element.xml files on disk or ElementConfig entries in the database with the new state. The Output tab of the tool, which lists all warnings and actions of the tool, will display information whether changes have been executed successfully or not.
The tool also allows you to export the element states in CSV or XML format. To do so, go to the File menu, select Export, and select your preferred export format.
Note
When working with files on disk, the tool may not function correctly when updating an element state in case an element folder contains other element folders where an Element.xml file is missing.