Configuring the DataMiner Health Check Tool
To begin receiving results from the DataMiner Health Check Tool, you will first need to configure the test cases and configure the general report settings.
Configuring test cases
There are two main types of test cases that can be configured, script-based tests and subscription-based tests, each providing a different mechanism for querying data to allow for greater flexibility depending on the kind of data being tested.
Script-based tests
Script-based tests use custom Automation scripts to execute and retrieve data. These tests can retrieve data from various sources, including DataMiner elements (via SLNet calls), DataMiner Agents (via DMS calls), or other external systems the DMS communicates with. Once the data is retrieved, it is evaluated against predefined thresholds to determine if the test passes or fails.
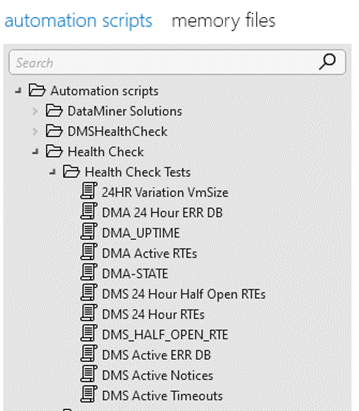
Several default tests are available related to the state of the DataMiner System, but you can also integrate new tests using Automation scripts. For the Health Check tool to recognize the new tests, the Automation scripts must be placed in the following folder in the Automation module: Automation Scripts > Health Check > Health Check Tests.
Adding a script-based test
Make sure the script for the test you want to add is available in the Automation module in the folder Automation Scripts > Health Check > Health Check Tests.
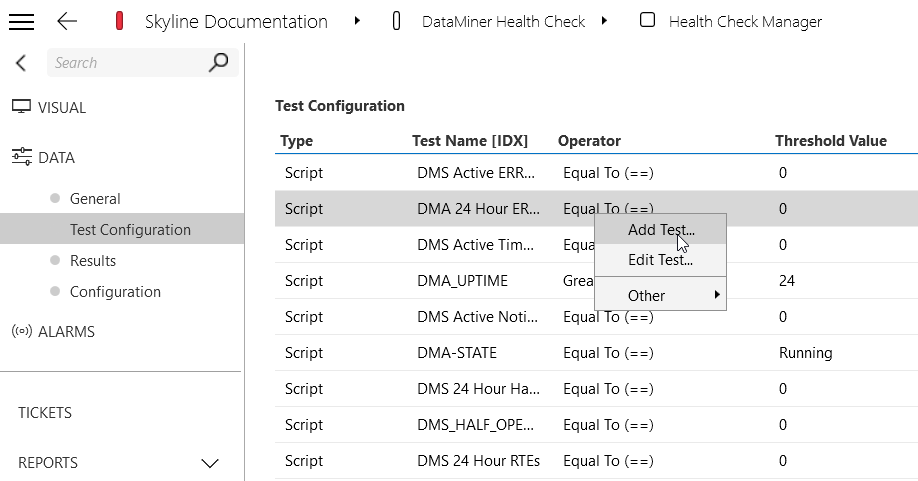
In DataMiner Cube, open the Health Check Manager element and go to the Test Configuration page.
This page shows a list pre-configured tests related to your DataMiner System's health. These include tests for checking the status of DMAs in the cluster, monitoring active timeouts, and more.
Right-click the Test Configuration table and select Add Test in the context menu.
In the pop-up window, fill in the required fields:
- Test Type: Make sure Script is selected.
- Name: Select an available script-based test.
- Operator and Threshold: Define the conditions for the test to determine whether it passes or fails.
- Display Title: Optionally, enter a custom name for the test to make it easily identifiable. If provided, this title will be used to identify the test in the email report; otherwise, the default test name will be displayed.
- Element/DMA Filter: Use this field to apply the test to a specific element. Enter the name of the element you want to target.
- Display Key Filter: Apply this filter if you want the test to consider only certain entries for the test. This filter must be in the format of a regular expression.
- Status Checkbox: Select this box if you want the text to be enabled as soon as it is created.
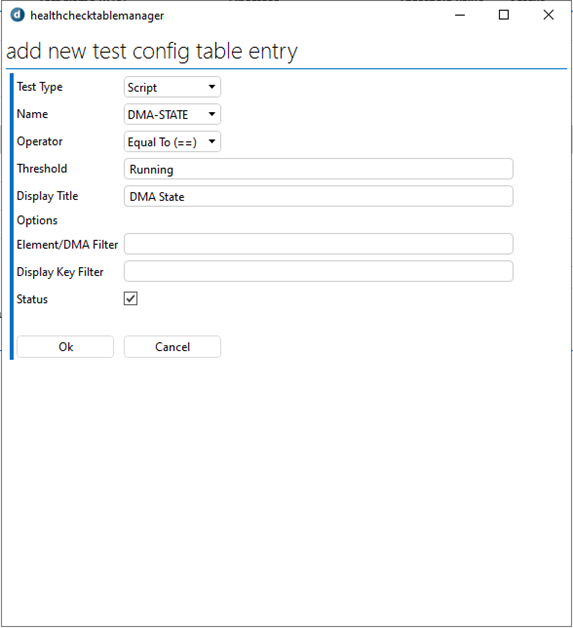
Click OK to create the test.
Editing a script-based test
In DataMiner Cube, open the Health Check Manager element and go to the Test Configuration page.
Right-click the test you want to edit and select Edit Test in the context menu.
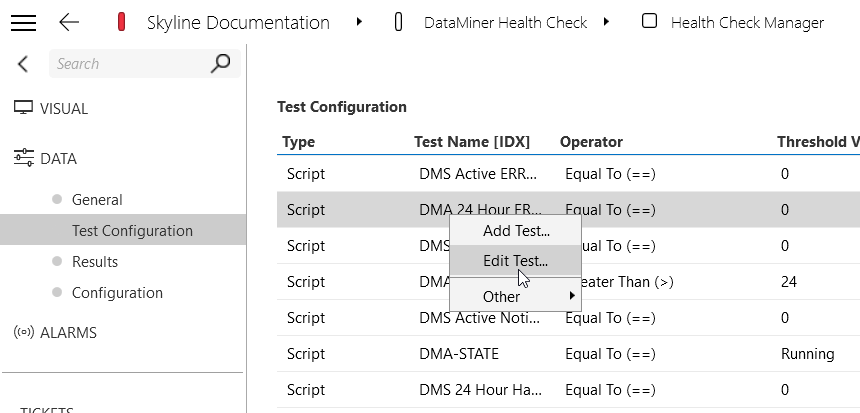
A pop-up window will show the current configuration of the selected test.
Modify any of the fields in the window as needed.
These are the same fields as when you add a test.
Click OK to apply the changes.
The updated test configuration will be reflected in the Test Configuration table.
Parameter subscription-based tests
Subscription-based tests allow you to select a specific standalone parameter or table column from any connector in the DataMiner System and subscribe to it. Once you have created a subscription, you can link it to a test that retrieves the parameter's value and evaluates it against defined thresholds. This process helps assess the data's current state and detect any deviations from expected conditions.
Creating a subscription
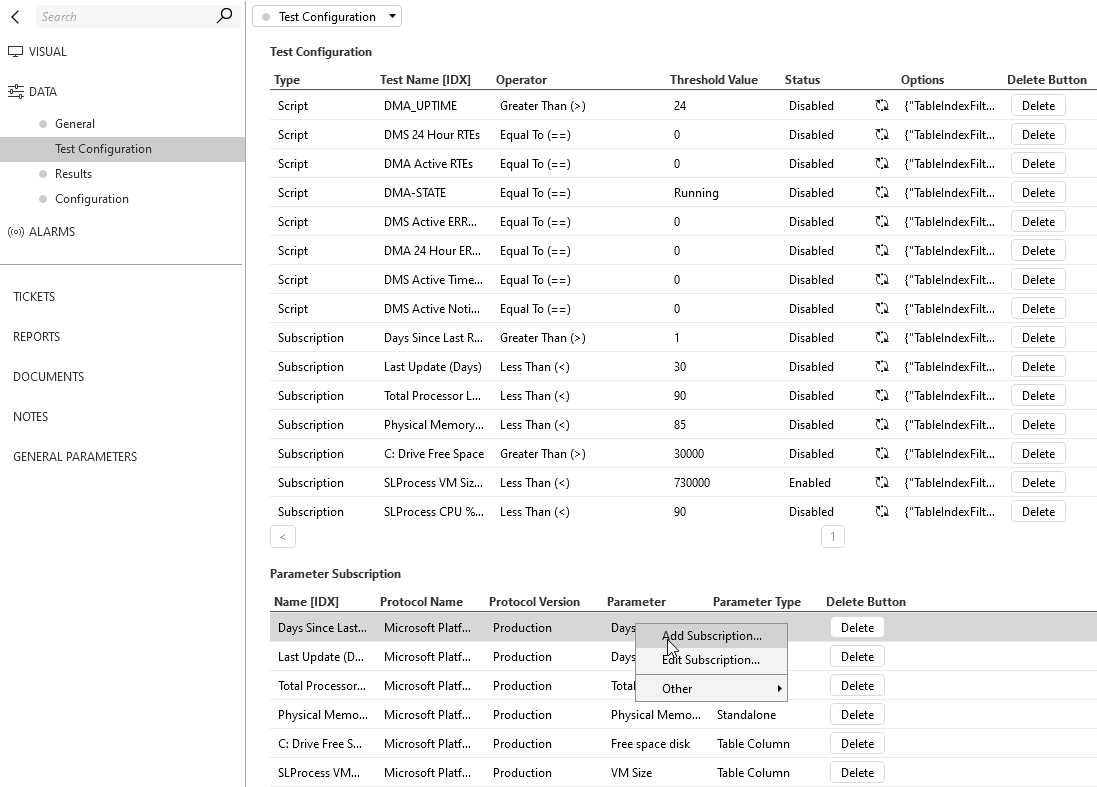
In DataMiner Cube, open the Health Check Manager element and go to the Test Configuration page.
Right-click the Parameter Subscription Table and select Add Subscription in the context menu.
In the pop-up window, configure the fields to set up the subscription:
- Protocol: Select the protocol associated with the parameter you want to subscribe to. Only protocols with active elements will be displayed in the dropdown menu.
- Protocol Version: Select the version of the selected protocol you want to use.
- Parameter Type: Indicate whether you want to subscribe to a standalone parameter or a table parameter
- If you select Standalone Parameter, in the Parameter field, select the name of the parameter you want to subscribe to.
- If you select Table Parameter, specify the table name in the Table field and the column name in the Parameter field.
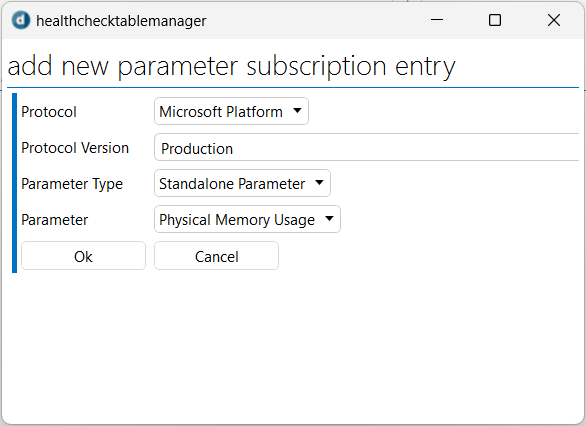
Click OK to add the subscription.
Editing a subscription
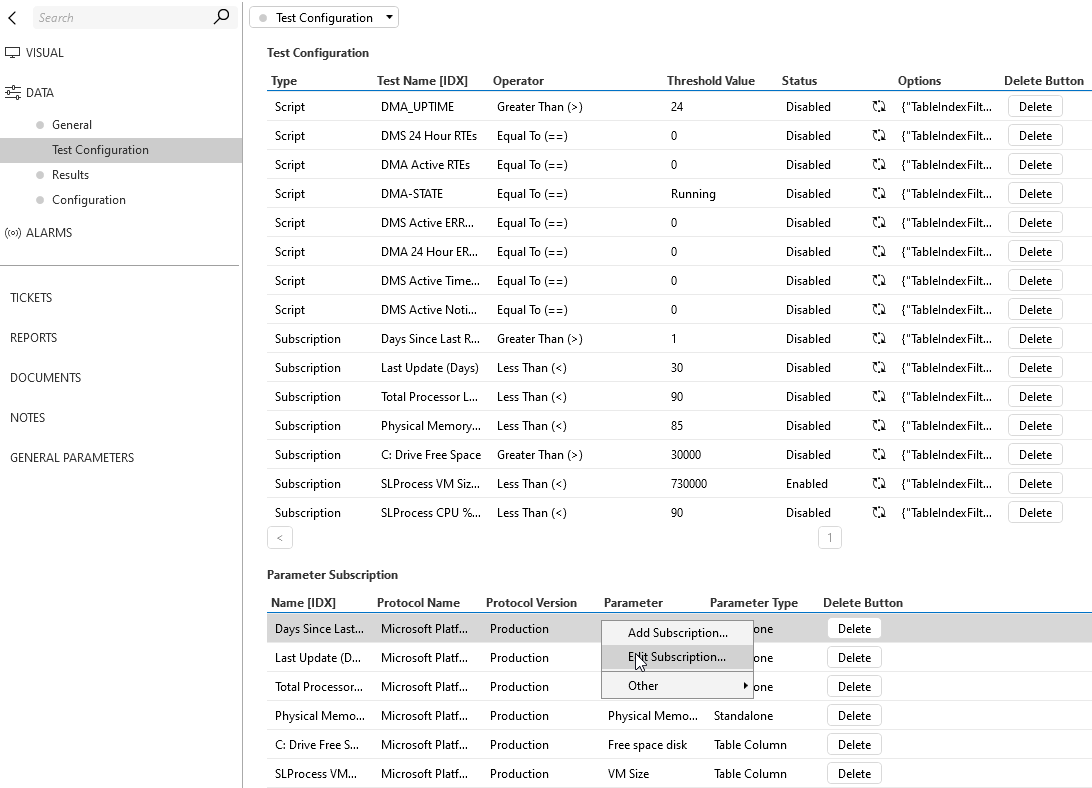
In DataMiner Cube, open the Health Check Manager element and go to the Test Configuration page.
Right-click the Parameter Subscription Table and select Edit Subscription in the context menu.
A pop-up window will show the current configuration of the selected subscription.
Modify any of the fields in the window as needed.
These are the same fields as when you create a subscription.
Click OK to apply the changes.
The updated subscription will now be reflected in the Parameter Subscriptions table.
Linking a subscription to a test
After you have created a subscription, you will still need to link it to a test:
In DataMiner Cube, open the Health Check Manager element and go to the Test Configuration page.
Right-click the Test Configuration table and select Add Test in the context menu.
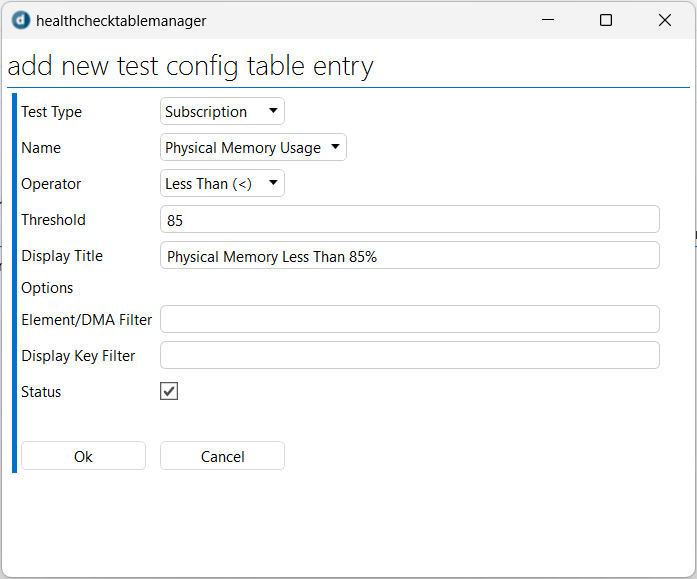
In the pop-up window, fill in the required fields:
- Test Type: Set this field to Subscription.
- Name: Select the name of the subscription you want to link to a test.
- Operator and Threshold: Define the conditions to determine whether the test passes or fails.
- Display Title: Optionally, enter a custom name for the test to make it easily identifiable.
- Element/DMA Filter: Use this field to apply the test to a specific element. Enter the name of the element you want to target.
- Display Key Filter: Use this field if the test should only consider specific entries. The filter must be in the format of a regular expression.
- Status Checkbox: Select this box if you want the text to be enabled as soon as it is created.
Configuring email reports
The DataMiner Health Check Tool can provide daily email reports summarizing the results of the tests that have been executed.
To set up the recipients for the email reports, follow these steps:
In DataMiner Cube, open the Health Check Manager element and go to the Configuration page.
In the Email Configuration section, make sure Email State is set to Enabled, so that email reporting is activated.
In the Email Addresses field, enter a list of email addresses that should get the reports, using a comma (
,) as a separator.
Configuring the test execution schedule
You have the flexibility to schedule when and how frequently tests will run to ensure they align with your operational needs. Follow the steps below to configure the test execution schedule:
In DataMiner Cube, open the Health Check Manager element and go to the Configuration page.
In the Test Settings section, click the Edit button.
This will open a new window where you can configure the test schedule.
Configure the settings for the test schedule:
- Select the time when the tests should run (for example,
22:00). - Select how often the tests should be executed (Daily, Weekly, Every X days, etc.).
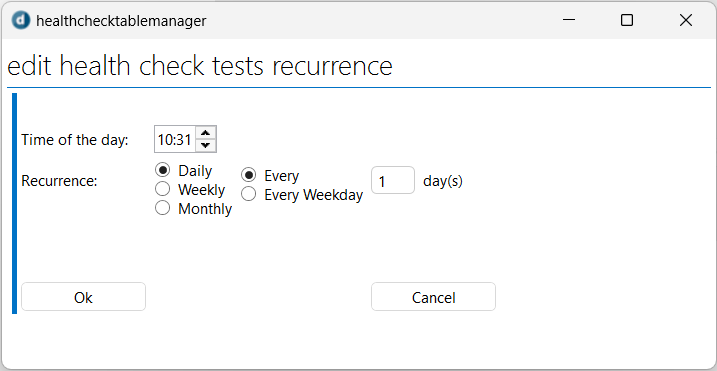
- Select the time when the tests should run (for example,
When you have configured the schedule, click OK.
The updated settings will be reflected in the Test Settings section.
Note
The Test Settings section also contains the Long Duration Time parameter, which lets you set the time span for including test results in the Overall Failure Rate (Longer Duration) calculations. For example, if this is set to 7 days, only test results from the last 7 days will be considered in the failure rate.