Getting started with IDP and onboarding new equipment
This tutorial will show you how to install IDP and onboard new equipment. By way of example, the Microsoft server running DataMiner will be onboarded, as this is easily accessible equipment.
Expected duration: 15 minutes.
Note
The content and screenshots for this tutorial were created using IDP version 1.5.0.
Tip
See also: Kata #25: Getting started with IDP and onboarding new equipment on DataMiner Dojo 
Prerequisites
The DataMiner System used for this tutorial has to meet the following requirements:
- DataMiner is installed on a machine running a Windows Server version (e.g. Windows Server 2022).
- The DataMiner System is connected to dataminer.services.
- The DataMiner version is 10.3.0 [CU0] or higher.
Important
If you are using a DataMiner version lower than 10.4.0 or 10.4.3, install the IDP Migration package before you start the tutorial.
Note
If you use a DaaS system, these prerequisites are automatically met.
Overview
- Step 1: Deploy IDP from the DataMiner Catalog
- Step 2: Configure the scan range
- Step 3: Run the discovery
- Step 4: Provision the discovered element(s)
Step 1: Deploy IDP from the DataMiner Catalog
Connect to your DataMiner System in DataMiner Cube.
You will notice that IDP will be automatically installed and set up for you.
Step 2: Configure the scan range
Open the IDP app.
Go to Admin > Discovery.
Select Scan Ranges on the left.
Click the New button.
This will open the following window:
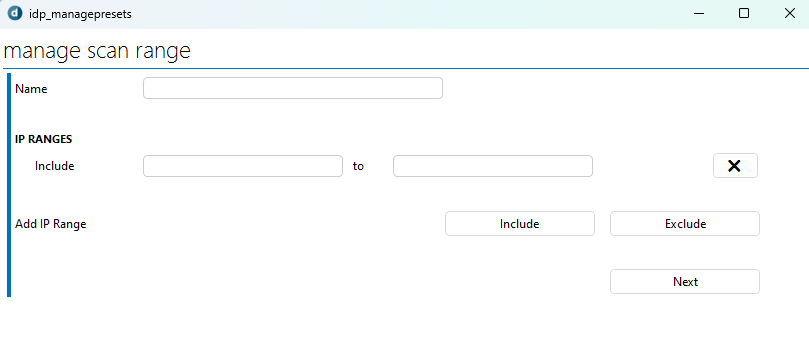
In the Name field, specify
Local.In both IP Ranges fields, fill in
127.0.0.1.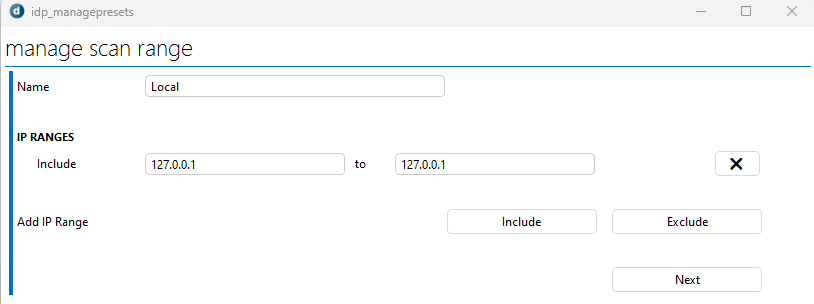
The range you have specified is the IP range IDP will use to discover devices in.
Click Next.
In the Discover Devices by box, select CI Type.
Under Selected CI Types, select Default - Microsoft Platform.
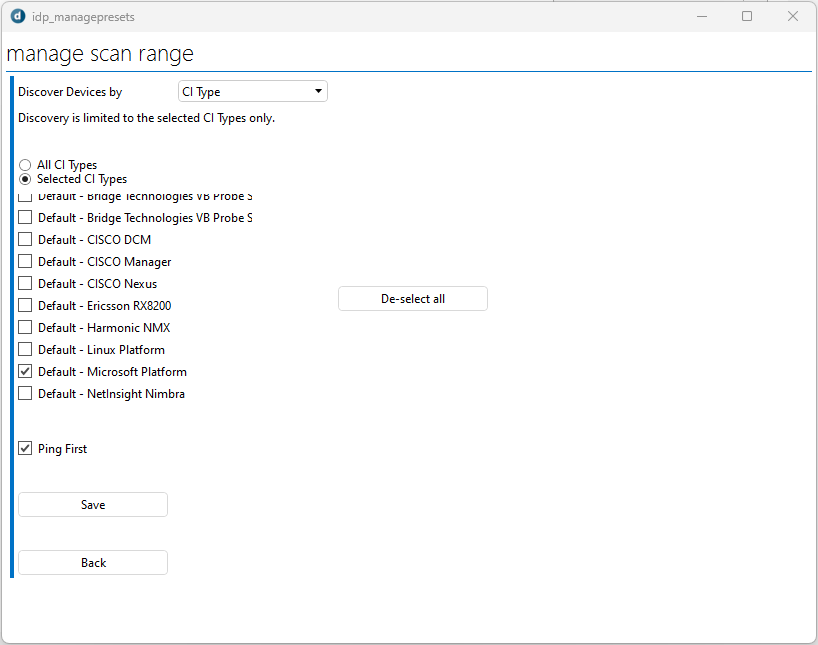
Click Save.
When you select the row in the table now, you will see the following result:
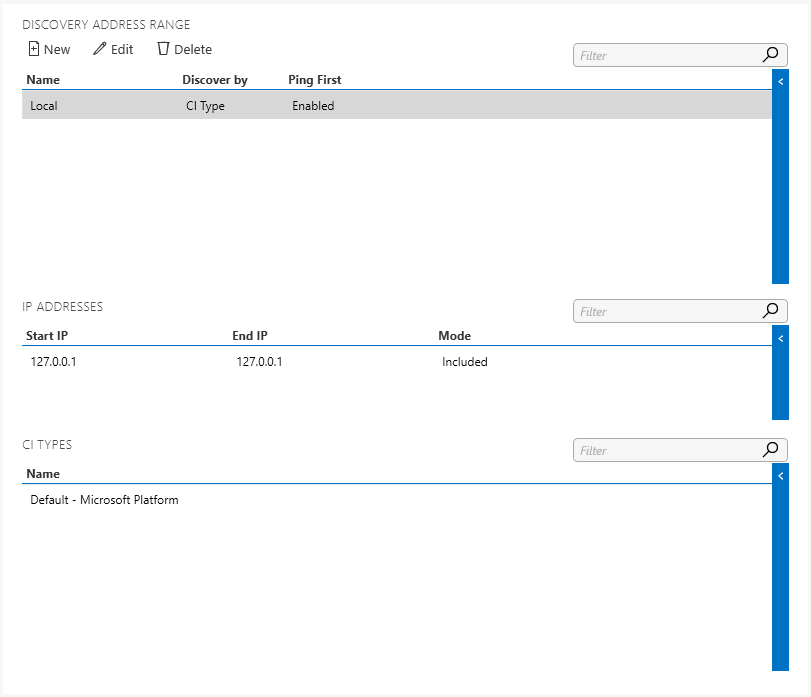
Step 3: Run the discovery
Go to Inventory > Discovered.
In the Actions section at the top, select the Local scan range in the dropdown box.
Click the Discover button.
IDP will now check the scan range to try to discover devices that match the CI Type configured for this scan range.
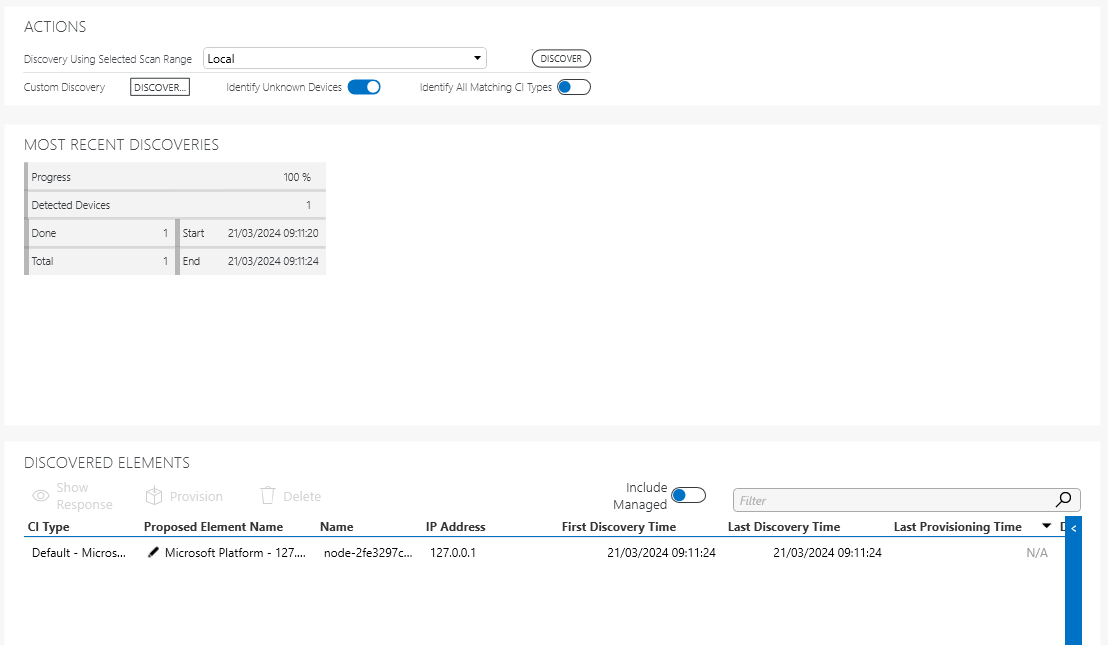
After a couple of seconds, a row will be added in the Discovered Elements table at the bottom of the page:
Step 4: Provision the discovered element(s)
Select the row in the Discovered Elements table.
Click the Provision button.
Depending on whether the Microsoft Platform connector is already in the system and whether it already has a version set to production, different results can be shown:
- Microsoft Platform connector is not available or is not set as production
- Microsoft Platform connector is available and set as production
Microsoft Platform connector is not available or is not set as production
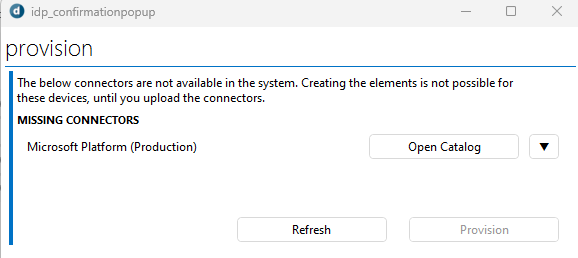
If the Microsoft Platform connector is not available in the system yet, or if no production version has been set, you will see this window:
Proceed as follows:
In the Cube apps pane in the sidebar, select Protocols & Templates.
In the Protocols & service protocols column of the Protocols & Templates module, check whether Microsoft Platform is listed.
If it is not listed:
In the IDP pop-up window displayed above, click Open Catalog.
If you are asked for permission to open the link, click Yes.
On the Catalog page, go to Versions.
Look up the latest version in the 1.1.3.x range (e.g. 1.1.3.20).
Click Deploy to deploy that version to your DataMiner System.
If Microsoft Platform is listed, or if you have just added it as detailed above:
In the Protocols & Templates module, look up the above-mentioned version in the Versions column.
Right-click the version and select Set as production.
Go back to the IDP pop-up window and click Refresh.
Note
In case the script has timed out, you can click the Provision button again.
Continue in the same way as detailed below for Microsoft Platform connector is available and set as production.
Microsoft Platform connector is available and set as production
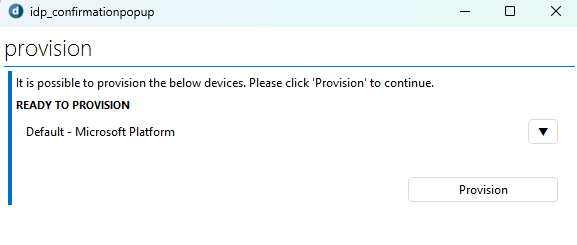
If the Microsoft Platform is available and a production version has been set, you will see this window:
Proceed as follows:
Click Provision.
Click Finish.
After a few seconds, you will see that a new element is being added in the Surveyor.
To check the result in the IDP app, go to Inventory > Managed.
In the Managed Elements table, you will see that a new row has been added with the information of the newly created element.
Select the new element in the Surveyor.
You will see the parameter values getting filled in as data is being polled from your system.
Congratulations, you have provisioned your first element with IDP!
Note
To be granted DevOps Points for taking this tutorial, take a screenshot of the newly created element and the Managed Elements table and either send it to thunder@skyline.be or upload it via the Dojo tutorials page.