Getting started with configuration backups
This tutorial will show how you can use IDP to retrieve and store device configurations.
Expected duration: 20 minutes.
Note
The content and screenshots for this tutorial were created using DataMiner version 10.4.3 and IDP version 1.5.0.
Tip
See also: Kata #26: Set up IDP to back up your device configuration on DataMiner Dojo 
Prerequisites
The DataMiner System used for this tutorial has to meet the following requirements:
The DataMiner System is connected to dataminer.services.
The DataMiner version is 10.3.0 [CU0] or higher.
The latest version of IDP is installed.
Tip
A shared folder must be accessible from the system to store the backups.
Important
Do not use a DaaS system to follow this tutorial. On DaaS systems, it is not possible to configure a shared folder or access a shared folder outside the DaaS system.
Overview
- Step 1: Create the CI Type
- Step 2: Create an element and manage it
- Step 3: Set up the configuration archive
- Step 4: Create the script to retrieve the configuration backup
- Step 5: Retrieve the device configuration
Step 1: Create the CI Type
First, a CI Type needs to be created for IDP to know how to manage the element or device.
Instead of creating the CI Type from scratch, you will generate it based on an existing connector. In this example, the Generic Switch connector is used, but you can use any other connector.
Deploy the connector to start from:
Deploy the latest version of the Generic Switch connector from the DataMiner Catalog.
Tip
See also: Deploying a Catalog item to your system
Make sure the latest version is set as production.
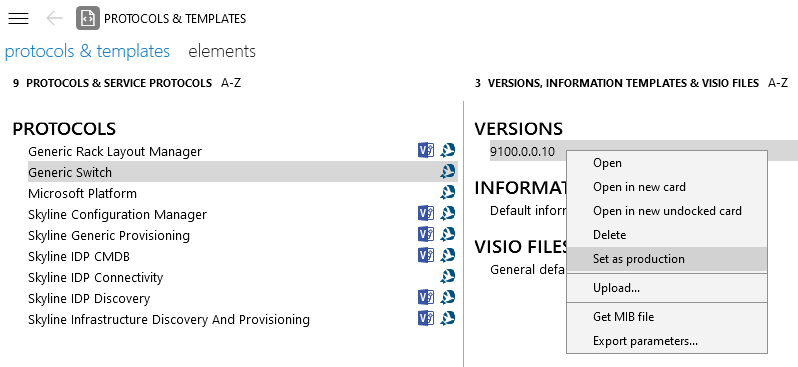
Generate the CI Type:
Open the IDP app.
Go to Admin > CI Types.
Above the table on the right, click Generate to start the wizard.

In the wizard, select the connector and click Generate.
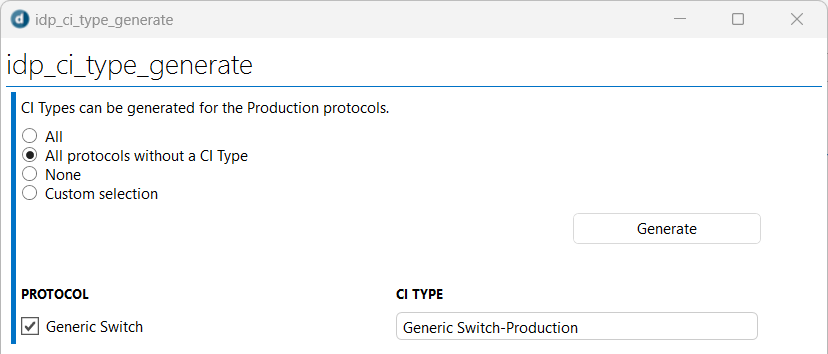
Click Finish to close the wizard.
Switch off the Show All button in the top-right corner to locate the generated CI Type more easily.

Step 2: Create an element and manage it
Create an element that uses the connector you deployed in the previous step.
You can enter any IP address in the IP address/host field, for example
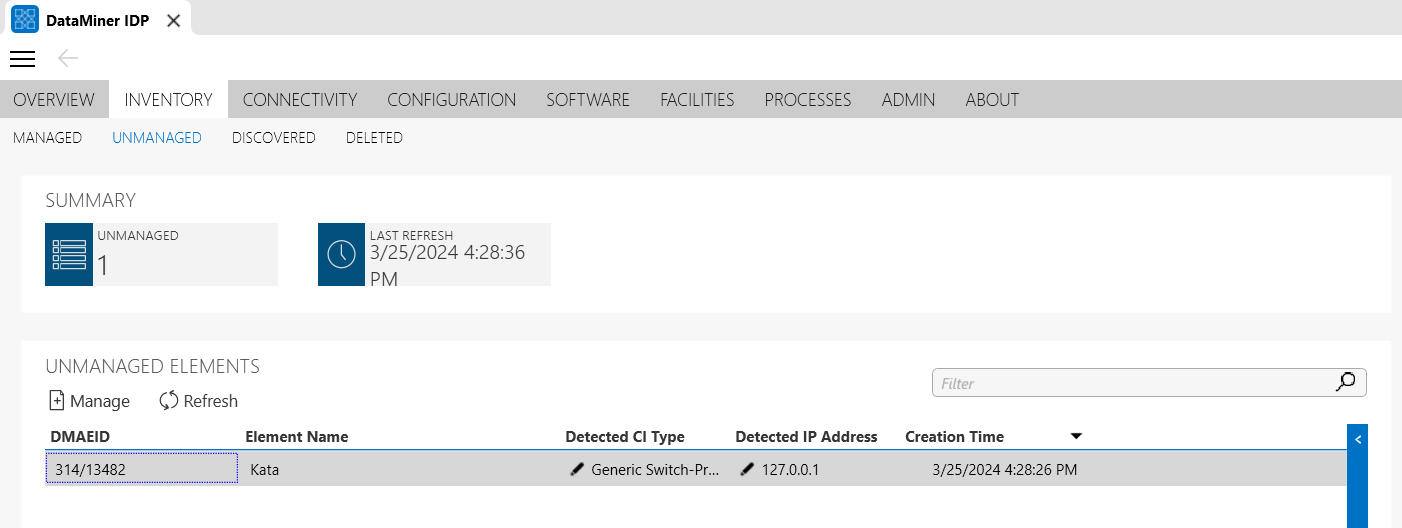
127.0.0.1.In the IDP app, go to Inventory > Unmanaged.
Click Refresh to refresh the table.
Note
Make sure Detected CI Type contains the generated CI Type. If it does not, confirm that the element was created with the production version.
Select the recently created element, and click Manage.
Go to Inventory > Managed to confirm the element is now managed by IDP.

Step 3: Set up the configuration archive
For IDP to store the configurations, it needs to access a local folder or a shared folder.
In the DataMiner IDP app, go to Admin > Configuration.
Under DataMiner Configuration Archive, specify the settings to access the local or shared folder.
Click the triangle button in the top right corner to specify a value for each setting.
Specify the credentials for a user account that has access to the specified path.
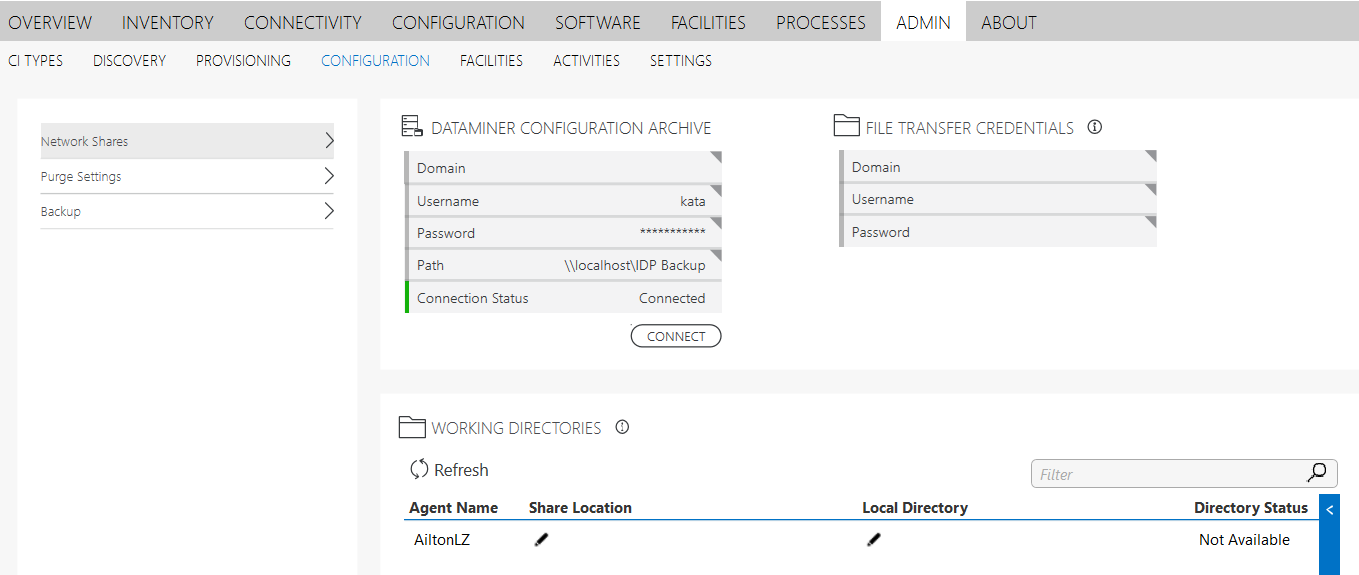
Click Connect.
At this point, you have already generated the CI Type, created an element and added it to the managed elements, and configured IDP to access the archive. In the next step, you will create the script that will retrieve the configuration and send it to IDP.
Step 4: Create the script to retrieve the configuration backup
When IDP is installed it comes with an example script on how to retrieve the configuration and send it to IDP. You will now need to duplicate this script and change it to retrieve the parameter values from the element created in step 2.
Duplicate the example configuration backup script:
Go to the Automation module.
Expand the folders until you reach DataMiner Solutions > IDP > CI Type Management > Configuration Management > Backup.
Within this folder, duplicate the IDP_Example_Custom_ConfigurationBackup script, and rename it.
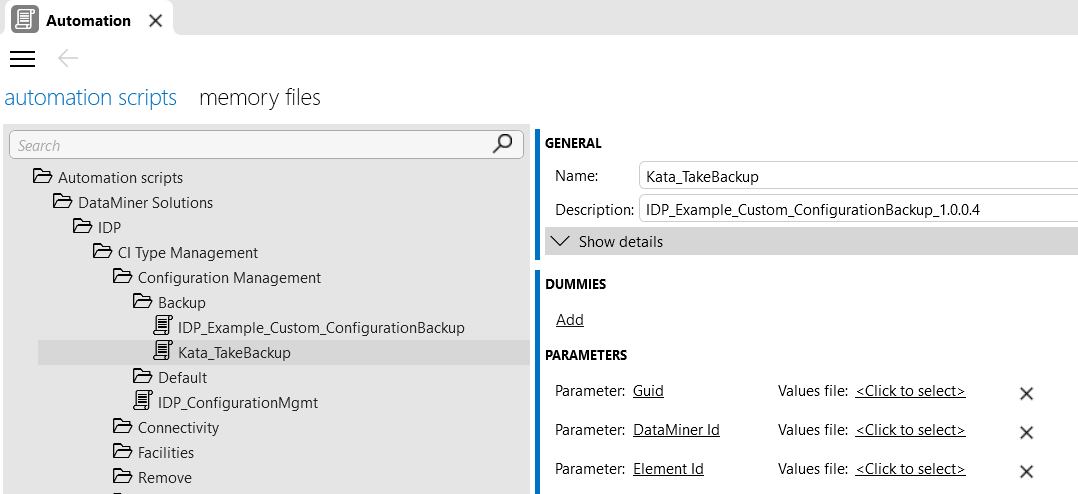
Update the script to retrieve the parameter values from the element you created earlier:
Open the script.
Go to the GetDeviceFullBackupAsText function.
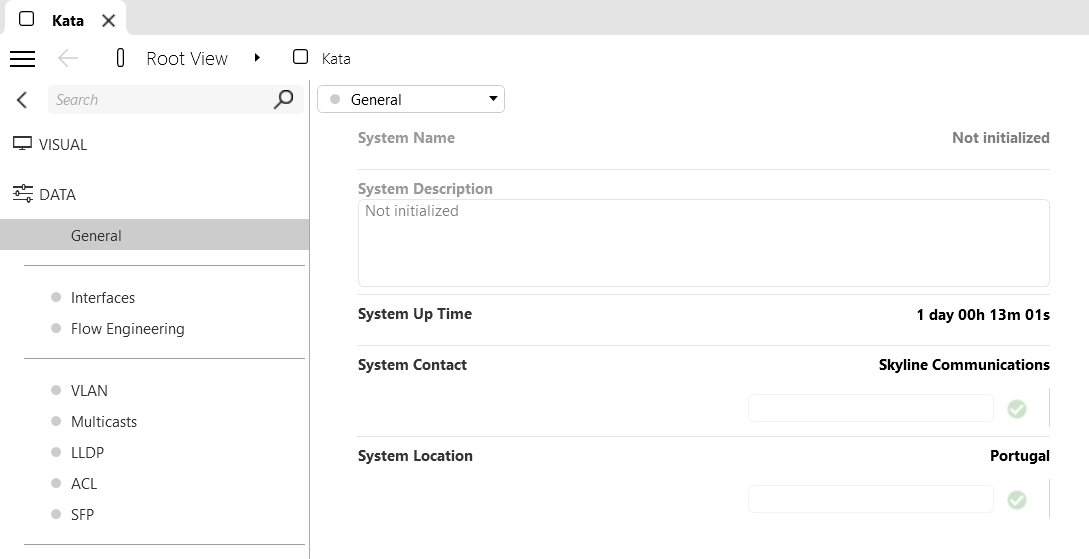
Change the function to retrieve the values from parameters 502 (System Contact) and 504 (System Location).
private static string GetDeviceFullBackupAsText(IActionableElement element)
{
    StringBuilder builder = new StringBuilder();

    builder.Append(Convert.ToString(element.GetParameter(502)));
    builder.Append("\n");
    builder.Append(Convert.ToString(element.GetParameter(504)));

    return builder.ToString();
}
Note
Note that the above-mentioned parameters 502 and 504 are parameters of the suggested connector. If you have chosen another connector, you should adapt these parameters accordingly.
Go to the CreateAndSendBackup function.
Change it to only include the fullBackupData.
private void CreateAndSendBackup(IEngine engine)
{
    string fullBackupData = BackupDevice(engine, GetDeviceFullBackupAsText);
    backupManager.SendBackupContentToIdp(fullBackupData);
}
Click Save script.
Open the element you created in step 2, and assign values to parameters 502 (System Contact) and 504 (System Location).
Step 5: Retrieve the device configuration
Open the DataMiner IDP app.
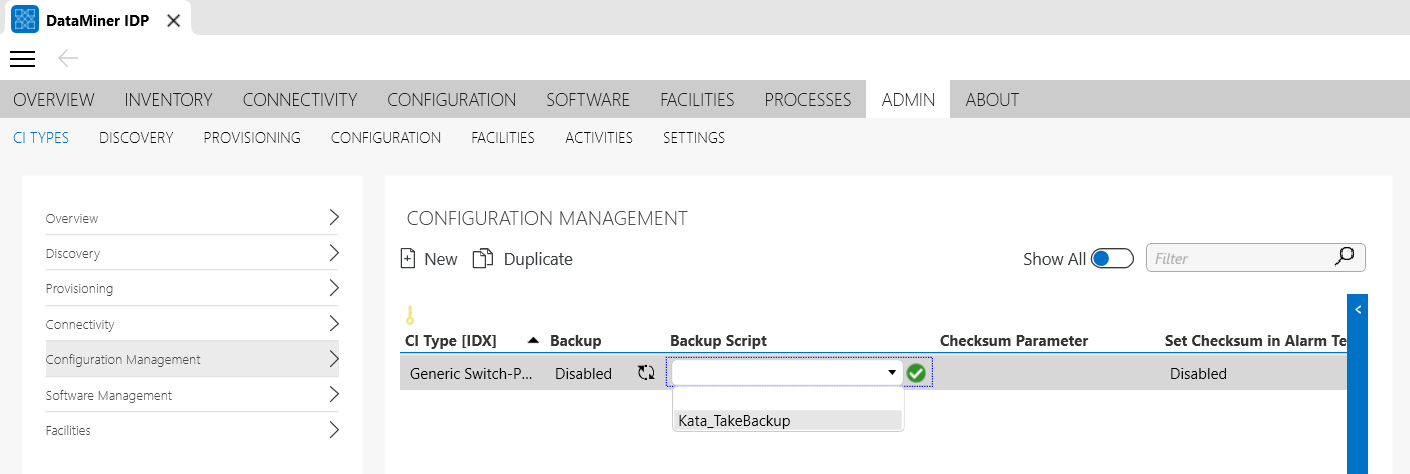
Go to Admin > CI Types > Configuration Management.
Select the backup script.
Note
If you cannot see the script in the dropdown, go to Admin > Settings and click the refresh button for the Backup Script Folder setting.

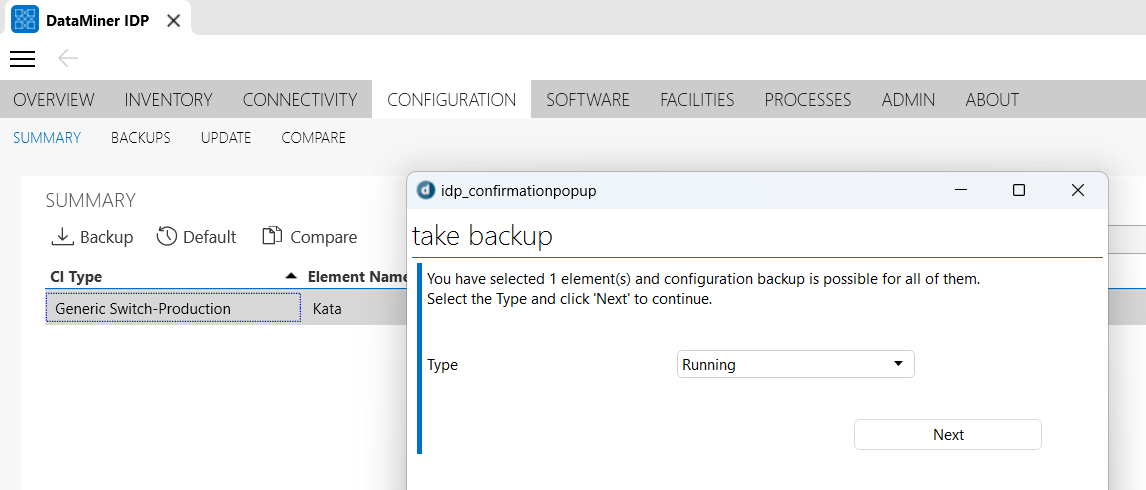
Go to Configuration > Summary.
Select the element, and click Backup.

This will open a wizard.
Select a type (e.g. Running), click Next, and then click Finish.
Tip
See also: Configuration types
Select the element again, and click Show backups.
Select the recent backup, and click Show content.

Congratulations, you have saved your first device configuration with IDP.
Note
- For more information, see Implementing the Configuration Backup script.
- To be granted DevOps points, take a screenshot of the Show content result and either send it to thunder@skyline.be or upload it via the Dojo tutorials page.