Creating resource tasks
Important
When resource management is not required, use script tasks instead of resource tasks if at all possible. Resource tasks are significantly more difficult to implement and maintain.
Note
Resource tasks need to be designed in such a way that their execution does not exceed the default Automation script timeout time of 15 minutes.
In the Profiles module, define the input parameters required for the resource task to execute.
For example, for a “Ping IP” activity, an input parameter could be “IP Address”.
In the Parameters tab, create an input parameter by selecting Add parameter in the lower left corner.
Specify the following information:
Name: The name of the parameter, e.g. "Ping - IP Address".
Type: Set to Text.
Save all changes.
In the Profiles module, define the output parameters that a resource task can potentially generate.
For example, for a “Ping IP” activity, possible output parameters could be “Ping Result” and “RTT”.
In the Parameters tab, create an output parameter by selecting Add parameter in the lower left corner.
Specify the following information:
Name: The name of the parameter, e.g. "Ping - Result".
Type: Depends on the parameter. For example:
Set to Discrete.
Value: Click Add discrete value.
Value: 0.000000
Display value: Failed
Value: 1.000000
Display value: Succeed
Save all changes.
Set to Number.
- Units: ms
Save all changes.
In the Profiles module, group your input and output parameters into a profile definition.
For example, for a “Ping IP” activity, create a “Ping IP” profile definition with the following profile parameters:
Ping - IP
Ping - Result
Ping – RTT
In the Definitions tab, select Add definition
Specify the following information:
Name: The name of the profile definition, e.g. "PING IP"
Parameters: Add your previously created input and output parameters.
Save all changes.
Note
A reference is dynamically generated: e.g. bd625869-cb7a-472c-b834-bd4cba993705 (not visible in the UI)
Implement a protocol containing all the logic for the resource task, and create an element based on that protocol.
Example: The “Generic Ping” protocol, with the following parameters:
IP Address (RW): Indicates the target IP.
‘Ping’ button: Button to trigger a QAction to ping the IP.
Ping Result (R): Indicates success or failure of the ping request.
Ping RTT (R): Indicates the Round Trip Time of the ping query.
Implement an SRM function on top of the protocol, using DIS:
Provide a meaningful name consisting of a verb and a noun, for example “Ping IP”.
Define input and output interfaces, without associating them with a profile definition.
Example:
<Interfaces>
   <Interface id="1" name="IN" type="in"/ >
   <Interface id="2" name="OUT" type="out"/ >
</Interfaces>
Set the previously created profile definition as the node profile definition.
Example:
<Function id=".." name="Ping IP" maxInstances="..." profile="bd625869-cb7a-472c-b834-bd4cba993705">Set the function type to
ResourceTask.<Function id=".." name="..." maxInstances="..." profile="..."> <FunctionType>ResourceTask</FunctionType> ... </Function>This could e.g. result in the following function.xml getting generated for the “Ping IP” resource task:
<Functions xmlns="http://www.skyline.be/config/functions">
  <Version>1.0.0.1</Version>
  <Protocol>
    <Name>Generic Ping</Name>
  </Protocol>
    <Function id="264357d0-3ff9-45c2-8a0c-7ac572b5d93e" name="Ping IP" maxInstances="0" profile="bd625869-cb7a-472c-b834-bd4cba993705">
        <FunctionType>ResourceTask</FunctionType>
        <Parameters>
            <Parameter id="1"/>
            <Parameter id="2"/>
            <Parameter id="101"/>
            <Parameter id="201"/>
            <Parameter id="202"/>
        </Parameters>
        <EntryPoints/>
        <Interfaces>
            <Interface id="1" name="IN" type="in"/>
            <Interface id="2" name="OUT" type="out"/>
        </Interfaces>
    </Function>
</Functions>
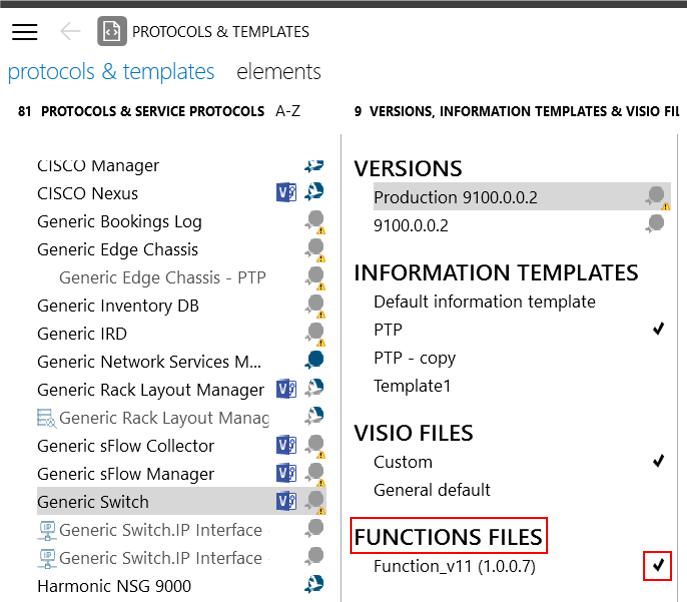
In the Protocols & Templates module, import the function into your DataMiner System and activate it.
Tip
Create an Automation script based on the PA_ProfileLoadDomTemplate script, which is added to the DataMiner System when Process Automation is deployed. In the script:
Instantiate the PaProfileLoadDomHelper.
Use the helper to retrieve the input arguments, based on profile parameter names created earlier.
Implement the resource task logic. This is the code that will trigger an action in the underlying element/function.
Use the helper to output relevant results, based on profile parameter names created earlier.
Add a FunctionDve script dummy, and configure it with the function protocol. The name of the function protocol is composed of the name of the base protocol implementing the logic and the name of the function (
<base Protocol name>.<Function name>).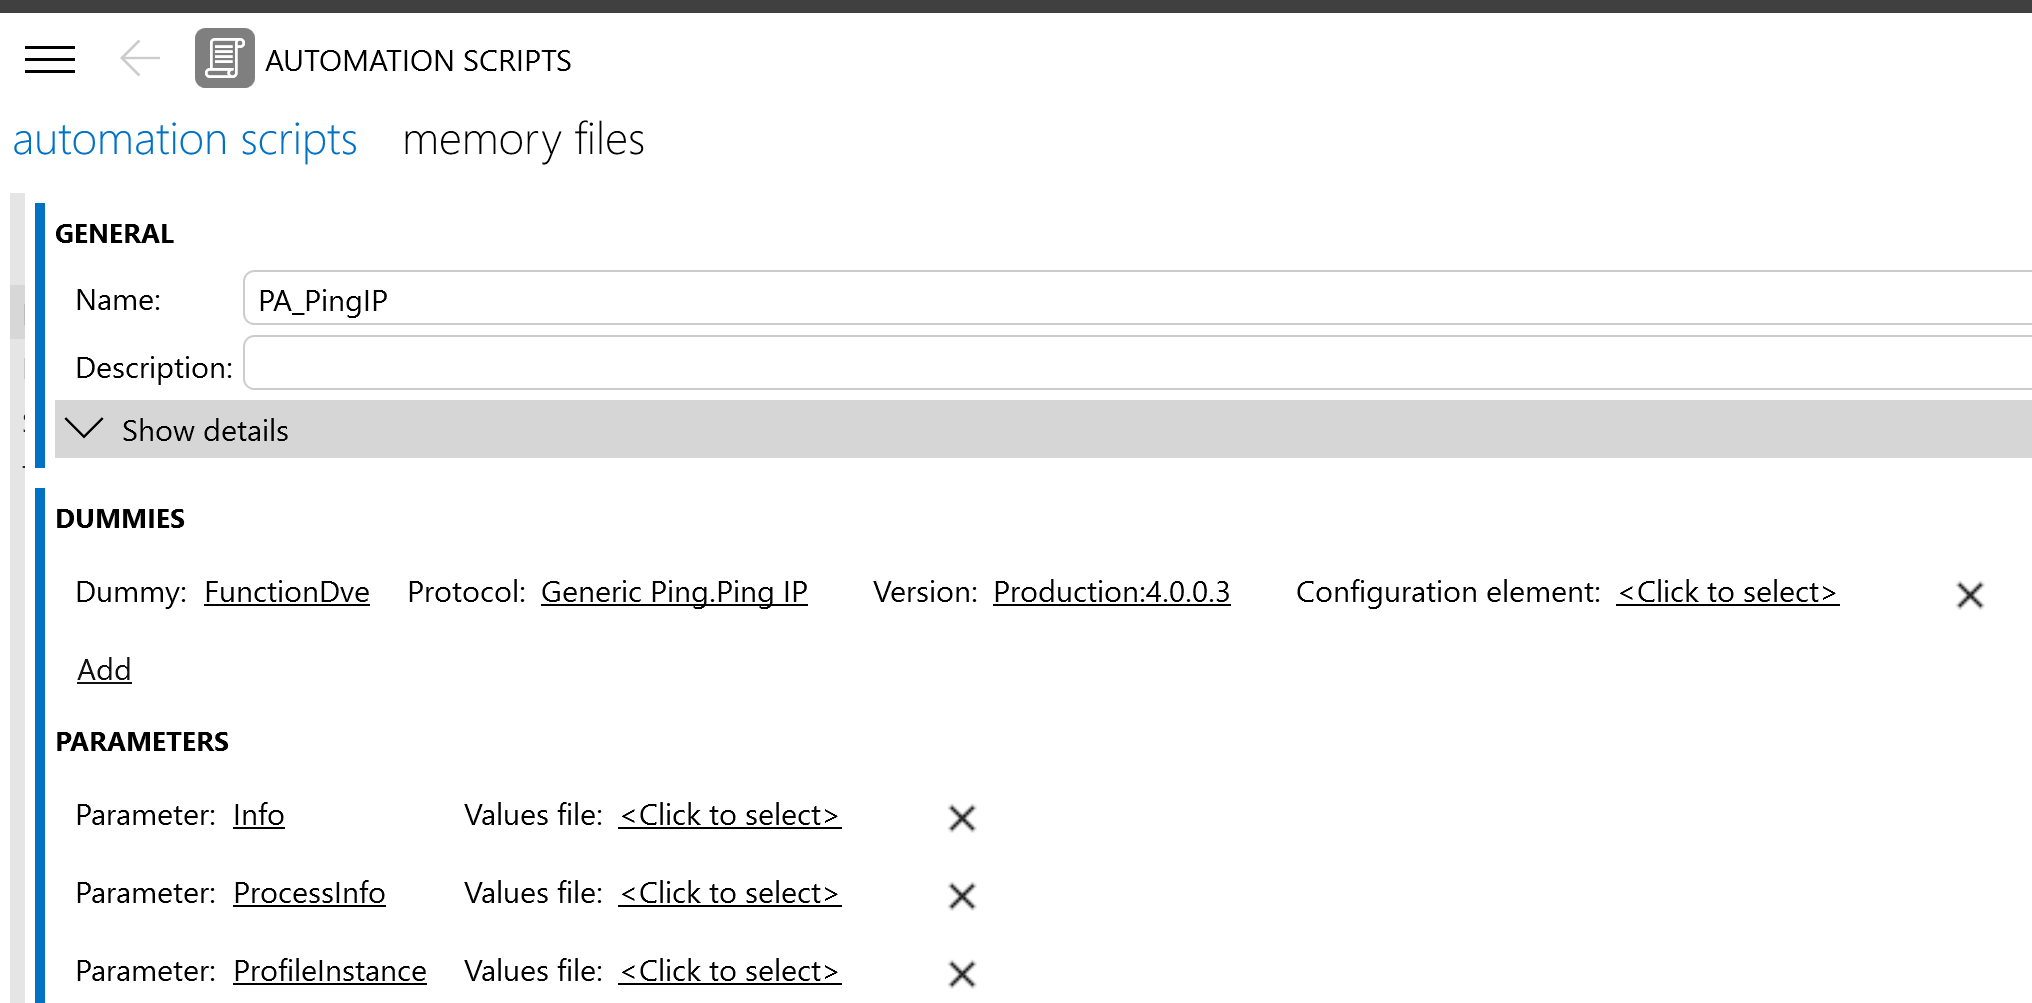
Example: for the “Ping IP” task, the script could look like this:
public void Run(Engine engine)
{
    var helper = new PaProfileLoadDomHelper(engine);

    try
    {
        helper.Log("Ping IP", PaLogLevel.Information);

        var ipaddress = helper.GetParameterValue<string>("Ping - IP Address");

        ScriptDummy element = engine.GetDummy("FunctionDve");

        // custom logic to initiate the ping query on the element and retrieve the result
        // var result = ...
        // var rtt = ...

        helper.UpdateField("Ping - RTT", rtt);
        helper.UpdateField("Ping - Result", result);

        helper.ReturnSuccess();
        helper.Log("Successfully executed Ping query", PaLogLevel.Information);
    }
    catch (Exception ex)
    {
        helper.Log($"An issue occurred while trying to execute Ping query: {ex}", PaLogLevel.Error);
        helper.SendErrorMessageToTokenHandler();
    }
}
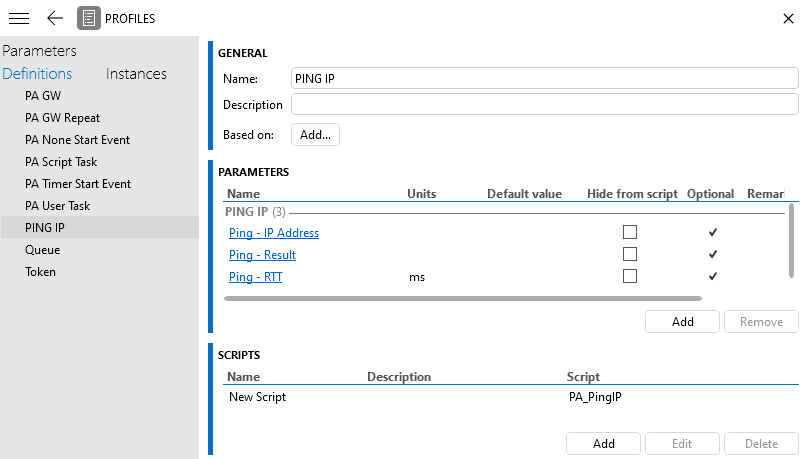
Link the script with the profile definition you created earlier, using the Scripts section of the profile definition:
In the Profiles module, select your previously created profile definition in the Definitions tab.
In the Scripts section, click Add. Next to Script, select the script and click OK.
Save all changes.
Create a resource pool.
Go to Resources.
Select global in the overview on the left and select Add.
Give your pool a name, e.g. "PING IP".
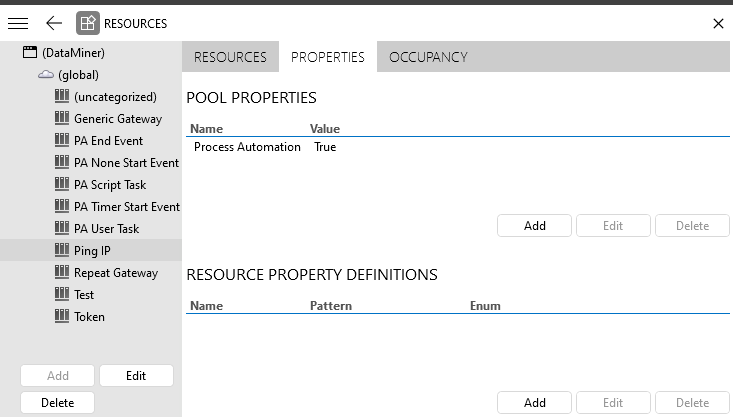
Select your newly created resource pool in the overview on the left, go to the Properties tab, and add the following pool property:
Name: Process Automation
Value: True
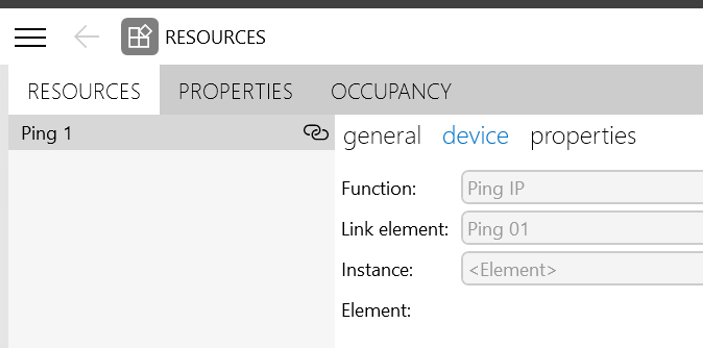
Generate a resource from the element created earlier, using the previously defined function.
Go to the Resources tab and click Add resource.
In the Device tab, specify the following information:
Function: Choose your previously defined function, e.g. "PING IP".
Link element: Specify the element you created earlier, e.g. "PING 01".
Instance:
Click the Save button in the lower right corner.
Return to the Automation module and launch the SRM_Setup script:
Select the SRM_Setup script.
In the lower right corner, click Execute.
In the Booking Manager Element Info box, specify the value
{}.Click Execute now.