Building interactive automation scripts with C#
In an automation script, you can define custom-made dialog boxes in C# code blocks. When the script is run, those dialog boxes can then either ask the user to provide input or display some status information or error message.
In DataMiner Cube, it is also possible to add these dialog boxes using the script action User interaction. For more information, see User interaction.
Note
- For detailed information on the classes, methods, and properties that can be used in C# code blocks of automation scripts, see Skyline.DataMiner.Automation.
- For more information on how to abort an interactive automation script, see How do I abort a running automation script?
- For a high-level API to build interactive automation scripts, see Interactive Automation Script Toolkit.
- From DataMiner 10.5.9/10.6.0 onwards, interactivity of a script can be defined using the Interactivity tag of the script.
Important
Avoid assigning multiple blocks to the same row and column. This could lead to unexpected results in the UI.
Example of a dialog box displaying information
The following code first creates and then displays a simple dialog box that shows the text “Hello World!” and stays open until you click the Close button.
Notice that the programmer defined a number of columns and rows. This forms a grid onto which all dialog box items (i.e., controls) are positioned:
The “static text” item displaying the text “Hello World!” is positioned on row 0, column 0.
The button is positioned on row 2, column 0.
Also notice that a height and a width have been defined for every dialog box item, and that the row heights and column widths have been set to “a” (i.e., automatic) instead of to a specific number of pixels. That way, the rows and columns will automatically be resized according to the size of the dialog box items.
// Create the dialog box
UIBuilder uib = new UIBuilder();

// Configure the dialog box
uib.RequireResponse = true;
uib.RowDefs = "a;a;a";
uib.ColumnDefs="a;a;a";

// Add a 'StaticText' item to the dialog box
UIBlockDefinition blockStaticText = new UIBlockDefinition();
blockStaticText.Type = UIBlockType.StaticText;
blockStaticText.Text = "Hello World!";
blockStaticText.Height = 50;
blockStaticText.Width = 200;
blockStaticText.Row = 0;
blockStaticText.Column = 0;
uib.AppendBlock(blockStaticText);

// Add a button to the dialog box
UIBlockDefinition blockButton = new UIBlockDefinition();
blockButton.Type = UIBlockType.Button;
blockButton.Text = "Close";
blockButton.Height = 20;
blockButton.Width = 75;
blockButton.Row = 2;
blockButton.Column = 0;
uib.AppendBlock(blockButton);

// Display the dialog box
engine.ShowUI(uib);
Example of a dialog box asking to enter information
The following code displays a simple dialog box that shows a checkbox list. When you select one of the options in the list and you click Next, another dialog box will appear, showing the text of the option you selected.
// ------------------------ SCREEN 1 -----------------------------

UIResults uir = null;
string selection = "";

UIBuilder uib = new UIBuilder();
uib.RequireResponse = true;
uib.RowDefs = "50;*;*";
uib.ColumnDefs="50;*;*";

UIBlockDefinition blockCheckBoxList = new UIBlockDefinition();
blockCheckBoxList.Type = UIBlockType.CheckBoxList;
blockCheckBoxList.AddCheckBoxListOption("Option 1");
blockCheckBoxList.AddCheckBoxListOption("Option 2");
blockCheckBoxList.DestVar = "selectionDest";
blockCheckBoxList.WantsOnChange = false;
blockCheckBoxList.Height = 100;
blockCheckBoxList.Width = 100;
blockCheckBoxList.Row = 1;
blockCheckBoxList.Column = 1;
uib.AppendBlock(blockCheckBoxList);

// Add a button to the dialog box
UIBlockDefinition blockButtonNext = new UIBlockDefinition();
blockButtonNext.Type = UIBlockType.Button;
blockButtonNext.Text = "Next";
blockButtonNext.Height = 50;
blockButtonNext.Width = 100;
blockButtonNext.Row = 2;
blockButtonNext.Column = 1;
uib.AppendBlock(blockButtonNext);

uir = engine.ShowUI(uib);
selection = uir.GetString("selectionDest");
// ------------------------ SCREEN 2 -------------------------------
// Create the dialog box
UIBuilder uib2 = new UIBuilder();

// Configure the dialog box
uib2.RequireResponse = true;
uib2.RowDefs = "50;*;*";
uib2.ColumnDefs="50;*;*";

// Add a 'StaticText' item to the dialog box
UIBlockDefinition blockStaticText = new UIBlockDefinition();
blockStaticText.Type = UIBlockType.StaticText;
blockStaticText.Text = "You chose " + selection;
blockStaticText.Row = 1;
blockStaticText.Column = 1;
blockStaticText.Height = 50;
blockStaticText.Width = 200;
uib2.AppendBlock(blockStaticText);

// Add a button to the dialog box
UIBlockDefinition blockButtonClose = new UIBlockDefinition();
blockButtonClose.Type = UIBlockType.Button;
blockButtonClose.Text = "Close";
blockButtonClose.Row = 2;
blockButtonClose.Column = 1;
blockButtonClose.Height = 50;
blockButtonClose.Width = 200;
uib2.AppendBlock(blockButtonClose);

// Display the dialog box
engine.ShowUI(uib2);
Using the grid layout in web apps to control the tab behavior
From DataMiner 10.6.12/10.7.0 onwards, you can set the WebUILayout property of UIBuilder to WebUILayout.Grid to align keyboard navigation with the workflow of your dialog box, without changing how the dialog box looks. For versions prior to this, the table layout is used. For more information on the available layout types, see WebUILayout.
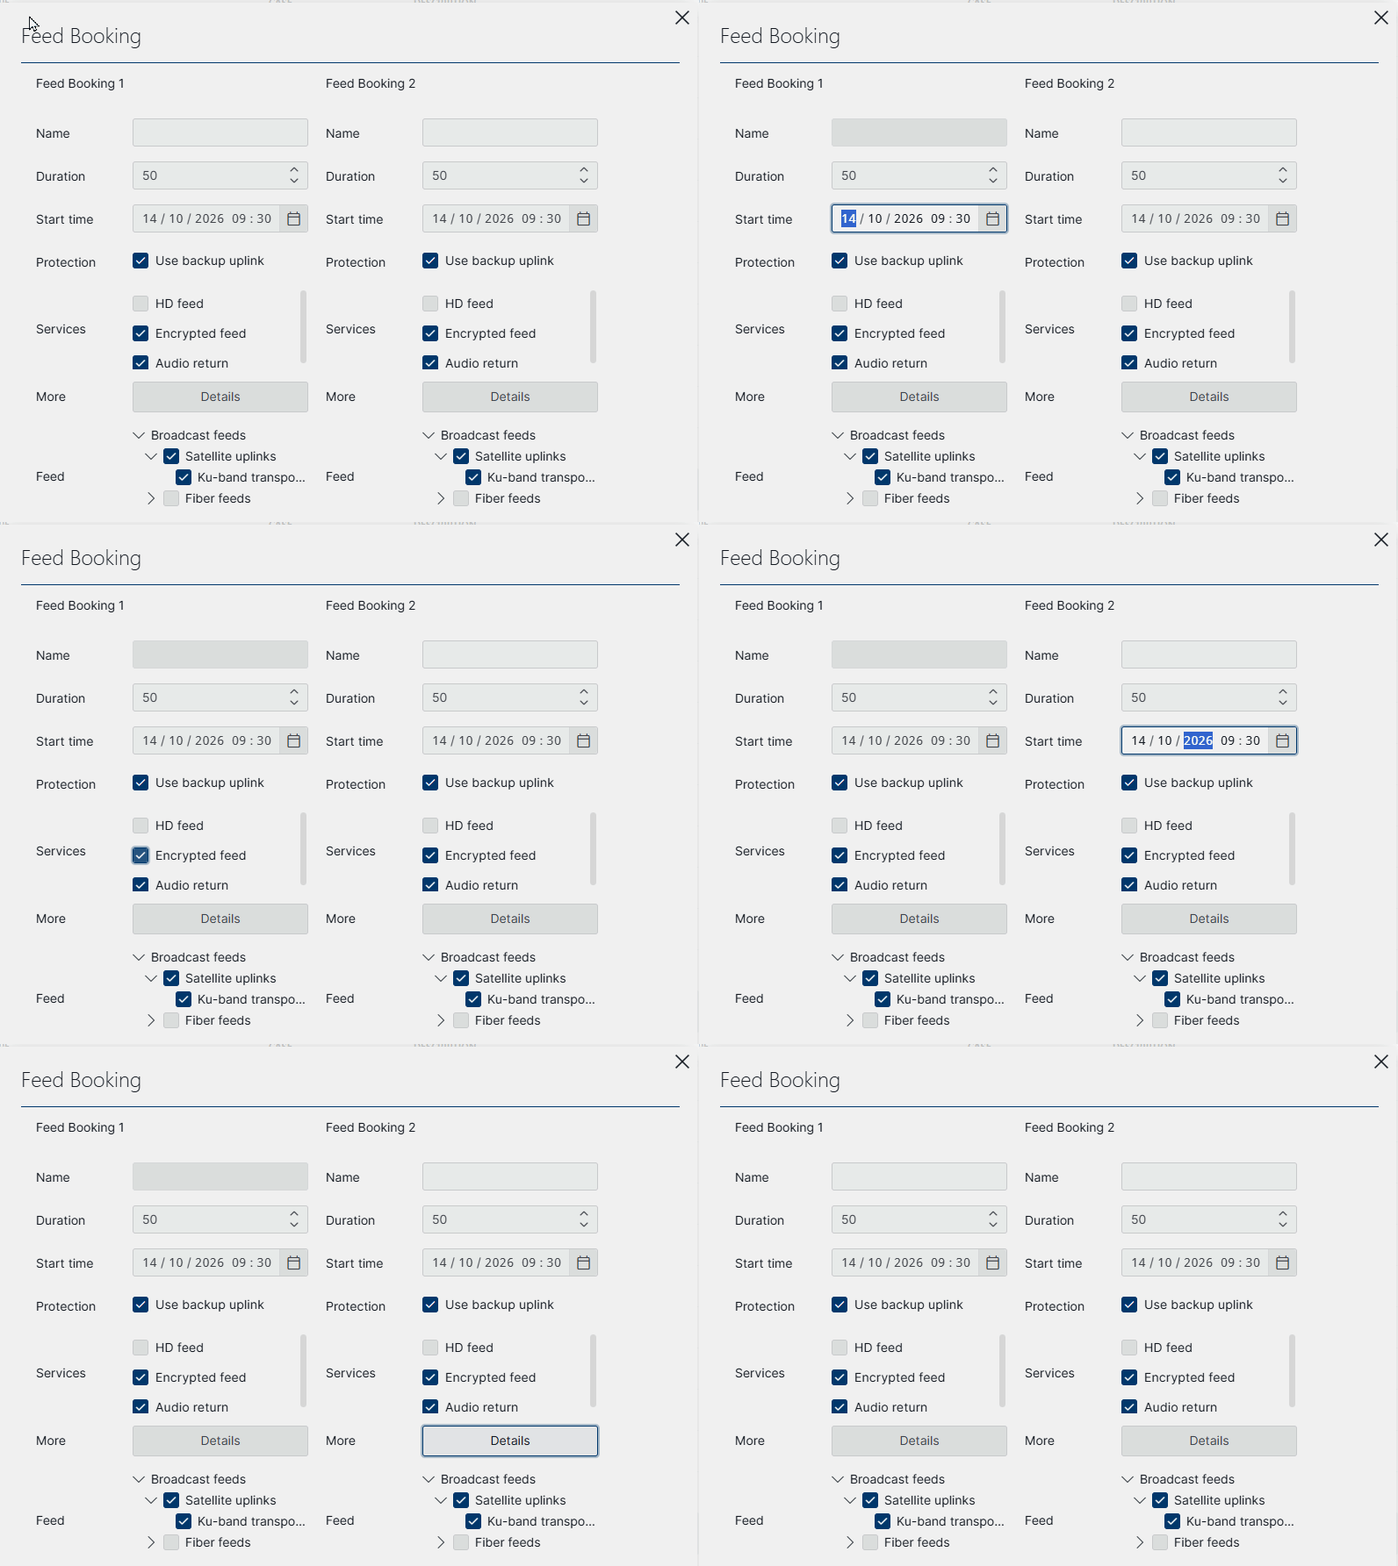
In the default table layout, pressing the TAB key moves the focus from left to right across each row before moving to the next row. In the grid layout, the components stay in the rows and columns defined in the script, but the TAB order follows the order in which you add the blocks to the UIBuilder using AppendBlock.
The following example arranges four time input fields in two columns. Because the blocks are added from top to bottom in the first column and then in the second column, pressing the TAB key moves down the first column before continuing in the second column.
var uiBuilder = new UIBuilder
{
  WebUILayout = WebUILayout.Grid,
  RowDefs = "auto;auto",
  ColumnDefs = "auto;auto"
};

var firstColumnTop = new UIBlockDefinition
{
  Type = UIBlockType.Time,
  Row = 1,
  Column = 0
};

var firstColumnBottom = new UIBlockDefinition
{
  Type = UIBlockType.Time,
  Row = 2,
  Column = 0
};

var secondColumnTop = new UIBlockDefinition
{
  Type = UIBlockType.Time,
  Row = 1,
  Column = 1
};

var secondColumnBottom = new UIBlockDefinition
{
  Type = UIBlockType.Time,
  Row = 2,
  Column = 1
};

// The order of these calls determines the TAB order.
uiBuilder.AppendBlock(firstColumnTop);
uiBuilder.AppendBlock(firstColumnBottom);
uiBuilder.AppendBlock(secondColumnTop);
uiBuilder.AppendBlock(secondColumnBottom);

engine.ShowUI(uiBuilder);
The screen recording below shows a similar dialog box with two side-by-side feed booking panels. Pressing the TAB key moves through all the fields in the first panel before continuing in the second panel, even though fields in both panels share the same rows.