Topology app configuration
Note
The Topology app is available from DataMiner Cube 10.4.0 [CU14]/10.5.0 [CU2]/10.5.5 onwards. In earlier DataMiner versions, it is available in preview if the CPEIntegration soft-launch option is enabled. See Soft-launch options.
Prerequisites
From DataMiner Cube 10.4.0 [CU14]/10.5.0 [CU2]/10.5.5 onwards, multiple front-end EPM Manager elements are supported within one DataMiner System. However, because of this, the following prerequisites apply if you want to use the Topology app from this version onwards:
The system type for each front-end manager must be unique, as it is the system type that will be used to trace EPM objects back to their respective front-end managers. If you for example have an "HFC" and an "IOT" front-end EPM Manager in your system, these cannot both have a "Location" cell. Instead, you can prefix this, e.g. "HFC_Location" and "IOT_Location", respectively.
The front-end and back-end EPM Manager elements for the same technology must use the same DataMiner protocol and version.
Front-end element configuration
To have an EPM tab in the Surveyor in Cube, the DMS must be able to recognize the front-end elements. To configure this:
Add a parameter of type "double" named "ElementManagerType" to the EPM Manager protocol.
Note
This parameter check will only be done on elements that are running a protocol where the Protocol.Display@type attribute has been set to "element manager".
<Param id="1" save="true" trending="false">
   <Name>ElementManagerType</Name>
   <Description>Element Manager Type</Description>
   <Information>
      <Subtext>Element Manager Type: Front-End or Back-End</Subtext>
   </Information>
   <Type>read</Type>
   <Interprete>
      <RawType>numeric text</RawType>
      <Type>double</Type>
      <LengthType>next param</LengthType>
   </Interprete>
   <Display>
      <RTDisplay>true</RTDisplay>
      <Positions>
         <Position>
            <Page>General Configuration</Page>
            <Row>0</Row>
            <Column>0</Column>
         </Position>
      </Positions>
   </Display>
   <Measurement>
      <Type>discreet</Type>
      <Discreets>
         <Discreet>
            <Display>Front-End</Display>
            <Value>1</Value>
         </Discreet>
         <Discreet>
            <Display>Back-End</Display>
            <Value>2</Value>
         </Discreet>
      </Discreets>
   </Measurement>
</Param>
When the front-end manager element has been created, set the value of the parameter you added in the previous step to 1.
Go to System Center > System settings > EPM config, and add the front-end EPM Manager elements to the list.
In the Topology app, you will now be able to select the front-end managers and the corresponding topology chains.
Note
If you are using a DataMiner version prior to DataMiner 10.4.0 [CU14]/10.5.0 [CU2]/10.5.5, only one front-end element is supported, and it is not possible to configure this element in System Center. Instead, on startup, the DMS will crawl through the system to find which element meets the conditions mentioned in the first step above to establish it as the front end. When the DMS finds the element, it will register its DMA and element ID in the DMS cache. This cache is wiped when the DMS is shut down or restarted. To avoid having to do this crawl, you can register the element using an Automation script. You can use the EpmConfig script to register the element after inputting the DataMiner and element ID of the front end.
Data section configuration
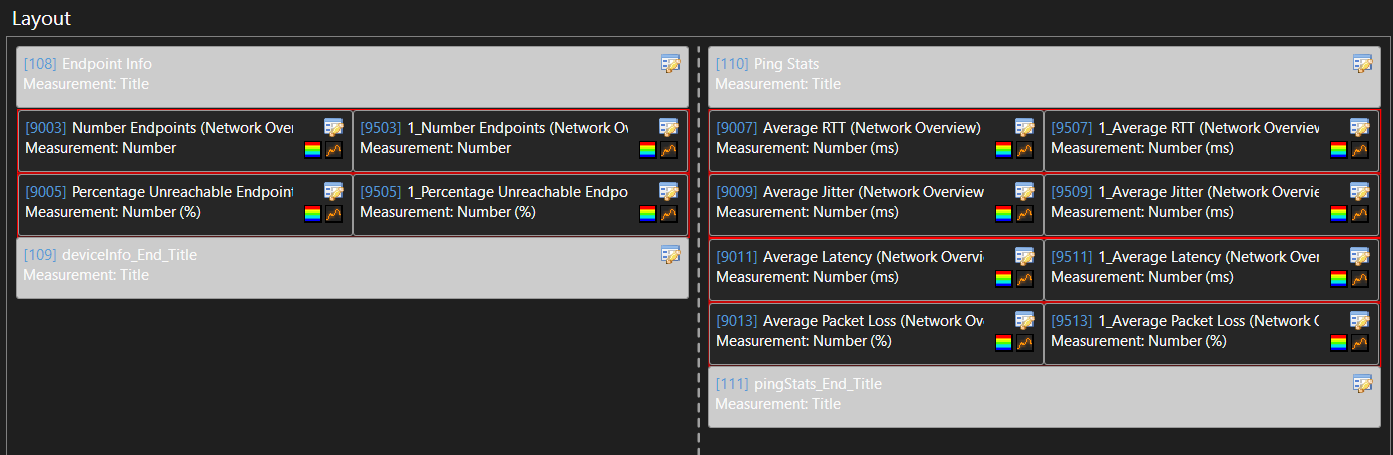
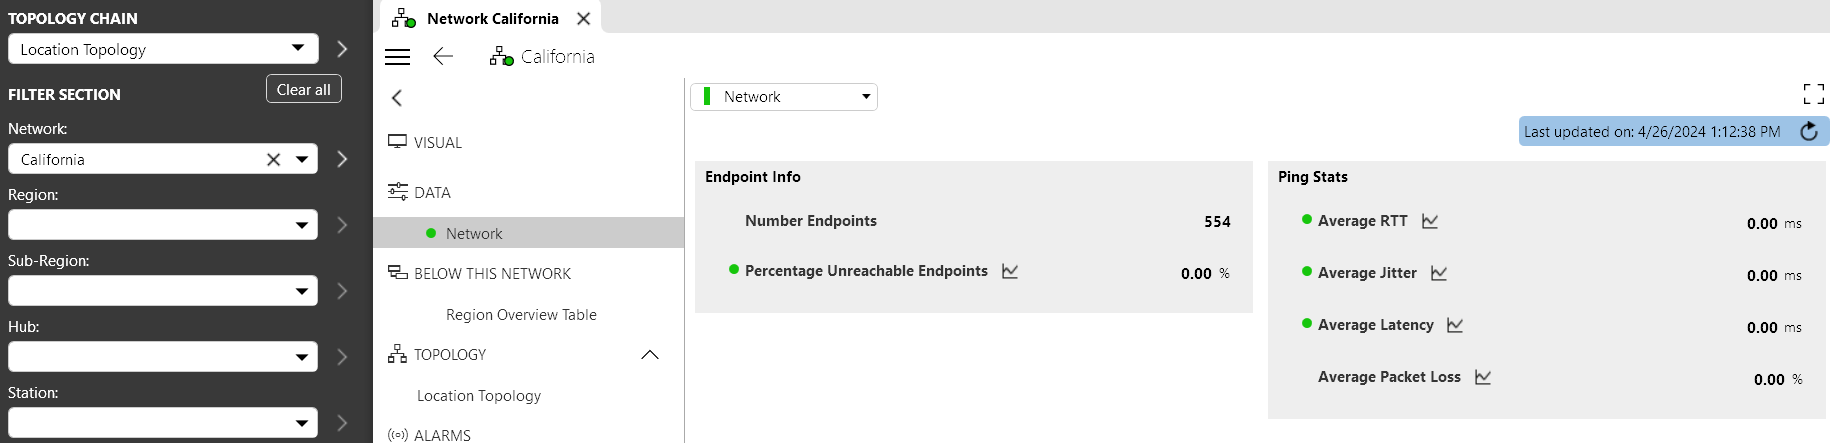
The native look of the Data section of an EPM entity is two columns filled with all the information related to the row of the entity in the column order of the table. All columns that are configured to be shown are also shown in the Data section. If a column has a width of 0, it will not show in this section, and it will be impossible to view this column.
To further configure the look of the Data section and also add title boxes, you can put the parameters on one or more pages with the CPEIntegration/[CustomPageName] name, e.g. CPEIntegration/Region or CPEIntegration/Region Ping Stats.
On these pages, you can add parameters as you would on any other page, but you can also add individual column parameters associated with the entity. If you use the duplicateAs option, both the native and view table column will occupy the same space, but this will not cause issues in DataMiner.
If the CPEIntegration_ prefix is added to data pages in an EPM protocol, you can also apply a custom order for these pages in the pageOrder attribute of the Display tag in the protocol. For example:
<Display type="element manager" pageOptions="*;CPEOnly" defaultPage="General" pageOrder="General;Configurations;----------;CPEIntegration_Data/General;CPEIntegration_Data/Fiber;CPEIntegration_Data/Household;CPEIntegration_Data/Service Usage"/>