XML editor
If you open a protocol XML file or an automation script XML file in Microsoft Visual Studio, or if you create a new file from scratch, that file will appear in a customized file tab.
Note
- To create a new protocol XML file, go to File > New > File > General > DataMiner, select DataMiner Protocol Template, and click Open.
- To create a new automation script XML file, select File > New > File > General > DataMiner, select DataMiner Automation Script Template, and click Open.
- To create a new function XML file, select File > New > File > General > DataMiner, select DataMiner Function Template, click Open, specify the function file version, select the associated protocol XML file, and click OK.
File tab header
After you install the DataMinerIntegrationStudio.vsix extension, a file tab containing a protocol XML file or an automation script XML file will have a custom header containing a number of buttons as well as a search box.
Validate
If you opened a protocol XML file, click Validate to check for errors that cannot be detected by the XML schema.
Since DIS v.2.13, a next-generation Validator runs side by side with the legacy Validator, which will be retired at a later stage. The next-generation Validator is extremely modular in design and allows for easy creation of a wide range of code checks and unit tests.
As of DIS v2.41, when you open a main DVE protocol and click Validate, DIS will not only validate the main protocol but also all its exported child DVE protocols.
After having validated a protocol, you can ask DIS to automatically fix a number of common errors: replace all invalid characters in a parameter name with an underscore, trimming tag contents, etc. In the DIS Validator pane, all errors that can be fixed automatically will be marked by a "wrench and screwdriver" icon.
- To fix an error marked by a "wrench and screwdriver" icon, right-click the error, and select Fix > This error. If the error has successfully been fixed, it will be removed from the DIS Validator pane.
To fix all errors of one particular type or severity at the same time, do the following:
- To fix all errors of a particular type, right-click an error, and select Fix > All errors of this type.
- To fix all errors of a particular severity, right-click that severity, and select Fix > All errors in this category.
When, for an error listed in the DIS Validator pane, there is more information available than what is being displayed, an information icon will appear next to the description. If you click such an information icon, the additional information will be displayed in a pop-up window.
Note that when you try to fix an error with warnings, a popup window may appear to draw your attention to those warnings. Only when you click OK in that popup window will the error be fixed.
When you right-click an error in the list, a shortcut menu offers you the following options:
| Command | Function |
|---|---|
| Navigate | Go to the line in the protocol that triggered the error. |
| Copy | Copy the error to the Windows Clipboard. |
| Show Details... | Show all details of the error in a separate window. |
| Suppress... | Suppress the error. Note: Click the Show/hide suppressed results button to include/exclude the suppressed errors in/from the list. |
| Postpone > This error... | |
| Postpone > All errors of this type... |
Note
- In the DIS Validator pane, you can select multiple items. To select more than one item, click one, and then click another while holding down the Ctrl key, etc. To select a list of consecutive items, click the first one in the list and then click the last one while holding down the Shift key. Use this feature to, for example, copy, suppress or postpone a number of results in one go. However, note that suppressing or postponing a number of results will only work when all selected items have the same error code.
- Use the filter box in the upper-right corner to filter the validation results.
Compare
Clicking the Compare button opens the DIS Comparer tool window.
Tip
For more information on how to work with this tool window, see DIS Comparer.
Refactor
If you opened a protocol XML file that has not yet been edited in DataMiner Integration Studio, click Refactor right after opening the file. That way, the file will be made "DIS compliant".
Changes made to the protocol XML file include:
- Adding a namespace reference to the <Protocol> tag
- Changing the casing of attribute values
- ...
Display Editor
If you opened a protocol XML file, and you click Display Editor, the file tab will be turned into a graphical interface editor.
This editor allows you to design the Data Display pages of a protocol using simple drag-and-drop operations.
Tip
See also: Display editor
Table editor
If you opened a protocol XML file, and you click Table Editor, the file tab will be turned into a graphical table editor.
This editor allows you to design the parameter tables of a protocol using simple drag-and-drop operations.
Tip
See also: Table editor
Publish
If you click Publish, the protocol or the automation script you are currently editing will be published to the DMA that was set as default DMA in the DMA tab of the DIS Settings dialog box.
To publish a protocol or an automation script to another, non-default DMA, click the dropdown button at the right of the Publish button, and click the DMA to which you want the file to be published.
When you publish a protocol or an automation script, DIS will create either a .dmprotocol package (in case of a protocol) or a .dmapp package (in case of an automation script) in the background, install that package on the DataMiner Agent, and then automatically remove it again. This way, there is no need to manually copy all required DLL files on the DataMiner Agent in question (e.g., DLL files of NuGet packages that are used in the protocol or automation script).
Tip
See also: DMA
Note
- You cannot click the Publish button when Visual Studio is running in debug mode.
- DIS will refuse to publish a protocol
- when the Protocol.Type tag contain an incorrect value,
- when the Protocol.Version tag is empty, or
- when the Protocol.Name tag is empty.
- When As Development is selected, a
_DISsuffix will be added to the Protocol.Version tag before compiling and publishing.
Search
If, in the search box on the right, you enter a word, then all instances of that word will be highlighted throughout the XML file you are editing.
In the search box, you can enter either a single word or a series of words separated by spaces. You can also specify a piece of text surrounded by double quotes.
| If you enter... | then... |
|---|---|
| a single word, | all instances of that word will be highlighted throughout the XML file. |
| a series of words separated by spaces, | all instances of every specified word will be highlighted throughout the XML file. Note: Every word will be highlighted in a different color. |
| a piece of text surrounded by double quotes, | all instances of that specific piece of text will be highlighted throughout the XML file. |
Note that highlighting can also be very useful to pinpoint instances of specific words when tags are collapsed.
Find next, Find all
When you enter words in the search box, those words will immediately be highlighted in the XML file. You do not need to press Enter. If you do press Enter or Ctrl+Enter, you will notice the following behavior.
| If you press... | then... |
|---|---|
| Enter, | The cursor will jump to the first instance of the word in the search box. Pressing Enter again will make the cursor jump to the next instance of the word. Note: If the search box contains a series of words separated by spaces, only the first word will be taken into account. |
| Ctrl+Enter, | A Find Results pane will appear at the bottom of the screen, listing all instances of the word in the search box. Double-clicking a line in the Find Results pane will make the cursor jump to the instance referred to by that line. Note: If the search box contains a series of words separated by spaces, only the first word will be taken into account. |
Case sensitivity
If you want to override the default case sensitivity setting in a particular file tab, you can switch between "Case sensitive" and "Ignore case" by clicking the aA button to the right of the search box.
Tip
See also: Interface
Wildcard interpretation
If you want to override the default wildcard interpretation setting in a particular file tab, you can switch between "Treat as literal string" and "Interpret as wildcards" by clicking the *? button to the right of the search box.
Tip
See also: Interface
Inside the file tab
Using the right-click menu commands
When you right-click inside the file tab, a shortcut menu appears. Apart from the standard Visual Studio commands, you can perform a number of additional actions.
| Select... | in order to... |
|---|---|
| Copy Protocol to Clipboard | Copy the entire content of the protocol XML file to the Windows Clipboard. |
| Copy Code to Clipboard | Copy the entire content of the file to the Windows Clipboard. When you use this menu option while working with a protocol solution or an automation script solution, you will not only copy the current file to the Windows Clipboard, but all files of the entire solution combined in a way that is similar to the way they are combined when the solution is compiled. |
| Generate Parameters | Automatically generate <Param> tags (as well as all the necessary <Timer>, <Group>, <Trigger> and <Action> tags) based on parameter data in a MIB file, an XML file, a JSON file, a WSDL file or an Ember+ file. See Generating parameters from data stored in external files |
| Generate Write Parameters | Create a Write parameter for a selected Read parameter. See Generating Write parameters for Read parameters |
| Repeat Selected Text | Copy the text you selected a number of times. See Repeating selected text |
| Outlining > Toggle Outlining at Level [X] | Collapse all protocol tags at a certain level of depth. Examples: - If you click Toggle Outlining at Level 1, all level-1 tags (e.g., the <Protocol> tag) will be collapsed. - If you click Toggle Outlining at Level 2, all level-2 tags (e.g., the <Params> tag, the <Commands> tag, etc.) will be collapsed. |
| Snippet > Insert Snippet > DIS | Insert a protocol or automation script snippet. |
Generating parameters from data stored in external files
If you want to automatically generate <Param> tags (as well as all the necessary <Timer>, <Group>, <Trigger> and <Action> tags) based on parameter data in a MIB file, an XML file, a JSON file, a WSL file or an Ember+ file, then do the following:
Position the mouse cursor anywhere in the XML editor, right-click, and select Generate Parameters.
In the Generate Parameters Wizard window, set Input type to "MIB", "XML", "JSON", "WSDL" or "EmberPlus".
Depending on the choice you made in step 2, do the following:
If you selected ... then ... MIB Click Next. XML - Select File input, and select an XML file, or select Text input, and enter or paste the XML code in the text box.
- Click Next.JSON - Select File input, and select a JSON file, or select Text input, and enter or paste the JSON code in the text box.
- Click Next.WSDL Select a WSDL file, and click Next. EmberPlus Select an Ember+ file, and click Next. Select the items that you want to convert into protocol parameters, and click Next.
Configure the following parameter ID settings, and click Next.
Setting Description Start PID In this box, you can specify the ID of the first parameter that is about to be created.
If, for example, you enter "1000", then the first parameter will have ID 1000, the second parameter will have ID 1001, etc.
Default: 1000Offset Read PID ->
Write PIDIf the parameter data indicates that a parameter can be updated, DataMiner Integration Studio will also generate a parameter of type "write".
In this box, you can specify the offset between the ID of the parameter of type "read" and the ID of the parameter of type "write".
Default: 100Offset Read PID ->
SNMP Write PIDIf the parameter to be created is that of a writable table column, DataMiner Integration Studio will generate a second parameter of type "write".
In this box, you can specify the offset between the ID of the parameter of type "read" and the ID of the second parameter of type "write".
Default: 200Offset Table PID ->
Set Instance PIDIf the parameter to be created is that of a table on which SET actions will be performed, then DataMiner Integration Studio will generate a so-called "instance parameter", which will contain row instances.
In this box, you can specify the offset between the ID of the table parameter and the ID of the instance parameter.
Default: 900If the list shows any ID conflicts between existing parameters and parameters that are about to be created, change the conflicting, new parameter IDs (which are marked in red), and click Next.
Define the necessary timers, and click Next.
Define the necessary groups, and click Next.
Define the parameter polling, and click Finish.
Note
- When an XML/JSON node does not contain a value, a parameter of type "string" will be created, and a warning icon will appear next to the node in the XML/JSON source file.
- Obsolete or deprecated MIB nodes will not be imported when you generate parameters based on MIB data.
Generating Write parameters for Read parameters
If you want to automatically generate parameters of type "write" for a number of existing parameters of type "read", do the following:
In the protocol XML file, select the <Param> tags of the parameters of type "read" for which you want to generate a parameter of type "write", right-click, and select Generate Write Parameters.
In the Generate Write Parameters window, each read parameter in the list has a checkbox in front of it. This checkbox will by default be selected, meaning that a write parameter will be created when you click OK. However, if a read parameter already has an associated write parameter, then its checkbox will by default not be selected. This will prevent you from creating duplicate write parameters.
If, in the Generate Write Parameters For Read Parameters window, the list shows any ID or name conflicts between existing parameters and parameters that are about to be created, then change the conflicting, new parameter IDs and/or names (which are marked in red), and click OK.
Above the list, you can change the default ID offset (default offset: 1). This way, you can change the IDs of all listed parameters of type "write" in one go.
When in the Write ID column a suggested parameter ID is not available, you can click a "search for next available Write ID" button in the form of an arrow to replace the non-available ID by an available one.
The Setter column allows you to enable the "setter" attribute for a particular write parameter.
If you want to enable this attribute for all non-SNMP parameters in the list, then you can select the "select all" checkbox in the column header. Note that, when the protocol does not contain any non-SNMP parameters, this "select all" checkbox will be disabled. As will all "setter" checkboxes for the SNMP parameters in the list.
The SNMP Set and Get column allows you to enable the "snmpSetAndGet" attribute for a particular write parameter.
If you want to enable this attribute for all SNMP parameters in the list, select the "select all" checkbox in the column header.
Note that when the protocol does not contain any SNMP parameters, this "select all" checkbox will be disabled, as will all "SNMP Set and Get" checkboxes for the non-SNMP parameters in the list.
Note
- As long as there is at least one row showing a duplicate parameter ID or duplicate parameter name, the OK button will be disabled and a warning icon will be displayed in the upper-right corner of the window.
- Only rows of which the checkbox is selected are taken into account when performing the above-mentioned validation.
Repeating selected text
The right-click menu option Repeat Selected Text allows you to select a particular piece of text and have it copied a number of times. Moreover, by inserting variables and formulas in the text to be copied, you can have parts of the text change automatically from copy to copy.
Select the text that has to be repeated, right-click, and select Repeat Selected Text.
In the DIS Repeater window, if necessary, go to the Template box, and edit the text you want to have repeated.
If you want to insert a variable (or a formula including a variable) in the text to be repeated, then do the following:
- Place your cursor where you want the variable or formula to be inserted, and click Insert placeholder.
- If necessary, change the default placeholder that appeared at the location where you placed your cursor: a single value "x" delimited by
$characters. You could change it to, for example,$x+5$.
At the bottom of the window, select Overwrite Selection, if you want the text you selected to be overwritten by the text that is currently displayed in the Preview box.
Click OK to have the text in the Preview box pasted in the editor.
Using "$" characters inside a formula
When you insert a variable or a formula into the text to be copied, that variable or formula is delimited by $ characters. If you want to use a $ character inside a formula, you have to put an escape character in front of it. Example: $(x*10)+"\$"$.
Defining the range of value "x"
The range of value "x" can be defined using the range definition boxes at the top of the window.
There are two ways to define the range:
- Specify a starting "x" value in Start and a number of iterations in Count.
- Specify a starting "x" value in Start and an ending "x" value in End.
In both cases, you can also specify a step size in Step.
Tag shortcut menus
In the XML editor, you can click a small Down arrow in front of certain XML tags to open a shortcut menu. See the table below for an overview of all available commands per XML tag.
Param
| Command | Function |
|---|---|
| Edit Table... | Open the parameter in the table editor. (only for table parameters) |
| Add New Column | Add a new column to a table parameter. - The new column will automatically be assigned a default parameter ID. - The name of the new column will get a prefix containing the name of the table parameter. - The description of the new column will get a suffix containing the description of the table in parenthesis. - When the last column of the table is a displayKey column, then the new column will be inserted before that displayKey column. - When the last column of the table has a write column next to it, then the new column will be added after the write column. It will not be added in between a read and a write column. |
| Add Context Menu... | Create a context menu parameter and a QAction. See also the Add Table Context Menu... plugin. (only for table parameters) |
| Generate Write Parameter... | Create an identical parameter of type "Write". (only for read parameters) |
| Include in Group | Include the parameter in one of the listed groups of type "poll". From now on, this command is only available for SNMP parameters (i.e., parameters with an <SNMP> subtag). |
| Generate New Trigger (on change) | Create a new "on change" trigger that will get activated when the parameter changes. |
| Generate New QAction | Creates a new blank QAction that will be run when the parameter changes. |
| Generate New QAction - Context Menu | Creates a new QAction that holds the context menu logic. See also the Add Table Context Menu... plugin. (only for context menu parameters) |
| Generate New QAction - Trap Receiver | Creates a new QAction that holds the SNMP trap logic. See also the Add SNMP Trap Receiver... plugin. (only for trap receiver parameters) |
| Parameter Update Locations | Opens a new window with the locations where the parameter will (possibly) be updated. |
Trigger
| Command | Function |
|---|---|
| Include in Group | Include the trigger in one of the listed groups of type "trigger" or "poll trigger". |
| Add Existing Action | Add an existing action to the trigger. (only if the trigger is of type "action") |
| Generate New Action | Create a new action. (only if the trigger is of type "action") |
| Add Existing Trigger | Add an existing trigger to the trigger. (only if the trigger is of type "trigger") |
Action
| Command | Function |
|---|---|
| Include in Group | Include the action in one of the listed groups of type "action" or "poll action". |
| Include in Trigger | Include the action in one of the listed triggers. |
Session
| Command | Function |
|---|---|
| Include in Group | Include the session in one of the listed groups of type "poll". |
Timer
| Command | Function |
|---|---|
| Add Existing Group | Add an existing group to the timer. |
| Generate New Group | Create a new group. |
Pair
| Command | Function |
|---|---|
| Include in Group | Include the pair in one of the listed groups of type "poll". |
| Generate New Command | Create a new command. |
| Add Existing Command | Add an existing command to the pair. |
| Generate New Response | Create a new response. |
| Add Existing Response | Add an existing response to the pair. |
Group
| Command | Function |
|---|---|
| Generate New Trigger (after group) |
Create a new "after group" trigger. |
| Include in Timer | Include the group in one of the listed timers. |
| Generate New Parameter Add Existing Parameter Generate New Pair Add Existing Pair Generate New Session Add Existing Session |
As long as a group of type "poll" is still empty, you can use these commands to add a parameter, a pair, or a session to it. However, once you added one item to a group of type "poll", all other items you add must be of the same type. If a group already contains a pair, for example, you will no longer be allowed to add parameters or sessions to that group. |
| Generate New Action | Create a new action. (only if the group is of type "action" or "poll action") |
| Add Existing Action | Add an existing action to the group. (only if the group is of type "action" or "poll action") |
| Add Existing Trigger | Add an existing trigger to the group. (only if the group is of type "trigger" or "poll trigger") |
Command
| Command | Function |
|---|---|
| Include in Pair | Include the command in one of the listed pairs. |
| Add Existing Parameter | Add an existing parameter to the command. |
| Generate New Parameter | Create a new parameter. |
Response
| Command | Function |
|---|---|
| Include in Pair | Include the response in one of the listed pairs. |
| Add Existing Parameter | Add an existing parameter to the response. |
| Generate New Parameter | Create a new parameter. |
QAction
| Command | Function |
|---|---|
| Edit QAction | Create a temporary C# project containing the code of the QAction, and open the QAction in a new C# editor tab. |
| Edit All QActions | For each of the available QActions, create a temporary C# project containing the code of that QAction, and open each QAction in a new C# editor tab. |
| Change ID... | Change the ID of a QAction. Note that when you change the ID of a QAction, the following items will be updated: - The id attribute of the <QAction> tag - The name of the C# project ("QAction_ID") - The name of the main C# file ("QAction_ID.cs") - The name of the default namespace - ("QAction_ID") - The AssemblyInfo.cs file - The name of the project folder on disk |
| Delete QAction | Delete the entire QAction element as well as the associated C# project. Note: This action cannot be undone as it will also remove all associated C# project files stored on disk. |
| DLL Imports | Insert references to pre-compiled QActions into the dllImport attribute of the <QAction> element. The submenu will list - all QActions of which the options attribute contains the "precompile" option, - all QActions of which the C# project has a reference to another C# project in the solution that is not QAction_Helper, QAction_ClassLibrary or another QAction, and - all commonly used system DLL files. Note: - In the submenu, all DLL files already inserted into the dllimport attribute of the <QAction> element will be indicated by a check mark. - If you want to override the path associated with a DLL import, see the note below. |
Note
To override the path associated with a DLL import, do the following:
- Right-click the reference (which can be either a reference to a DLL or a reference to a project).
- Open its properties.
- Locate the DLL Path property, and enter in the value that should override the default path.
Exe
| Command | Function |
|---|---|
| Edit Script... | Create a temporary C# project containing the code of the "Exe" C# code block, and open the code block in a new C# editor tab. |
| Edit All Scripts... | For each of the available "Exe" C# code blocks, create a temporary C# project containing the code of that block, and open each code block in a new C# editor tab. |
| Change Exe ID... | Change the ID of an Exe. Note that when you change the ID of an Exe, the following items will be updated: - The id attribute of the <Exe> tag - The name of the C# project ("scriptName_ID") - The name of the main C# file ("scriptName_ID.cs") - The name of the default namespace ("scriptName_ID") - The AssemblyInfo.cs file - The name of the project folder on disk |
| Delete Script | Delete the entire Exe element as well as the associated C# project. Note: This action cannot be undone as it will also remove all associated C# project files stored on disk. |
| Copy Script to Clipboard | Copy the entire contents of the "Exe" C# code block (i.e., the automation script) to the Windows Clipboard. |
Note
- If, in an "Include in ..." list or an "Add Existing ..." list, you select an item that is already included, then that item will be removed.
- "Include in ..." and "Add Existing ..." lists do not close when you have selected an item. They will stay open to allow you to select multiple items.
Name
| Command | Function |
|---|---|
| Change Script Name... | Rename the automation script XML and update all linked projects. |
IntelliSense and instant XML validation
If the root tag of the protocol XML file or the automation script XML file you are editing contains a reference to the protocol or automation namespace, and if the protocol and automation script schema files are in the Microsoft Visual Studio Schema folder, then the protocol XML file or the automation script XML file you are editing will be validated against the protocol or automation script schema while you type.
- When you type a "<" sign between two existing tags, a selection box will appear listing all tags you are allowed to insert at that location. After you select one of the proposed tags, a list will be presented with all possible attributes for that specific tag.
- When adding content to Commands, Responses, Pairs, Groups, Triggers, Timers, etc., an IntelliSense pop-up will appear, listing all existing items that can be added. In case of a group, the listed items will depend on the type of the group, e.g., actions are only added to the list when the type is "action" or "poll action".
DIS Validator tool window
All syntax errors in the XML file you are editing can be found in the DIS Validator tool window.
If the DIS Validator tool window is not displayed, choose Tool Windows > DIS Validator from the DIS menu.
Inserting snippets
DataMiner Integration Studio comes with a number of custom XML snippets.
To insert a snippet while working in the XML editor:
- Press Ctrl+K, followed by Ctrl+X.
- Open the DIS > Protocol folder, and select a snippet. You may have to open an additional folder.
Note
If you want to insert a particular snippet without having to go through the above-mentioned snippet folder and all its subfolders, use the following shortcut:
- At the location where you want to insert the snippet, enter "<", type the name of the XML tag (or select it from the IntelliSense list), and press TAB.
Context-sensitive help in tooltips
The DataMiner schema files contain online help information about the different tags and tag attributes that can be used in a protocol XML or an automation script XML file.
Whenever you move your mouse pointer over a tag, an attribute or one of the preset values in an enum list, a tooltip will display a few lines of basic information. For more detailed information, the tooltips will refer to the DataMiner Development Library.
Jump to linked item button
Next to certain items, you will find a button in the shape of a paper clip. When you hover over this paper clip, a list box will appear, listing all items that are in some way linked to the item in question (e.g., read parameters linked to write parameters, or group parameters linked to bit parameters).
All those linked items are then grouped by category. For example:
- the Outgoing list will show all items to which the item contains a link,
- the Incoming list will show all items that contain a link to the item,
- the Conditions list will show all items referred to in the item’s <Condition> element (if applicable), etc.
When, in the list box, you click the type of a linked item (notice that the type turns into a hyperlink!), the cursor will jump to the tag that defines the item you selected.
Edit Table button
In front of every table parameter, you will find an Edit Table button.
If you click such a button, the table parameter will be opened in the Table Editor. This will allow you to edit the table in a graphical environment.
Tip
See also: Table editor
Edit C# button
In front of every QAction or Exe code block containing C# code, you will find an Edit C# button.
If you click such a button, a temporary C# project will be created, containing the code of that QAction or Exe code block. Also, the code of the QAction of Exe code block will appear in a new file tab.
Tip
See also: C editor
Virtual comments
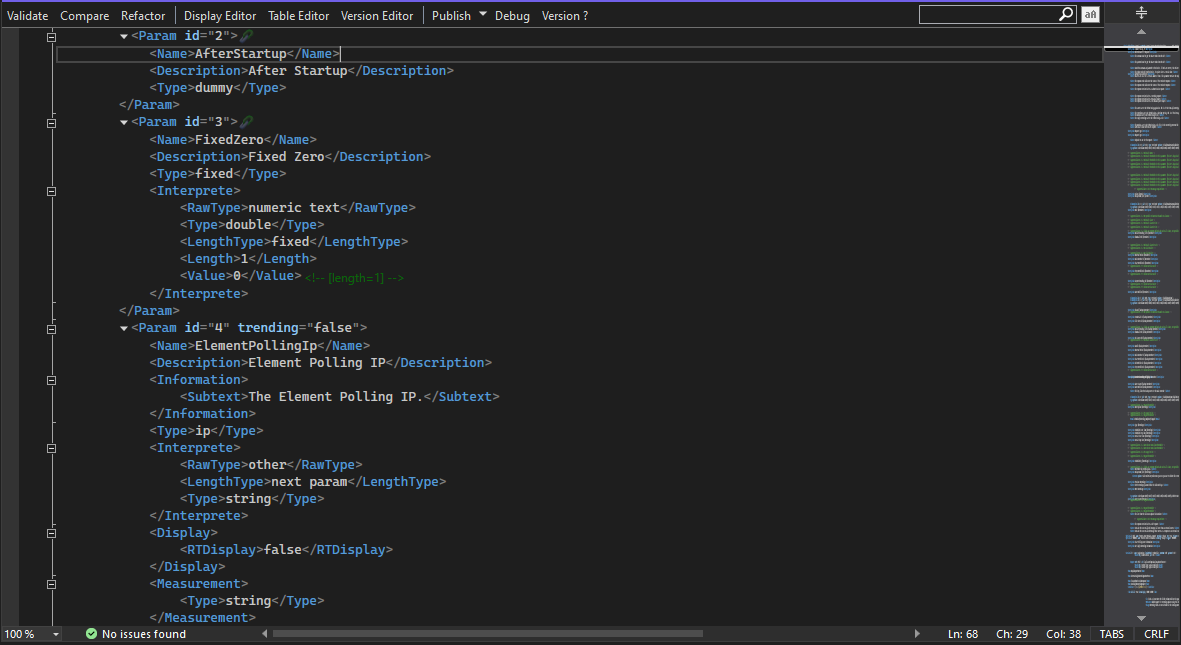
When working in the XML editor, you will notice so-called "virtual comments" next to certain XML tags. They are called "virtual" because they cannot be found in the protocol XML file itself.
In the following example, there are "virtual comments" next to the referenced parameters. They contain the names found in the <Description> tags of those parameters.
For example, next to <Param>30</Param>, you can see <!-- System Table --> because, in the parameter definition, the <Description> tag contains "System Table".
<Group id="2">
    <Name>Table</Name>
    <Description>Table</Description>
    <Content>
        <Param>30</Param><!-- System Table -->
    </Content>
</Group>

<Param id="30">
    <Name>systemTable</Name>
    <Description>System Table</Description>
    <Type>array</Type>
    <ArrayOptions index="0" options=";naming=/33">
        <ColumnOption idx="0" pid="31" type="snmp" options=";save" /><!-- System Index -->
        <ColumnOption idx="1" pid="32" type="snmp" options=";save" /><!-- System ID -->
        <ColumnOption idx="2" pid="33" type="snmp" options=";save" /><!-- System Description -->
        <ColumnOption idx="3" pid="34" type="snmp" options=";save" /><!-- System Up Time -->
    </ArrayOptions>
</Param>
Note
If you do not want virtual comments to appear, you can turn them off. See Interface.