Installing the Asset Management application
Prerequisites
DataMiner version 10.3.11 or higher
Important
The DataMiner Asset Management application was tested to be compatible with DataMiner versions 10.3.11 and higher. We do not recommend using an older version as this may lead to unexpected issues.
A DataMiner System connected to dataminer.services
Deploying the Asset Management app
Look up the Asset Management Application package in the Catalog.
Click the Deploy button.
Select the target DataMiner System and confirm the deployment. The package will be pushed to the DataMiner System.
Accessing the Asset Management app
To access the Asset Management application:
Go to
http(s)://[DMA name]/root.Select Asset Management to start using the application.
Tip
See also: Use case: Asset Management on DataMiner Dojo
Setting up the application
Before the application is fully functional, you need to modify the asset URLs on the QR code page, configure the Import new assets from Excel button on the Complete assets overview page, and optionally modify the theme to ensure optimal use of the application.
Modifying the asset URLs
To gain access to the asset detail reports, you first need to modify the asset URLs to use your personal system instead of the default slc-h79-g04.skyline.local system.
Click the hamburger button in the top-left corner to fully expand the sidebar.
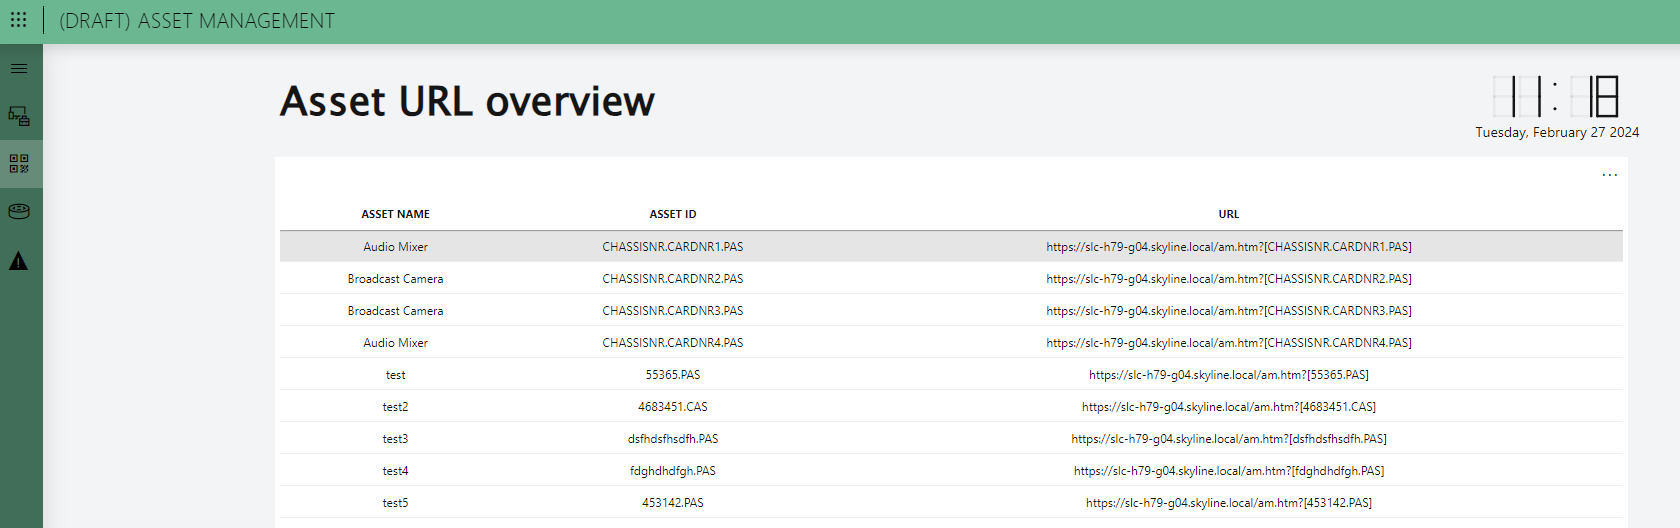
Select QR code.
A page with a table component listing all asset URLs is displayed.
DataMiner Low-Code Apps in DataMiner 10.4.3In edit mode, navigate to Data > Queries > Assets all in the configuration pane to the right.
Click the pencil icon next to Assets all to edit the query.
Scroll down to the Concatenate method used to specify the URL in the query.
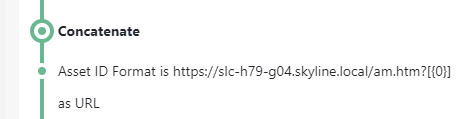
DataMiner Low-Code Apps in DataMiner 10.4.3Select the information specified below Concatenate, and replace
slc-h79-g04.skyline.localwith your own DMA in the Format field.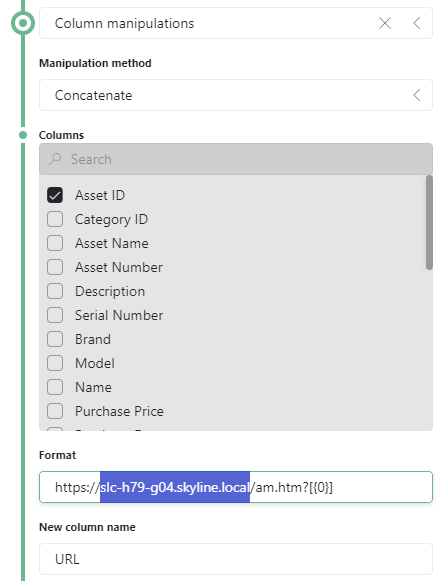
Click the pencil icon again to stop editing the query.
The table component now displays the updated URLs.
Configuring the 'import new assets' button
Before the Import new assets from Excel button on the Complete assets overview page is functional, you need to configure an on-click action.
Click the hamburger button in the top-left corner to fully expand the sidebar.
Select Complete assets overview.
In edit mode, select the button component and navigate to the Settings tab in the configuration pane to the right.
In the General section, click the Configure actions button next to On click (1 action).
In the pop-up window, expand the Launch 'Automation script' configuration by clicking the sideward arrow.
Select IngestInstances from the dropdown list in the Filter box.
Select Ok in the lower right corner.
Modifying the theme
To make sure the application looks as it was intended, modify the theme before you start using it.
In edit mode, make sure no components are selected, and navigate to the Layout tab in the configuration pane to the right.
Click + New theme.
Enter a theme name, e.g. "Asset Management theme".
Change the background color to rgb(243,244,245).
Edit the following component style properties:
Title > Font: Lucinda Sans Unicode
Title > Bold: Enabled
Color > Background color: rgb(243,244,245)
Color > Font color: rgb(21,21,21)
Color > Data colors or Color > Color palette (depending on your DataMiner version):
Color 1: rgb(244,190,73)
Color 2: rgb(233,141,66)
Color 3: rgb(215,90,112)
Color 4: rgb(93,201,178)
Color 5: rgb(71,137,219)
Click the Duplicate button next to the default component theme and change the component theme name from "Default (1)" to "Tables".
Edit the following component style properties:
Title > Font size: 28px
Color > Background color: rgb(255,255,255)
Border > Roundness: 5px
Click the Duplicate button next to the default component theme and change the component theme name from "Default (1)" to "Title 2".
Edit the following component style properties:
Title > Font size: 20px
Title > Bold: Disabled
Color > Font color: rgb(55,55,55)
Click the Duplicate button next to the default component theme and change the component theme name from "Default (1)" to "Attention title".
Edit the following component style properties:
Title > Font size: 28px
Color > Font color: rgb(71,137,219)
To save your theme, click Create in the lower right corner.
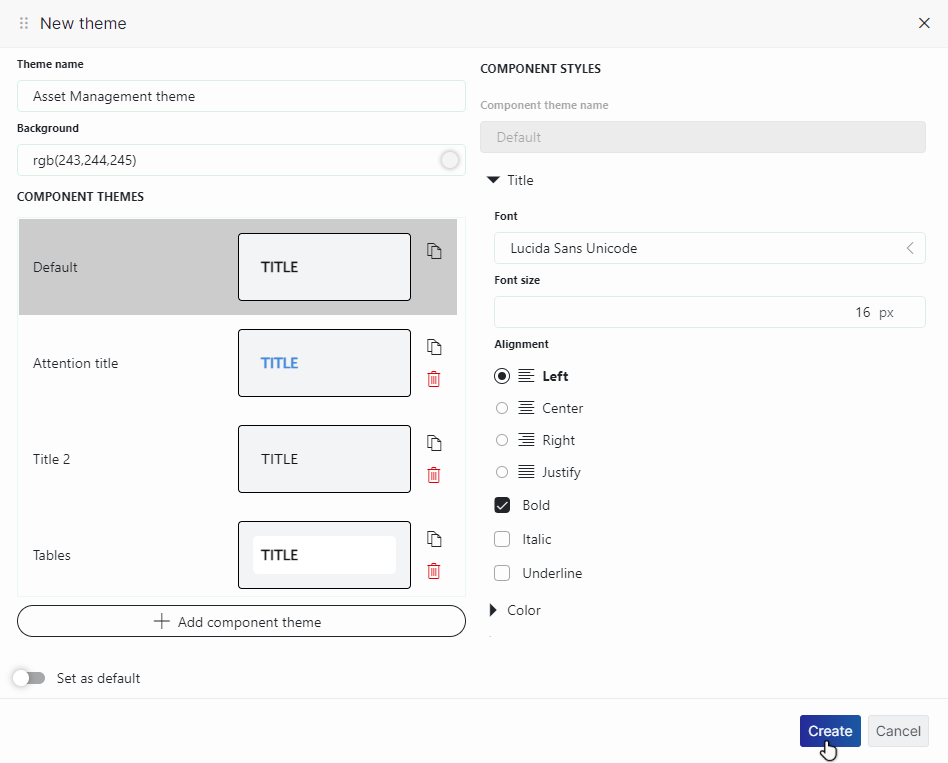
New theme pop-up window in DataMiner 10.4.3
Applying the new theme
In edit mode, navigate to the Asset overview page.
Make sure no components are selected, and navigate to the Layout tab in the configuration pane to the right.
Click the box indicating the currently used theme.
Select your new theme from the list of available themes.
Repeat these steps for the Asset detail report, QR code, Complete assets overview, and Alarm history pages.
Click the
 button in the header bar to publish the app.