Satellite Scheduling UI
Transponder timeline
The Satellite Scheduling UI is centered around a transponder timeline that shows all available transponder slots and existing bookings.
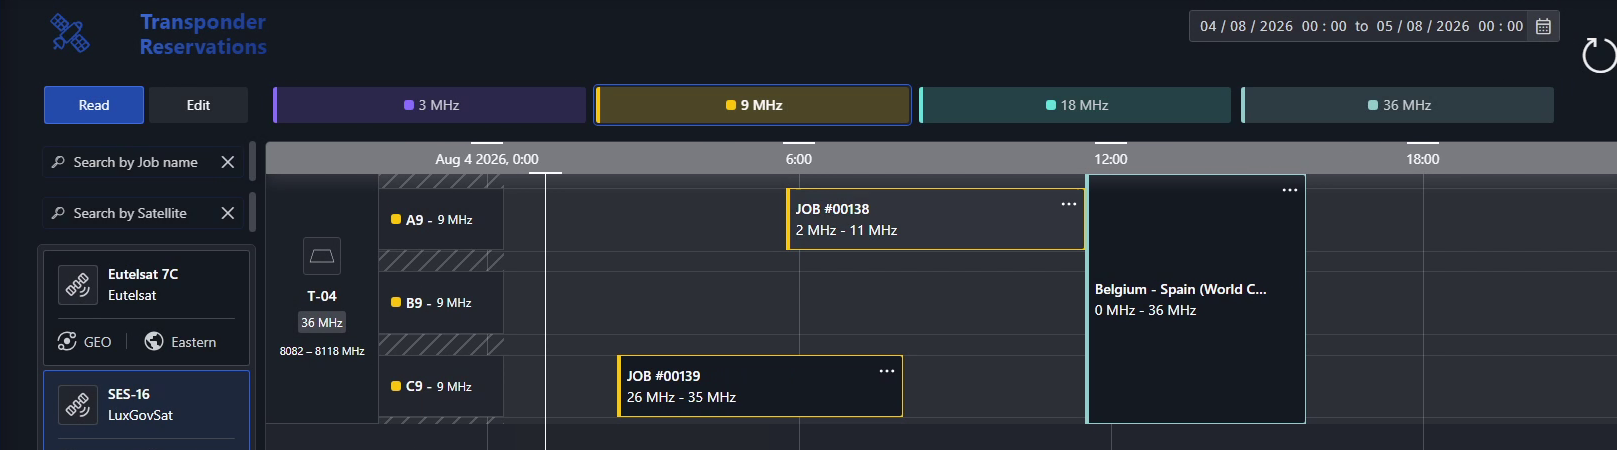
The slots are listed vertically. Each slot shows its name and bandwidth, for example "A9 - 9 MHz". The border color indicates the slot size (e.g., 3 MHz, 9 MHz, etc.), making it easy to see how the transponder capacity is divided.
The timeline initially shows the slots that match the Default Slot Size configured for the applicable transponder plan. However, you can filter the timeline to show slots of a different size.
Filtering the timeline
You can use the filters on the left to search by:
Job name.
Satellite.
To filter the timeline by slot size, use the color-coded size buttons at the top.
Note
To book a slot of a specific size, first select that size using the corresponding filter button. For example, to book a 6 MHz slot, select the 6 MHz filter. Only slots of the selected size are then available for booking.
Read and edit mode
You can switch between the following modes using the Read and Edit buttons in the upper-left corner:
Read mode: Browse the timeline and view existing bookings. You can scroll horizontally and vertically, but you cannot make changes.
Edit mode: Create or modify bookings by interacting with the timeline.
Navigating between apps
You can navigate between the Satellite Scheduling and Satellite Inventory apps:
In Satellite Inventory, click the transponder name in the header of the Slots panel to open the timeline for that transponder.
In Satellite Scheduling, click the transponder block in the left column of the timeline to open that transponder in Satellite Inventory.
For an example of both, see Transponder plans and slots.