Transponder plans and slots
A transponder plan defines how the bandwidth of a transponder is divided into slots. The transponder slots generated from a plan are the bookable units of capacity that appear in the Satellite Scheduling app.
To open the Slots panel, go to the Transponders page and click the  Slots icon in the row of the transponder you want to manage.
Permanent and temporary plans
There are two types of transponder plans:
Permanent plan: The base plan of a transponder. It applies unless a temporary plan overrides it. A transponder has exactly one permanent plan, marked with an
 infinity icon in front of the plan name.
Temporary plan: A time-boxed plan that overrides the permanent plan during a specific date range. A transponder can have any number of temporary plans, but their date ranges cannot overlap.
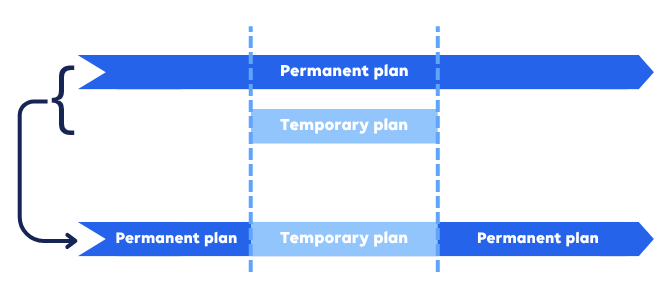
The following diagram shows how permanent and temporary plans combine over time. The upper row shows the plans configured for the transponder. The lower row shows the effective plan used by Satellite Scheduling. During the temporary plan's date range, the temporary plan overrides the permanent plan. Before and after that date range, the permanent plan applies.
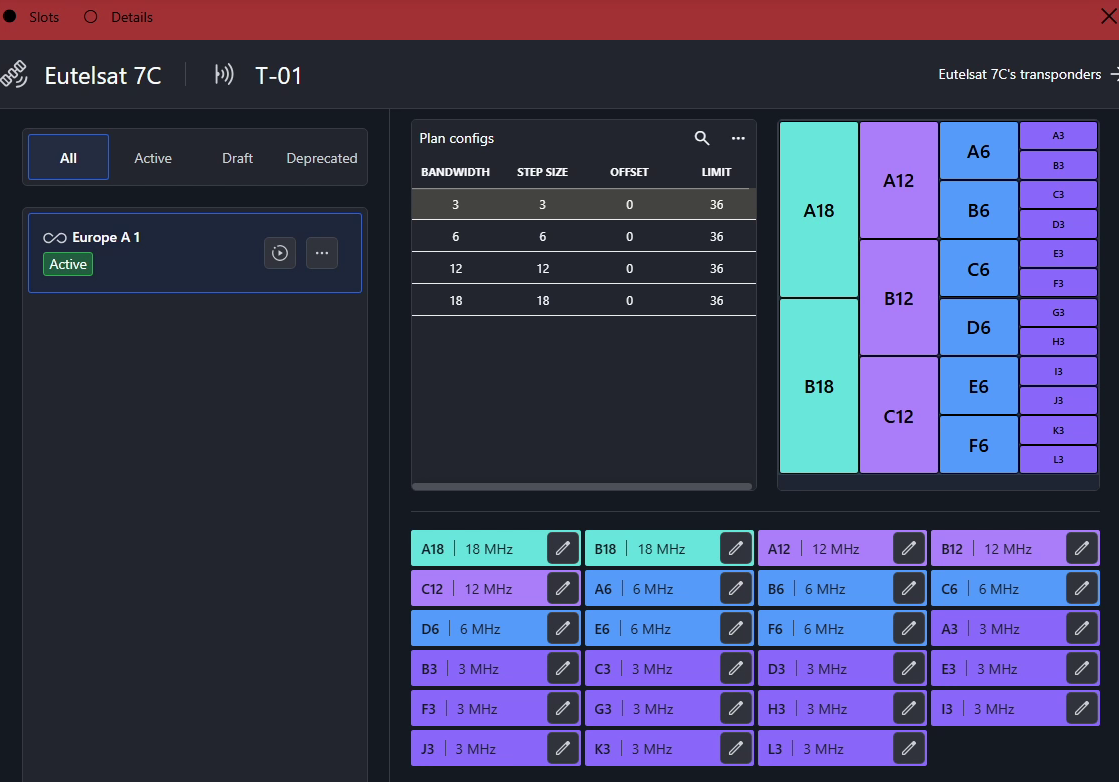
The following example shows an existing permanent plan for transponder 1 of Eutelsat 7C. The transponder has a bandwidth range of 36 MHz, and the plan defines slots of 3, 6, 12, and 18 MHz.
Creating a plan
On the Slots panel, click Add plan in the lower-left corner.
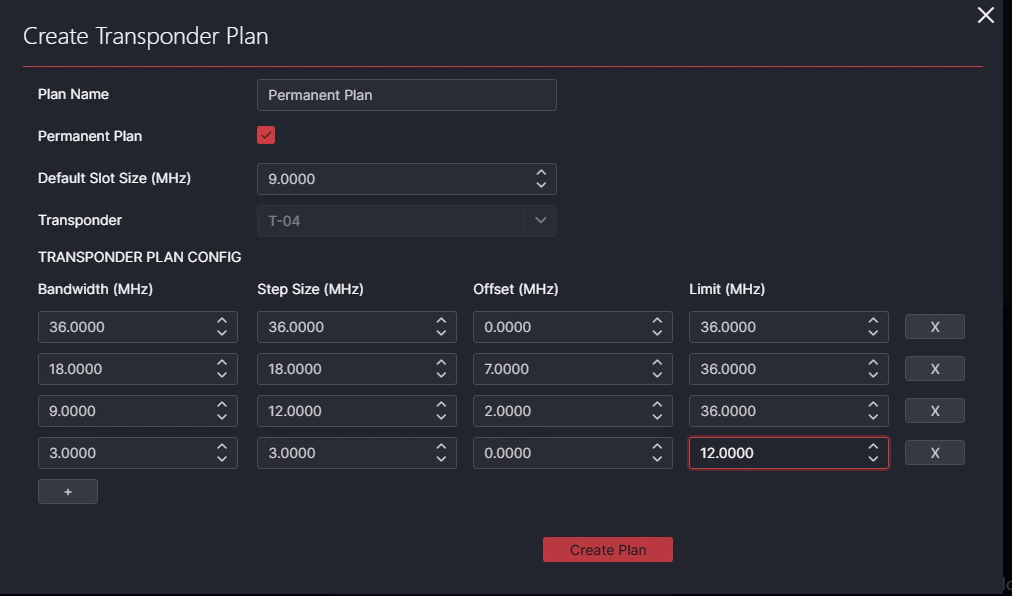
Specify the plan details:
Plan Name: Enter a name for the plan.
Permanent Plan: Enable this setting to create a permanent plan. If you leave this setting disabled, a temporary plan is created.
Start Date Time (temporary plans only): Specify the date and time from which the plan applies.
End Date Time (temporary plans only): Specify the date and time until which the plan applies.
Default Slot Size (MHz): Specify the slot size selected by default when the plan is opened in Satellite Scheduling.
Under Transponder Plan Config, click the "+" button to add one or more bandwidth rows.
Each row generates a set of slots.
Specify the following settings for each row:
Bandwidth (MHz): The width of each slot.
Step Size (MHz): The distance between the start of one slot and the start of the next.
The step size cannot be smaller than the bandwidth.
If the step size is larger than the bandwidth, a gap is left between consecutive slots.
If the step size equals the bandwidth, the slots are placed back to back.
Offset (MHz): The frequency at which the first slot in the row starts.
Limit: The maximum frequency that the slots in the row can reach. By default, this value corresponds to the bandwidth range of the transponder.
Click Create plan.
The plan is added to the plan list on the left. An infinity icon in front of the plan name identifies a permanent plan.
By default, the plan is in the Draft state. Before the plan can take effect, you must activate it.
Tip
To create a plan based on an existing plan, select Duplicate from the plan's More menu. This copies the plan and all its config rows, which is useful when a new temporary plan only differs from an existing one in its date range.
Examples
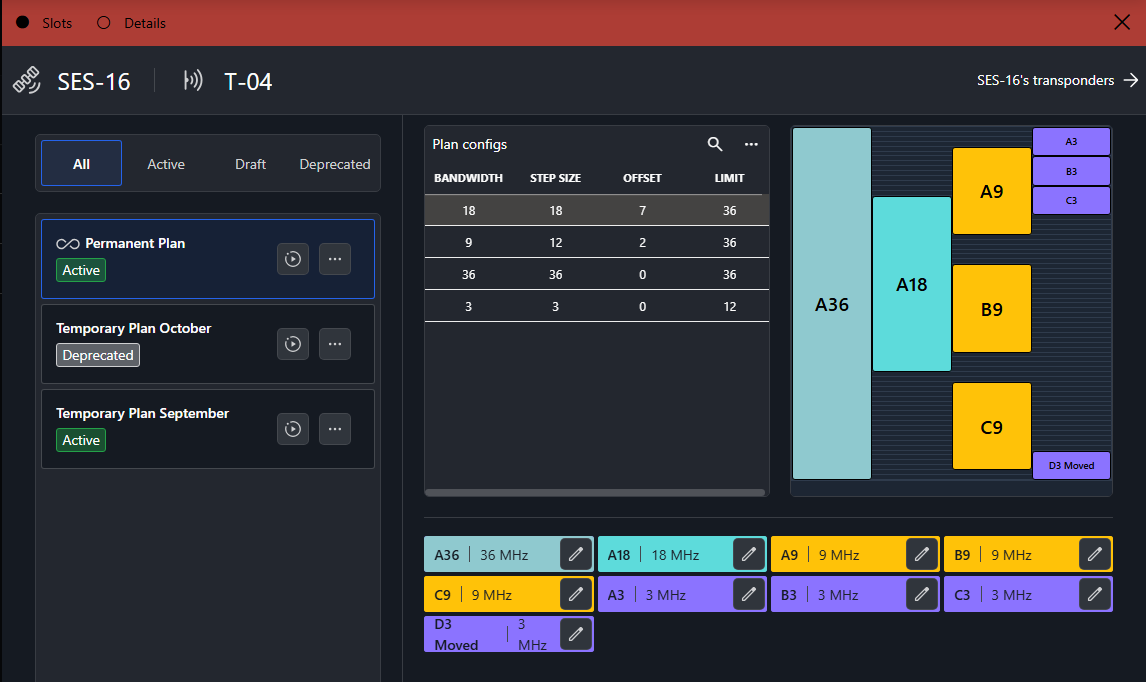
The following rows illustrate how the settings interact for a transponder with a bandwidth range of 36 MHz. Apart from the second row, these are the rows of the permanent plan shown further down on this page.
Bandwidth 36, step size 36, offset 0, limit 36: Generates one slot that uses the entire capacity.
Bandwidth 18, step size 18, offset 0: Generates 18 MHz slots placed back to back.
Bandwidth 18, step size 18, offset 7: Generates the same arrangement, but the first slot starts at 7 MHz instead of 0 MHz.
Bandwidth 9, step size 12, offset 2: Generates 9 MHz slots with a 3 MHz gap between consecutive slots because the step size is 3 MHz larger than the bandwidth.
Bandwidth 3, step size 3, offset 0, limit 12: Generates 3 MHz slots up to the 12 MHz limit. As a result, only the first 12 MHz of the available 36 MHz capacity is used.
Generating slots
Creating a plan does not automatically generate its slots.
To generate the slots:
On the Slots panel, click the
 Create Slots icon next to the transponder plan for which you want to generate slots.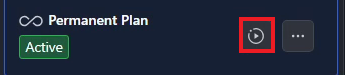
In the pop-up window, select Create Slots.
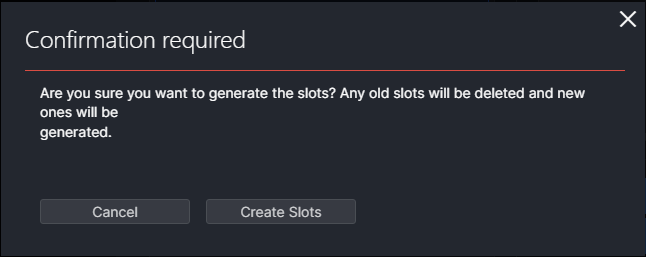
Important
Any previously generated slots for the plan will be replaced.
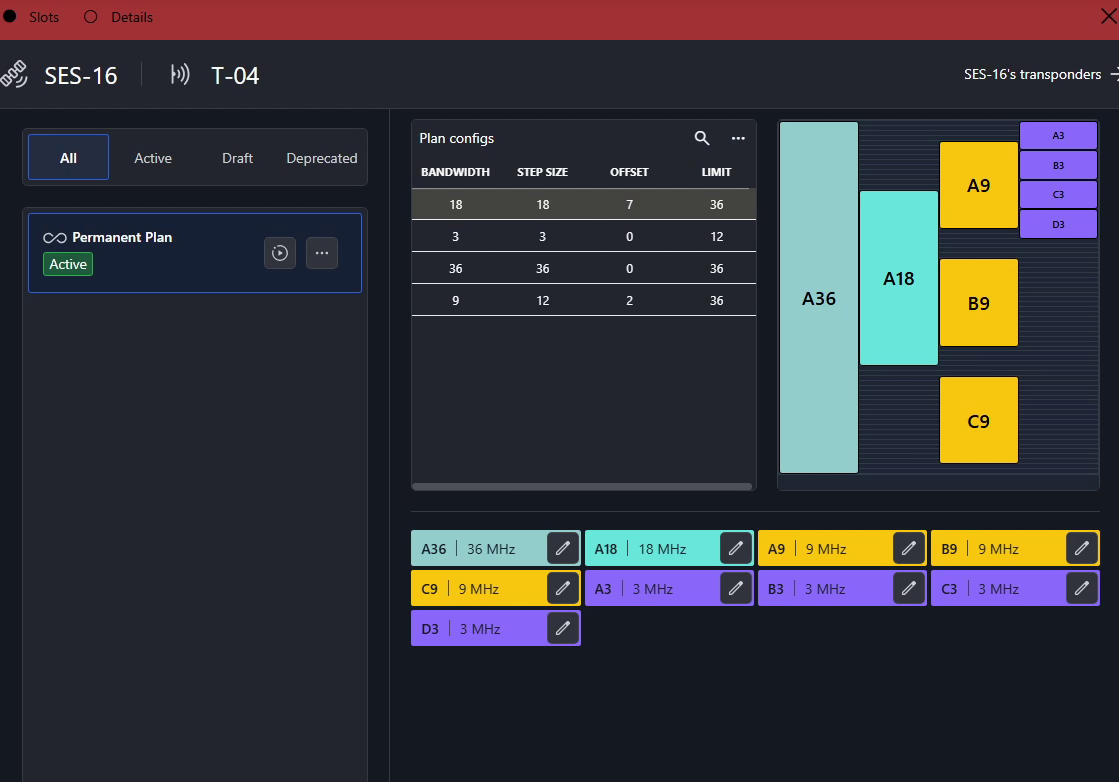
The slots are generated based on the Transponder Plan Config settings configured for the plan.
The app immediately shows a visualization of the resulting slot layout, with the full list of slots below it.
Viewing the transponder details
Slot frequencies are expressed relative to the transponder's frequency range, so it can be useful to have access to the transponder frequencies and other settings in the Details view.
At the top of the panel, switch from Slots to Details.
The transponder settings are displayed, including its state, bandwidth, band, beam, start and end frequency, downlink start and end frequency, and polarization.
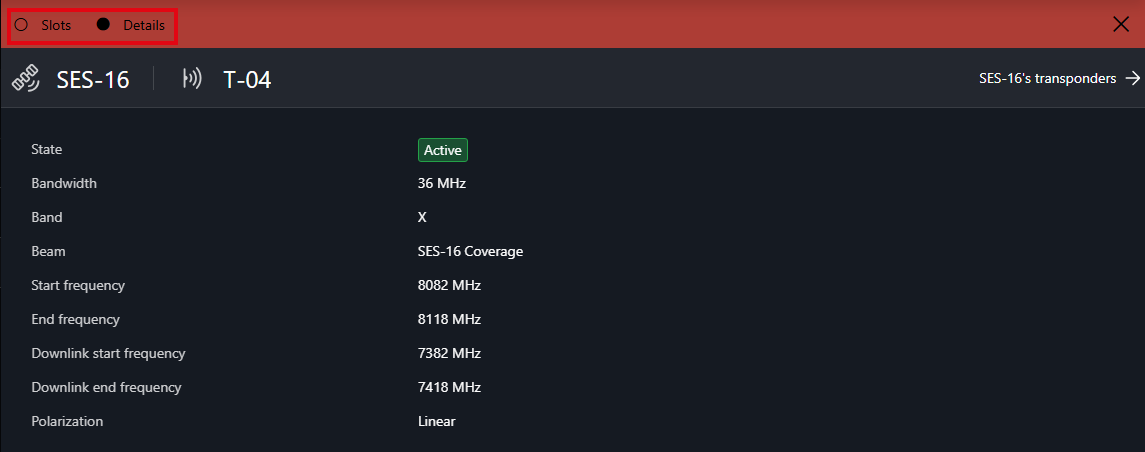
To return to the plan overview, switch back to Slots.
Editing a slot
After generating the slots, you can change the auto-generated name and the start frequency of an individual slot:
Click the
 Edit icon next to the slot.
The Update Slot dialog opens.
Modify the Slot Name and/or Slot Start Frequency.
Click Update Slot to save your changes.
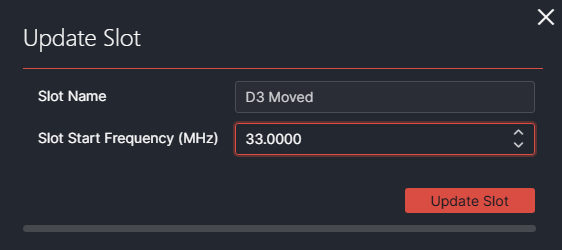
The updated slot name is shown in the slot overview and in Satellite Scheduling.
Activating a plan
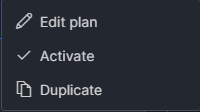
After a plan is created, its state is automatically set to Draft. You must activate the plan before it takes effect.
Click the
 More icon next to the transponder plan name.
Select Activate from the context menu.
Deprecating a plan
An active plan can be taken out of service at any time. There is no delete option, so deprecating is how you retire a plan.
Click the
More icon next to the transponder plan name.Select Deprecate from the context menu.
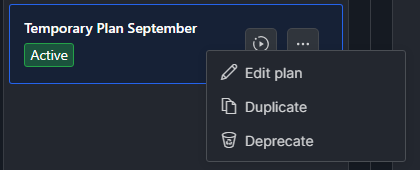
The following example shows how different plan states appear in the plan list. Transponder T-04 of SES-16 has an active permanent plan, a deprecated temporary plan for October, and an active temporary plan for September. The permanent plan is selected, so the pane on the right shows its Plan configs and the slots generated from them.
From plan to schedule
The generated slots are the units of capacity that can be booked in Satellite Scheduling. From a plan, you can jump straight to the matching view in the Satellite Scheduling app to see the bookings, and then return to the transponder in the Satellite Inventory app.
To open the transponder in Satellite Scheduling, click the transponder name in the header of the Slots panel.

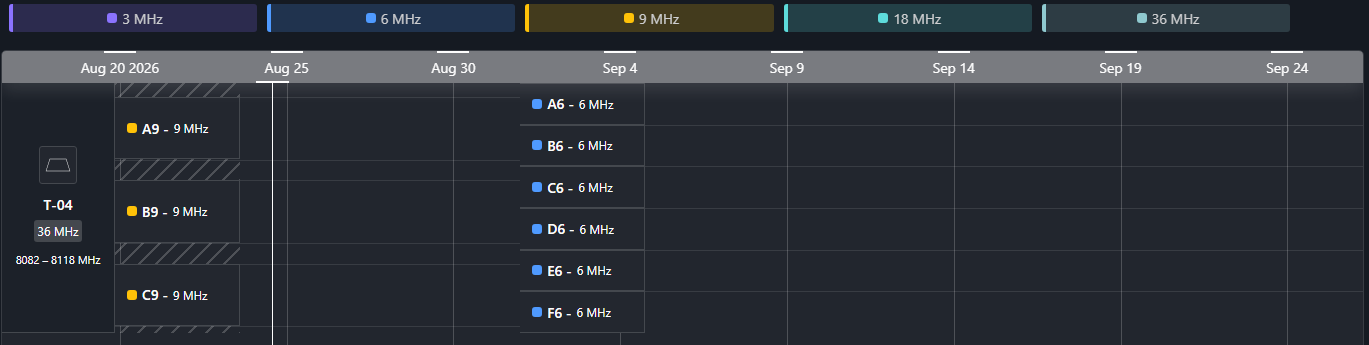
The timeline opens filtered on that transponder. Here the switch between both plans is visible: the 9 MHz slots apply in August, and from 1 September the 6 MHz slots take over.
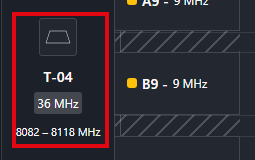
To go back to the transponder in Satellite Inventory, click the transponder block in the left column of the timeline.