Generating code with the DOM Editor
In this tutorial, you will learn how to use the DOM Editor to generate code from your DOM module. You can then use this code to interact with your DOM modules, definitions, and instances more easily.
Expected duration: 10 minutes.
Tip
See also: Kata #57: Generating code with the DOM Editor on DataMiner Dojo 
Note
The content and screenshots for this tutorial have been created in DataMiner 10.4.12 with DOM Editor version 10.4.4.3.
Prerequisites
DataMiner version 10.3.10 or higher.
A DataMiner System with an indexing database or Storage as a Service.
DOM Editor (version 10.4.4.3 or higher) is installed.
Visual Studio and DIS.
Basic knowledge of DataMiner Object Models (DOM).
Tip
If you are new to DOM, take a look at the Getting Started with DOM tutorial.
Overview
This tutorial consists of the following steps:
- Step 1: Install the example package from the Catalog
- Step 2: Generate the code
- Step 3: Use the code
- Step 4: Test the code
Step 1: Install the example package from the Catalog
Go to the Tutorial - Generating code with the DOM Editor package in the Catalog.
Deploy the package to your DataMiner System by clicking the Deploy button.
This will add the eventmanagement DOM module, the event DOM definition, and the Event Management low-code application.
Go to
http(s)://[DMA name]/root, and select the Event Management application.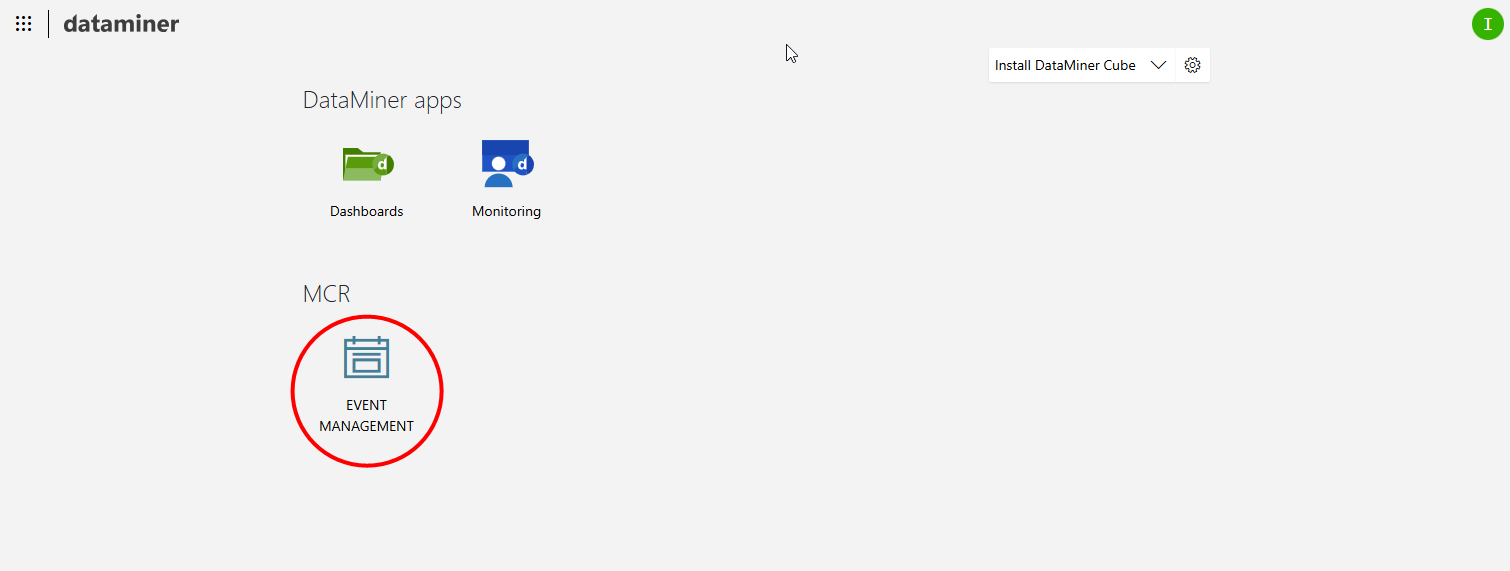
Step 2: Generate the code
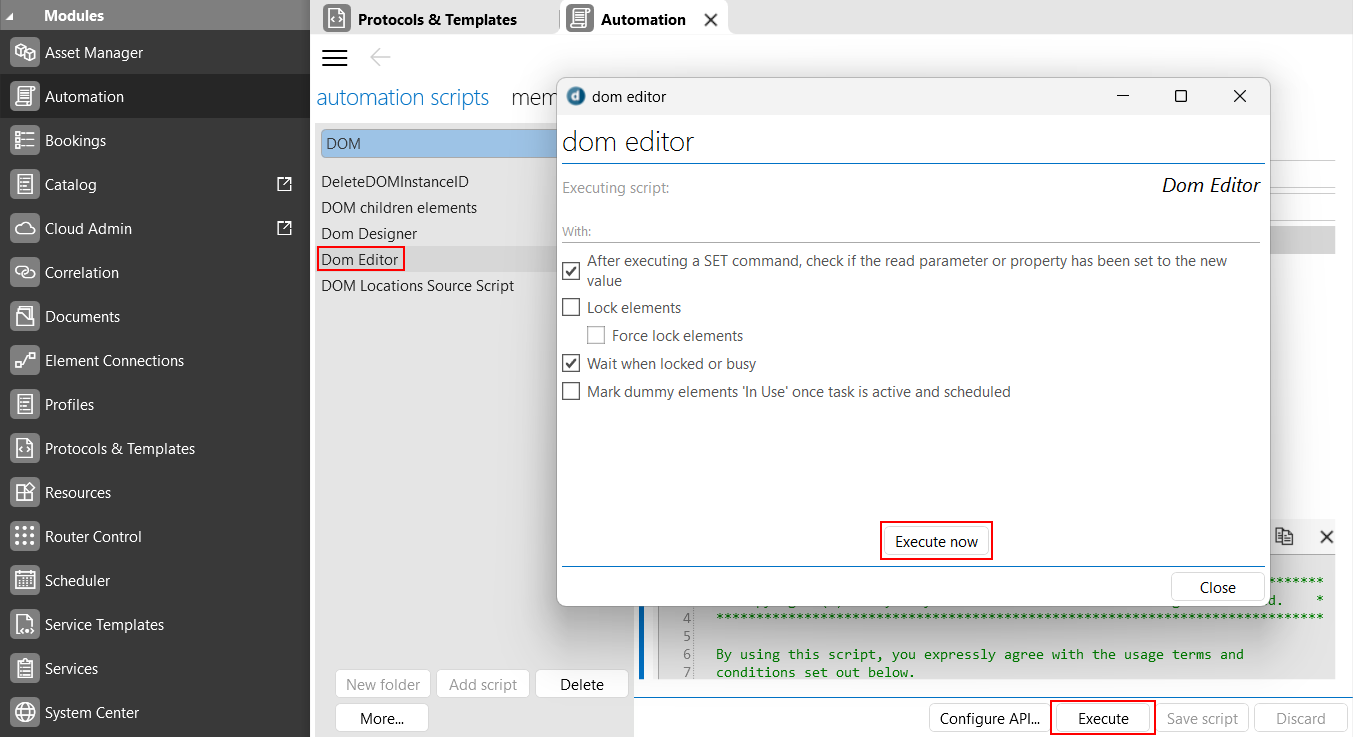
Open the Automation module in DataMiner Cube.
If necessary, use the filter box at the top to find the DOM Editor script.
Select the script and click the Execute button on the right, then click Execute now.
Click the Generate Code button in the lower-right corner.
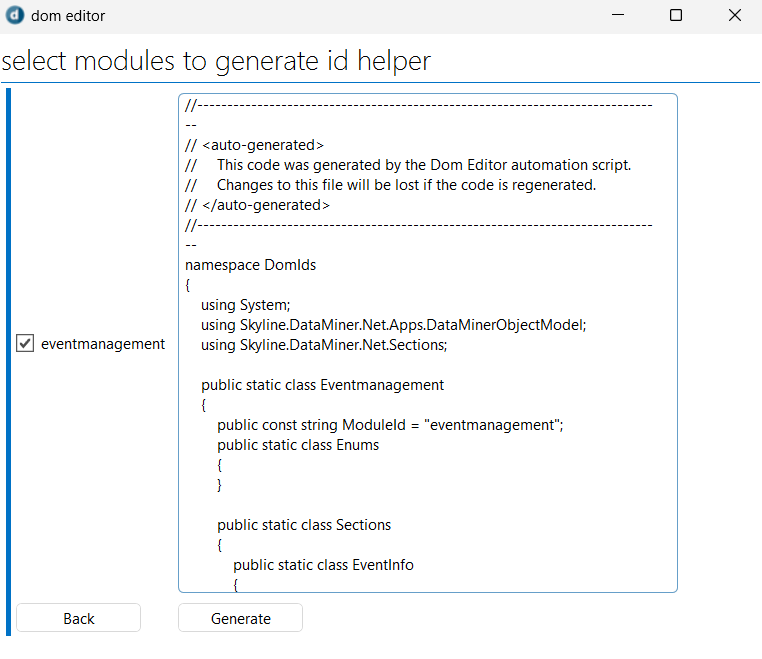
Select the checkbox in front of the eventmanagement module.
Click the Generate button.
Copy the generated code to the clipboard.
Step 3: Use the generated code
Create a new Automation script solution
Create a new Automation script solution using Visual Studio and DIS.
While you could develop the Automation script in Cube, creating an Automation script solution in Visual Studio will give you the advantage of having access to all the features of Visual Studio and DIS.
To create an Automation script solution:
In Visual Studio, select File > New > Project.
Search for DataMiner Automation Script Project (Skyline Communications) in the template search box and click Next.
Note
If you follow Kata #57, the project template DataMiner Automation Script Solution (Skyline Communications) will be mentioned instead, but this project template is no longer available and has been replaced with the above-mentioned template.
Use
Generate Kata DOMas the name for your solution.Choose a location to save the Automation script solution and click Next.
Specify Generate Kata DOM Instances as the name of your Automation script.
Fill in your name as the author, and click create.
Add the generated code to your solution
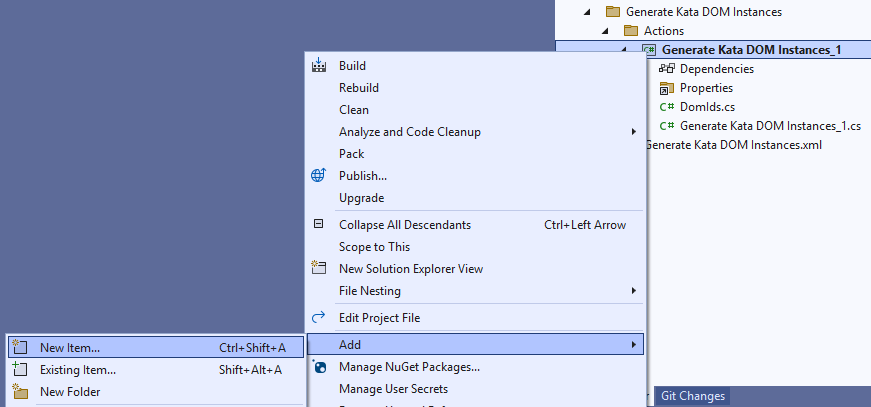
Right-click the Generate Kata DOM Instances_1 project in the Solution explorer and select Add > New Item.
Tip
If you have trouble accessing the project in the Solution Explorer, refer to Visual Studio troubleshooting.
Enter DomIds as the name.
Replace the content of the DomIds.cs file with the code you copied from the DOM Editor.
Open the Generate Kata Dom Instances_1.cs file to edit the main script code.
Replace the content of the Generate Kata Dom Instances_1.cs file with the code below.
namespace GenerateKataDOMInstances_1
{
    using System;

    using DomIds;

    using Skyline.DataMiner.Automation;
    using Skyline.DataMiner.Net.Apps.DataMinerObjectModel;
    using Skyline.DataMiner.Net.Sections;

    /// <summary>
    /// Represents a DataMiner Automation script.
    /// </summary>
    public class Script
    {
        public void Run(IEngine engine)
        {
            DateTime kataTime = new DateTime(2025, 01, 03, 10, 00, 00, DateTimeKind.Local);

            DomHelper domHelper = new DomHelper(engine.SendSLNetMessages, DomIds.Eventmanagement.ModuleId);

            for (int week = 0; week < 52; week++)
            {
                DomInstance domInstance = new DomInstance
                {
                    DomDefinitionId = DomIds.Eventmanagement.Definitions.Event,
                };

                domInstance.AddOrUpdateFieldValue(DomIds.Eventmanagement.Sections.EventInfo.Id, DomIds.Eventmanagement.Sections.EventInfo.EventName, $"Kata {week + 1}");
                domInstance.AddOrUpdateFieldValue(DomIds.Eventmanagement.Sections.EventInfo.Id, DomIds.Eventmanagement.Sections.EventInfo.Start, kataTime);
                domInstance.AddOrUpdateFieldValue(DomIds.Eventmanagement.Sections.EventInfo.Id, DomIds.Eventmanagement.Sections.EventInfo.End, kataTime.Add(TimeSpan.FromHours(1)));

                domHelper.DomInstances.Create(domInstance);

                kataTime = kataTime.Add(TimeSpan.FromDays(7));
            }
        }
    }
}
Important
Visual studio will show some errors if you are not using the latest version for some of the NuGet packages. To resolve this:
Open the NuGet package manager from the tools menu: Tools > Nuget Package Manager > Manage NuGet Packages for Solution.
Go to the Updates tab and select the Skyline.DataMiner.Dev.Automation package.
On the right-hand side, select version 10.3.10 (or higher) and click the Install button.

You can spot the different places in the code where the generated code is used through the DomIds prefix. Using the generated code, you can write code more quickly, while making it more readable at the same time. Without the generated code, the code would contain a series of GUIDs.
Note
The DomIds namespace prefix does not have to be present in the body of the code. It is only added in this tutorial to clearly indicate where the generated code is used.
Publish the script
When the Automation script is complete, it needs to be published to the DataMiner System. You can do so using the built-in publish feature of DIS. Make sure that DIS can connect to the DataMiner System you want to upload your script to. You will need to edit the DIS settings so the DMA is selectable.
In the Solution Explorer, double-click Generate Kata DOM Instances.xml.
At the top of the code window, click the arrow next to the Publish button, and select the DataMiner System you want to upload the script to.
Step 4: Test the code
Go to the Event Management application.
Verify whether no entries are present.
In Cube, execute the Generate Kata DOM Instances script.
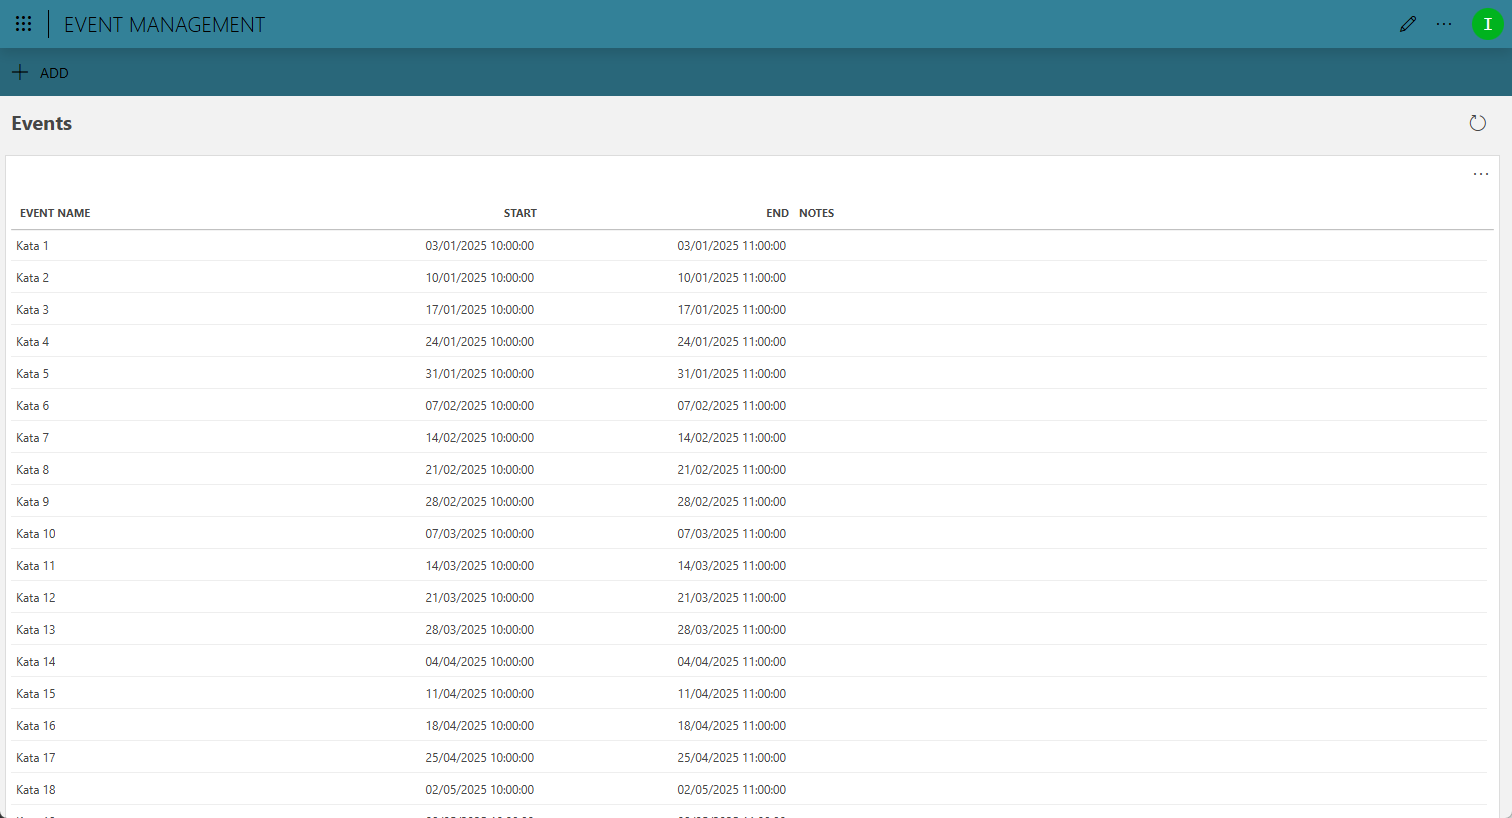
A series of events will be generated and shown in the app.
Important
The events table is not updated automatically. To refresh the table, use the refresh button in the upper right corner.
