Building a GQI custom operator that calculates a duration
In this tutorial, you will learn how you can create a GQI custom operator that can be used to calculate a duration.
Expected duration: 15 minutes.
Tip
See also:
- Configuring a custom operator for a query
- Kata #5: Transform data with GQI on DataMiner Dojo

Note
This tutorial uses DataMiner version 10.3.9.
Prerequisites
A DataMiner Agent connected to dataminer.services
If you are using a DataMiner version prior to DataMiner 10.3.0 [CU10]/10.4.1, make sure the GenericInterface soft-launch option is enabled.
Tip
Basic knowledge of GQI extension development.
Overview
- Step 1: Get a quick start from the catalog
- Step 2: Open the custom operator in Visual Studio
- Step 3: Provide the input arguments for the custom operator
- Step 4: Create a new column to show the duration
- Step 5: Add the duration to the added column
- Step 6: Use the data source
Step 1: Get a quick start from the catalog
Go to https://catalog.dataminer.services/details/package/5408
Deploy the catalog item to your DataMiner Agent by clicking the Deploy button.
Step 2: Open the custom operator in Visual Studio
Open Visual Studio and select Extensions > DIS > DMA > Connect to connect DIS to your DMA.
Select Extensions > DIS > DMA > Import Automation Script.
Select Duration - GQIO and click Import.
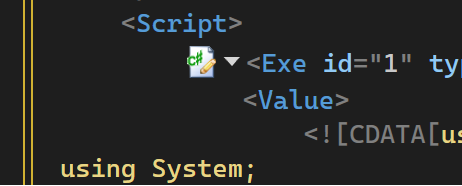
Go to the C# code of the imported Automation script by clicking the C# icon.
Note
If certain types cannot be found in the file, verify if the Skyline.DataMiner.Dev.Automation NuGet package has the correct version. Go to Tools > NuGet Package Manager > Manage NuGet Packages for Solution. Select Skyline.DataMiner.Dev.Automation, and verify whether the version installed for the current project is at least 10.3.2.
Step 3: Provide the input arguments for the custom operator
This is the first step to implement the custom operator.
Add the IGQIInputArguments interface to the DurationOperator class.
public class DurationOperator : IGQIInputArgumentsImplement the GetInputArguments method to provide GQI with the arguments that the user should fill in.
public GQIArgument[] GetInputArguments()
{
   return new GQIArgument[] { _startColumnArg, _endColumnArg };
}
Implement the OnArgumentsProcessed method to store the values that the user has filled in through the arguments.
public OnArgumentsProcessedOutputArgs OnArgumentsProcessed(OnArgumentsProcessedInputArgs args)
{
   _startColumn =  args.GetArgumentValue(_startColumnArg);
   _endColumn = args.GetArgumentValue(_endColumnArg);
   return default;
}
Step 4: Create a new column to show the duration
Add the IGQIColumnOperator interface to the DurationOperator class.
public class DurationOperator : IGQIInputArguments, IGQIColumnOperatorImplement the HandleColumns method to let GQI know that a new column should be added.
public void HandleColumns(GQIEditableHeader header)
{
   header.AddColumns(_durationColumn);
}
Step 5: Add the duration to the added column
Add the IGQIRowOperator interface to the DurationOperator class.
public class DurationOperator : IGQIInputArguments, IGQIColumnOperator, IGQIRowOperatorImplement the HandleRow method to calculate the duration and set that value in the cell matching the new duration column.
public void HandleRow(GQIEditableRow row)
{
   var start = row.GetValue<DateTime>(_startColumn);
   var end = row.GetValue<DateTime>(_endColumn);
   var duration = end - start;
   row.SetValue(_durationColumn, duration);
}
Step 6: Use the data source
Open the Dashboards app and create a new dashboard.
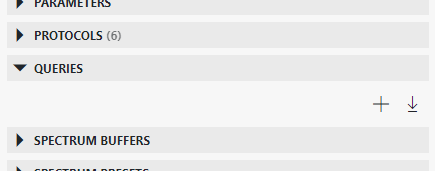
In the Data pane on the right, go to Queries and click the "+" icon to create a query.
Select a data source that has at least two columns containing datetime values.
Note
If you do not have an applicable data source, you can download one from the catalog.
Add a custom operator to the query and select Duration.
Fill in the input arguments matching with the necessary columns.
Drag the query to the dashboard.
Select a table visualization for the component.
The table should now also contain a Duration column containing the calculated duration.