Creating a completely new dashboard
On the home page, click Start with a new blank dashboard.
Alternatively, you can also select a folder or dashboard in the list of dashboards on the left and select New dashboard in the right-click menu.
Enter the name of the dashboard.
To specify the folder that should contain the dashboard, specify the folder name in the Location box, or select the folder in the tree view below this box.
If you created a dashboard by first selecting a folder in the list, this folder will automatically be selected.
You can also create folders at this point in the dashboard creation, by hovering the mouse pointer over the folder in the tree view where you want to create a folder and clicking the + icon. Then specify the folder name and click the check mark icon.
In the Security box, select whether other users should be able to view and edit the dashboard.
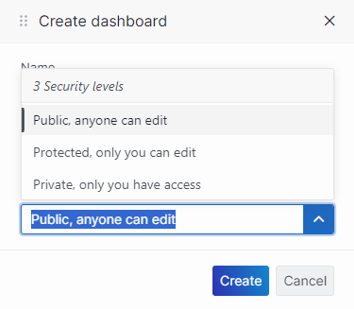
Setting dashboard security level in DataMiner 10.4.5Note
- Once the dashboard has been created, you can further refine which users have which level of access in the dashboard options. See Changing dashboard settings.
- The built-in Administrator account always has full access to all dashboards.
Click Create or OK, depending on your DataMiner version.
Optionally, fine-tune the dashboard settings. See Changing dashboard settings.
Optionally, fine-tune the dashboard layout. See Configuring the dashboard layout.
Configure the necessary components. See Configuring components.
When the dashboard is ready, in the top-right corner of the screen, click the “x” icon.
Note
The following characters are not allowed in the name of a dashboard or dashboard folder: / \ : ; * ? < > | °
If you do specify a backslash (“\”) in a folder name, this will not become part of the folder name. Instead, a subfolder will be created, with the characters after the backslash as its name.