Query filter
Note
This feature is in preview until DataMiner 10.3.9/10.4.0. If you use the preview version of the feature, its functionality may be different from what is described below. For more information, see Soft-launch options.
Available from DataMiner 10.3.9/10.4.0 onwards. Prior to this, the component is available in soft launch if the soft-launch option ReportsAndDashboardsPTP is enabled.
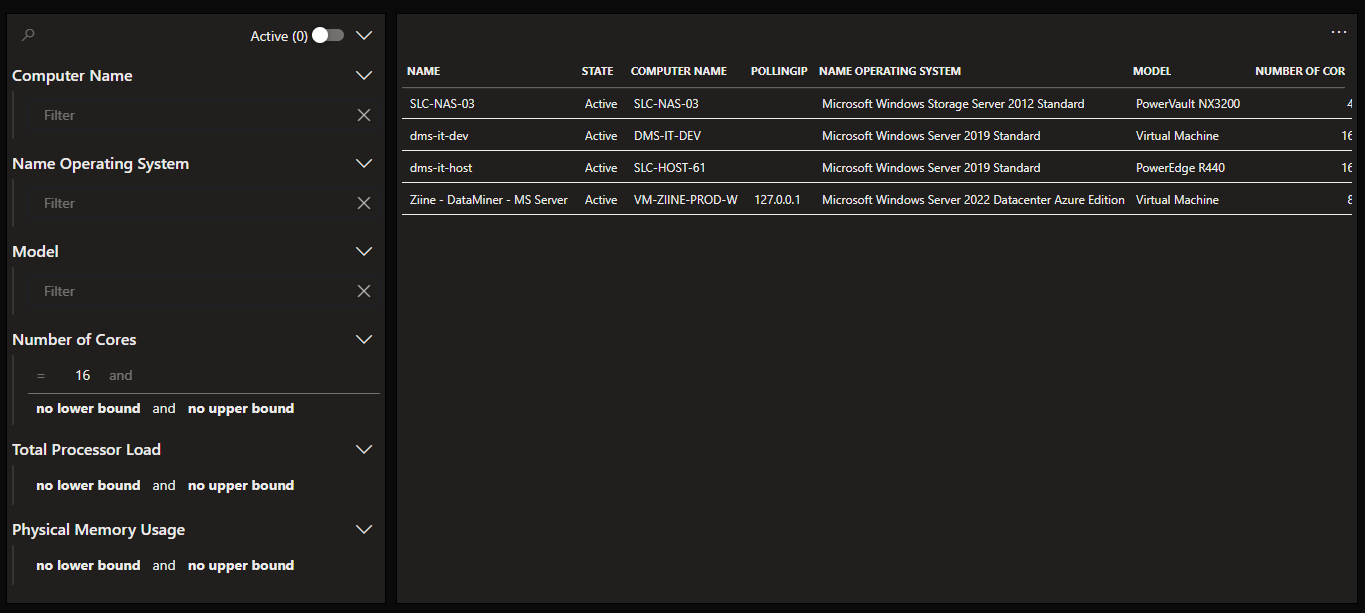
This component allows the user to filter and refine data based on specific criteria. It can be used as an intermediary between the raw dataset and other components. Depending on the data type of the column, the filter can manifest as a text input field, range filter, list of checkboxes, etc. It generates an enhanced query that incorporates additional filter nodes, stemming from the original query result.
From DataMiner 10.4.0 [CU12]/10.5.3 onwards, you can use a trigger component to refresh the filtered data.
Query filter component in DataMiner 10.4.5
Configuring the component
Apply the necessary data. See Adding data to a component.
Note
The assigned data name will be visible in the lower right corner of the query filter component (e.g. Query filter 1).
Optionally, fine-tune the component layout. See Customizing the component layout.
Optionally, customize the following component options in the Component > Settings pane:
WebSocket settings: Allows you to customize the polling interval for this component. To do so, clear the checkbox in this section and specify the custom polling interval.
Filter assistance: Determines whether the column filters will assist you by providing suggestions and other information such as units, step size, etc. By default disabled.
Note
Depending on the size of your data, enabling this setting may impact performance.
Allow color mode: Determines whether conditional coloring can be applied within the query filter. By default enabled.
In the top-right corner of the query filter component, there is an Active (x) toggle button. If you enable this button, the component displays only the active filter options, and the button itself indicates the number of active options.
Next to columns containing discrete values of type string or number, you can find a button that allows you to change how the possible values are displayed when you hover your mouse over it:
Select the Toggle free form button to display a text box in which you can type a value.
Select the Toggle checklist button to list all possible values as a checklist.
When a node edge graph is exclusively filtered by node, edges will only be highlighted when both the source and destination are highlighted. Alternatively, when a node edge graph is exclusively filtered by edge, the source and/or destination attached to the highlighted edge segments will be highlighted.
Linking a component to the query filter
When linked to a component using a feed, the query filter component allows real-time filtering of that associated component.
Two methods exist for linking a query filter:
Passing queries as data
After configuring the query filter component:
Add a table component to your dashboard.
Note
In this example, we are using a table component. However, any component capable of receiving a query can be linked to the query filter.
From DataMiner 10.3.0 [CU21]/10.3.0 [CU9]/10.4.12 onwards, go to All available data > Components > Query filter # > Filters > Queries in the Data pane and drag it onto the table component. Prior to DataMiner 10.3.0 [CU21]/10.3.0 [CU9]/10.4.12, use All available data > Feeds > Query filter # > Queries in the Data pane instead.
Each time you change the query filter, a new query is passed to the table, displaying only rows that match the filter settings.
Passing query columns as filter
After configuring the query filter component:
Add a table component to your dashboard.
Note
In this example, we are using a table component. However, any component capable of receiving a query can be linked to the query filter.
In the Data pane, go to All available data > Queries. Drag the query you created earlier onto the table component.
In the Data pane, go to All available data > Components > Query filter # > Filters and drag Query columns onto the yellow filter drop area of the table component. Prior to DataMiner 10.3.0 [CU21]/10.4.0 [CU9]/10.4.12, you can find Query columns in the All available data > Feeds > Query filter # > Filters section of the Data pane instead.
Each time you change the query filter, the data inside the table is filtered according to the filter settings in the query filter. No new query is passed to the table. The latter keeps displaying all rows, but those that do not match the filter will turn gray.
Conditional coloring
If the Allow color mode setting is enabled, a color marker icon will be available in the top-right corner of the filter query component.
Click the color marker icon to see a color legend to the right of the filter options. For each option, you can configure a custom color (default color: green).
Note
When you deactivate the Allow color mode setting, any previously configured colors remain visible and applied.