Registering a new version of a connector in the Catalog
This tutorial demonstrates how to add a new version to a Catalog item using the Catalog API. It builds on the example from the tutorial Registering a new connector in the Catalog, so unless you already know how to register a new Catalog item and have done so already, we recommend that you follow that tutorial first.
While the tutorial uses the example of a connector, registering a new version for a different type of Catalog item is very similar.
Expected duration: 15 minutes
Note
If you are interested in reusing Skyline's pre-made pipelines, which include quality-of-life features and a robust quality gate, refer to the From code to product tutorial. Alternatively, if you would prefer not to use Postman and HTTPS directly, you can try our platform-independent tooling.
Prerequisites
An organization key or account with the Owner role in order to access/create organization keys.
A registered Catalog item.
Tip
For an example of how to register an item, see Registering a new connector in the Catalog.
Overview
- Step 1: Register the Catalog version URL
- Step 2: Configure the authentication header
- Step 3: Register the Catalog version body
- Step 4: Register the version
Step 1: Register the Catalog version URL
To register a new version of a connector, you will need to use the register version call from the Catalog API:
Create a new HTTP request using the POST HTTP method and the URL
https://api.dataminer.services/api/key-catalog/v2-0/catalogs/{catalogId}/register/version.As the catalogId route parameter, fill in the Catalog ID of the connector.
Note
If you followed the previous tutorial, this is the ID that was returned in the last step. If you are registering a new version for a different Catalog item, you can find it by navigating to its details page in the Catalog and checking the last part of the URL.
For example:

Step 2: Configure the authentication header
The Catalog version register API call is authenticated using an organization key, which you can obtain in the Admin App. This key identifies your organization and will make sure your Catalog item is registered under the correct organization.
Important
You need to have the Owner role in order to access/create organization keys. See Changing the role of a dataminer.services user for information on how to change a role for a user.
In the Admin app, under Organization in the sidebar on the left, select the Keys page.
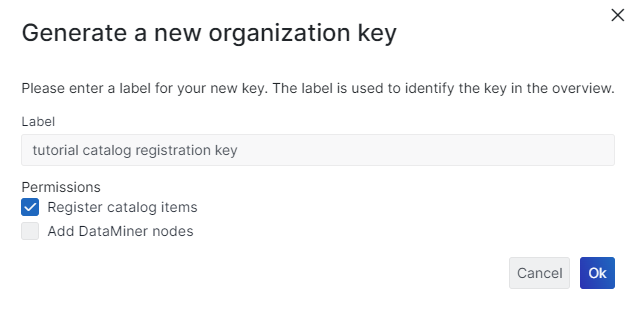
At the top of the page, click New Key.
Configure the key with a label of your choice and the permission Register catalog items.

Copy the key and use it as the value in the Ocp-Apim-Subscription-Key header.

Step 3: Register the Catalog version body
The body of the version registration request requires a file containing the connector. For this, you will be using the Skyline.DataMiner.CICD.Tools.Packager NuGet to create a .dmprotocol package.
Navigate to Example Rates connector and download the connector.
Open a terminal window and run the command below to install the packager.
dotnet tool install --global Skyline.DataMiner.CICD.Tools.Packager --version 2.0.3Run the following command to create a .dmprotocol package, adapting the directory paths as needed.
dataminer-package-create dmprotocol "C:\Tutorials\Catalog Registration\SLC-C-Example_Rates-Custom-1.0.1.X" --name catalog_registration_tutorial --output "C:\Tutorials\Catalog Registration\Packages"In this example command, the first version of the Example Rates connector is registered.
Add the following to the multipart/form-data body of the request:
- The dmprotocol file you created earlier in a key of type File with name file.
- The version number in a key of type Text with name versionNumber.
- The version description in a key of type Text with name versionDescription.

Step 4: Register the version
Execute the call.
When the item has been registered correctly, you will receive an HTTP Status 200 OK response, with the Catalog ID and artifact ID in the body of the response.
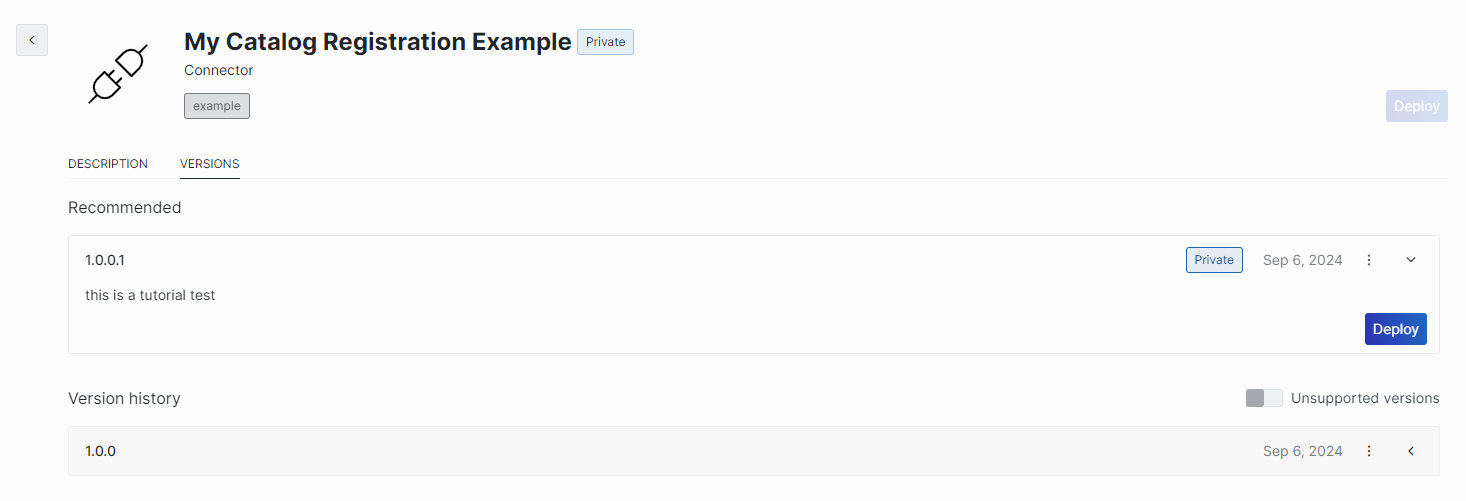
In the Catalog, you will now be able to see the version you registered in the versions tab for the item.
