Getting Started with the DIS MIB Browser
Tip
See also: Tutorial: Exploring the DIS MIB Browser
Note
All images displayed on this page show DataMiner Integration Studio version 2.44.
Prerequisites
-
Tip
For more information on how to install DIS, see Prerequisites.
Basic knowledge of network management concepts, especially MIB and SNMP
Launching the MIB Browser
After installing the DIS extension, open Visual Studio and go to Extensions > DIS > Tool Windows > DIS MIB Browser.
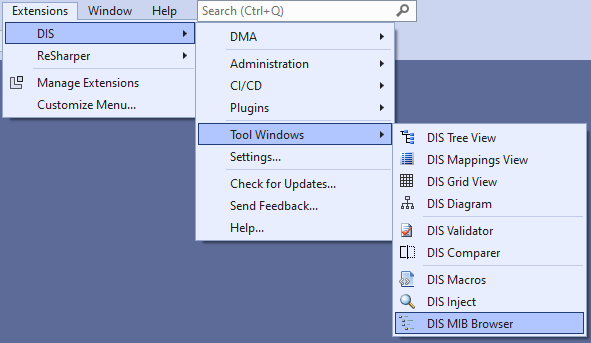
By default, the DIS MIB Browser window will open undocked. Dock it just as you would dock any other tool window in Visual Studio.
Tip
For an overview of the three main tabs in the DIS MIB Browser tool window, see DIS MIB Browser.
Loading MIB files
For every MIB file you want to load into the MIB tree, go to the Files tab, click Add, locate and select the file, and click Open.
Note
The MIB browser allows you to import files with the following extensions: mib, smi, and txt.
If, for any reason, the list contains a MIB file that does not have to be loaded into the MIB tree, then clear the Active checkbox in front of it.
Click Load Files to load the listed MIB files into the MIB tree.
When not all MIB files could be loaded, an error message will be shown.
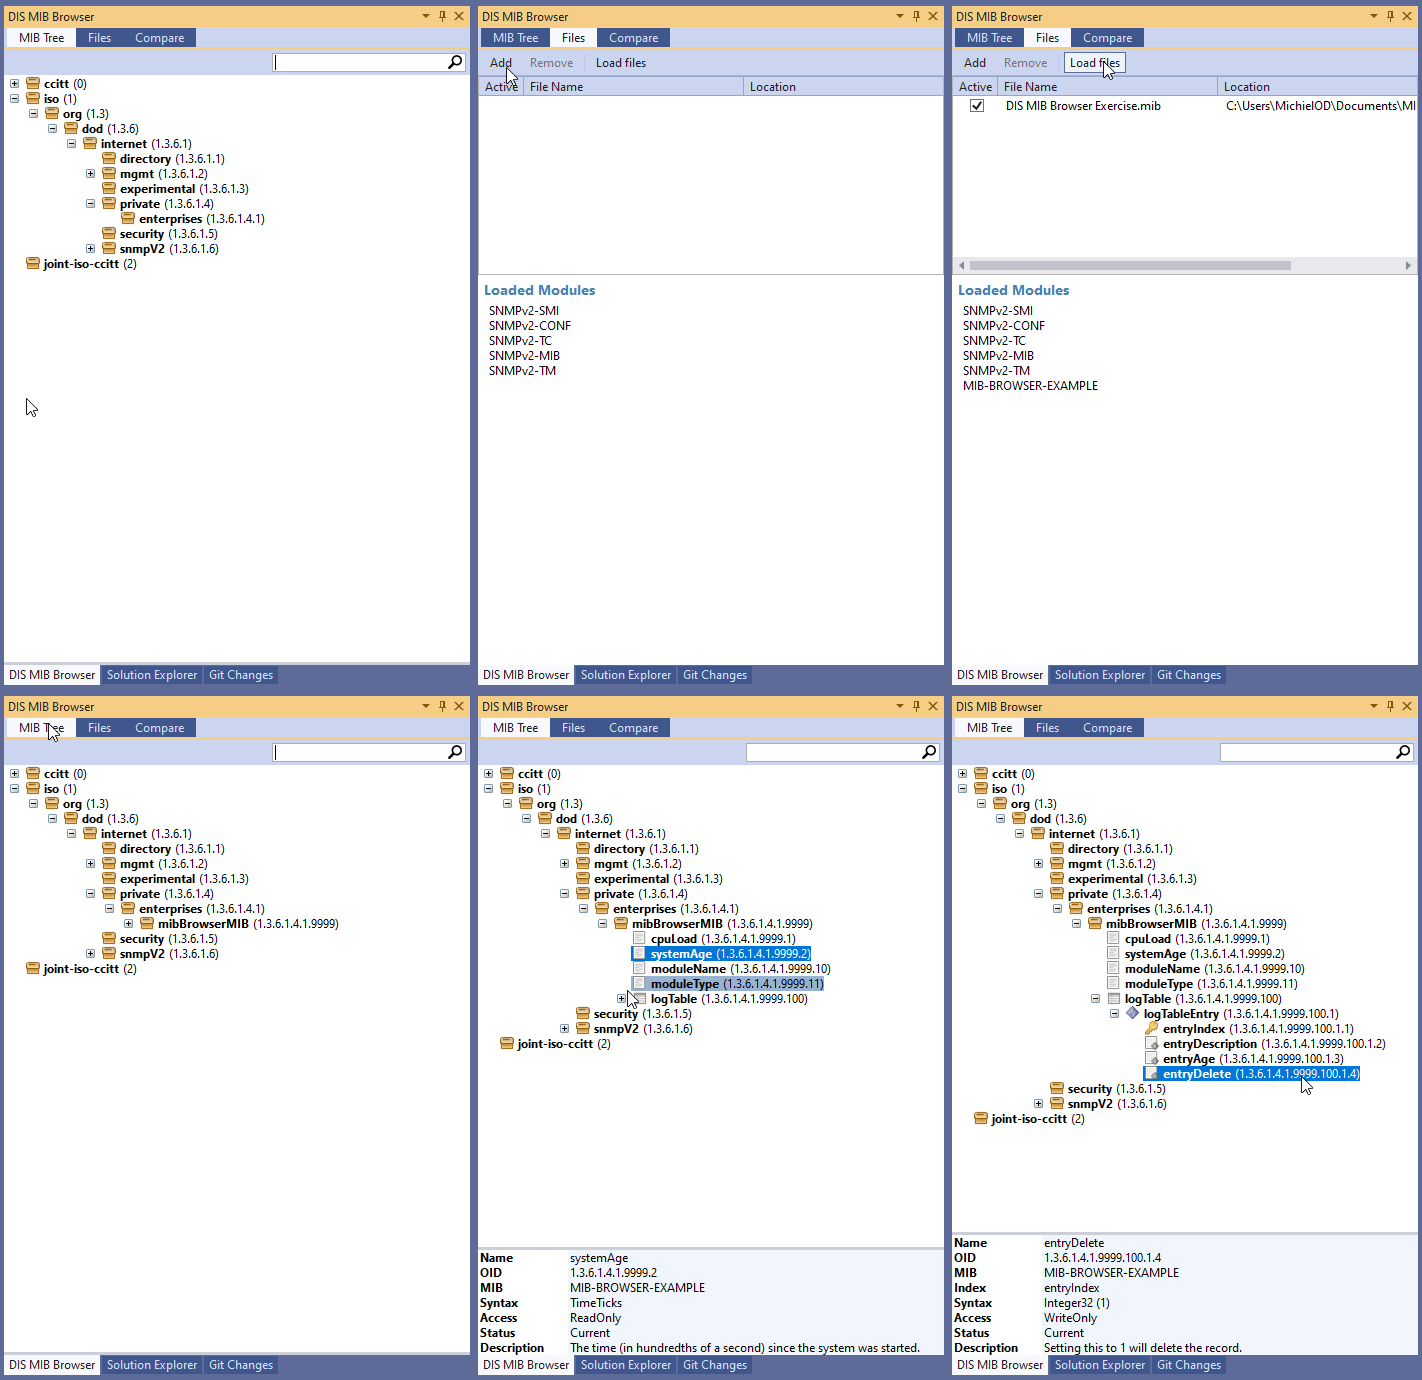
When you want to remove files from the list, select them and click Remove. To select more than one file, click one, and then click another while holding down the Ctrl key. To select a list of consecutive files, click the first one in the list and then click the last one while holding down the Shift key.
Generating parameters
Generating an individual parameter
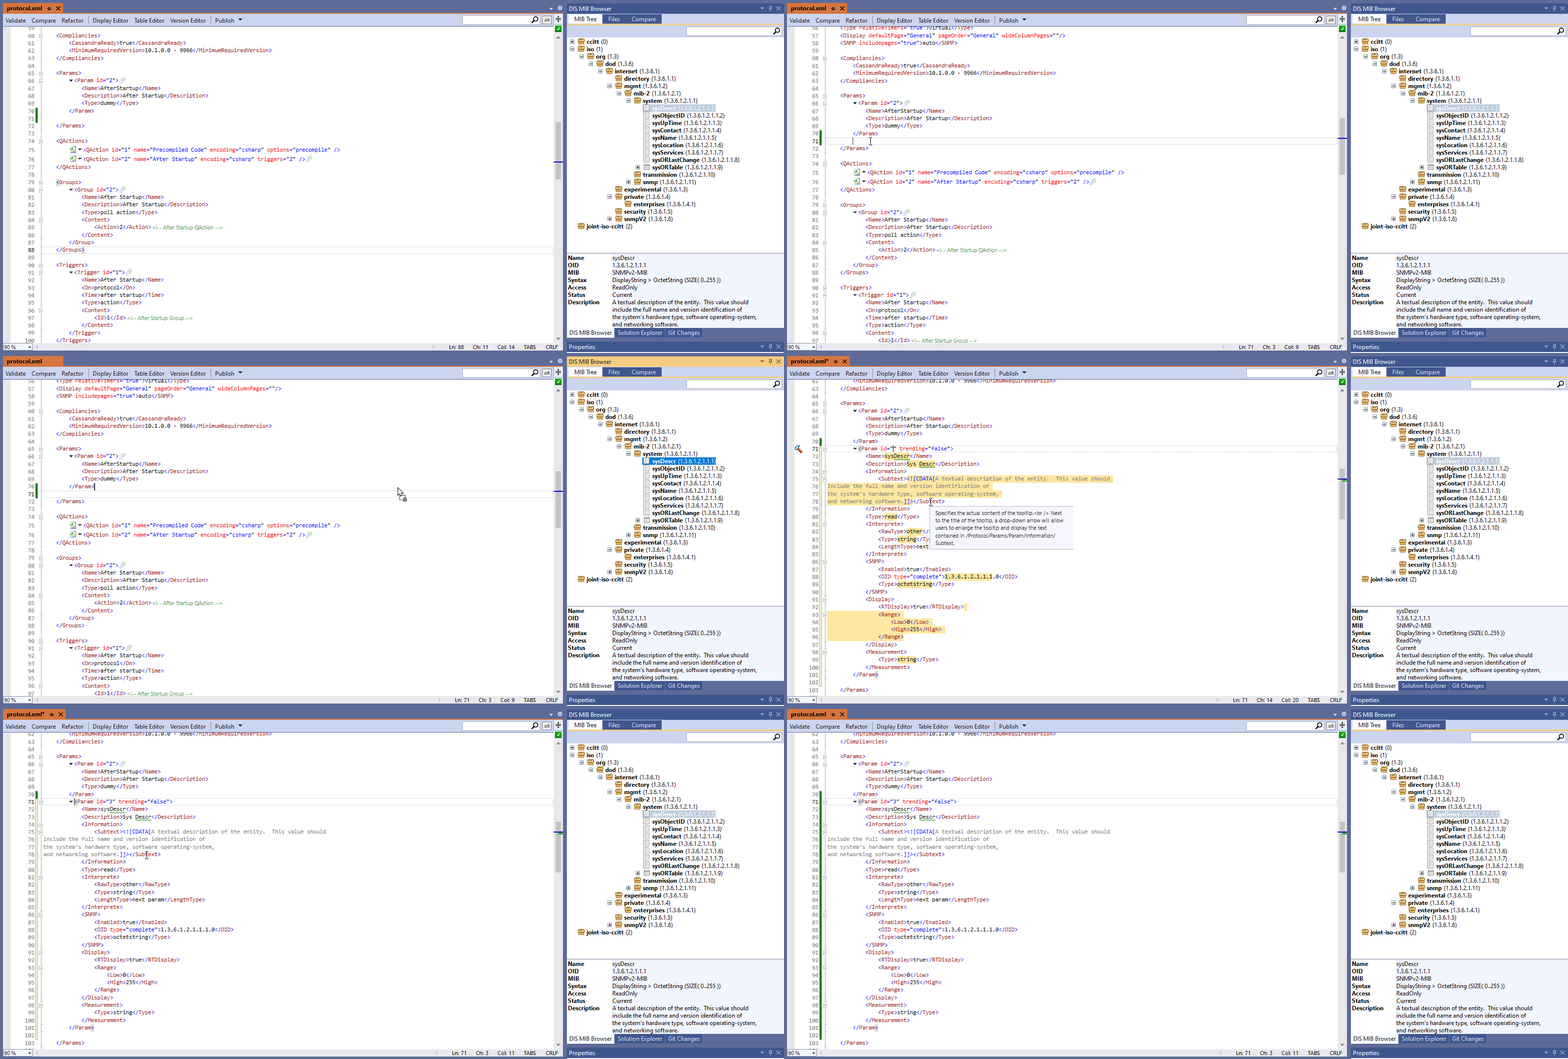
To generate a single parameter, drag a parameter from the MIB Tree and drop it into the connector at your chosen location.
The DIS tool will automatically retrieve the relevant MIB data and populate the parameter accordingly.
Note
- When you drag and drop a column parameter, the table name will only be added if it is not already included.
- If the SNMP name of a table contains "Table", this string will be excluded from the column parameter name and description. This prevents table names from being duplicated in column parameter names.
Generating parameters in bulk
In larger projects, generating multiple parameters simultaneously may be beneficial:
Right-click your chosen location within the XML file.
Select Generate Parameters.
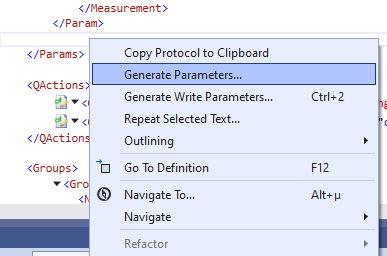
This action opens the Generate Parameters Wizard.
Specify the necessary information:
Input type: The default is MIB.
Item selection: Choose the parameters you want to generate from the list of available items. For table generation, the wizard auto-includes columns, but you can omit any unnecessary ones.
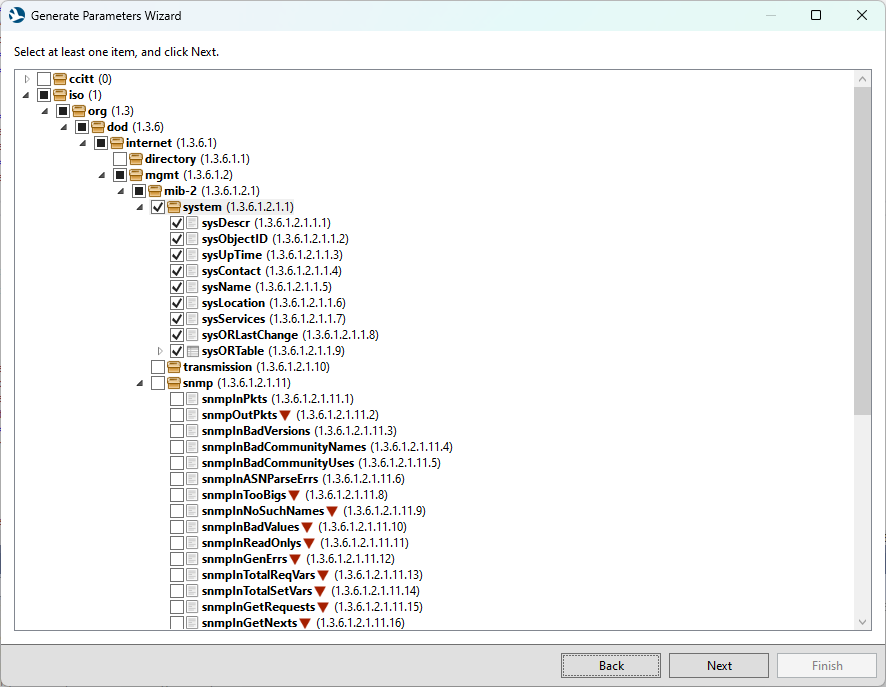
Parameter ID settings: Define a starting ID for the generated parameters. Adjust the offset for write parameters.
ID validity check: A list of all parameters about to be generated is displayed, highlighting any potential ID conflicts. Modify IDs if needed.
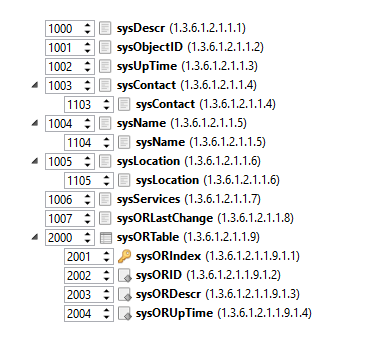
Note
After this point, you can skip additional settings and generate parameters immediately by selecting Finish.
Timers: A list of all timers in the connector is displayed. You can modify the current timers or add new ones.

Groups: The wizard suggests groups based on your current selections. You can modify these groups or add new ones. If applicable, select an appropriate timer for the groups.

Group assignment: Decide which group each parameter belongs to.
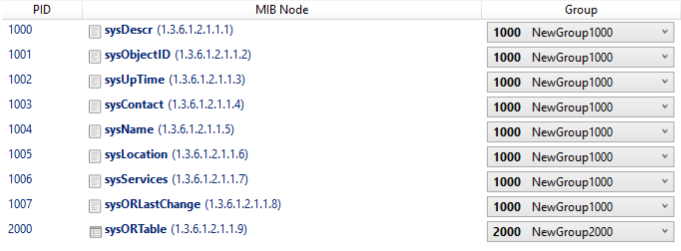
Select Finish in the lower-right corner to generate your parameters, along with their respective groups and timers.
Comparing the connector with MIB Files
Your SNMP connector should always be up-to-date with the latest MIB files. The DIS MIB Browser's Compare tab offers an effective way to identify any disparities between your connector and the MIB files.
In the DIS MIB Browser, go to the Compare tab.
Click Refresh to synchronize the data.
Observe any potential differences between the loaded MIB files and your connector:
The top list displays parameters found in the MIB files that are missing in your connector.
The bottom list displays parameters found in your connector that are missing in the loaded MIB files.
Note
You can copy and share any differences by selecting Copy to Clipboard.
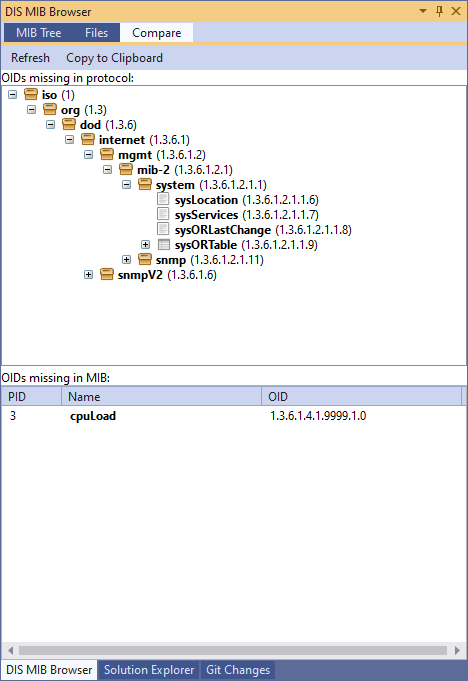
If there are parameters missing from your connector, use the drag and drop feature to transfer them from the top list to the connector.
This action will enable the DIS MIB Browser to populate various parameter details automatically, streamlining the integration process.