Facilities
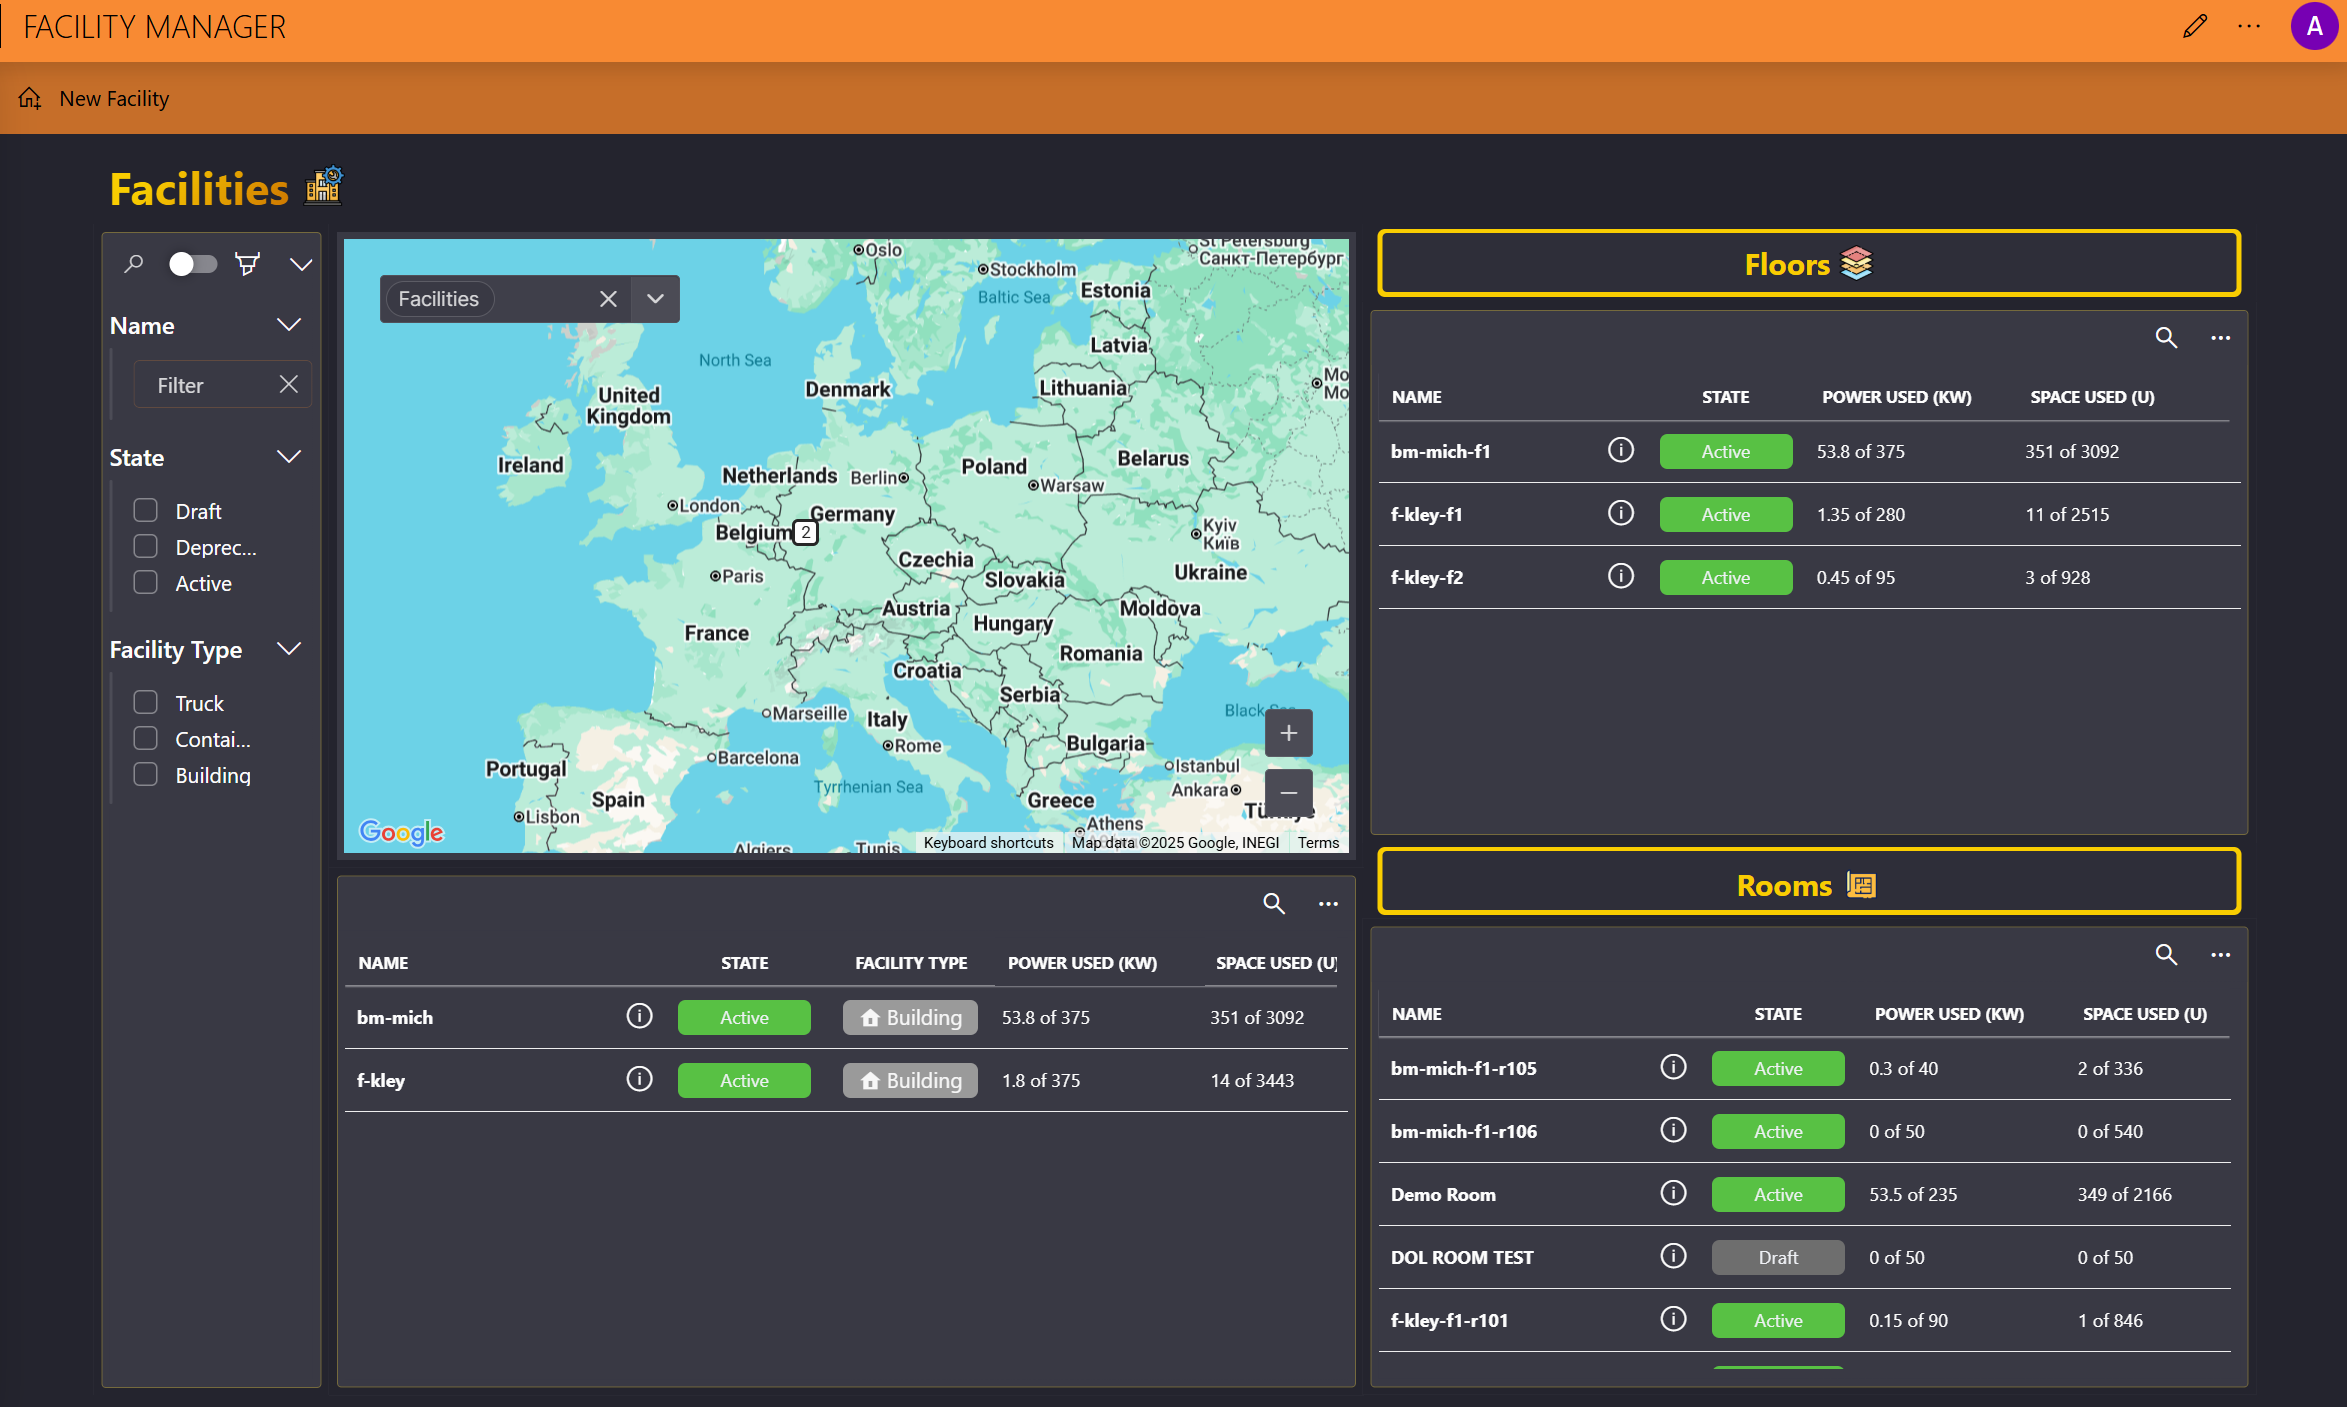
The Facilities page of the Facility Manager app allows you to create, edit, and delete facilities, floors, and rooms. It displays an overview of the configured facilities on a map, based on defined geographic coordinates (latitude and longitude).
On the left, it includes a filter panel. Selecting a facility also filters the lists of floors and rooms accordingly.
This page is where you will typically begin your configuration, first adding facilities, then adding floors, and finally adding rooms.
Note
To take full advantage of the map component, you will need to configure a valid Google Maps API key on the About page of the app.
Adding a new facility
In the upper-left corner of the Facilities page, click New Facility.
Specify the following information:
- The name of the facility.
- The facility type: Building, Container, or Truck.
- The ID of the facility.
Click Save.
In the table below the map, click the details button (ⓘ).
This will open the Facility details pane.
Click the pencil icon in the section you want to edit, and configure the metadata you want.
You can configure the location's description, latitude, longitude, country, city, address, and zip code.
When the facility is fully configured, click the Activate button.
As long as this button has not been clicked, the facility is considered a draft. After it has been clicked, you can remove the facility again by clicking the Deprecate button.
Adding a new floor
To add a floor to a facility, in the Facility details pane, click the Add Floor button at the top.
Specify the floor name, and click Save.
Close the Facility details pane.
To further configure the floor, in the Floors table, click the details button (ⓘ) for the floor.
You can then:
Click the pencil icon in the Floor Info section to specify a description for the floor.
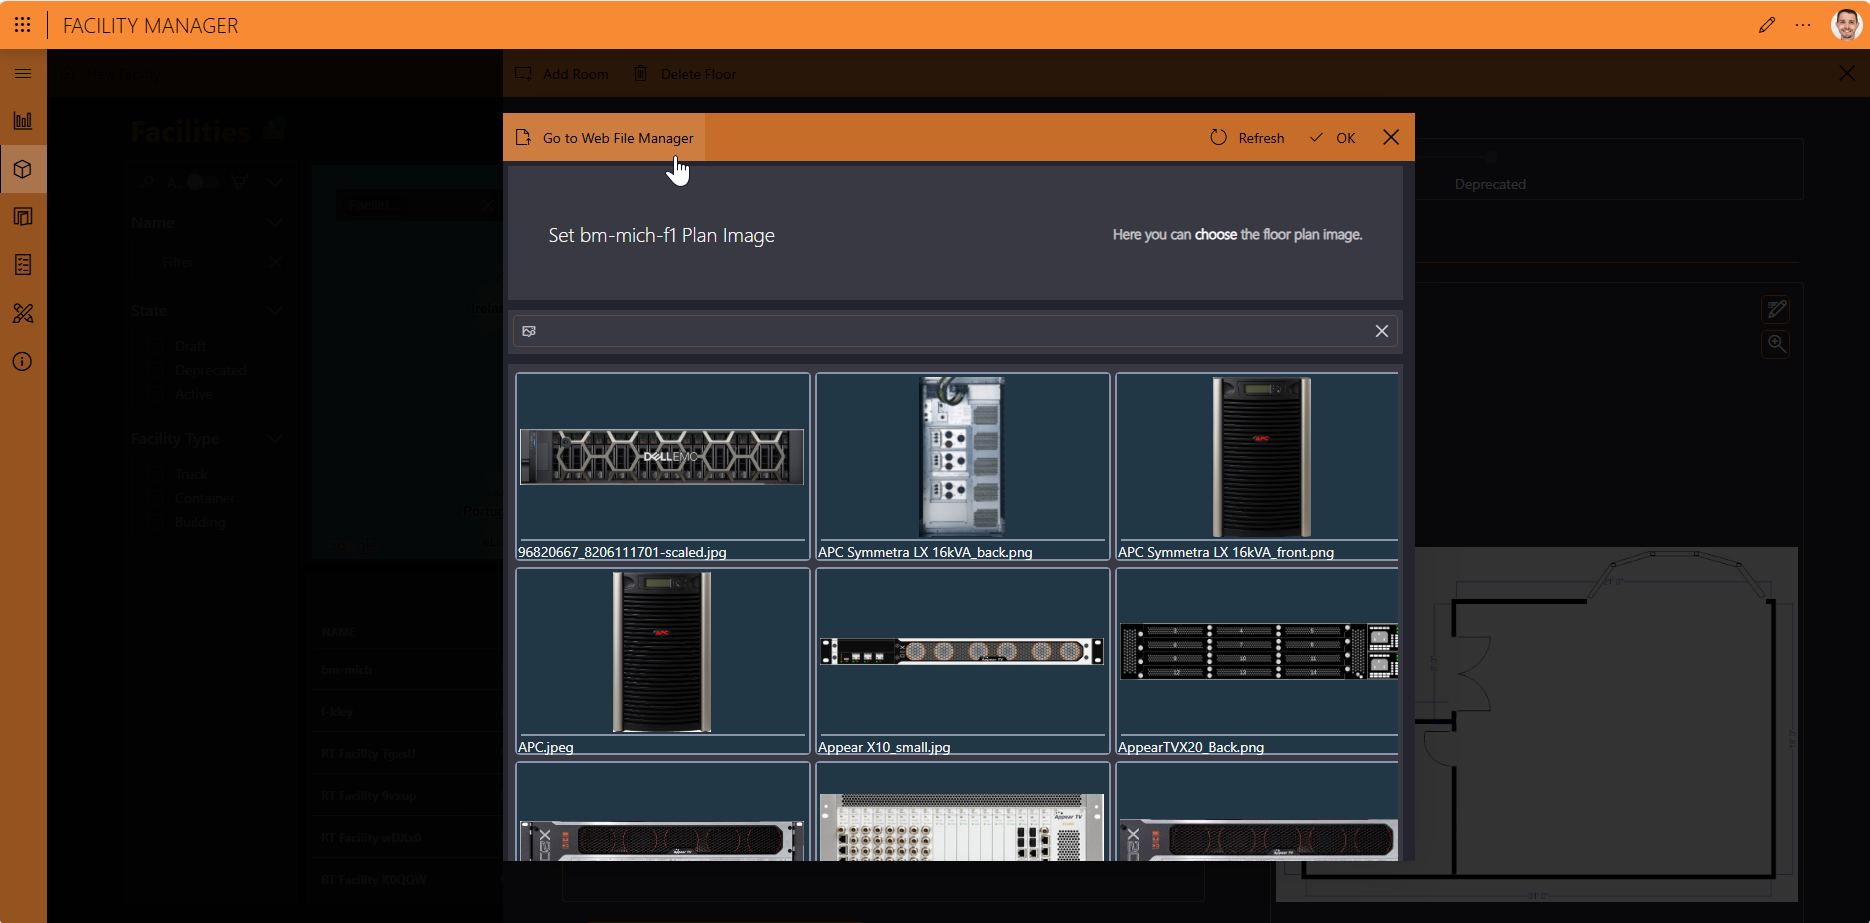
Click the pencil icon in the Floor Plan section to add an image as the floor plan.
To have additional images available for selection, upload them using the Web File Manager app, which you can access directly via the button in the upper-left corner.
As soon as floors have been added to the facility, you will also be able to add rooms from the Floor details pane.
Adding a new room
In the Floors table on the Facilities page, click the details button (ⓘ) for the floor where you want to add a room.
This will open the Floor details pane.
In the upper-left corner of the pane, click Add Room.
Specify the name of the room as well as its width and depth, and click Save.
The width and depth of the room are required to use the room in the Room Designer.
Close the Floor details pane.
In the Rooms table, click the details button (ⓘ) for the room.
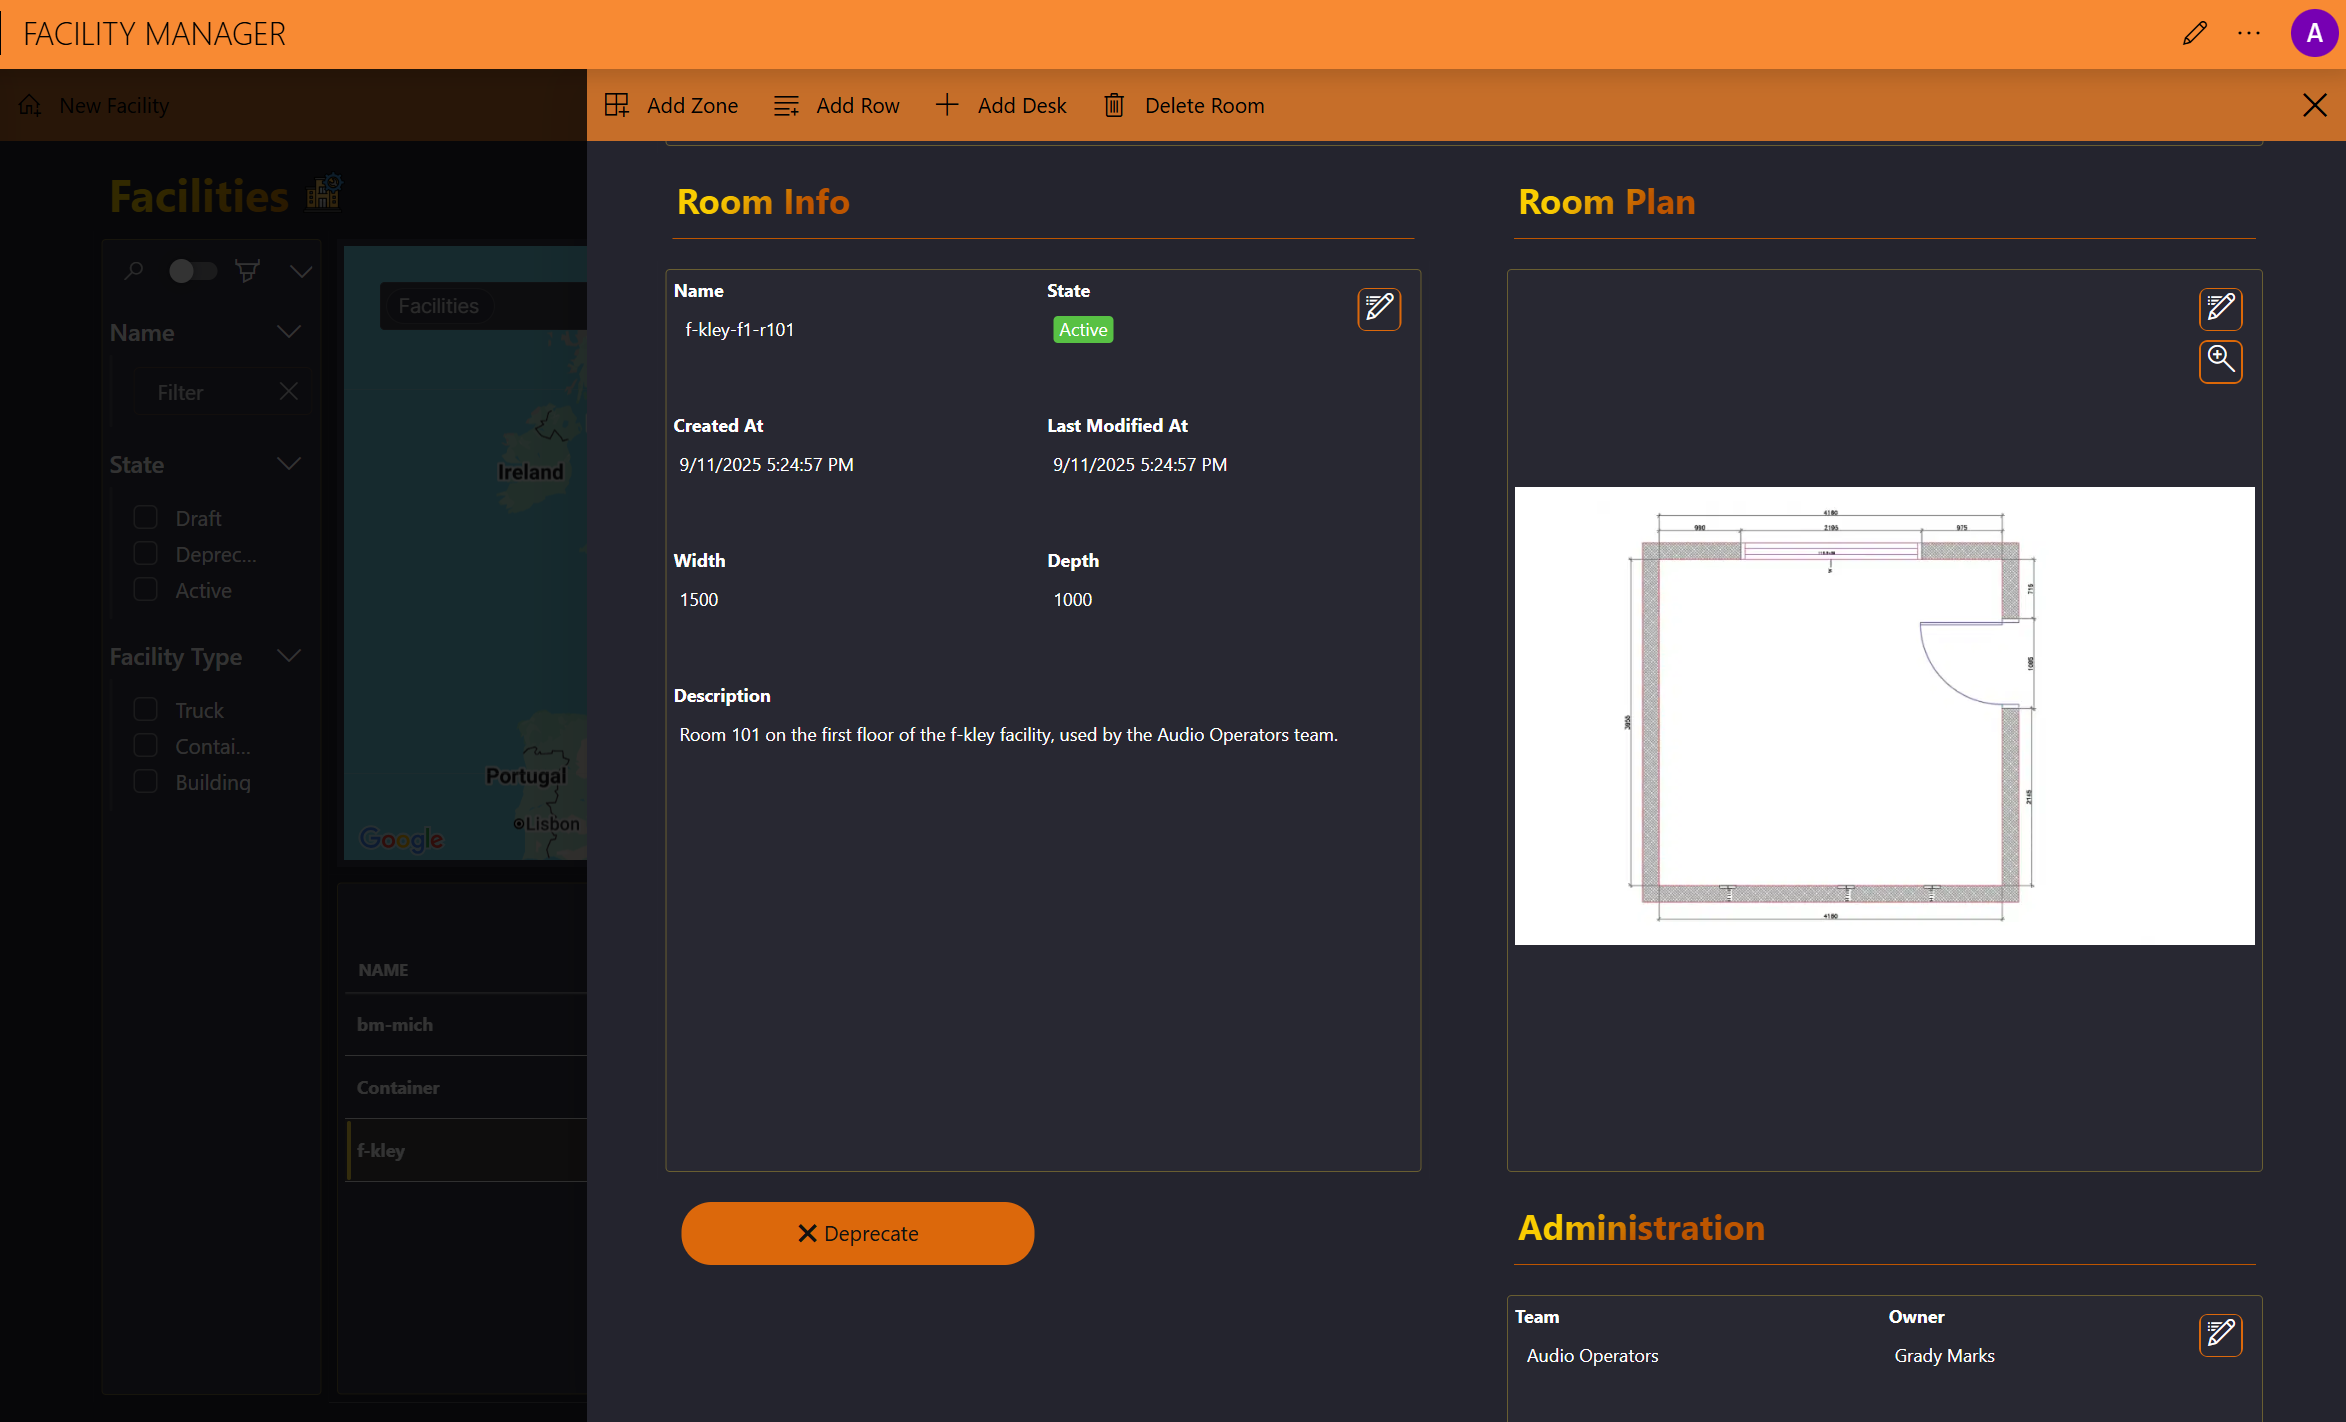
This will open the Room details pane.
Configure the room as necessary:
In the Room Info section, click the pencil icon to configure the room's description, owner, and team. The list of possible owners and teams is retrieved from the People & Organizations app.

In the Room Plan section, click the pencil icon and then select an image to add this image as the room plan. More images can be uploaded using for selection using the Web File Manager app.
Add zones, rows, and/or desks with the buttons at the top of the pane. For details, see Rooms.
When the room is fully configured, click the Activate button.
Only when a room has been activated, will it be possible to assign assets to it in the Asset Manager app.
Note
You can also add a room with the New Room button on the Rooms page.
Example of a fully configured, activated room: