Getting started with the Ping Monitoring tool
In this tutorial, you will learn how to use the Ping Monitoring tool for network monitoring and diagnostics.
Expected duration: 15 minutes
Note
The content and screenshots for this tutorial have been created using DataMiner version 10.4.8 and Ping Monitoring version 1.0.1-CU12.
Tip
See also: Kata #47: Monitor a network with ping commands on DataMiner Dojo 
Prerequisites
- A DataMiner System using DataMiner 10.3.9-CU2 or higher, which is connected to dataminer.services.
- Your dataminer.services organization has been verified.
Overview
- Step 1: Deploy the Ping Monitoring package from the Catalog
- Step 2: Create a new group
- Step 3: Create a new destination
- Step 4: Analyze the results
- Step 5: Filter and access destination details
- Step 6: Delete the destinations
Step 1: Deploy the Ping Monitoring package from the Catalog
Look up the Ping Monitoring package in the Catalog.
Click the Deploy button.
Tip
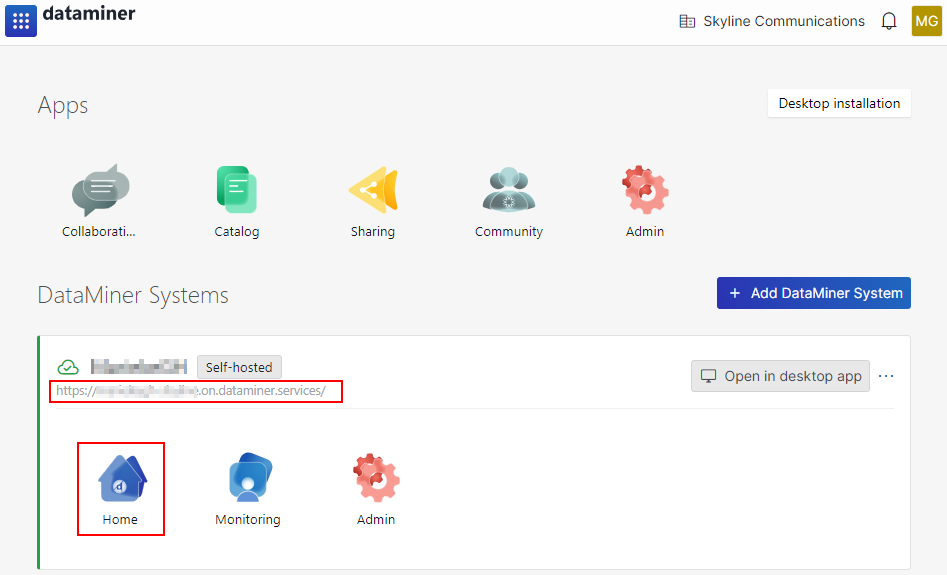
Go to the root page of your DataMiner System and check if the tool has been added:
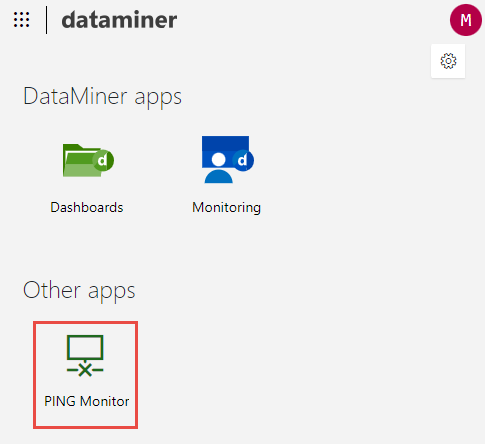
If you do not know where to find the home page URL, open https://dataminer.services/ in a browser, and copy the URL or click the Home button.
Open the Ping Monitoring tool.
This is what the application will look like:
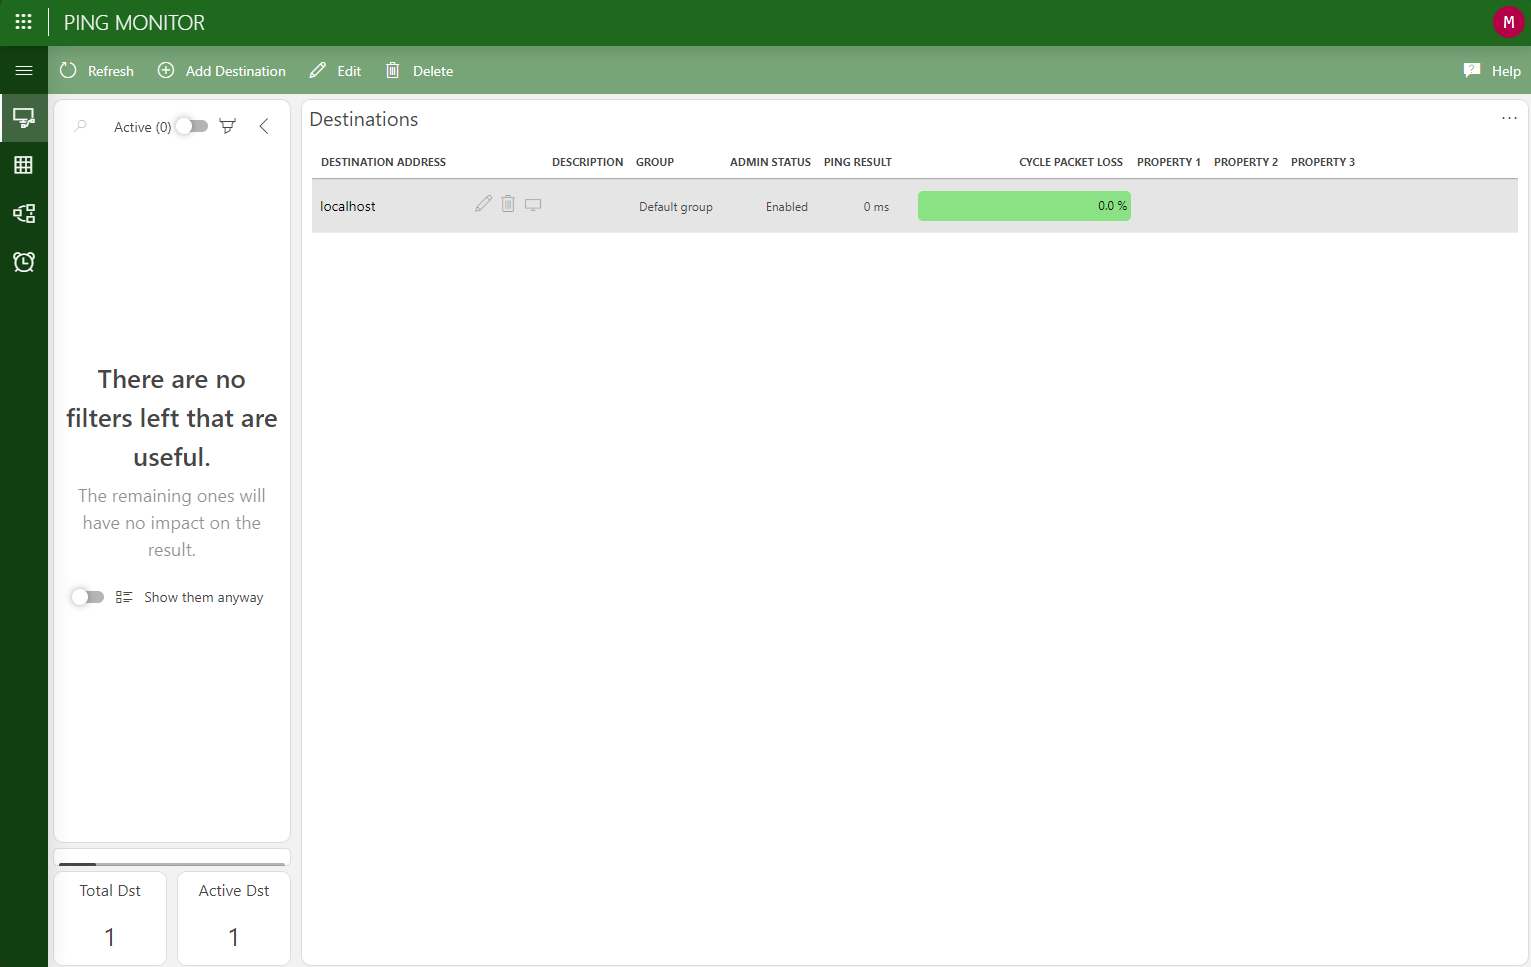
Tip
See also: Ping Monitoring UI overview
Step 2: Create a new group
Groups are used to organize the destinations configured in the application. Destinations that belong to the same group share the same properties that differentiate them from other destinations.
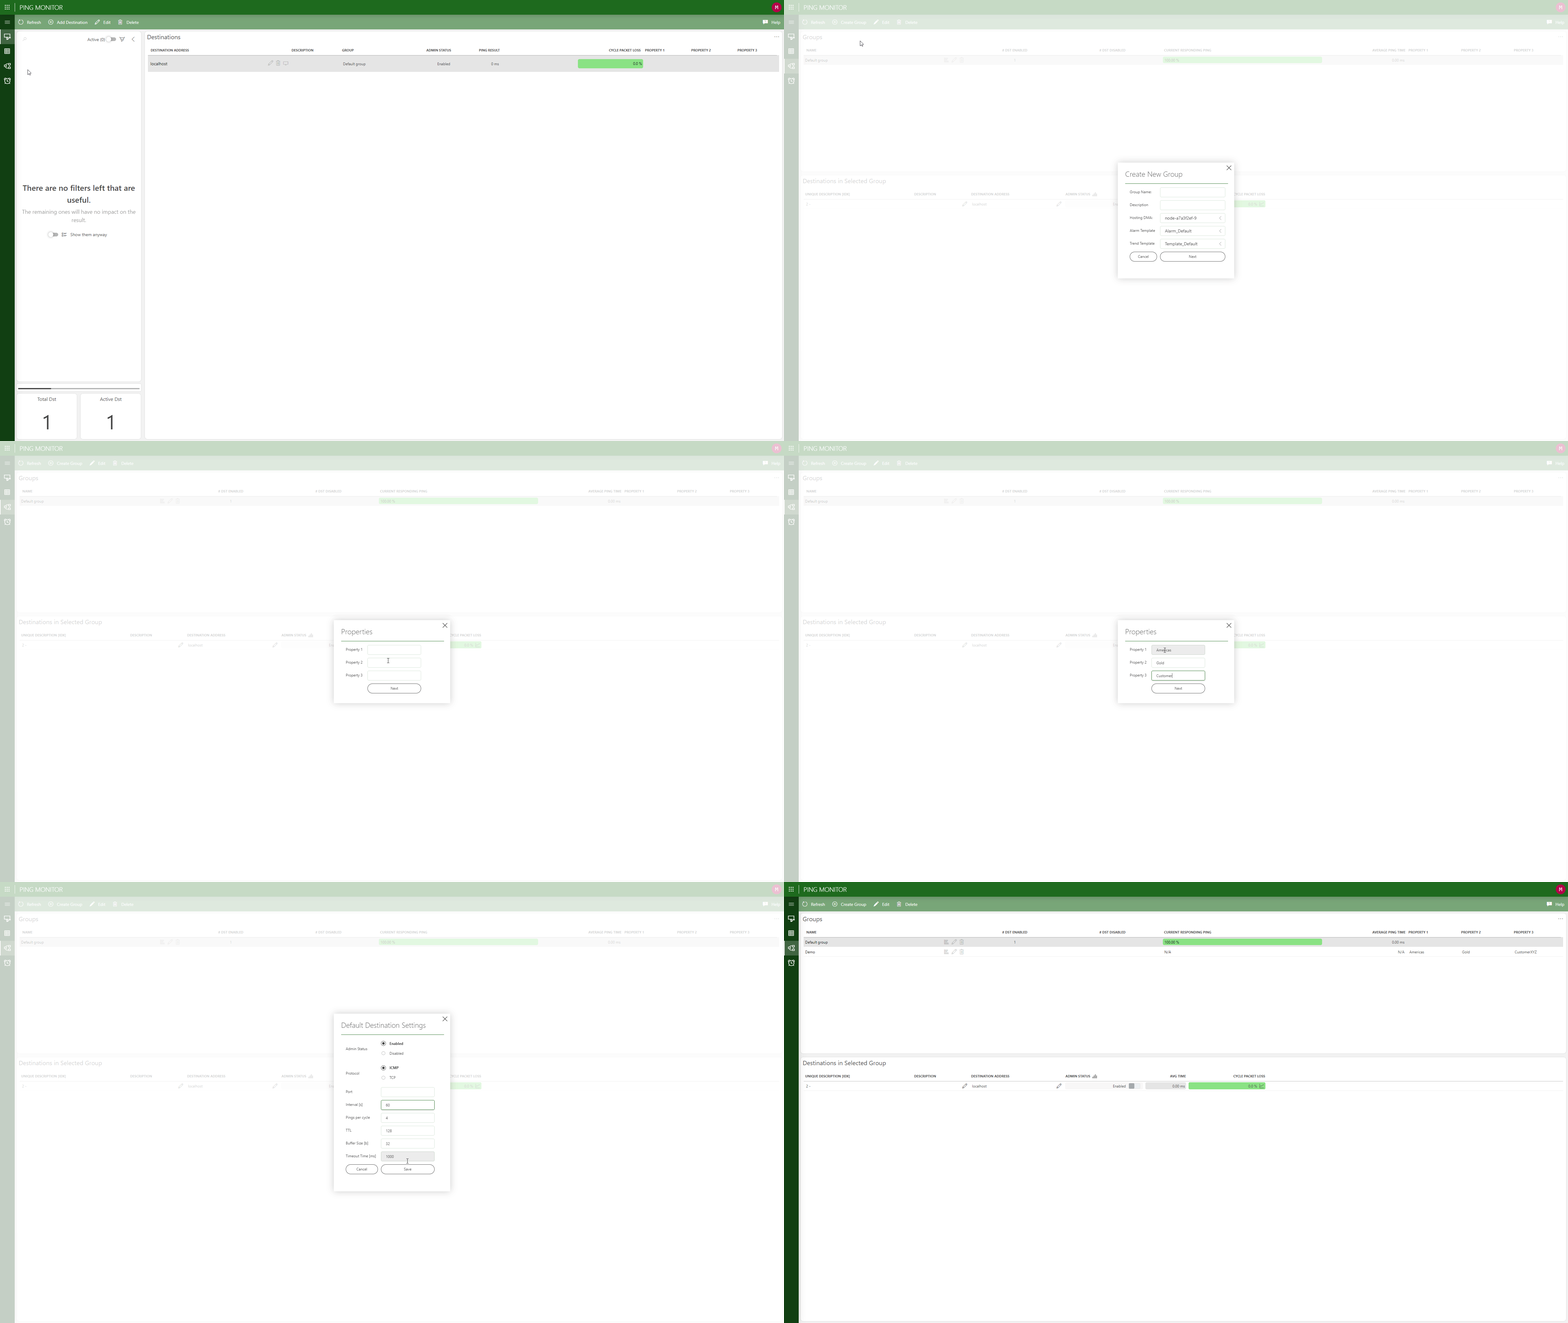
In the Ping Monitoring tool, go to the Groups page.
In the header bar, click Create Group.
This will open a pop-up window.
Enter group name Demo, then click Next.
Populate the three property fields with the values
Americas,Gold, andCustomerXYZ, respectively, and then click Next.Set the interval to
60.Click Save.
Step 3: Create a new destination
A destination is a point in the network you want to test against. The Ping Monitor application allows you to easily manage hundreds and even thousands of destinations to monitor the availability of different devices and services in your network.
In this step, you will create three destinations using the following addresses accessible on the public internet. The first value corresponds with the address, and the second is the description:
- 8.8.8.8 (Google DNS)
- skyline.be (Skyline website)
- dataminer.services (DataMiner Services)
Carry out the following steps for each one of the destinations above:
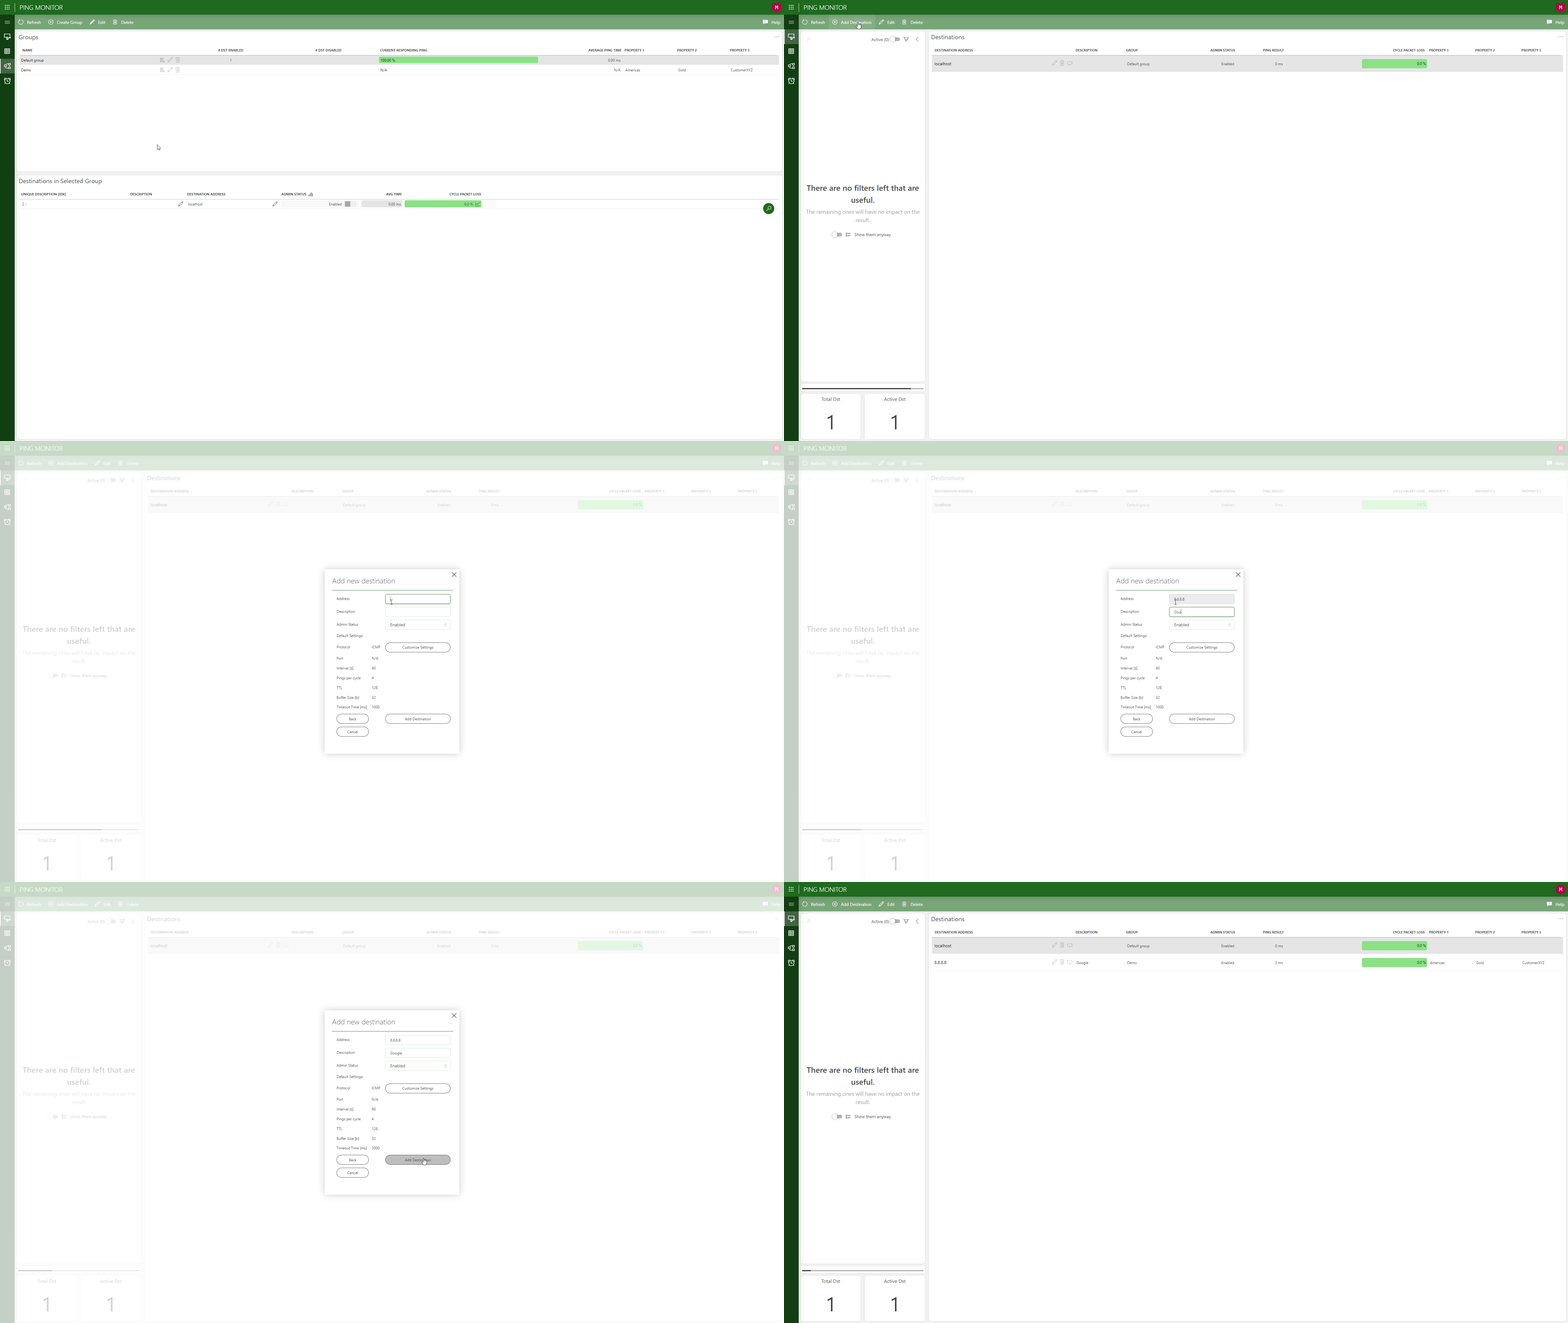
In the Ping Monitoring tool, go to the Destinations page.
In the header bar, click Add Destination.
Select the Demo group.
Specify the address and description in the corresponding boxes.
Click Add Destination.
Tip
See also: Adding a new destination.
Step 4: Analyze the results
When you have configured the destinations, the application will update to display the results of the latest test cycles.
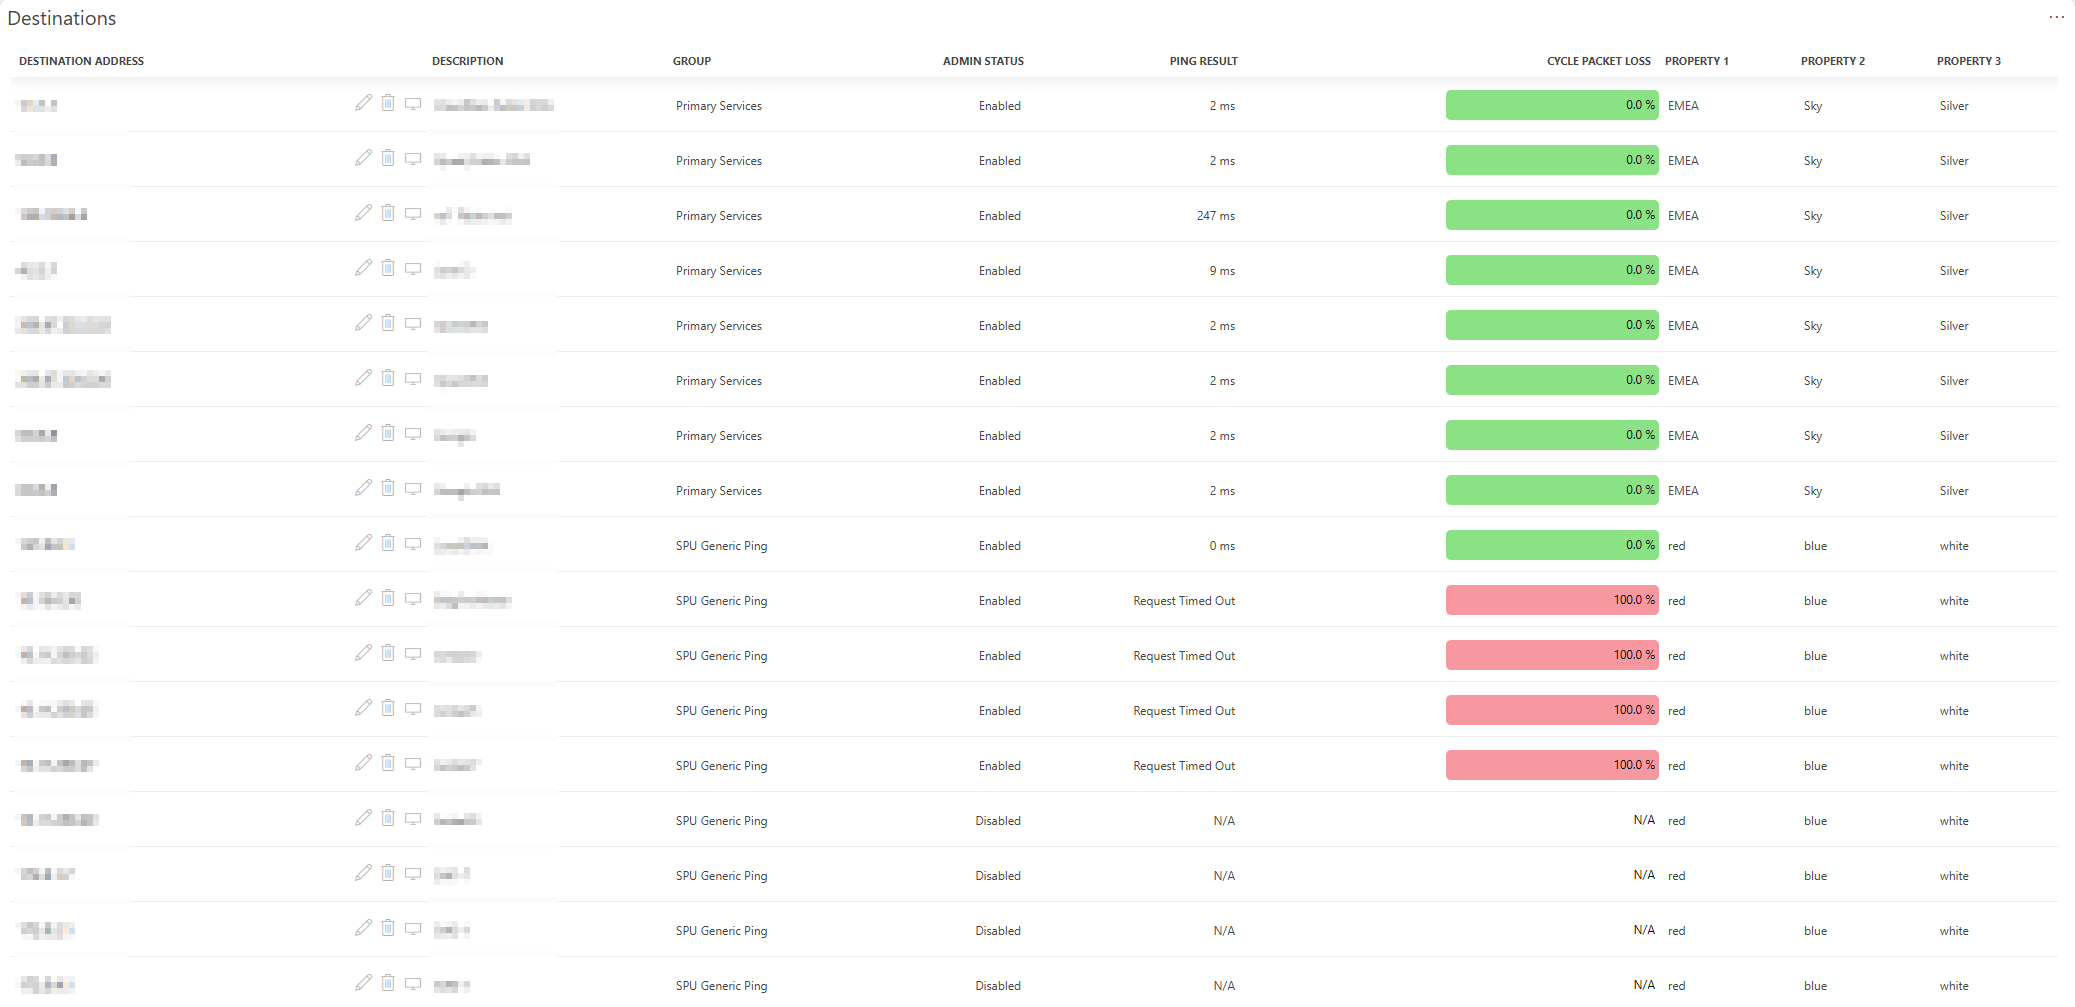
In the Destinations table, take a look at the values in the following columns:
- Ping Result: The amount of time passed from the moment DataMiner sent the command to the moment it received the reply from each destination, e.g. 4 ms.
- Cycle packet loss: The percentage of lost packets during the last ping cycle, e.g. 0.00 %. By default, the application sends 4 packets in every cycle, configurable for each destination.
These values can help you monitor network congestion and detect outages.
If you are a member of the DevOps Program, take a screenshot of the Destinations table (similar to the one below), ensuring all columns are clearly visible, and upload it on the Kata page on DataMiner Dojo.
Tip
For more ideas, see Ping Monitoring Use Cases - DataMiner Dojo.
Step 5: Filter and access destination details
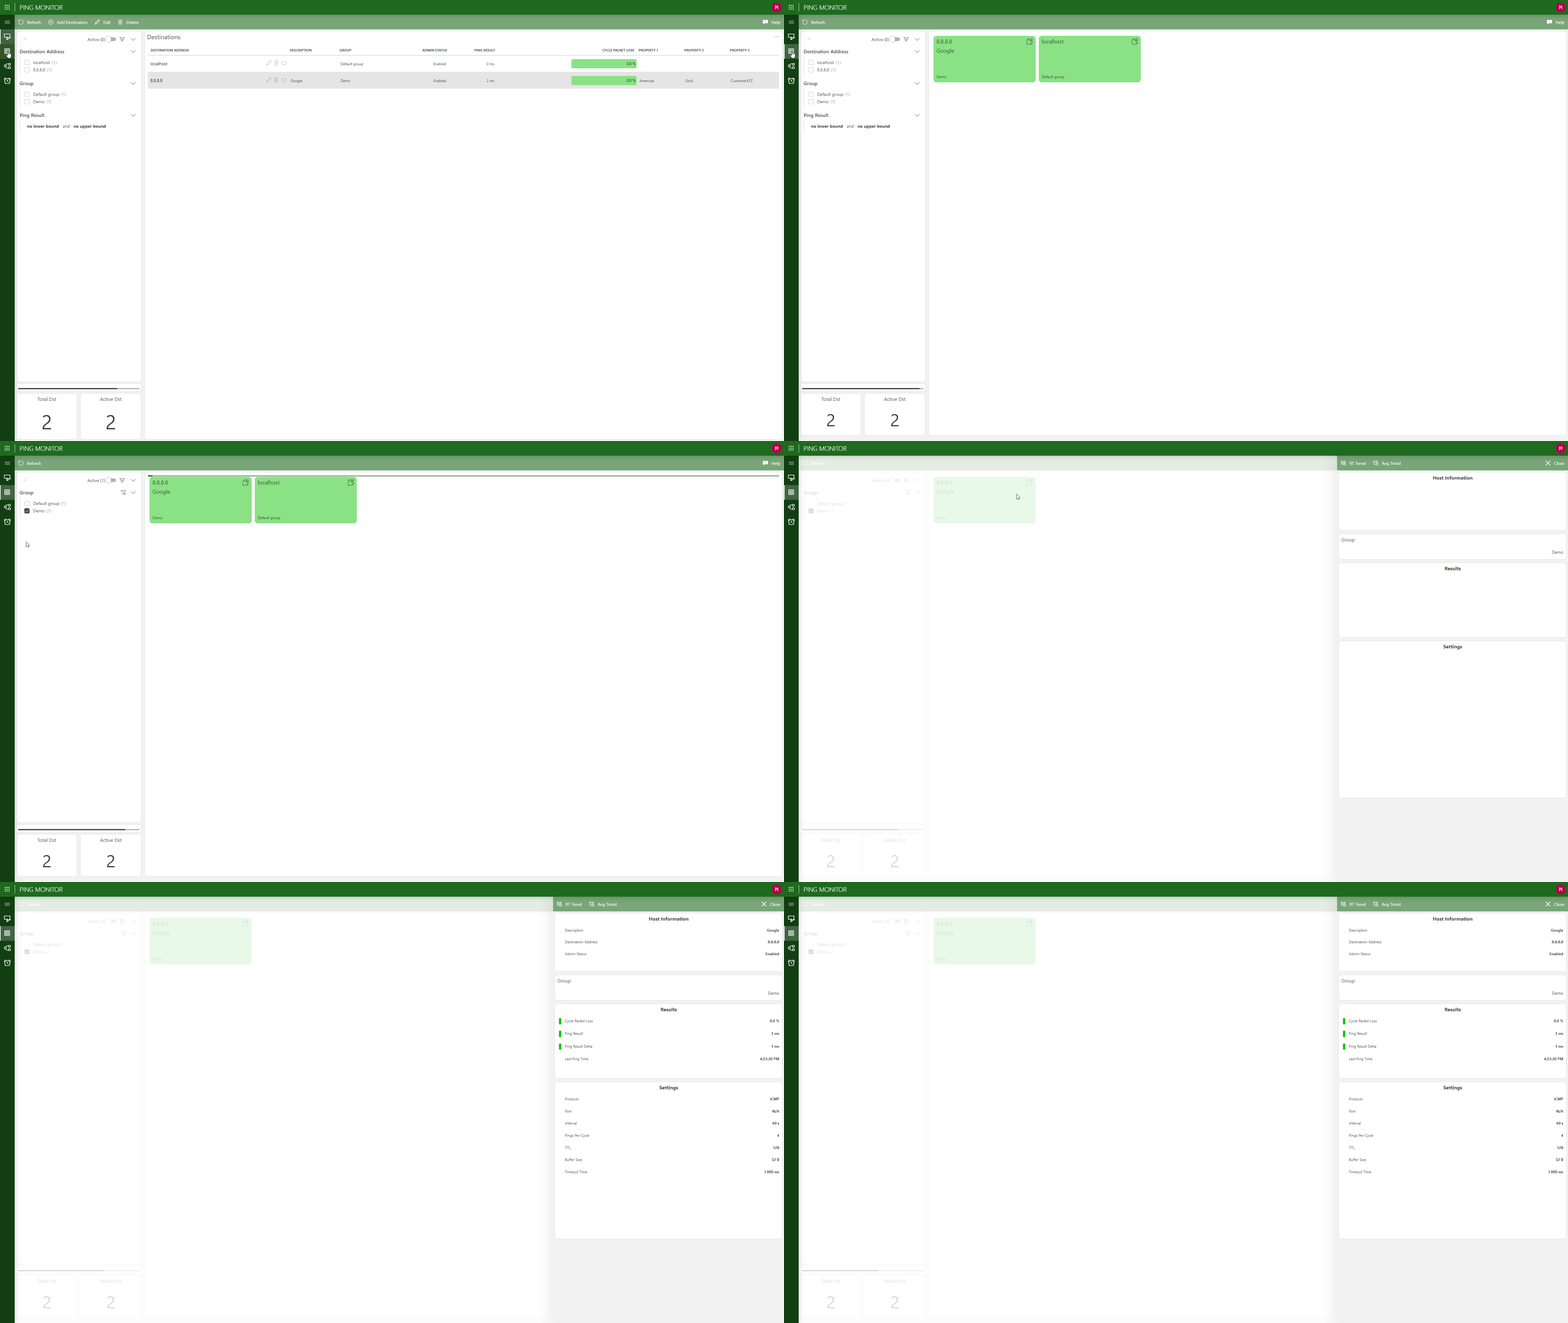
In the app, go to the Grid View page.
This page shows all the active destinations sorted by cycle packet loss.
In the panel on the left, under Destination Address, select skyline.be.
This will filter out all other destinations in the grid.
Click the destination tile in the grid to open its details.
The details will be shown on the right, including host information, results, and settings.
Close the panel on the right with the Close button near the top-right corner.
Step 6: Delete the destinations
To finalize this tutorial, delete each of the destinations you have created as follows:
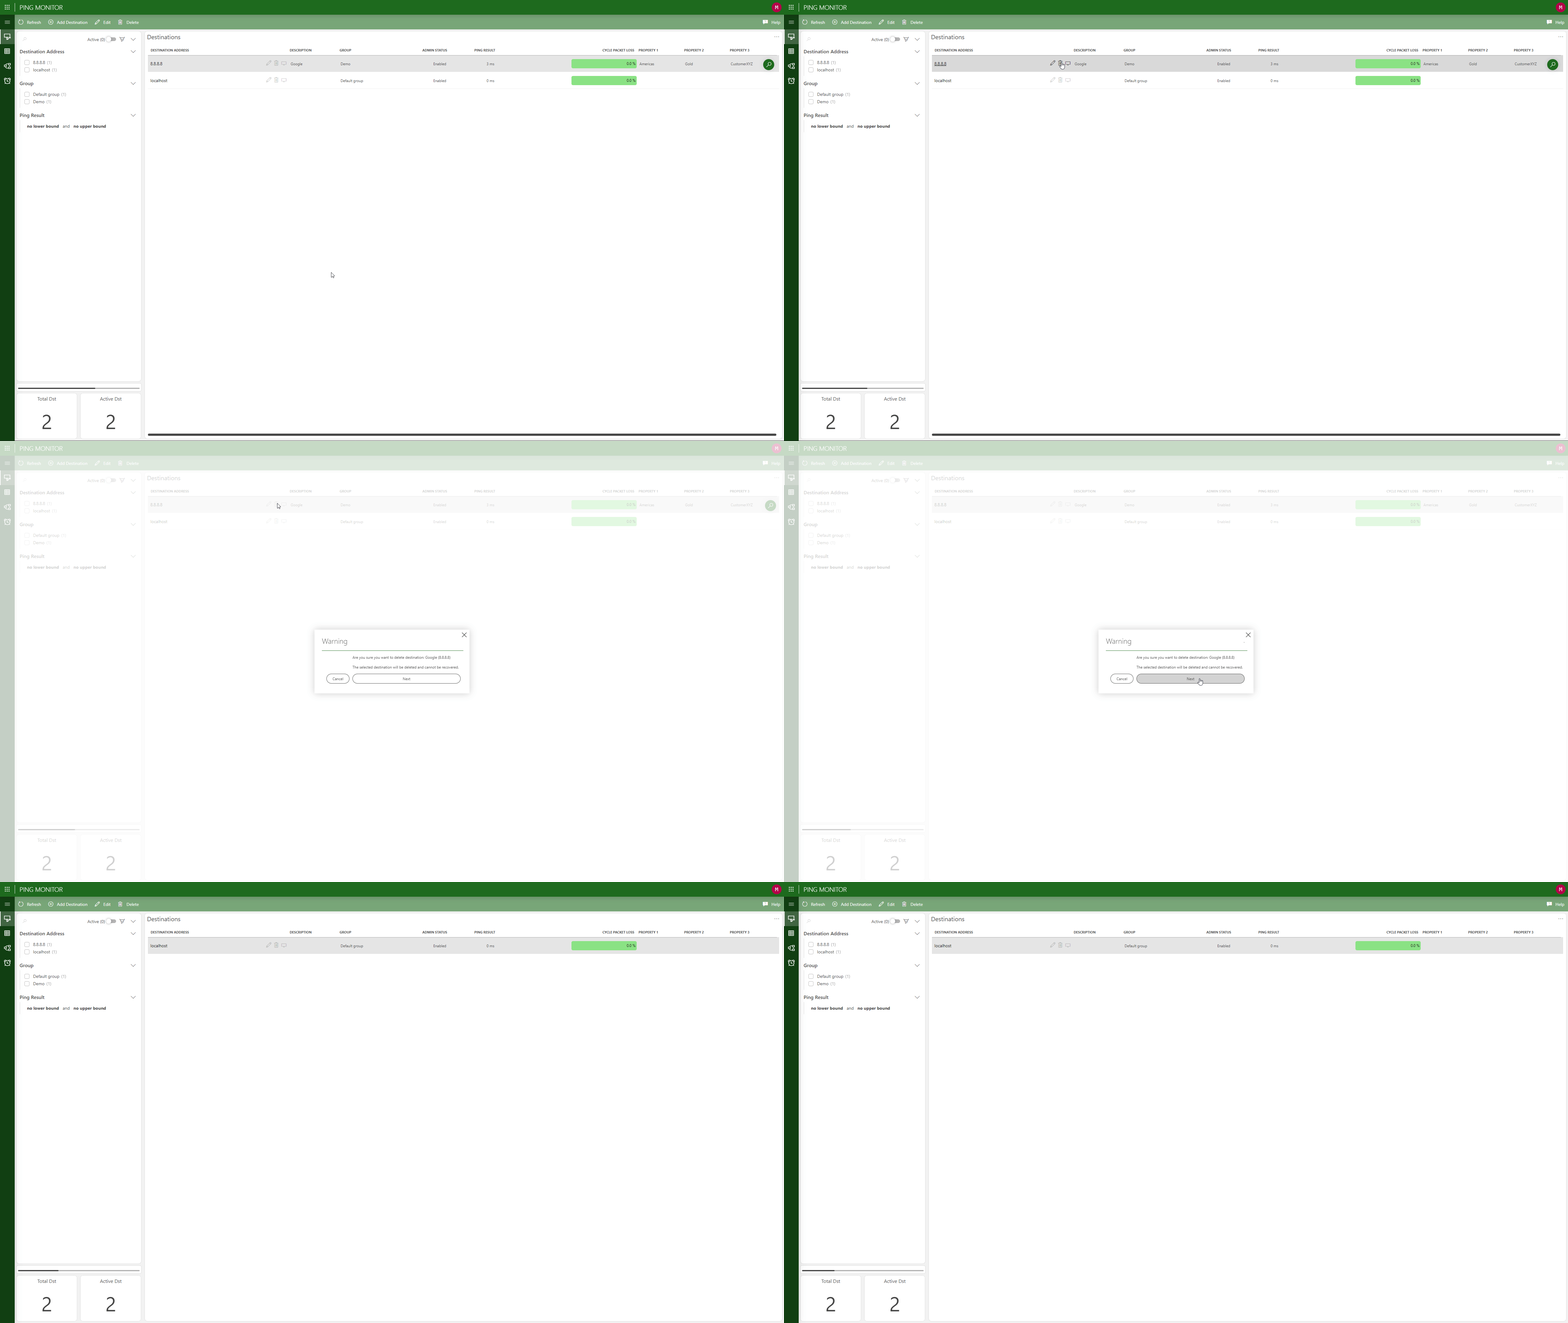
On the Destinations page, click the garbage can icon next to the destination.
Click Next to permanently delete the destination.
Tip
See also: deleting a destination.