Enabling the Swarming feature
Tip
Instead of following the procedure detailed below, you can also follow the Enabling Swarming tutorial. This tutorial uses a script to check whether prerequisites are met and provides an example of how to adjust other scripts and protocols in order to prepare your system for Swarming.
Prerequisites
DataMiner 10.5.1/10.6.0 or higher.
STaaS or a dedicated clustered storage setup.
No Failover Agents are present in the cluster.
Swarming will eventually support automatic switchover of elements in case issues are detected, so that it will replace Failover functionality.
No data offloads are configured (note that this prerequisite will no longer be needed soon).
The LegacyReportsAndDashboards soft-launch option is not enabled.
All scripts and connectors (including enhanced service connectors) are compatible with Swarming.
For the user account that will be used to enable Swarming, the Admin Tools user permission is enabled.
Note
Before you switch to swarming, an automated prerequisites check will allow you to quickly find out if any of these prerequisites are not met yet.
Running a prerequisites check
To verify whether your system meets these prerequisites before you enable Swarming, you can send a SwarmingPrerequisitesCheckRequest message to SLNet using the SLNetClientTest tool. The prerequisite check is also executed when you enable Swarming, ensuring that all prerequisites are met before Swarming is enabled.
To run a prerequisites check using SLNetClientTest tool:
Connect to the DMA using the SLNetClientTest tool.
Caution
Always be extremely careful when using this tool, as it can have far-reaching consequences on the functionality of your DataMiner System.
Go to the Build Message tab of the main window of the SLNetCLientTest tool.
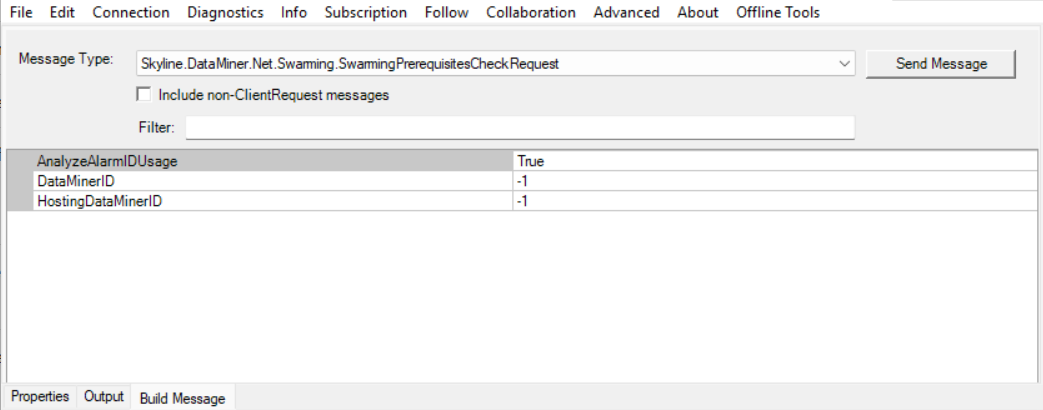
In the Message Type drop-down list, select the message Skyline.DataMiner.Net.Swarming.SwarmingPrerequisitesCheckRequest.
By default, the DataMinerID property for the message will be set to -1, which means that the entire cluster will be checked.
If you do not want to check the alarm ID usage yet, but you want to run a first, quicker check for the other prerequisites, you can set the AnalyzeAlarmIDUsage property to false.

Swarming prerequisites check in DataMiner 10.5.3Click Send Message.
While the prerequisites check is running, this will be indicated at the bottom of the window. The check can take several minutes, as the usage of legacy alarm IDs will be checked in all your scripts.
When the check is complete, the tool will switch to the Properties tab.
In the Properties tab, make sure the top message is selected, and check the summary in the pane on the right.
For each prerequisite, the tool will indicate whether the prerequisite is met (True) or not (False). If you hover over the Summary item, you will get a detailed overview of which items cause prerequisites not to be met (e.g. specific scripts, enhanced service connectors, connectors using the obsolete alarm ID format, etc.).
Note
Obsolete Engine methods are only included in the prerequisites check from DataMiner 10.5.3 onwards. If you are using DataMiner 10.5.1 or 10.5.2, these obsolete methods may still be present even if the prerequisite check does not report any issues. For detailed info, refer to Preparing scripts and connectors for Swarming.
Enabling Swarming
When you have made sure prerequisites are met, and you are ready to enable Swarming, you can do so using the SLNet message EnableSwarmingRequest (with the default parameters) in SLNetClientTest tool or an Automation script. Enabling Swarming via DataMiner Cube is currently not yet possible.
To enable Swarming using SLNetClientTest tool:
Optionally (but highly recommended), first take a backup of your DataMiner Agents.
Note
When you enable swarming, the element configuration will be moved from disk to database. While you can roll back this change, only a partial rollback is possible. The sooner you decide to roll back, the smaller the impact of the rollback will be. This is why we highly recommend taking a backup before enabling Swarming.
Connect to the DMA using the SLNetClientTest tool.
Caution
Always be extremely careful when using this tool, as it can have far-reaching consequences on the functionality of your DataMiner System.
Go to the Build Message tab of the main window of the SLNetCLientTest tool.
In the Message Type drop-down list, select the message Skyline.DataMiner.Net.Swarming.EnableSwarmingRequest.
This message will need to be sent with its default settings, so do not make any changes to the settings for the message.
Click Send Message.
If a confirmation box appears, click Yes.
The prerequisites, including the usage of legacy alarm IDs in scripts, will be checked for all Agents in the system, which can take several minutes. If the prerequisites are met, Swarming will be enabled and all Agents in the DMS will be restarted.
If SLNetClientTest tool is unable to reach any of the Agents at the time of the check, for example because an Agent is stopped, Swarming will not be enabled.
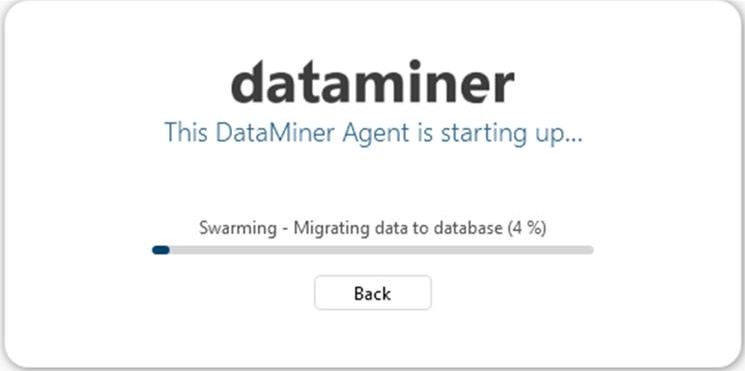
During DataMiner startup, the existing element XML files will be moved from the disk to the database. This can take several minutes. While this is happening, a message will be displayed on any clients that are trying to connect.

Tip
In case you encounter DataMiner startup issues after you have enabled Swarming, refer to Troubleshooting - DataMiner startup issues.
Make sure that the Swarming user permission is enabled for users that need to be able to swarm DataMiner objects (see Configuring a user group).
Users that have the Import DELT and Export DELT user permissions will automatically also get the Swarming user permission when DataMiner is upgraded to version 10.5.1/10.6.0 or higher.
Important
The migrated element files will be temporarily backed up in the Recycle Bin (e.g. 2024_11_20 11_03_12_300_ElementFolder_BeforeSwarmingMigration.zip). We recommend that you store these files somewhere safe if you ever want to access these again later or if you want to be able to partially roll back Swarming.
Verifying whether Swarming has been activated
You can verify whether the Swarming feature has been activated by checking if the following line is present in the SLSwarming.txt log file:
SwarmingManager::SwarmingManager|INF|-1|Swarming enabled
You can find this log file in DataMiner Cube via System Center > Logging > dataminer > Swarming. The log file also shows details on the migration of elements that happened during DMA startup.
Once Swarming is enabled, you can go to System Center > Agents > Status > Swarm to swarm elements for which this feature is supported. However, note that this is only available in DataMiner Systems consisting of multiple Agents.
Note
Elements for which swarming is not supported will not be shown in this UI.