Enabling Swarming
In this tutorial, you will learn how to enable Swarming in your DMS and swarm your first element. The tutorial makes use of an example Automation script to demonstrate how you need to adjust scripts to make sure you can enable Swarming.
The content and screenshots for this tutorial have been created using DataMiner version 10.5.3.
Tip
See also: Kata #61: Getting started with Swarming on DataMiner Dojo 
Prerequisites
For this tutorial, you will need a DataMiner System that meets the following requirements:
- Connected to dataminer.services.
- Using DataMiner 10.5.1/10.6.0 [CU0] or higher.
- Containing two or more Agents, but no Failover Agents. If you are using a single Agent, you can follow along, but you will not be able to do the last step (swarming an element).
- Using STaaS or a dedicated clustered storage setup.
- Without data offloads configured.
- The LegacyReportsAndDashboards soft-launch option is not enabled.
Other prerequisites for Swarming will be addressed later in this tutorial.
Overview
- Step 1: Deploy the tutorial package from the Catalog
- Step 2: Create a basic test element
- Step 3: Create a DataMiner backup (optional)
- Step 4: Enable Swarming
- Step 5: Swarm your first element
Step 1: Deploy the tutorial package from the Catalog
To deploy the package:
Go to the Tutorial - Getting started with Swarming package in the Catalog.
Deploy the latest version of the package on your DMA using the Deploy button.
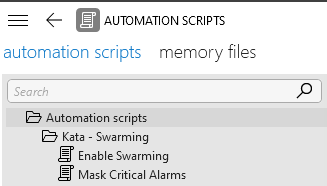
When the package has been deployed, open DataMiner Cube and check whether you can see the following scripts in the Kata - Swarming folder of the Automation module:
Mask Critical Alarms: This is a demo script to mask the critical alarms of an element.
Enable Swarming: This interactive Automation script takes you through the enabling procedure for Swarming.
Step 2: Create a basic test element
In this tutorial, you will swarm an element. To avoid impacting ongoing operations, start by adding a new test element.
You can either create a new basic test element yourself or import a demo element, e.g. by deploying the Satellite Earth Station Uplink package.
If you choose to create a new element yourself, you can select any protocol of your choice for it, except for a spectrum protocol or a DVE protocol, as these would not result in a swarmable element.
Step 3: Create a DataMiner backup (optional)
Once you enable Swarming, the element configuration of the DMS will be moved from disk to database, which is a change that cannot easily be rolled back. This is why taking a backup of your DataMiner Agents before you enable Swarming is highly recommended.
For detailed steps, refer to Backing up a DataMiner Agent.
Step 4: Enable Swarming
Swarming has its own set of prerequisites. In this step, you will use a script from the deployed package to make sure these are met and then enable Swarming.
In the Automation module in DataMiner Cube, select the Enable Swarming script and click the Execute button.
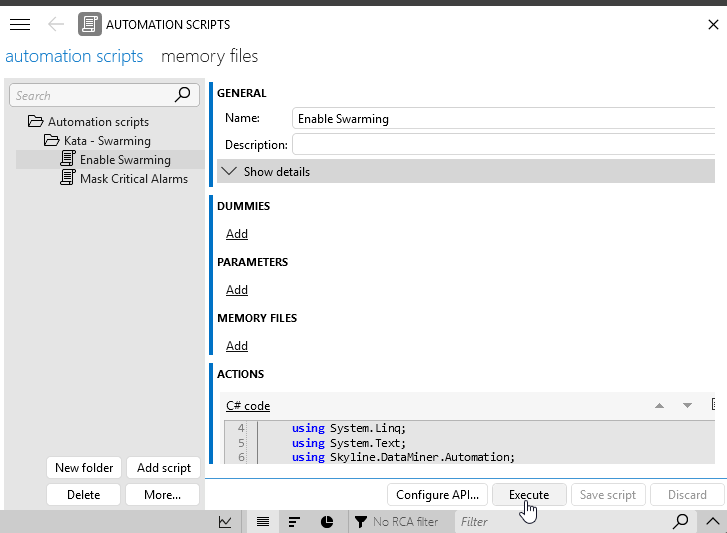
In the pop-up window, click Execute now.
Information about the Swarming prerequisites will be displayed.
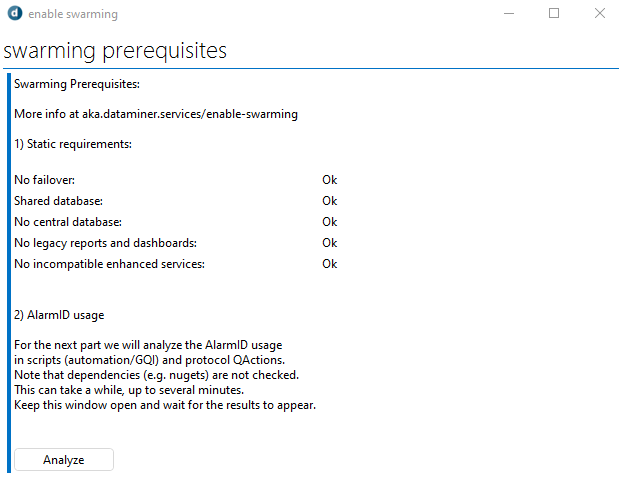
Take a look at the mentioned static requirements.
These are the DMS requirements that are more difficult to change, such as the database type or Failover configuration. Based on the prerequisites for this tutorial, all prerequisites should be met, except possibly the requirement for compatible enhanced services.
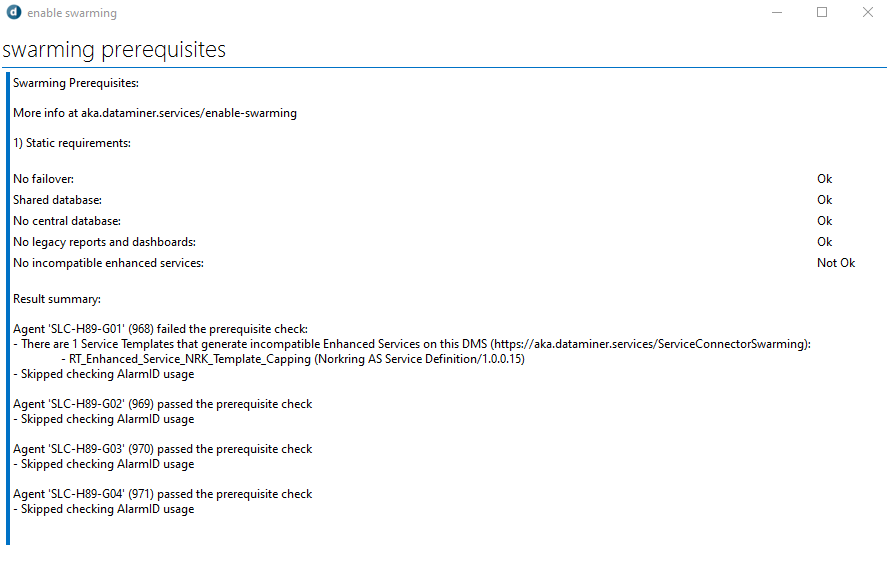
In case No incompatible enhanced services is Not Ok:
Check in the Catalog if a more recent version of the enhanced service connectors is available and upgrade to the latest version if possible.
If upgrading to a more recent version is not possible, follow the instructions to prepare enhanced service connectors for Swarming
Run the Enable Swarming script again.
Click the Analyze button to start checking the alarm ID usage.
This button will only be available once all static requirements are met. It will analyze the use of the unique identifiers of alarms in scripting (Automation scripts and QActions), as this has been modified to support Swarming. (See About the alarm ID changes.)
This check can take up to several minutes, depending on the number of scripts and connectors in the system.
Note
It is not possible to scan dependencies (e.g. NuGets) with this script, so these may still contain outdated references. However, if this should be the case, running these scripts on a system where Swarming is enabled will throw a clear error message.
Take a look at the results of the analysis.
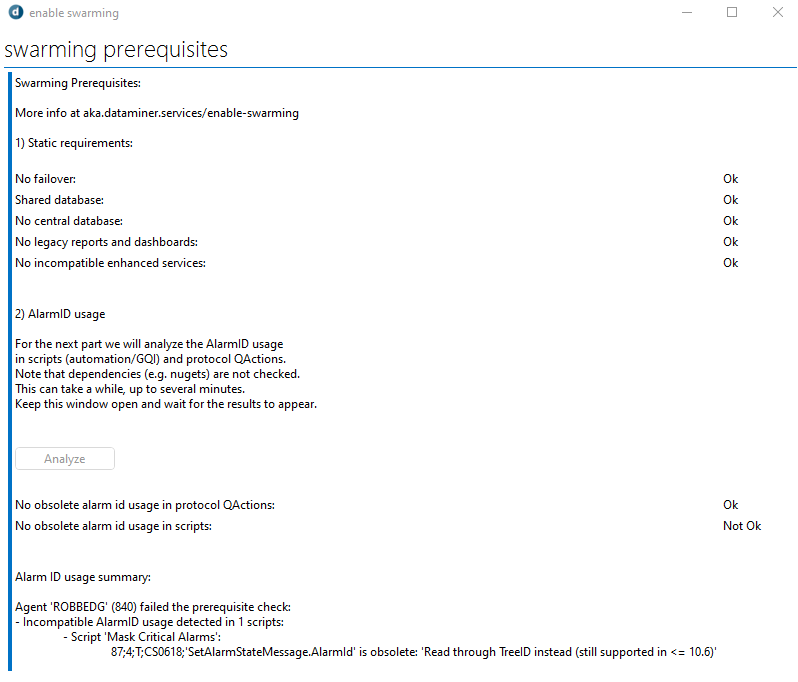
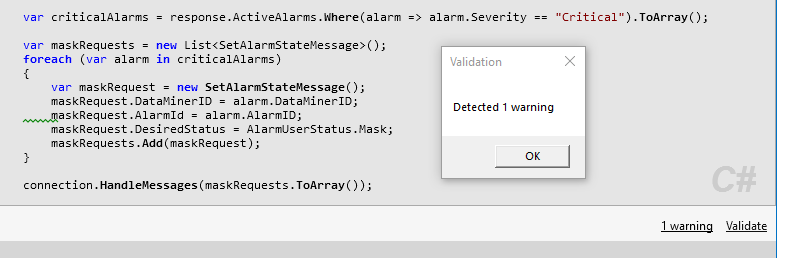
The Mask Critical Alarms script will be displayed as one of the problems that have been found. This script takes as input a reference to an element and will mask all critical alarms of this element. It does so by using a SetAlarmStateMessage and includes an identifier reference to the alarm it should mask, but this identifier still uses the old style of referring to an alarm, i.e. a DataMiner ID/alarm ID integer combination. This is must be changed to a tree ID instead.
Open the Mask Critical Alarms script in the Automation app, scroll down, and click Validate to check for errors and warnings.
You will see that a warning is detected.
Note that you could also open the script via DIS in Visual Studio instead, if you have this installed. In that case, if you target the Skyline.DataMiner.Dev.Automation package version 10.5.1 or higher, you will also see an obsolete warning for this script.
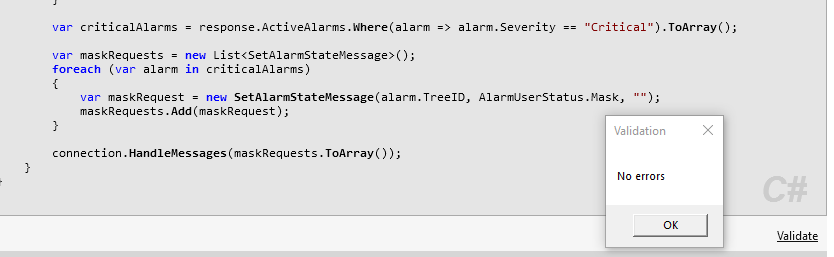
Update the code in the foreach block (line 85) as follows:
Before:
   var maskRequest = new SetAlarmStateMessage();
   maskRequest.DataMinerID = alarm.DataMinerID;
   maskRequest.AlarmId = alarm.AlarmID;
   maskRequest.DesiredStatus = AlarmUserStatus.Mask;
   maskRequests.Add(maskRequest);
After:
   var maskRequest = new SetAlarmStateMessage(alarm.TreeID, AlarmUserStatus.Mask, "");
   maskRequests.Add(maskRequest);
Click Validate again to see if all warnings and errors are gone.
Click Execute to run the script and test if it still works correctly.
If any other scripts or protocols are shown in the alarm ID usage summary, update these in a similar way to make sure they refer to the tree ID or alarm tree ID and validate and test them.
For detailed information, refer to Preparing scripts and connectors for Swarming
Run the Enable Swarming script again and click the Analyze button again.
If you have indeed correctly updated all scripts and protocols, a new button will be displayed at the bottom of the window. If you do not see this button, check which scripts or protocols still need to be updated and adjust them as mentioned above.
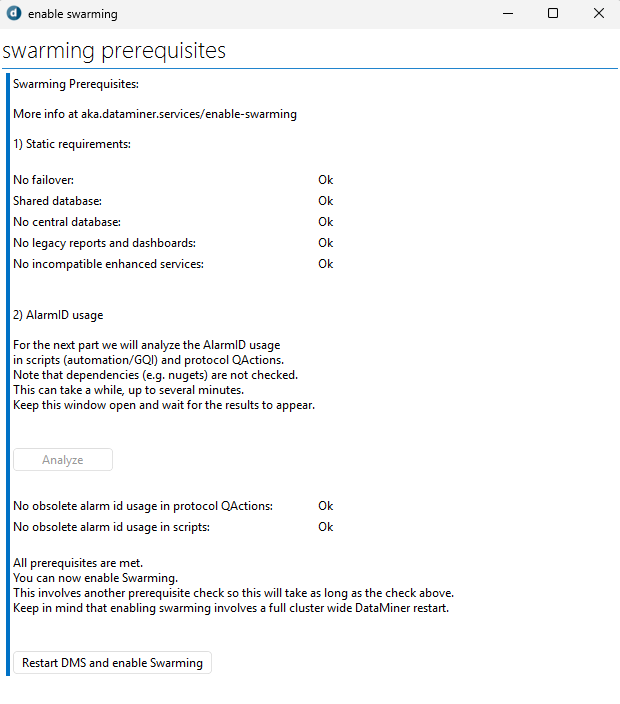
Click Restart DMS and enable Swarming.
The script will now double-check the requirements (which will again take some time), enable Swarming, and restart DataMiner.
Important
This will restart all DataMiner Agents in your DMS.
Step 5: Swarm your first element
Once DataMiner has restarted, you can test the Swarming functionality by moving an element from one host to another host in your DMS. You will only be able to follow these steps if you are using a DataMiner System consisting of multiple Agents.
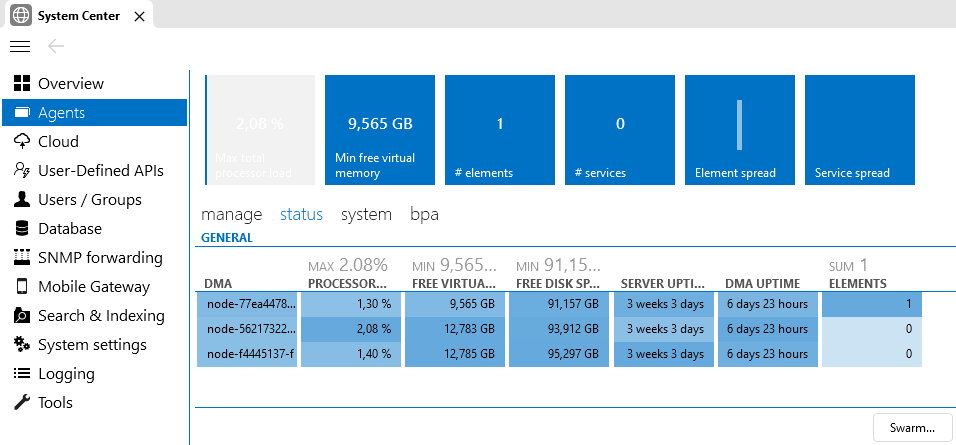
Go to System Center > Agents > Status and click the Swarm button in the lower right corner.
If you see a Migrate button here instead, this means Swarming has not been successfully enabled.
On the left, select the test element you created in step 2.
Note that you can select more elements to swarm if you want, but keep in mind that swarming an element involves an element restart, which will result in a brief downtime of the element.
On the right, select the destination DMA.
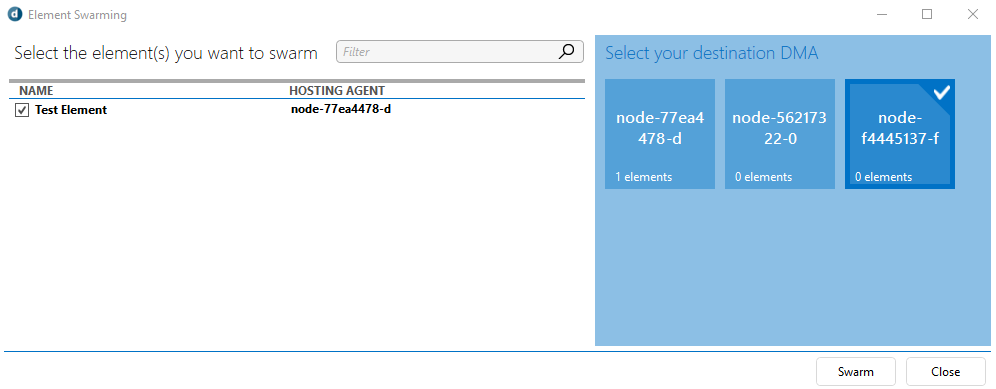
Click Swarm.
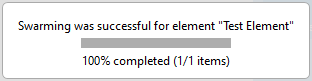
A message will be displayed when the element has been successfully swarmed:
Tip
For more details about Swarming elements, see Swarming elements.