Creating and showing a panel
This tutorial explains how you can add and display a panel in an app.
The content and screenshots for this tutorial were created in DataMiner version 10.3.11.
Expected duration: 5 minutes
Tip
See also: Kata #7: Pages, panels and headers in a low-code app on DataMiner Dojo 
Overview
- Step 1: Install the dummy data sources package
- Step 2: Create a panel
- Step 3: Add content to the panel
- Step 4: Show the panel
Prerequisites
- A DataMiner System that is connected to dataminer.services.
Step 1: Install the dummy data sources package
Go to https://catalog.dataminer.services/details/package/5410
Click the Deploy button to deploy the IPAM - GQI dummy data sources packages on your DMA.
This package contains data that will be used in this tutorial.
Step 2: Create a panel
Make sure that you are editing the application, and expand the "panels" section in the gray side panel.
Click the "+" sign in this section to create a panel.
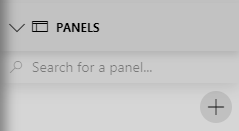
Specify a meaningful name for the panel, for example "Metrics".
Note
If you have already created apps in the past, a panel will already be created by default.
Step 3: Add content to the panel
Create a GQI query:
Use the "IP subnets - Dummy" ad hoc data source.
Add an Aggregate operator to it.
Configure it to count the records using the "Network address" column.
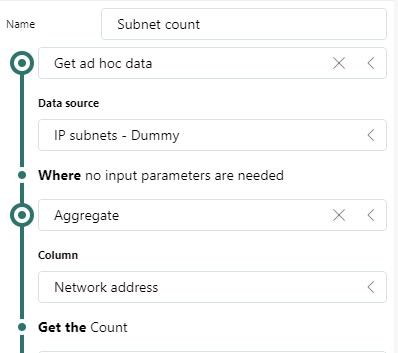
Drag the query onto the panel and display it using a state component.
Configure the layout of the component.
Use the large design.
Align in the center.
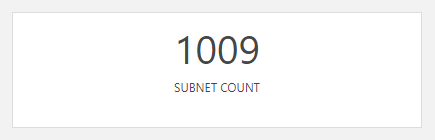
The result should look like this:
Close the panel editor by clicking the back button.
Step 4: Show the panel
You have now added a panel; however, panels are not automatically displayed in a low-code app. They need to be activated through a specific action. Actions define tasks that need to be executed in response to events.
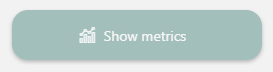
Add a button component to the page and configure its layout:
Specify a label.
Select an icon.
Under Styles, select the Transparent theme.
The button should look like this:
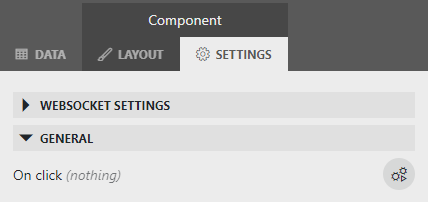
At this point, nothing will happen yet if a user clicks the button, because actions still need to be associated with the On click event of the button.
Go to the settings of the button and click the "Configure actions" icon.
This will open the action editor.
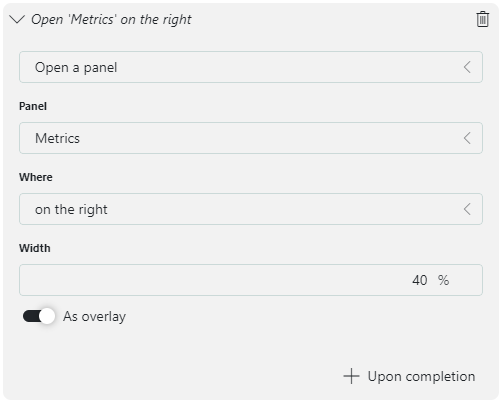
Select the Open a panel action.
Additional configuration options will become available.
The panel will be automatically selected in this case, as you have only one panel. If you were to have multiple panels, you would first have to select the right one.
Under Where, you can configure the display location of the panel.
Under Width, adjust the width of the panel to a percentage of the screen.
Enable the As overlay toggle button to open the panel as an overlay over the original page, which is automatically closed as soon as the user clicks outside the panel.
Publish your changes and check if clicking the button indeed opens the Metrics panel.
Next tutorial
You can also use a header bar to open panels:
Learning paths
This tutorial is part of the following learning path: