Chaining actions
This tutorial explains how you can chain actions in a low-code app, so that one action happens after another.
Expected duration: 10 minutes
Prerequisites
- A DataMiner System that is connected to dataminer.services.
- The Creating and showing a panel tutorial has been completed.
Overview
- Step 1: Install the dummy data sources package
- Step 2: Create the simulated network scan script
- Step 3: Create and configure the header button
- Step 4: Chain an action
Tip
See also: Kata #8: Actions and events in a low-code app on DataMiner Dojo 
Step 1: Install the dummy data sources package
Go to https://catalog.dataminer.services/details/package/5410.
Click the Deploy button to deploy the IPAM - GQI dummy data sources packages on your DMA.
This package contains data that will be used in this tutorial.
Step 2: Create the simulated network scan script
Open DataMiner Cube and go to the Automation module.
Check if the module already contains a folder with the name "Utility", and create this folder if it does not exist yet.
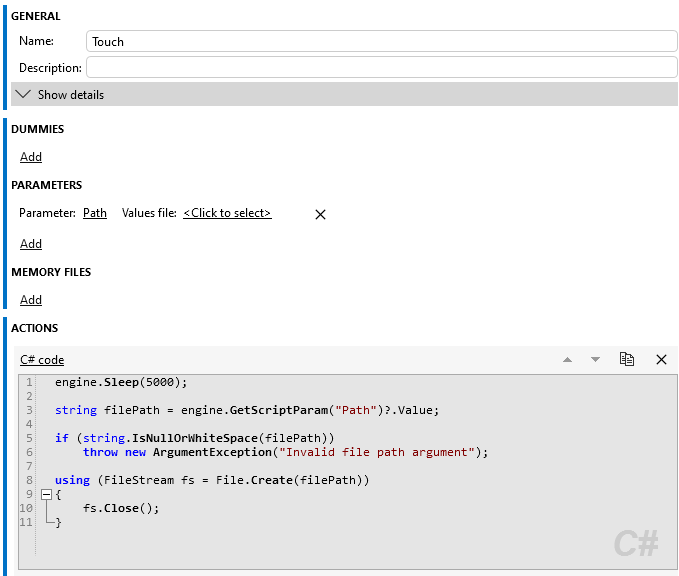
Within this folder, add a new Automation script with the name "Touch".
Add a script parameter named "Path".
This parameter will contain the path of a file that should be created or updated.
Add a C# action containing the following code:
engine.Sleep(5000);

string filePath = engine.GetScriptParam("Path")?.Value;

if (string.IsNullOrWhiteSpace(filePath))
    throw new ArgumentException("Invalid file path argument");

using (FileStream fs = File.Create(filePath))
{
    fs.Close();
}
Your script should look like this:
Check whether the script runs correctly:
Click the Execute button.
Provide a path.
Check whether a file is created or updated.
Note
This script invalidates the data that is generated by the "IP addresses - Dummy" ad hoc data source, which will cause the data to be different when it is queried again.
Step 3: Create and configure the header button
Make sure you are editing the app from the Creating and showing a panel tutorial.
Go to the "Metrics" panel.
Click the "+" icon on the left side of the header bar to add a button.
Set the label of the button to "Scan" and select a suitable icon.
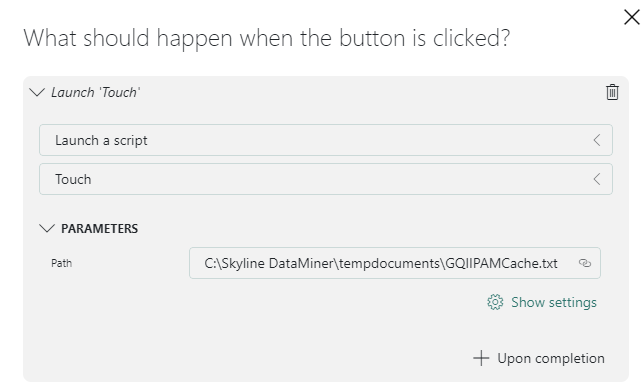
Configure the button to execute the script you created in step 2.
The configuration should look like this:
DataMiner Low-Code Apps in DataMiner 10.3.12
Step 4: Chain an action
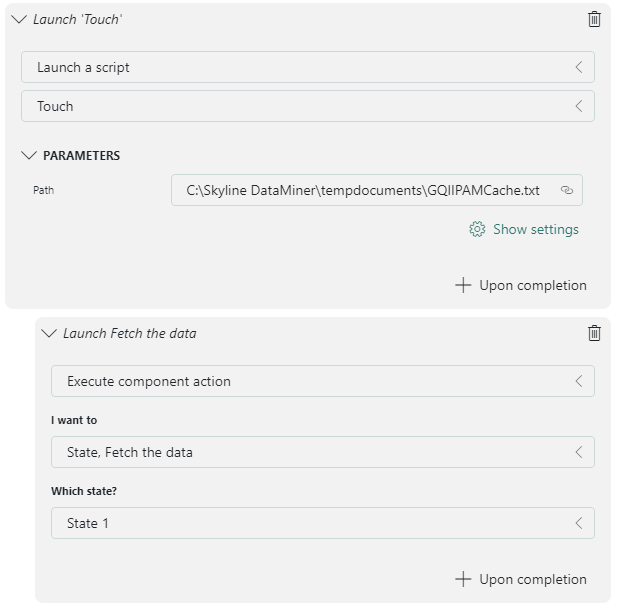
At the bottom of the configuration pane for the button you have just created, click Upon completion.
This will chain a new action to the previous action. This chained action will be executed as soon as the previous action is completed. The script you configured takes 5 seconds, which means the extra action will only be executed after that time.
Configure the extra action to perform a component action.
With this action, the data for the state component should be retrieved again so that the component is up to date after the network scan.
The complete configuration should look like this:
DataMiner Low-Code Apps in DataMiner 10.3.12Close the action editor and publish the app.
Click the "Scan" button on the "Metrics" panel and check if after 5 seconds the state component shows the latest number of subnets.
Learning paths
This tutorial is part of the following learning path: