Alarm table
Note
This feature is in preview until DataMiner 10.1.5. If you use the preview version of the feature, its functionality may be different from what is described below. For more information, see Soft-launch options.
Available from DataMiner 10.2.0/10.1.5 onwards. Prior to this, the component is available in soft launch from DataMiner 9.6.8 onwards.
The component displays a list of alarms or information events, which can be filtered in multiple ways. By default, the following columns are included in the alarm table: element name, parameter description, value, time, and root time. However, columns can be removed and added in the component settings (see information below).
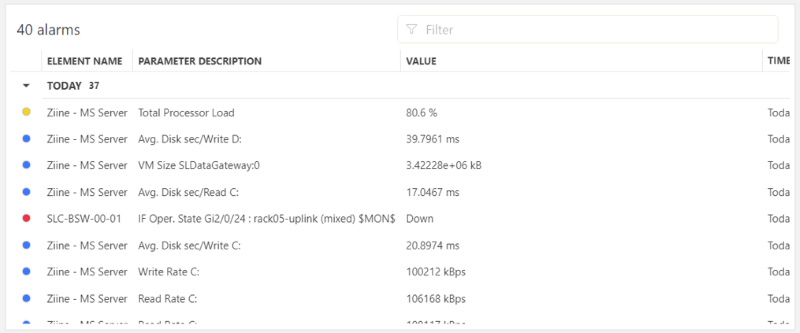
Alarm table component in DataMiner 10.4.6
To configure the component:
In the Settings pane, configure which type of alarms should be displayed and how:
To customize the polling interval for this component, expand the Settings > Websocket settings section, clear the checkbox in this section, and specify the custom polling interval.
In the Show box, select whether active alarms, masked alarms, history alarms, alarms in a sliding window or information events should be displayed in the list.
In case you select history alarms, the start time and end time will also need to be specified. In case you select alarms in a sliding window, the sliding window size and refresh time will need to be configured.
Note
From DataMiner 10.3.0 [CU15]/10.4.0 [CU3]/10.4.6 onwards, the sliding window size and refresh time are limited to a minimum of 1 minute and a maximum of 1 day. You can specify these parameters in minutes, hours, or days. Prior to DataMiner 10.3.0 [CU15]/10.4.0 [CU3]/10.4.6, you have the option to specify the sliding window size and refresh time in milliseconds, seconds, minutes, hours, or days.
Optionally, specify a filter for the list with the Filters boxes. You can either configure a filter of your own, or select Saved filter to use an existing shared alarm filter from the DMS. If you select to use a Parameter index filter, you can use “?” and “*” as wildcards (see Searching with wildcard characters).
Optionally, specify the Default sorting column, Default sorting order and Initial number of alarms to load.
Note
- If an initial number of alarms to load is specified, no grouping is applied.
- From DataMiner 10.3.0 [CU15]/10.4.0 [CU3]/10.4.6 onwards, the initial number of alarms to load is limited to a minimum of 1 alarm and a maximum of 100,000 alarms.
Below Columns, you can select one or more columns in order to have only those columns displayed in the alarm list, and you can add columns that were initially not included in the alarm table, e.g. "Alarm ID", "Root alarm ID", "Severity", and "Alarm type". For each column, arrow buttons will be displayed that allow you to customize the column order.
Note
The content of the Alarm ID and Root Alarm ID columns may differ depending on your DataMiner version:
Column From DataMiner 10.3.0 [CU21]/10.4.0 [CU9]/10.4.12 onwards Prior to DataMiner 10.3.0 [CU21]/10.4.0 [CU9]/10.4.12 Alarm ID DMAID/EID/RootAlarmID/AlarmID HostingDMAID/AlarmID Root Alarm ID DMAID/EID/RootAlarmID HostingDMAID/RootAlarmID "DMAID" refers to the DataMiner ID of the DataMiner Agent where the element was originally created. "HostingDMAID" refers to the DataMiner ID of the DataMiner Agent currently hosting the element and managing its alarms. Most of the time, these two values will be the same, but they may differ, for example, when an element is exported from one Agent and imported onto another Agent. In this case, the element retains the original DMAID, but the HostingDMAID will reflect the new Agent's ID.
In the Group by box, you can select the column by which the alarms or information events should be grouped.
Under Match parameter index data filter when, you can fine-tune how a parameter index data filter will be applied. With the default Equals setting, the index will need to match the filter exactly. Select Contains if the index should instead only contain the filter. This only applies to index data filters added from the Data pane, not to filters configured in the Settings pane.
Optionally, fine-tune the component layout. In the Component > Layout pane, the following options are available:
The default options available for all components. See Customizing the component layout.
Expand on hover: If this option is selected, and not all data within the component can be shown in the available space, the component will expand across other components when you hover the mouse pointer over it in order to show as much data as possible.
Optionally, apply a data filter. Element, parameter, index, service and view data can be used as a filter. Various components, such as a parameter selector and time range, can also be used as a filter. See Adding data to a component.