Monitoring a spectrum signal by comparing it with thresholds
For many international football games, a good live stream across the globe is of the utmost importance to make sure all football fans can watch the game live. Satellite communication plays a crucial role in this. A good example of this use case could be the Champions League Final of June 1st, 2024, broadcast from the legendary Wembley stadium in London. In this simulated use case, the satellite dish at the Skyline HQ receives the signal, behaving like a TV broadcaster to spread it to the Belgian living rooms. In this tutorial, you will learn how to monitor the signal and generate alarms when the signal is for example altered by rain fade or a sudden frequency change.
You will learn how to:
- Deploy an application package from the DataMiner Catalog
- Add and manage a spectrum preset
- Alter the settings to get the trace window applicable for your use case
- Add and edit thresholds
- Add and edit spectrum analyzer scripts
- Add and edit spectrum analyzer monitors
Expected duration: 20 minutes.
Tip
See also:
- Kata #32: Using the spectrum analyzer on DataMiner Dojo
- Skyline Spectrum Simulation connector
Note
The content and screenshots for this tutorial have been created in DataMiner 10.4.5.
Prerequisites
- A DataMiner System that is connected to dataminer.services.
Overview
This tutorial consists of the following steps:
- Step 1: Deploy the 'Spectrum Simulation' package from the Catalog
- Step 2: Initialize the use case
- Step 3: Add a first threshold (to detect the rain fade)
- Step 4: Add a spectrum script
- Step 5: Add a first spectrum monitor to detect the rain fade
- Step 6: Test the rain fade effect
- Step 7: Add a second threshold to detect a sudden shift in frequency
- Step 8: Edit the spectrum script
- Step 9: Add a second spectrum monitor to detect the shifted carrier
- Step 10: Test the shifted frequency effect
Step 1: Deploy the 'Spectrum Simulation' package from the Catalog
Go to https://catalog.dataminer.services/details/01ea2334-0cbb-4dfe-ae6b-07a7ed425df4.
Deploy the catalog item to your DataMiner Agent by clicking the Deploy button.
Tip
See also: Deploying a Catalog item to your system
Check whether the package has been successfully deployed:
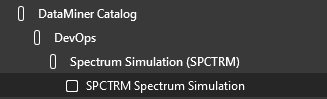
Open DataMiner Cube and check whether a view "Spectrum Simulation (SPCTRM)" and element named "SPCTRM Spectrum Simulation" have been added to your DataMiner Agent.
Open the Automation module in DataMiner Cube and check if the Automation script SPCTRM_AS_SkylineSpectrumSimulation has been added.
On the homepage of your DataMiner System, check whether the low-code app "Skyline Spectrum Simulation" has been added.
Tip
See also: Accessing the Low-Code Apps module
Step 2: Initialize the use case
Open the low-code app "Skyline Spectrum Simulation".
At the bottom of the window, click the button Initialize Signal.

Add a preset to the spectrum simulation element:
Open DataMiner Cube.
In the Surveyor, select the element SPCTRM Spectrum Simulation.
On the Spectrum Analyzer data page, select the Presets tab in the pane on the right, and click the Manage button at the bottom of the pane.
Click New and specify the necessary data:
Add a name, e.g.
myPreset.Optionally, add a description.
Select the checkbox Share preset with other users.
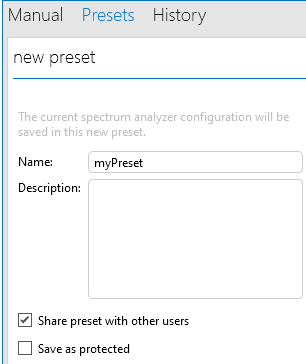
Click OK.
Tip
See also: Using spectrum analysis presets
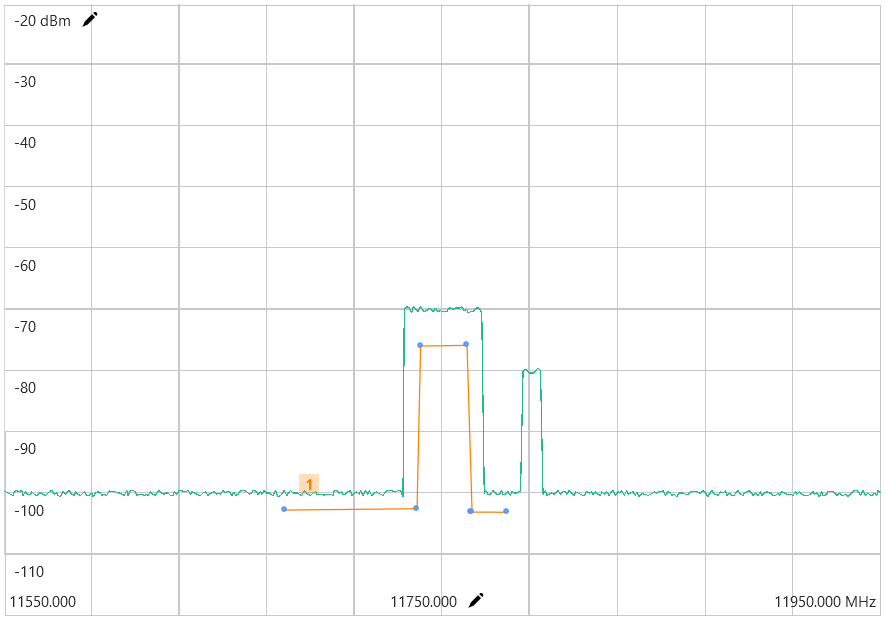
Select the Manual tab in the pane on the right, and configure the following settings:
- Frequency span: 400 MHz
- Center frequency: 11 750 MHz
- Sweeptime: 100 ms
The carrier of the main live feed and SNG feed will appear in the spectrum trace.

Note
When you edit settings of the preset later, you should regularly close and reopen the element card. This will ensure that the UI is updated with the latest changes.
Step 3: Add a first threshold to detect the rain fade
Make sure your preset is loaded:
In the Presets pane, select Show shared presets.
Select your preset, and click the Load button.
Add a threshold to detect the rain fade:
In the ribbon at the top of the card, select thresholds and click Threshold edit mode.
In the details pane to the right of the spectrum display, click Add threshold.
Draw the threshold on the spectrum real-time display so that it is slightly below the main signal (which has a center frequency of 11 750 MHz) in terms of amplitude.
Save the preset:
At the bottom of the Presets pane, select the preset you made earlier in the dropdown list.
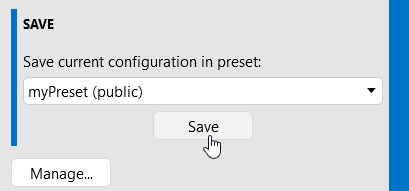
Click Save.
In the dialog box, click Yes.
Close and reopen the element card.
Tip
See also: Configuring spectrum thresholds
Step 4: Add a spectrum script
Create a script that calculates a boolean value "rainFadeDetected":
In the ribbon at the top of the card, select monitors and click New script.
Specify a name for the script, e.g.
myScript.Configure the script contents as illustrated below:
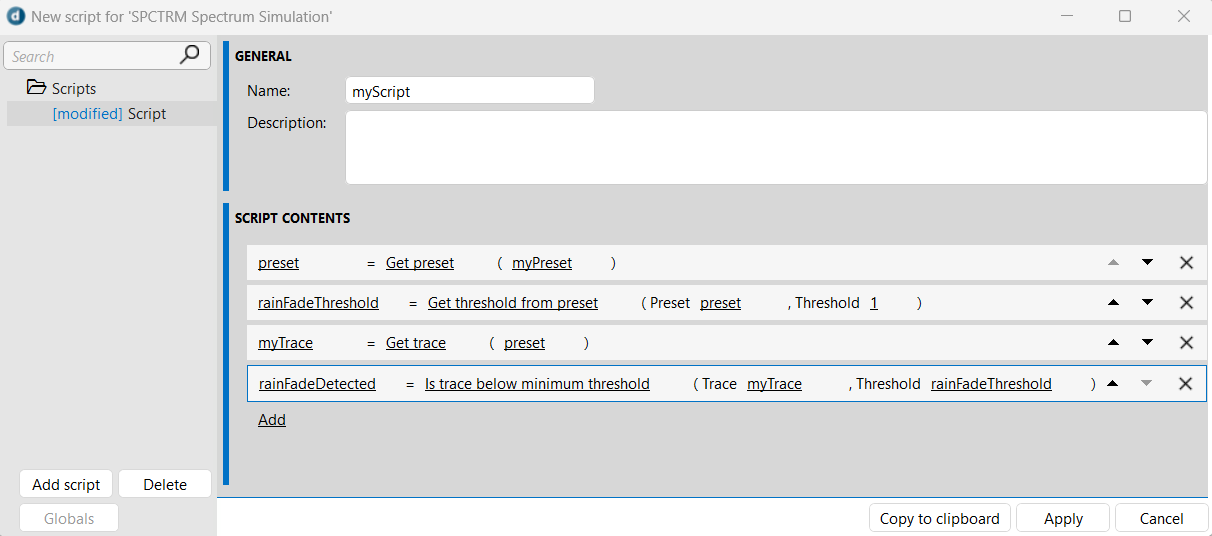
Click Apply to save the script, and close the script window.
Save the preset and reload the element card, like in the previous step.
Tip
See also: Working with spectrum scripts
Step 5: Add a first spectrum monitor to detect the rain fade
In this step, you will add a rain fade monitor that generates a major alarm when the "rainFadeDetected" boolean is evaluated as true.
In the ribbon at the top of the card, select monitors and click New monitor.
If this is the first monitor that gets added to the system, in the new monitor window, click Add monitor.
Specify a name for the monitor, e.g.
rainFadeMonitor.Expand Show details, and set Interval to 5 seconds (instead of the default value of 5 minutes).
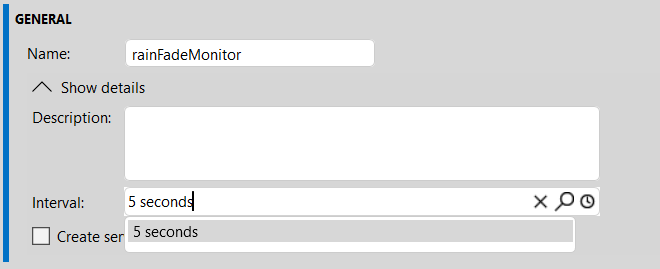
This will make sure that the monitor is triggered every 5 seconds, causing a quick reaction when the rain fade kicks in.
Make sure your script (e.g. "myScript") is selected in the script dropdown box.
Under Monitoring and trending, click Add and select Script variable rainFadeDetected to add this as a parameter.
Configure the parameter as illustrated below:

Click Apply to save the monitor, and close the monitor window.
Tip
See also: Working with spectrum monitors
Step 6: Test the rain fade effect
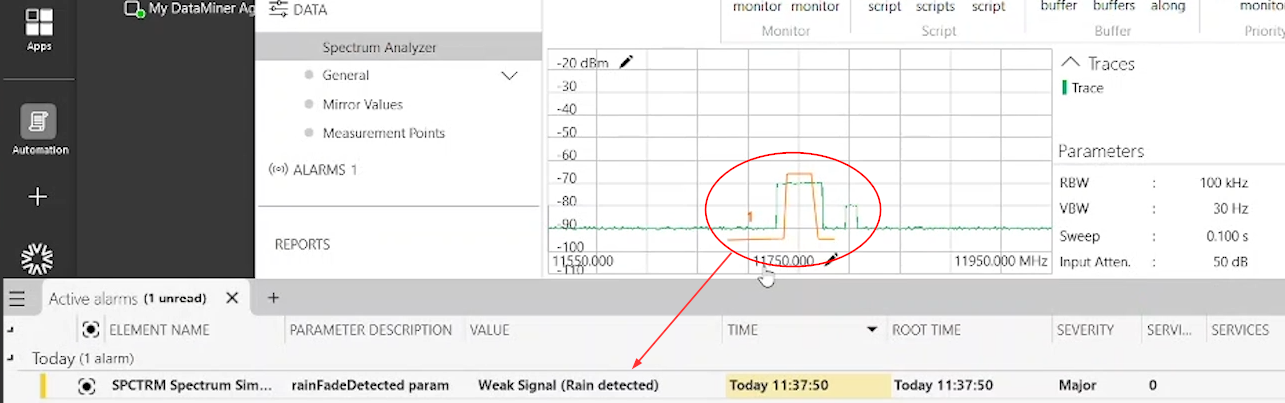
Open the Spectrum Simulation low-code app and click the button Let it rain.

This will make the main carrier go below the configure threshold, simulating the rain fade causing a sudden drop in amplitude.
Check in the Alarm Console in Cube if a major alarm is generated.
Note
As you configured the monitor to execute the script with an interval of 5 seconds, it can take up to 5 seconds before the alarm is generated after the start of the rain fade. By default, this interval is even set to 5 minutes.
In the Spectrum Simulation low-code app, click the button Let the sun shine.
This will cause the alarm to go away again.
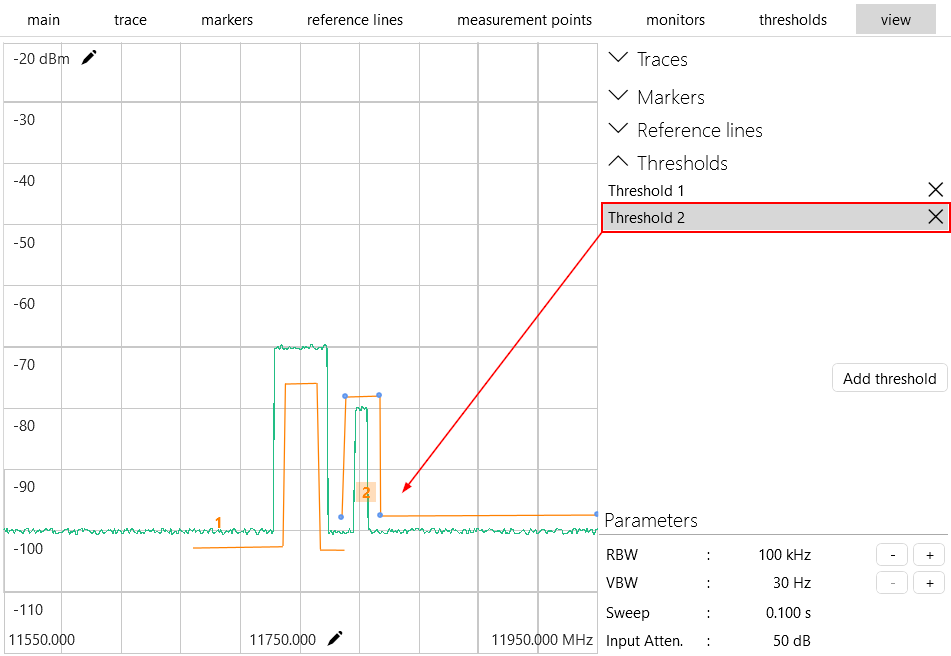
Step 7: Add a second threshold to detect a sudden shift in frequency
Go back to the spectrum analyzer page in Cube and make sure your preset is loaded.
Add a second threshold that is just a bit above your SNG Feed signal (with a small amplitude) and that goes all the way to the right of the current trace window:
Save the preset and reload the element card.
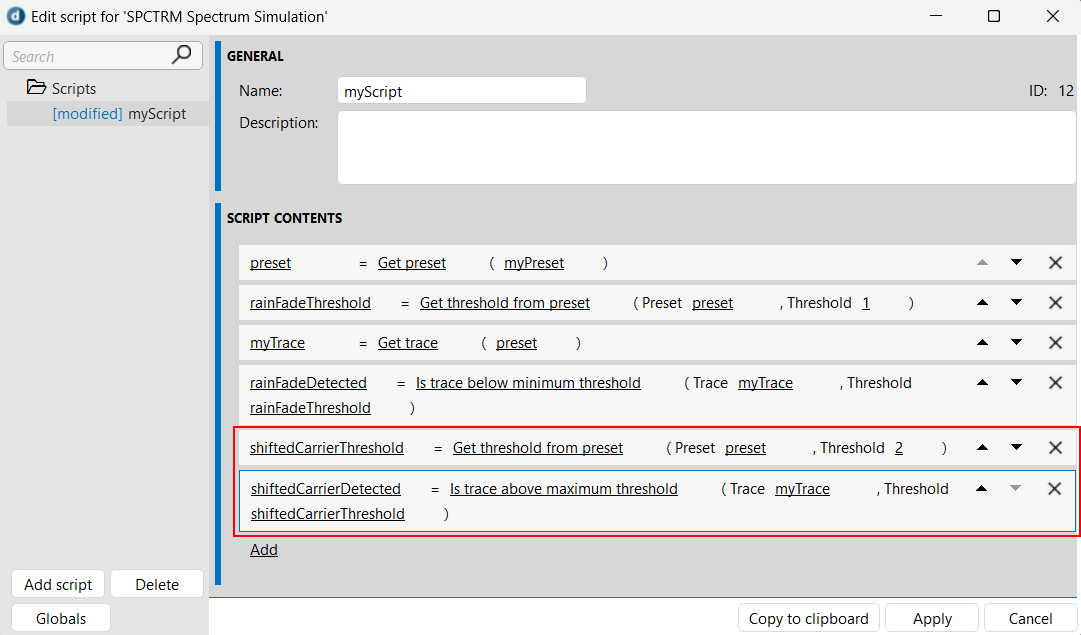
Step 8: Edit the spectrum script
In this step, you will further elaborate the script you created earlier, so that the new threshold 2 is used to detect if the SNG feed carrier has shifted to the right. While there are multiple ways to calculate booleans in spectrum scripts, in this tutorial, you will build on what you used earlier and therefore use the Trace above maximum threshold option.
In the ribbon at the top of the card, select monitors and click Edit scripts.
Select the script you created earlier and add the script content indicated below:
Click Apply to save the script, and close the script window.
Save the preset and reload the element card.
Step 9: Add a second spectrum monitor to detect the shifted carrier
In this step, you will add a second, separate monitor that will generate a critical alarm when a shifted carrier is detected.
In the ribbon at the top of the card, select monitors and click New monitor.
Specify a name for the monitor, e.g.
shiftedCarrierMonitor.Expand Show details, and set Interval to 5 seconds.
Make sure your script (e.g. "myScript") is selected in the script dropdown box.
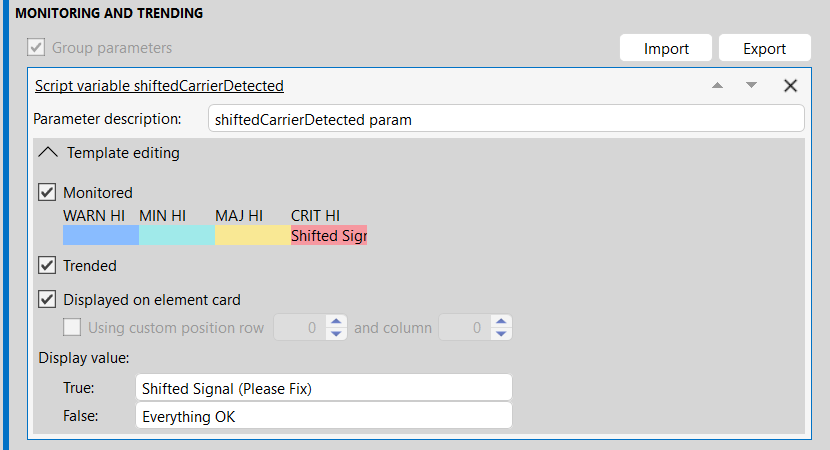
Under Monitoring and trending, click Add and select Script variable shiftedCarrierDetected to add this as a parameter.
Configure the parameter as illustrated below:
Click Apply to save the monitor, and close the monitor window.
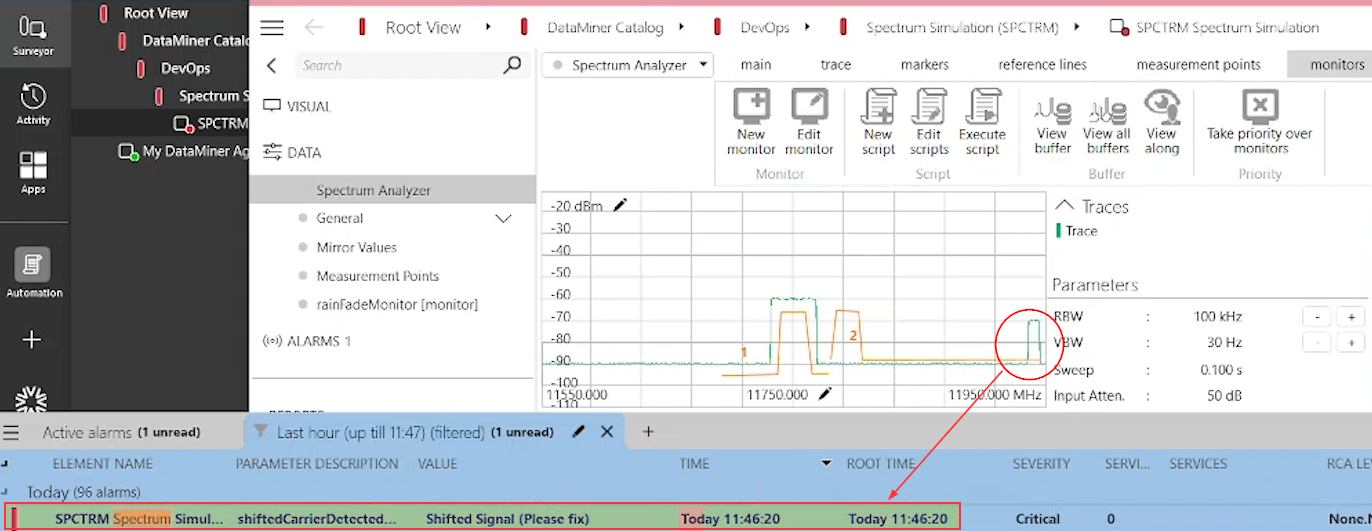
Step 10: Test the shifted frequency effect
Open the Spectrum Simulation low-code app and click the button Frequency Shift of SNG Feed (+150 MHz).

This will shift the SNG feed carrier by 150 MHz, which will bring it above the threshold monitored in the second spectrum monitor you added.
Check in the Alarm Console in Cube if a critical alarm is generated.