Adaptive Card notifications with custom buttons
This tutorial, which comes after the Chat notifications tutorial, shows you how to use buttons in Adaptive Card notifications (or custom command responses) to enable powerful two-way interactions.
Estimated duration: 15 minutes.
Tip
See also: Kata #27: Custom ChatOps Operator: Use buttons in Adaptive Cards on DataMiner Dojo 
Prerequisites
- A DataMiner System connected to dataminer.services
- The latest version of the DataMiner Cloud Pack
- Admin consent has been granted in the Admin app
Overview
- Step 1: Follow the chat notifications tutorial
- Step 2: Deploy the Custom Command Examples package from the Catalog
- Step 3: Fetch the teams and the channels of a team
- Step 4: Adjust the chat notification Correlation rule to send a notification with custom buttons
- Step 5: Use the custom buttons from the notification
Step 1: Follow the chat notifications tutorial
If you have not yet done so, go to Chat notifications and follow the tutorial. Otherwise, you can skip this step.
Step 2: Deploy the Custom Command Examples package from the Catalog
Later in this tutorial, you will trigger a custom command from the Custom Command Examples package with a button added to an Adaptive Card notification. To make this possible, this package first needs to be deployed.
Note
To learn more about this package, refer to its README file.
Go to https://catalog.dataminer.services/details/package/5863.
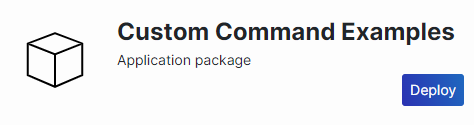
Click Deploy, and select the target DMS.
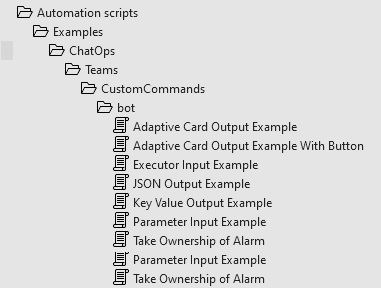
Verify that the package has been installed correctly by accessing the scripts in the Automation module in DataMiner Cube.
You should see the scripts illustrated below:
Step 3: Fetch the teams and the channels of a team
To be able to send a notification in a channel later in this tutorial, you will first need to fetch the teams and the channels of a team, or create new ones if you do not have any yet.
In DataMiner Cube, open the Automation module.
Fetch or create the teams:
To fetch the existing teams:
Execute the Fetch Teams Example script.
In the Teams box, select the memory file where the teams should be stored (TeamsExample).
Click Execute now.
Click Close to exit the Fetch Teams Example window.
To create a new team:
Execute the Create Team Example script.
Specify the email address of the team owner, the name of the team, and the memory file where the team should be stored (TeamsExample).
Click Execute now.
Click Close to exit the Create Team Example window.
Go to the memory files tab and verify that the TeamsExample memory file has been updated accordingly.
Fetch the channels of a team or create a new channel:
To fetch the existing channels:
Execute the Fetch Channels Example script.
Select the team and the memory file where the channels of that team should be stored (ChannelsExample).
Click Execute now.
Click Close to exit the Fetch Channels Example window.
To create a new channel:
Execute the Create Channel Example script.
In the Team ID box, select the ID of the team where the channel should be added.
Specify the name and description for the new channel.
In the Channels box, select the memory file where the channel should be stored (ChannelsExample).
Click Close to exit the Create Channel Example window.
Go to the memory files tab and verify that the ChannelsExample memory file has been updated accordingly.
Send a notification to a channel:
Execute the Send Channel Notification Example script.
Select the team and the channel, enter the notification you want to send, and click Execute now.
Click Close to exit the Send Channel Notification Example window.
Go to the Microsoft Teams channel you specified, and check whether the notification is displayed.
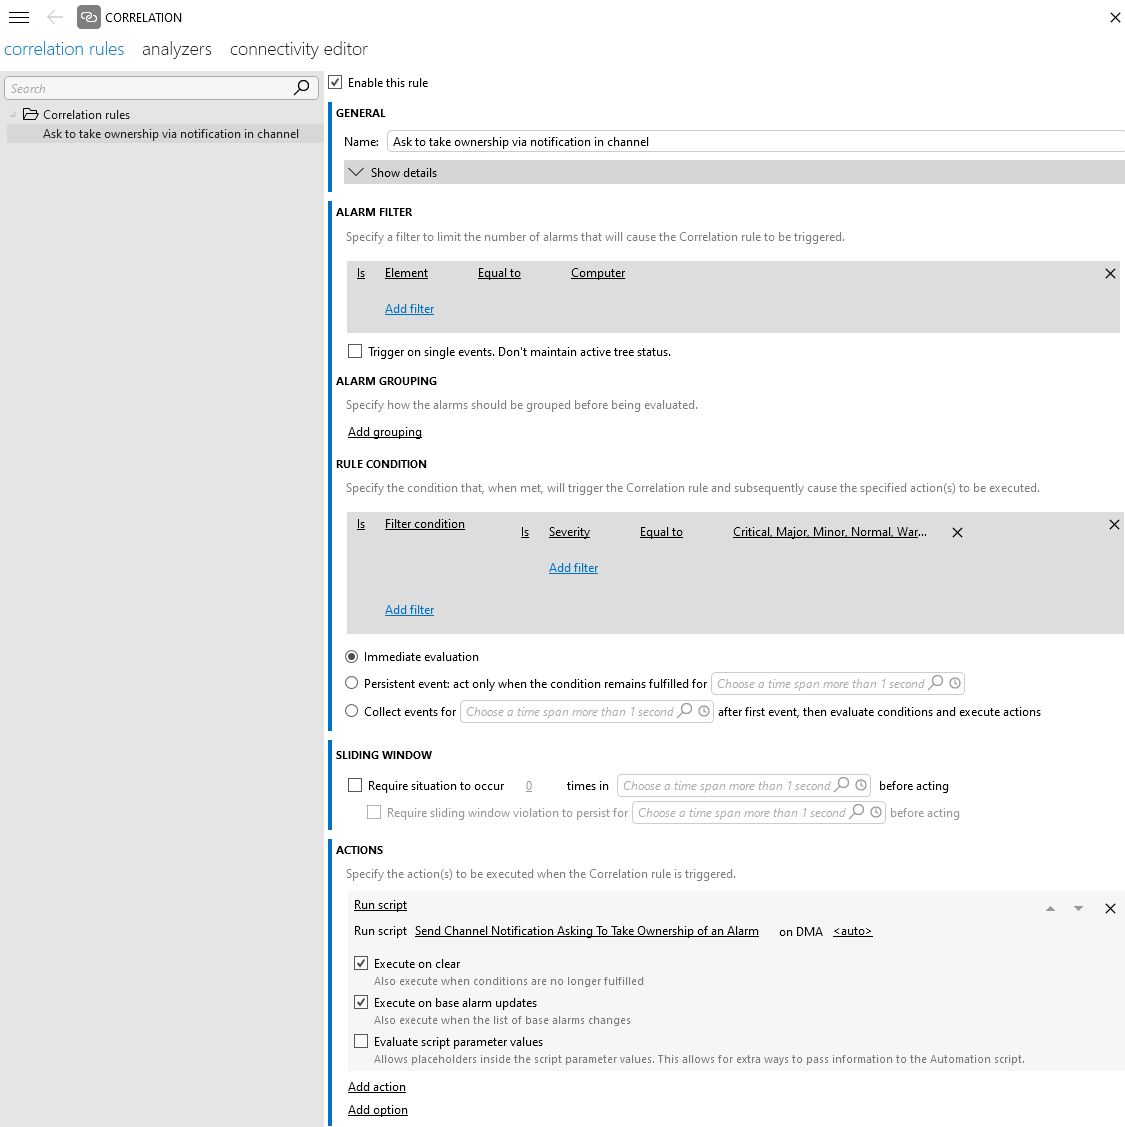
Step 4: Adjust the chat notification Correlation rule to send a notification with custom buttons
In this step, you will adjust the Correlation rule from the Chat notifications tutorial so that it sends a channel notification with custom buttons in an Adaptive Card when it is triggered by a specific alarm.
In DataMiner Cube, open the Correlation module.
Select the Correlation rule you created during the Chat notifications tutorial.
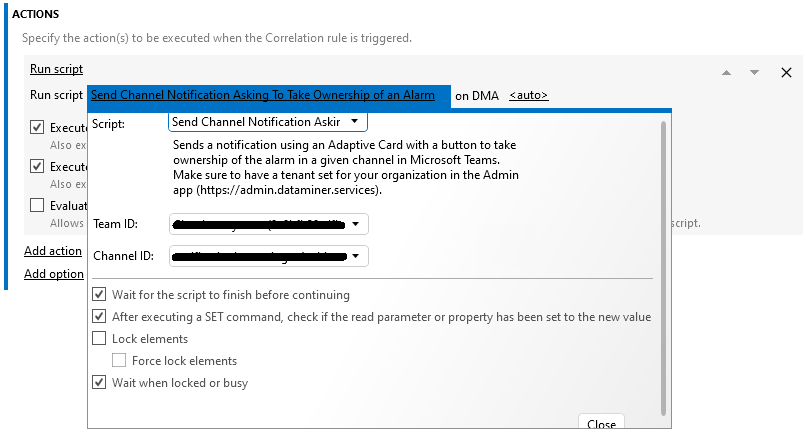
In the Run script action of the rule, select the script Send Channel Notification Asking To Take Ownership of an Alarm instead, and specify the team and channel from step 3 as input.
Trigger an alarm that will trigger the Correlation rule.
Go to the Microsoft Teams channel you specified, and check whether the notification is displayed.
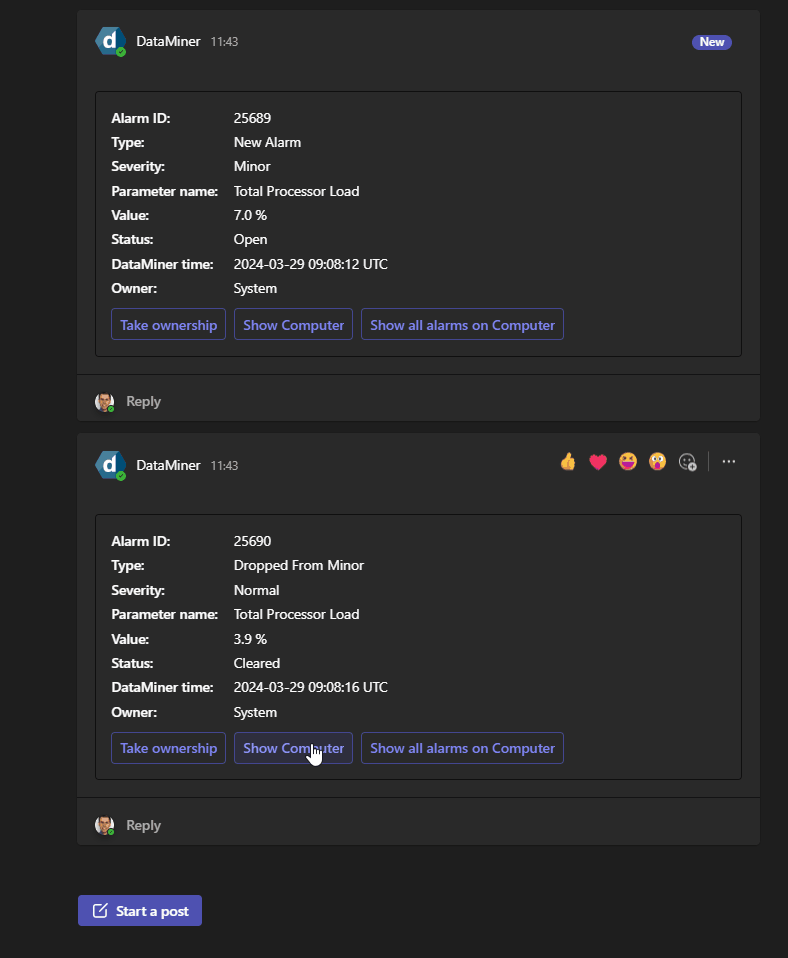
For example:
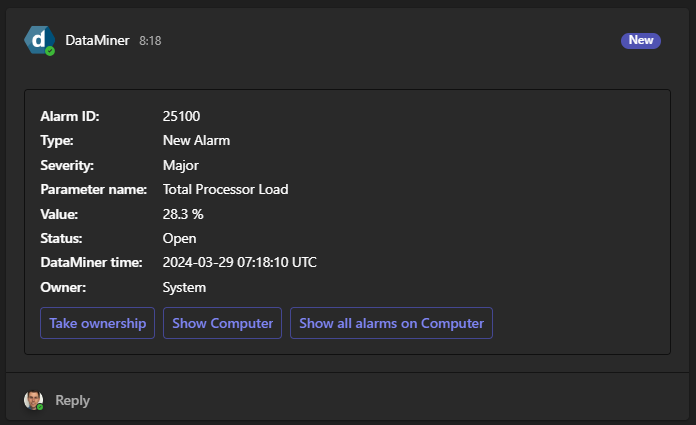
Step 5: Use the custom buttons from the notification
The notification in the channel contains a few buttons. Give them a try:
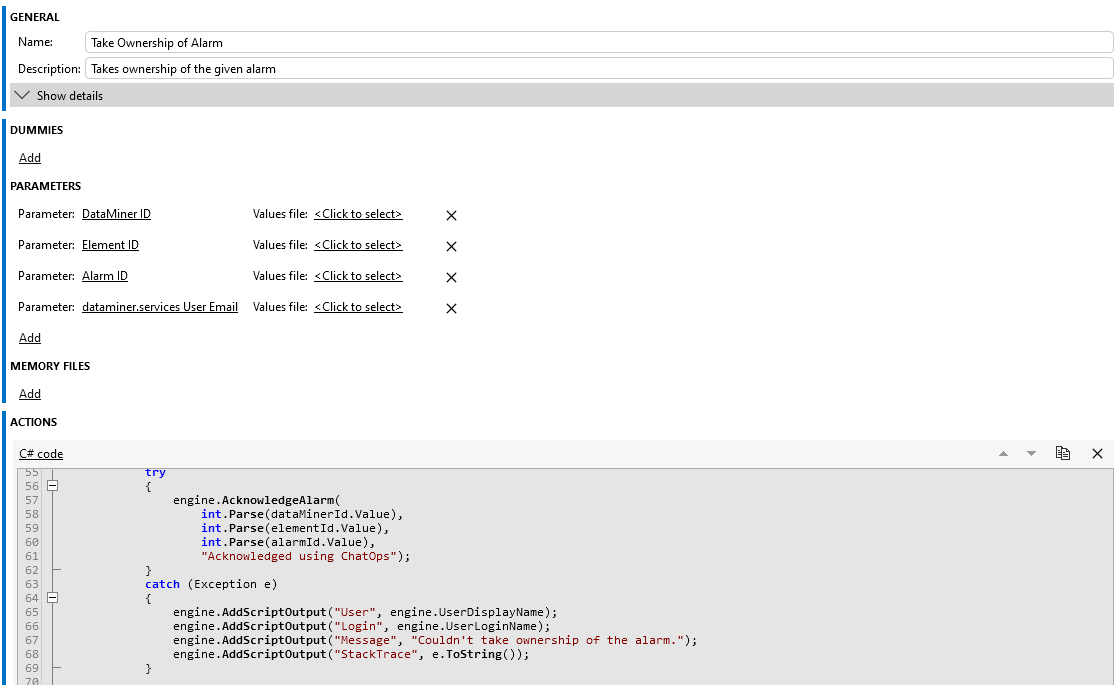
Take ownership: Executes the custom Take Ownership of Alarm command from the Custom Command Examples package.
With such commands, you can easily interact with the notification. The response of the custom command can again contain an adaptive card with buttons. This enables you to create user flows, while a notification can still be sent in another channel or private chat. This functionality offers a multitude of possibilities.
Show [element name]: Makes the DataMiner bot show more information about the element in question.
Show all alarms on [element name]: Makes the DataMiner bot show any alarms associated with the element in question.