Getting started with the Performance Analyzer
In this tutorial, you will learn how to get started with the Performance Analyzer solution based on an example solution with a simulated performance issue.
Expected duration: 25 minutes.
Note
The content and screenshots for this tutorial have been created using DataMiner version 10.5.4.
Tip
See also: Kata #62: Introduction to Performance Analyzer on DataMiner Dojo 
Prerequisites
For this tutorial, you will need a DataMiner System that meets the following requirements:
- DataMiner version 10.5.0 [CU1]/10.5.4 or higher.
- Connected to dataminer.services.
- The GQI DxM is enabled.
Tip
If you use a DaaS system, these DataMiner-related prerequisites are automatically met.
In addition, the following prerequisites are optional but highly recommended:
- Visual Studio with DIS extension, connected to your DataMiner System (see DIS installation and configuration).
- Git (this may be included with Visual Studio, depending on the version).
Overview
- Step 1: Set up the example solution
- Step 2: Create a low-code app
- Step 3: Implement the Performance Analyzer in the solution
- Step 4: Deploy the Performance Analyzer app
- Step 5: Analyze the collected data
- Step 6: Improve the implementation of the Process method
- Step 7: Analyze the collected data again
- Step 8: Exercise for DevOps Points (optional)
Step 1: Set up the example solution
To start this tutorial, you will need to follow the steps below to set up an example solution based on a GitHub repository that was specifically created for the tutorial.
Note
If you do not have Visual Studio, you can skip the steps below and instead deploy the example solution directly from the Catalog, by deploying the following package to a DMA connected to dataminer.services: Tutorial - Introduction to Performance Analyzer.
Clone the GitHub repository:
Open a command prompt in the location where you want to clone the repository.
Execute the command
git clone https://github.com/SkylineCommunications/SLC-GQIDS-Kata-PerformanceAnalyzerKataExercise.git.
Open the solution in Visual Studio:
Open the SLC-GQIDS-Kata-PerformanceAnalyzerKataExercise solution folder.
Open the solution PerformanceAnalyzerKataExercise.sln.
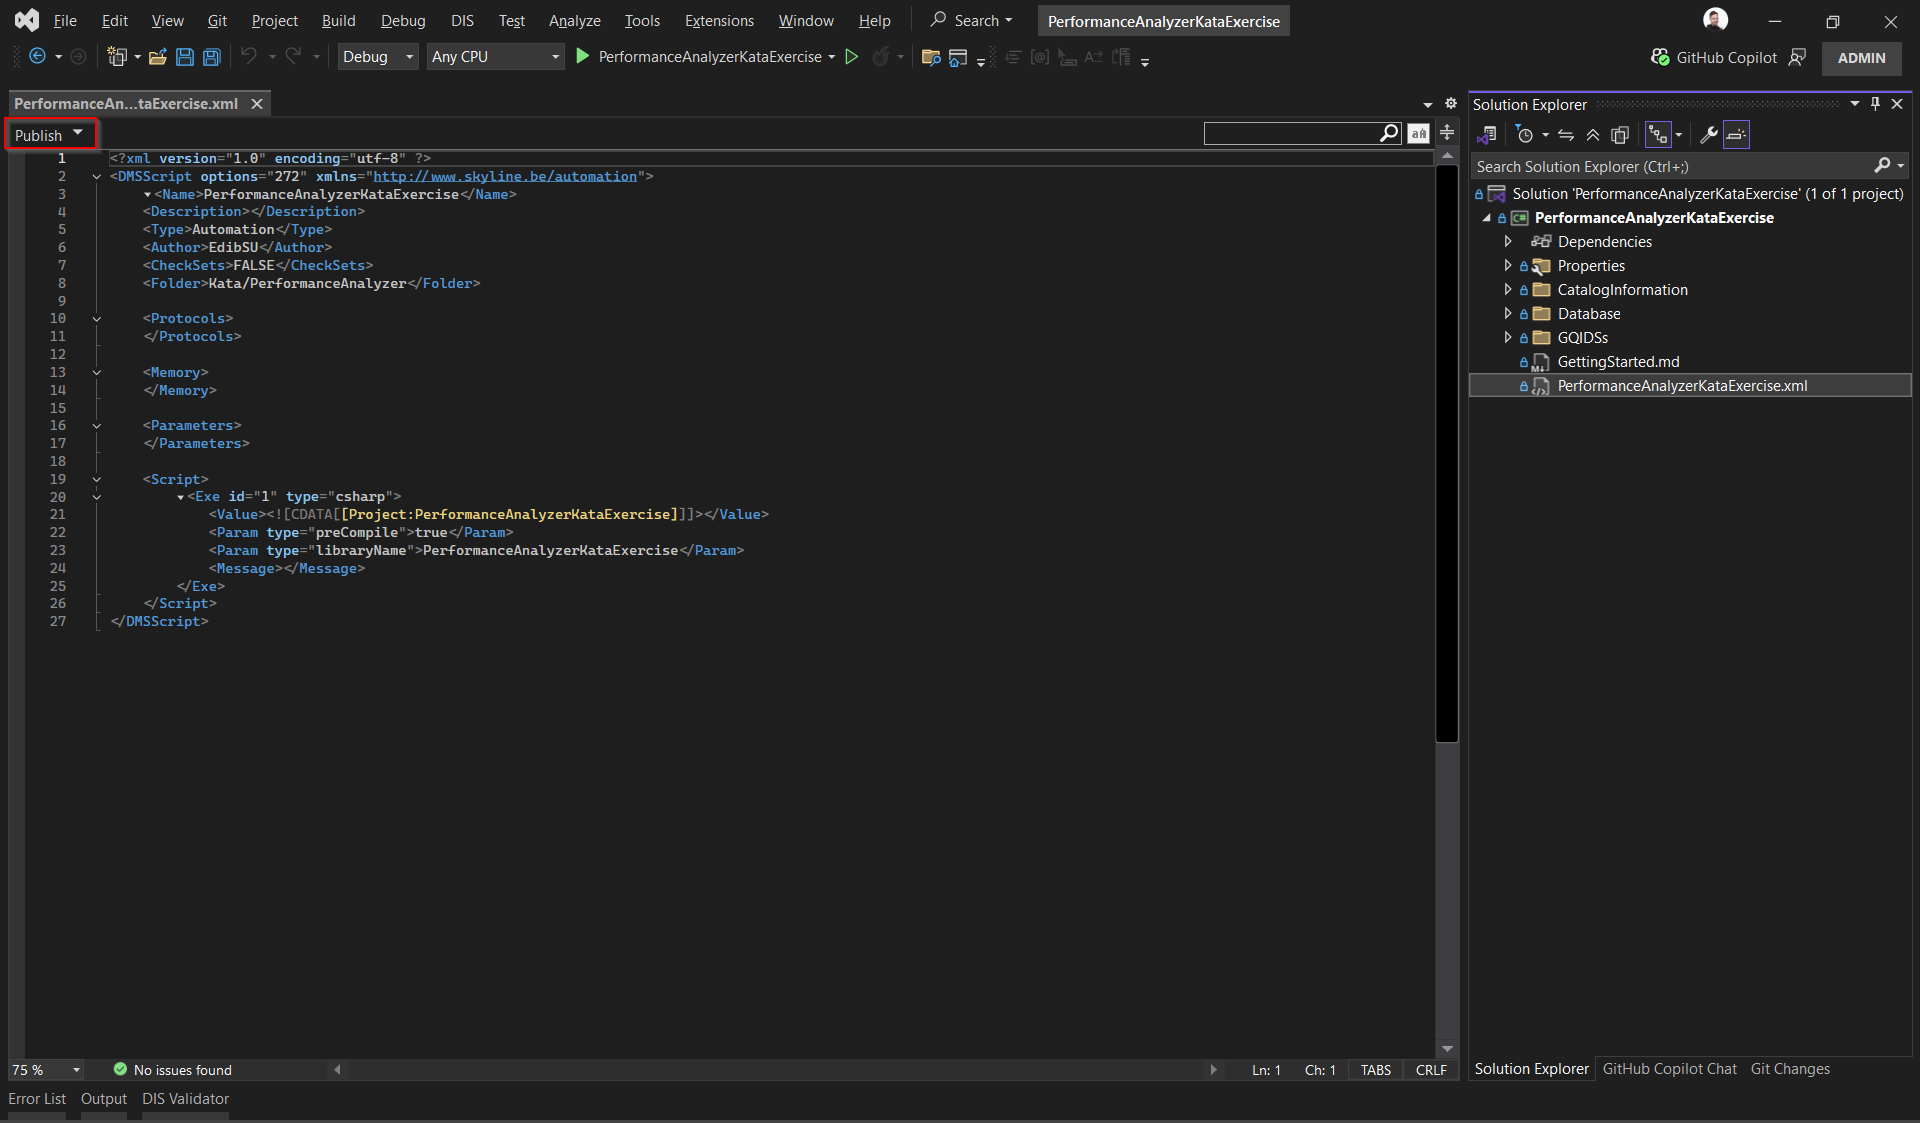
Publish the GQIDS:
Open PerformanceAnalyzerKataExercise.xml.
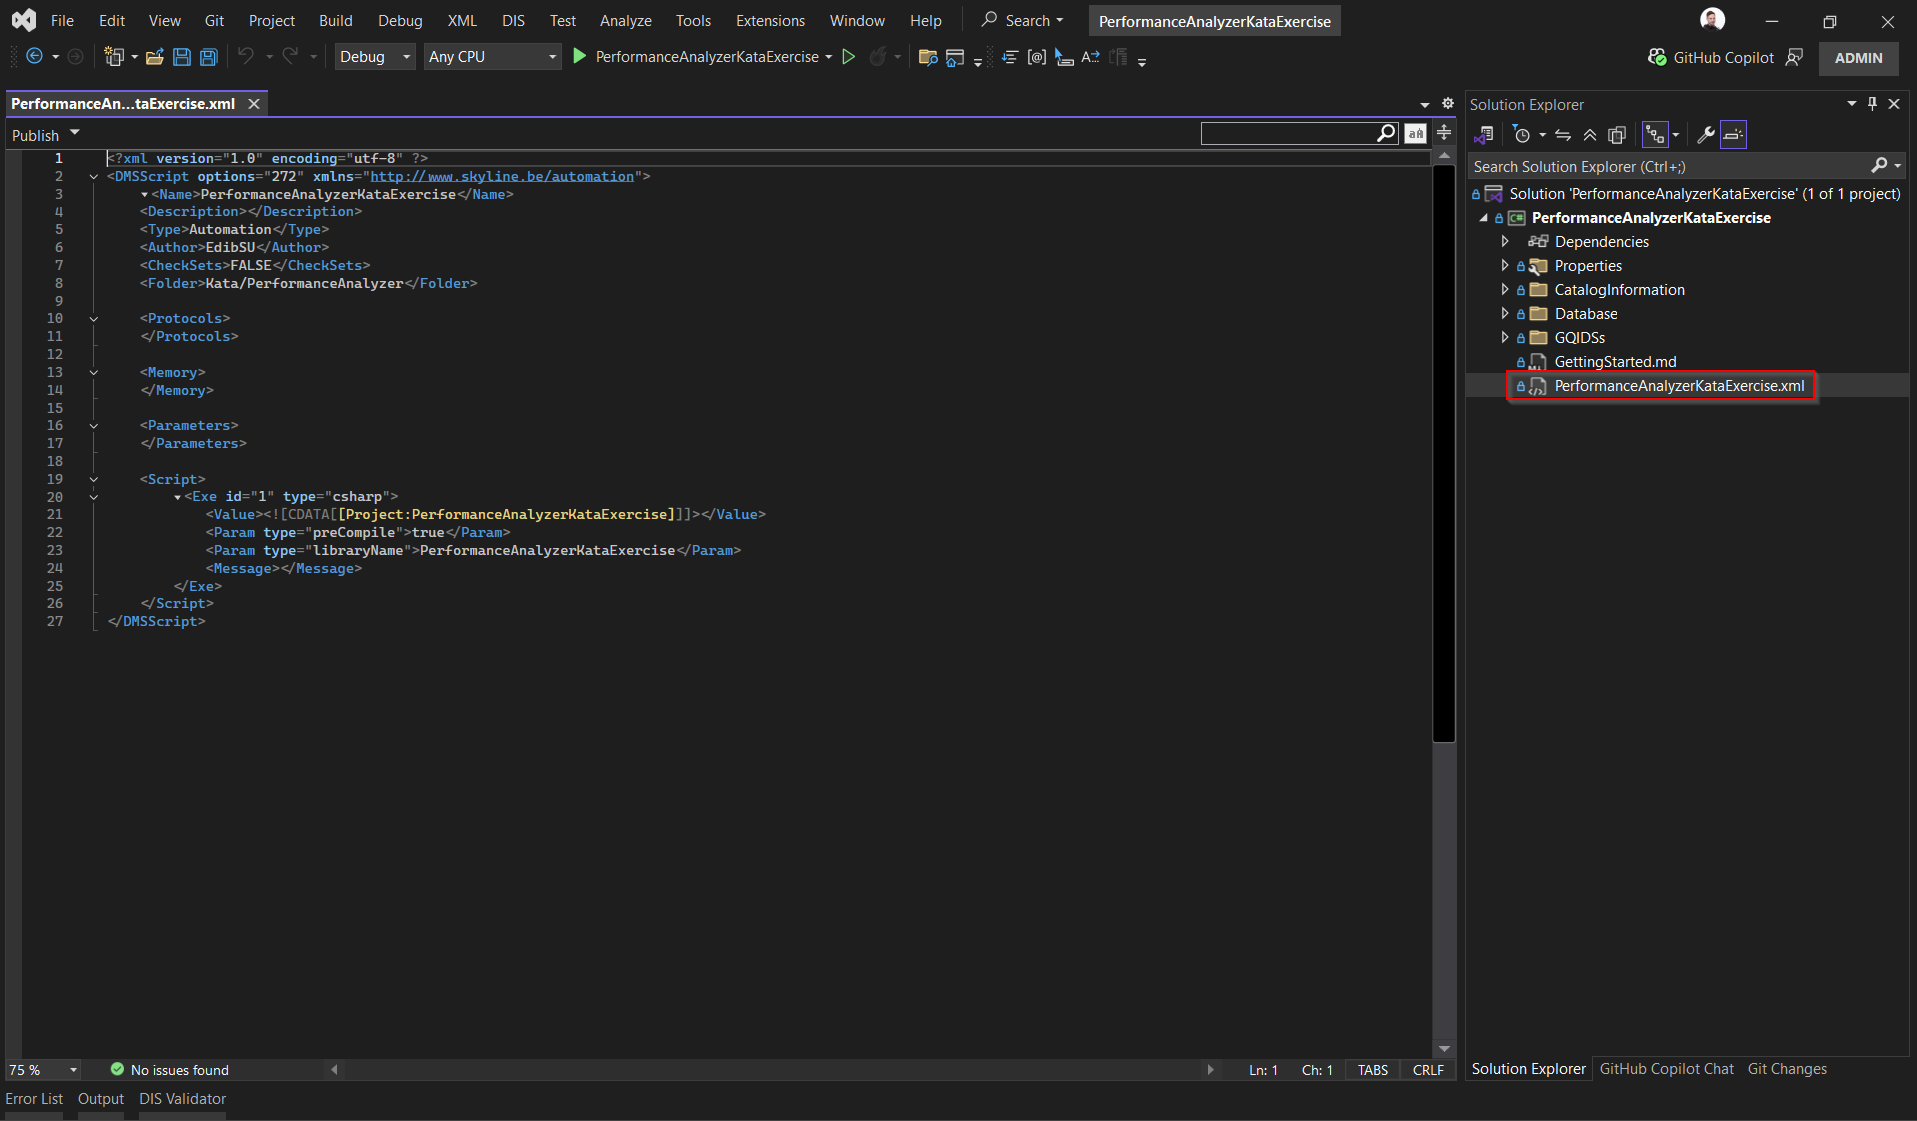
Click Publish.
Step 2: Create a low-code app
In this step, you will create a low-code app to visualize the performance issue that can then be analyzed with the Performance Analyzer.
Go to the root page of your DataMiner System, for example by clicking the Home button for your DMS on the dataminer.services page.
Create a new low-code app.
Optionally, give the app a name of your choice, e.g., Employee Overview.
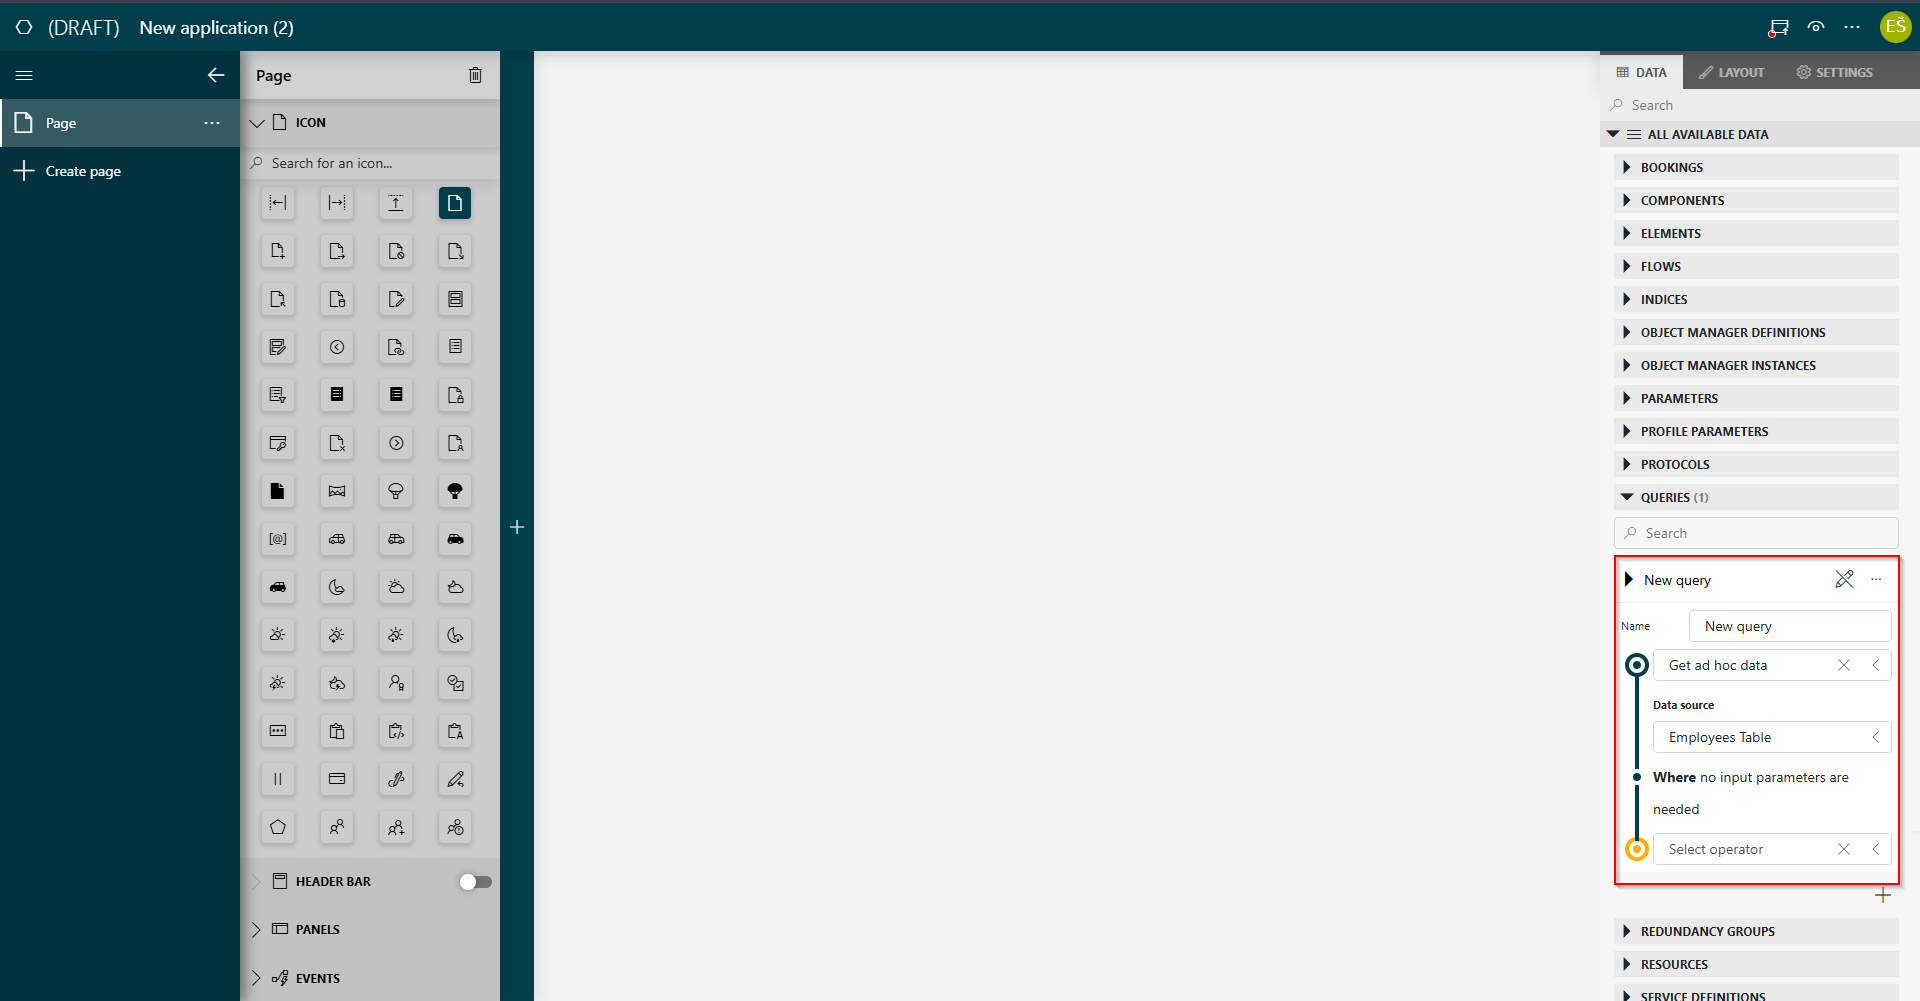
Create a query using the new GQIDS:
In the Data pane on the right, go to Queries and click the "+" icon to create a query.

Optionally, specify a custom name for the query, e.g., Employees Table.
Select Get ad hoc data and then Employees Table.
Drag the new query to the page.
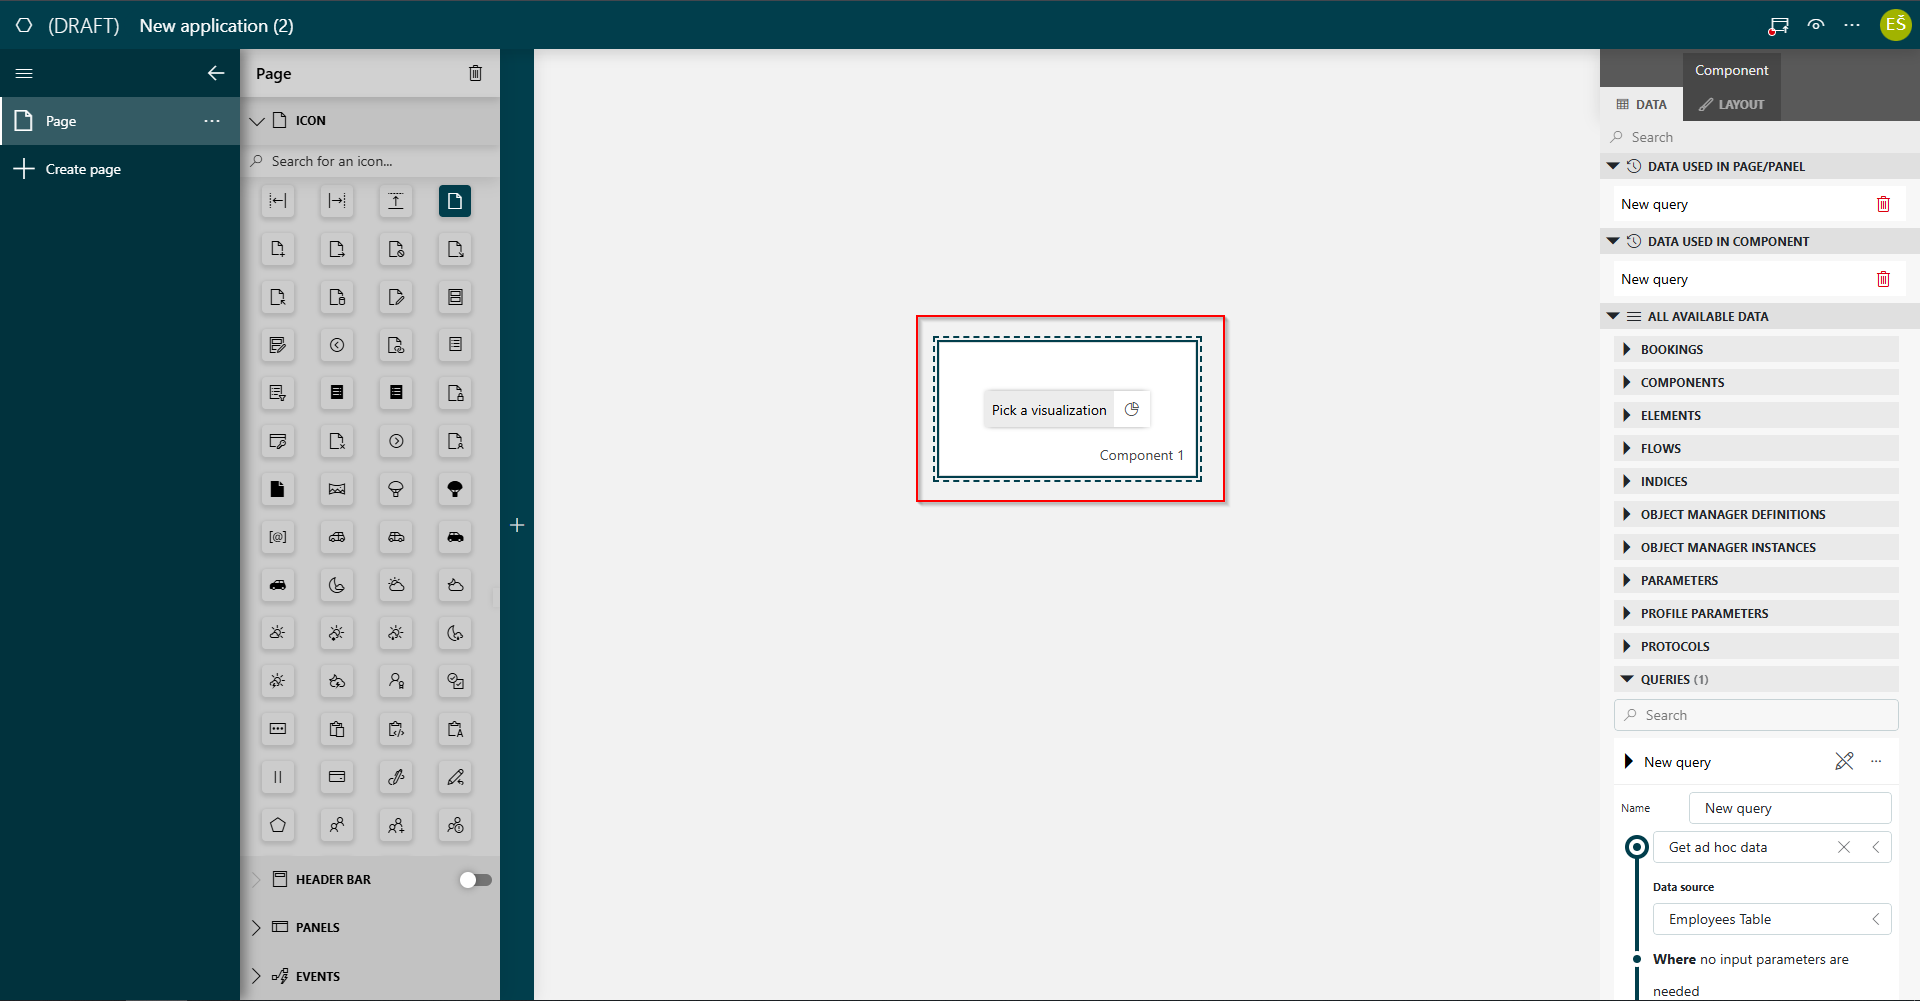
Select a table visualization for the component.
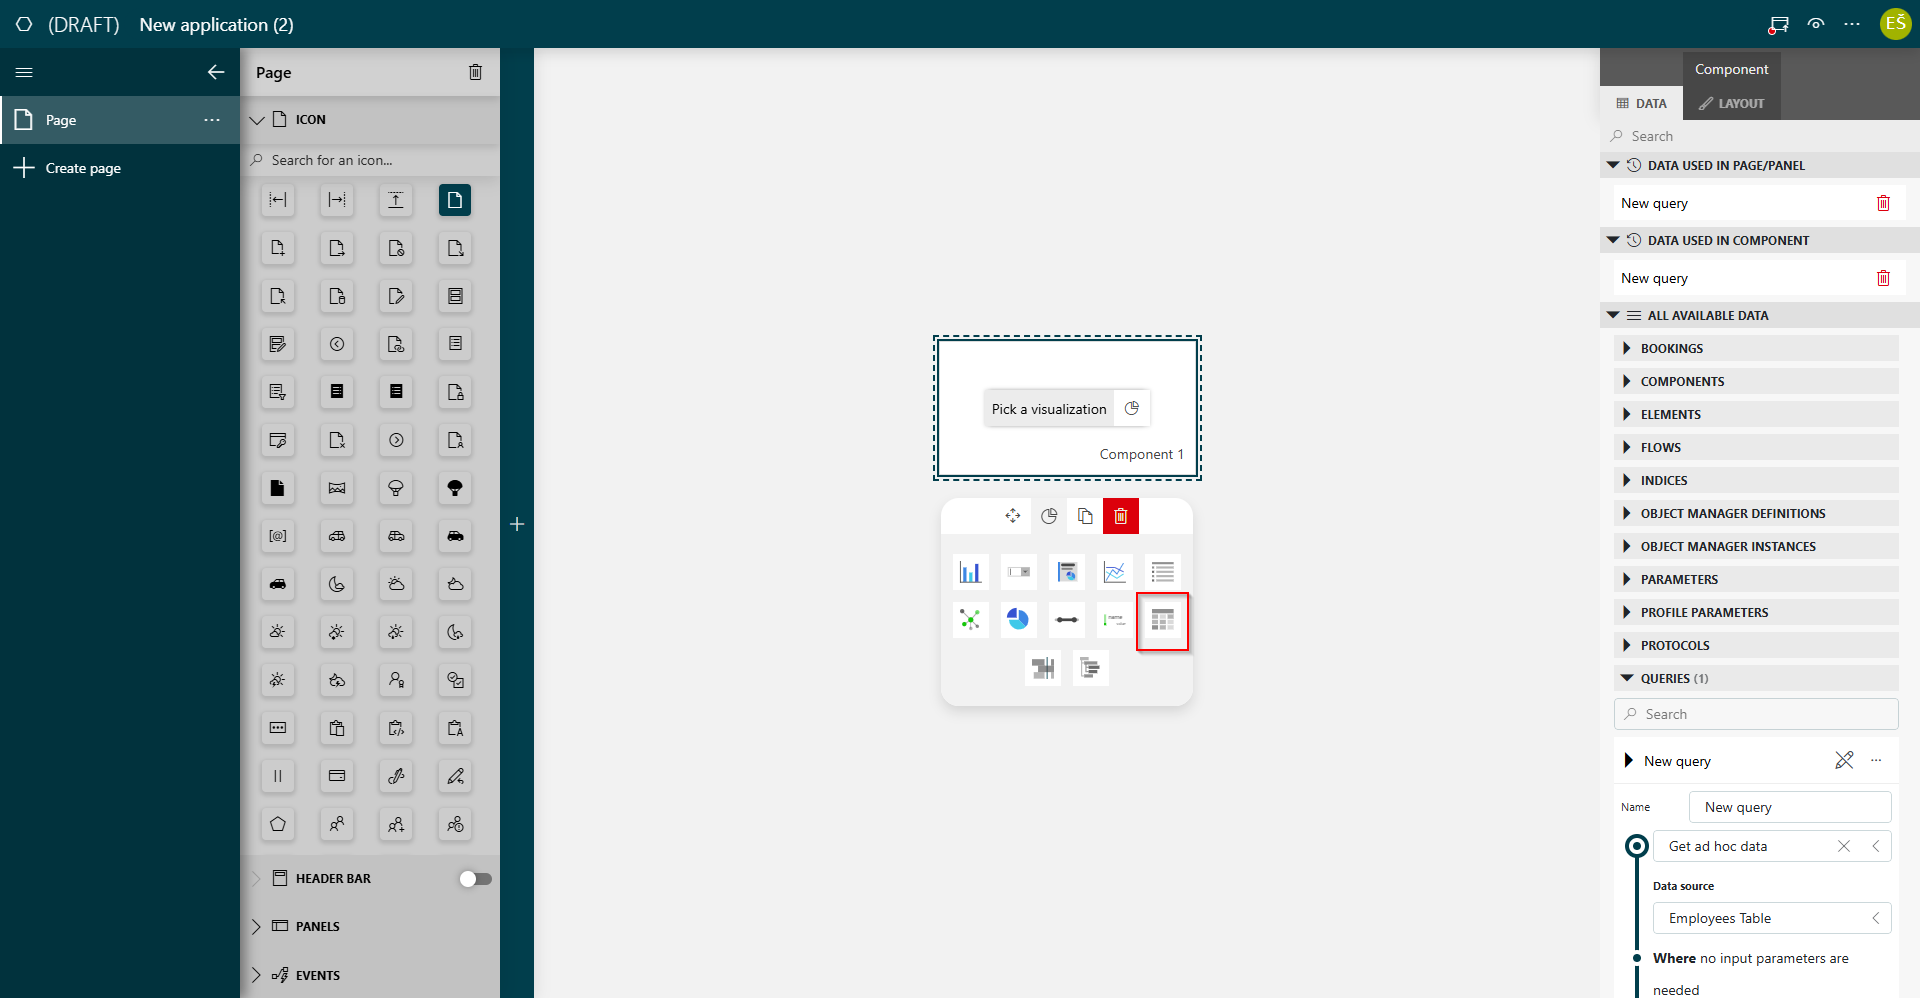
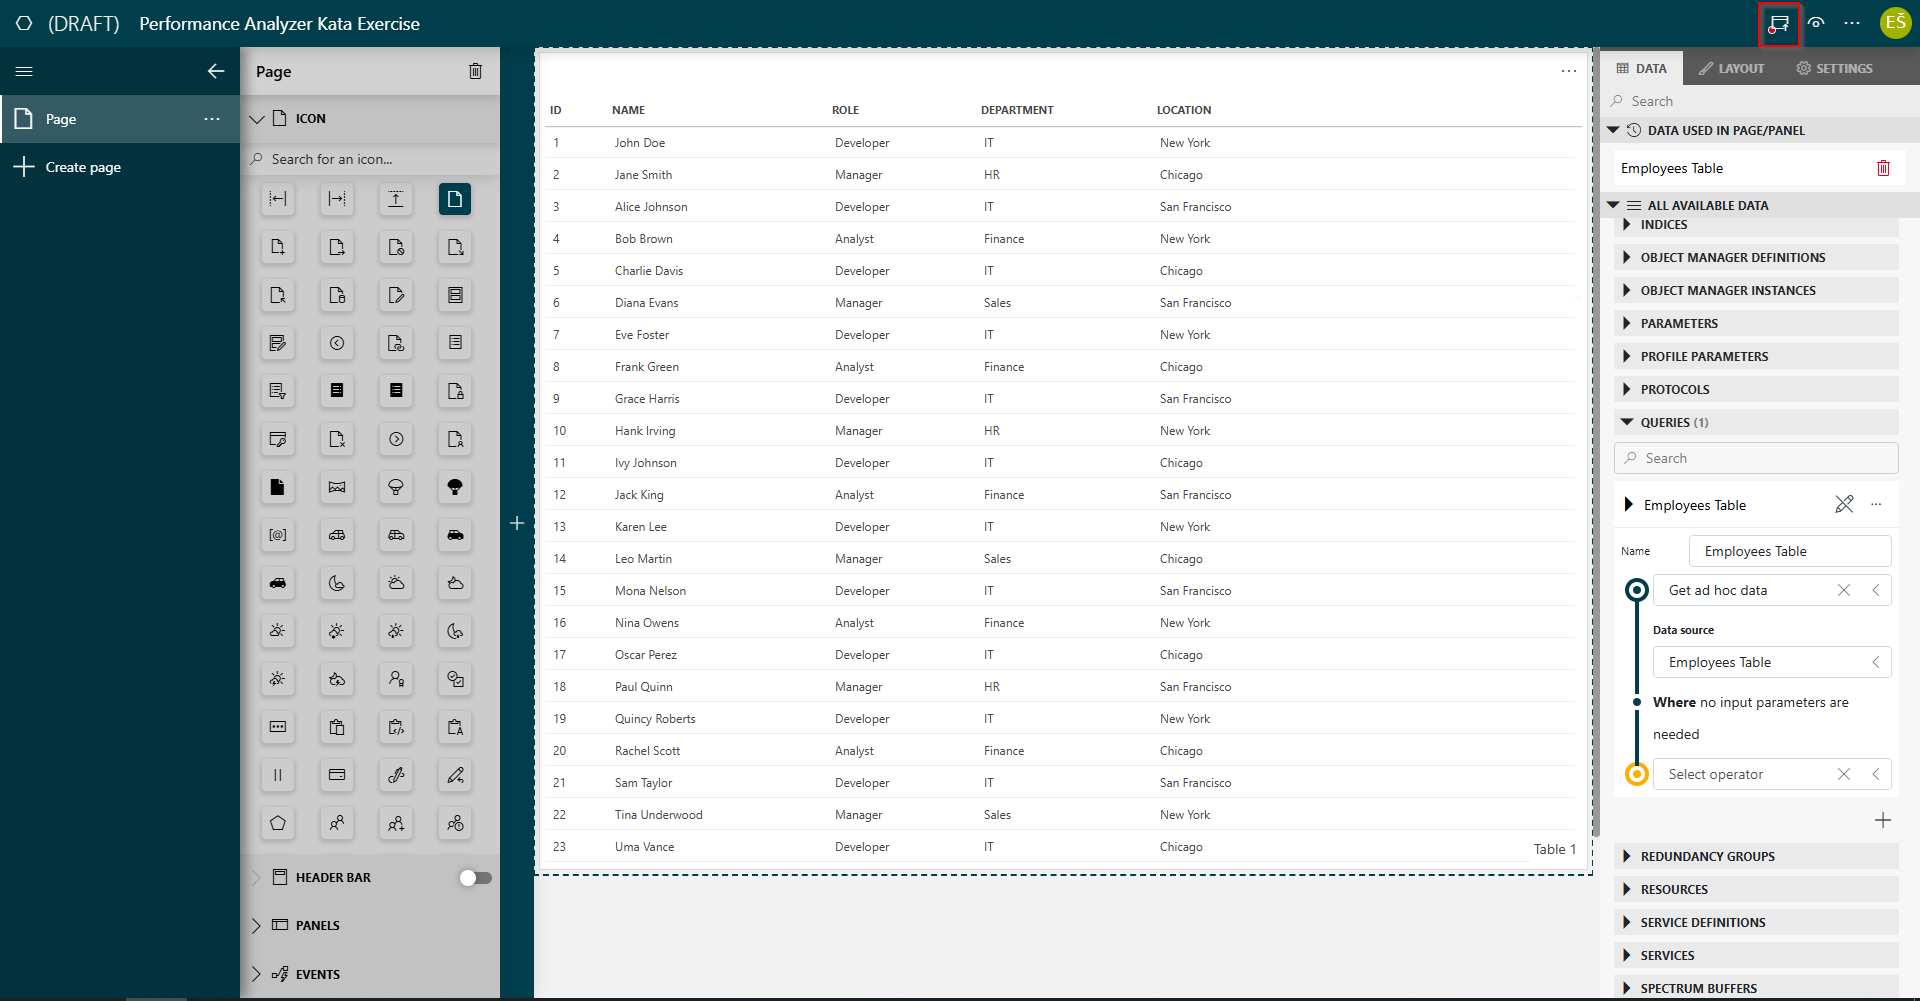
Optionally, drag the edges of the table component to adjust its size, until it looks like this:

Publish the low-code app using the button in the upper-right corner.
At this point, you will be notice that the table takes a while to load, without any obvious reason. Trying to figure out the cause of this issue can be a daunting task, so this is where the Performance Analyzer will prove very helpful.
Step 3: Implement the Performance Analyzer in the solution
Note
If you do not have Visual Studio , you can skip the steps below and instead deploy the exercise_1 branch of the example solution, where the Performance Analyzer has been implemented:
- Go to Tutorial - Introduction to Performance Analyzer.
- Go to the Versions tab and click the Deploy button for the 1.0.1-exercise1 branch.
Open the solution in the same way as in step 1.
Install the Skyline.DataMiner.Utils.PerformanceAnalyzer NuGet.
Tip
For more details about the Performance Analyzer NuGet, see Performance Analyzer library.
Implement the Performance Analyzer NuGet in the solution:
Add a
collectorfield of typePerformanceCollectorand initialize it in the constructor of theDatabaseControllerclass.
Wrap the bodies of all methods with
usingstatement with thePerformanceTrackerinstance, using thecollectorfrom the previous step.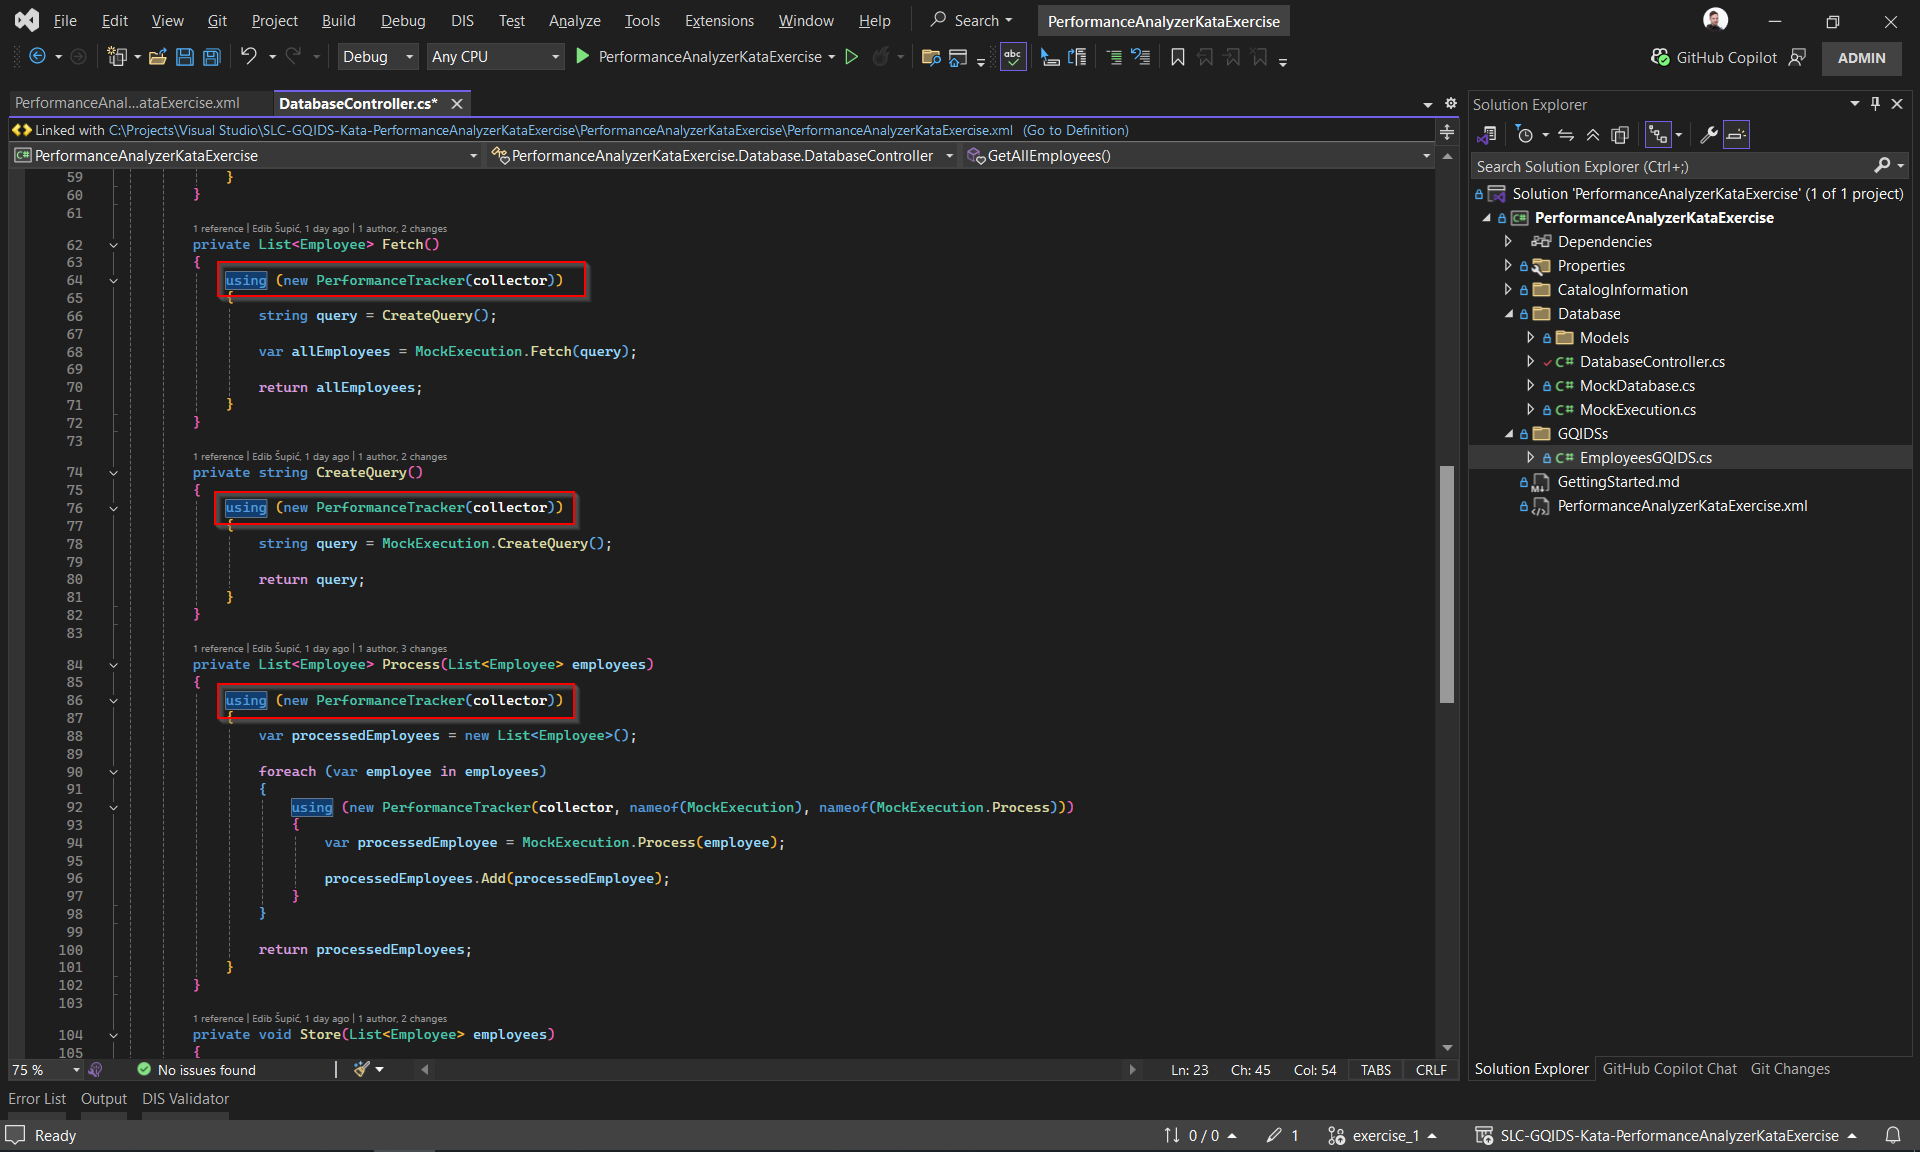
Publish the GQIDS in the same way as in step 1.
Step 4: Deploy the Performance Analyzer app
Go to the Performance Analyzer package in the Catalog.
Deploy the Catalog item to your DataMiner Agent by clicking the Deploy button.
Tip
See also: Performance Analyzer app.
Step 5: Analyze the collected data
As the Performance Analyzer has now been implemented in the solution, you will now be able to use the Performance Analyzer app to find out why loading your app takes so long.
Refresh the page in the low-code app from step 2.
From the root page of your DataMiner System, open the Performance Analyzer low-code app.

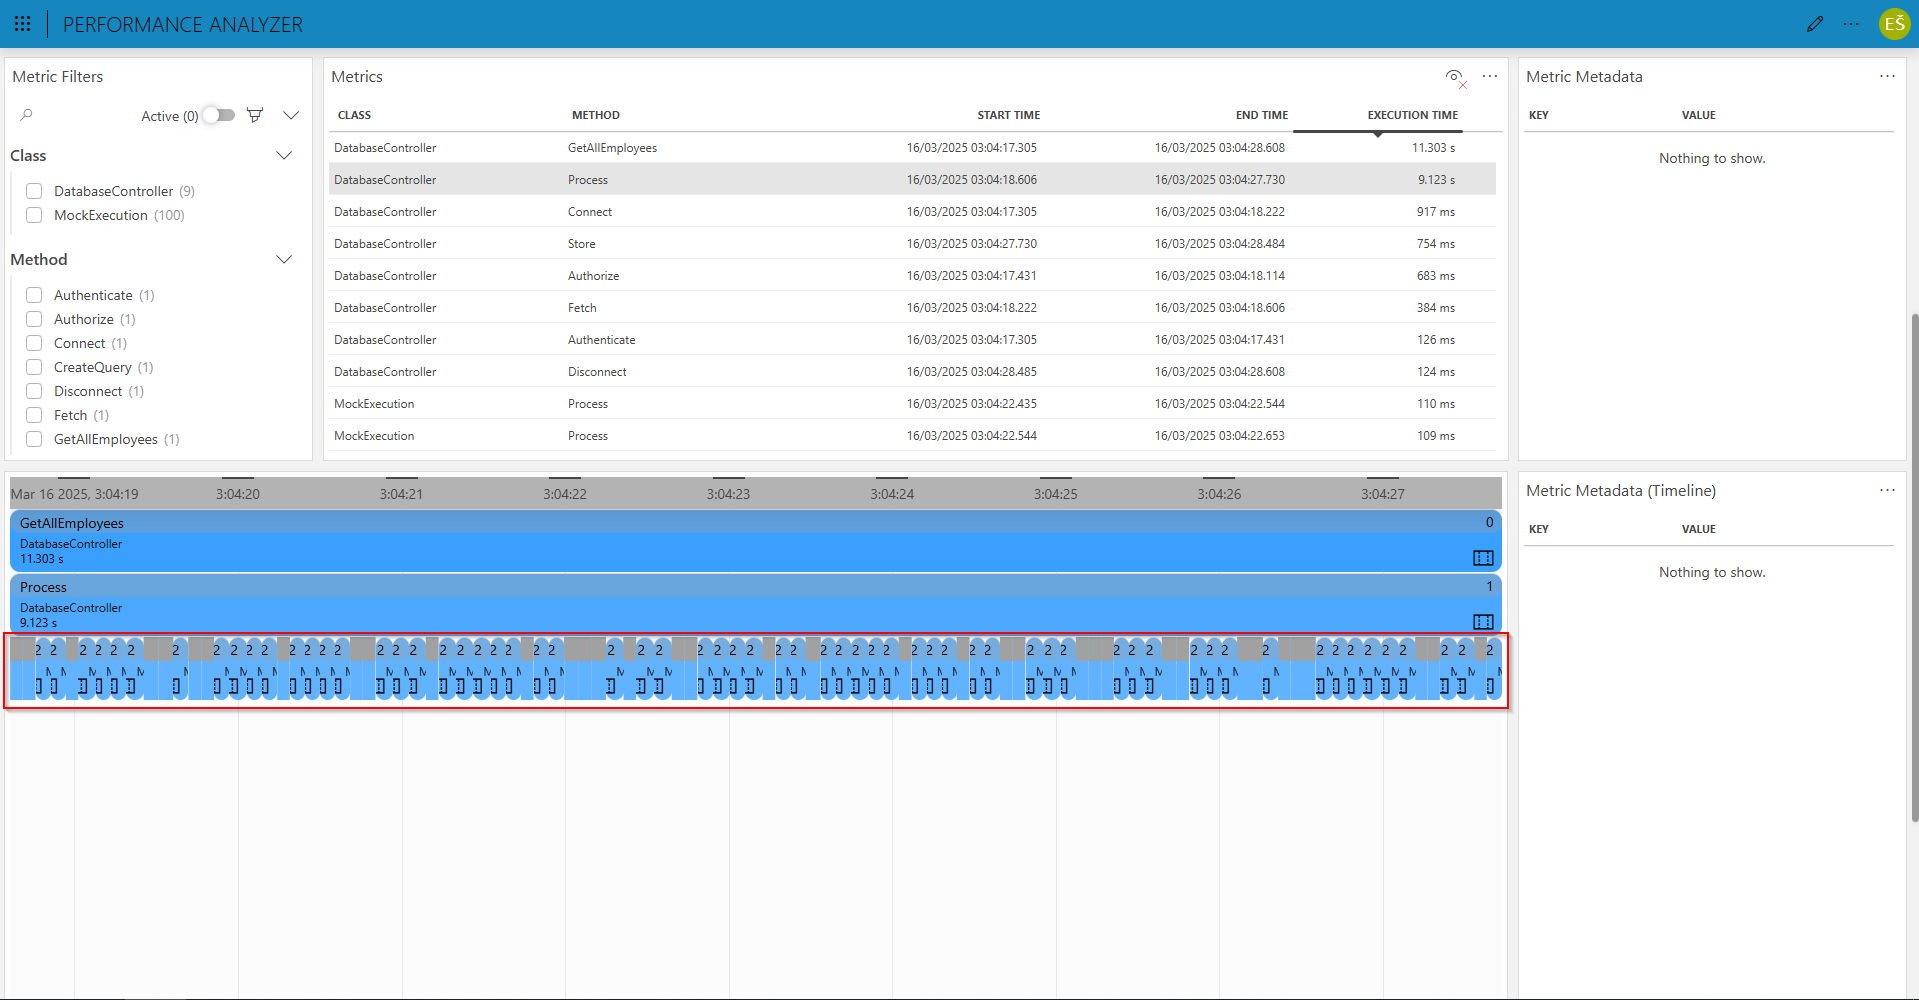
Analyze the performance of your low-code app: By taking a look at the Metrics table, you can see that the biggest chunk of time is spent on the DatabaseController.Process method.
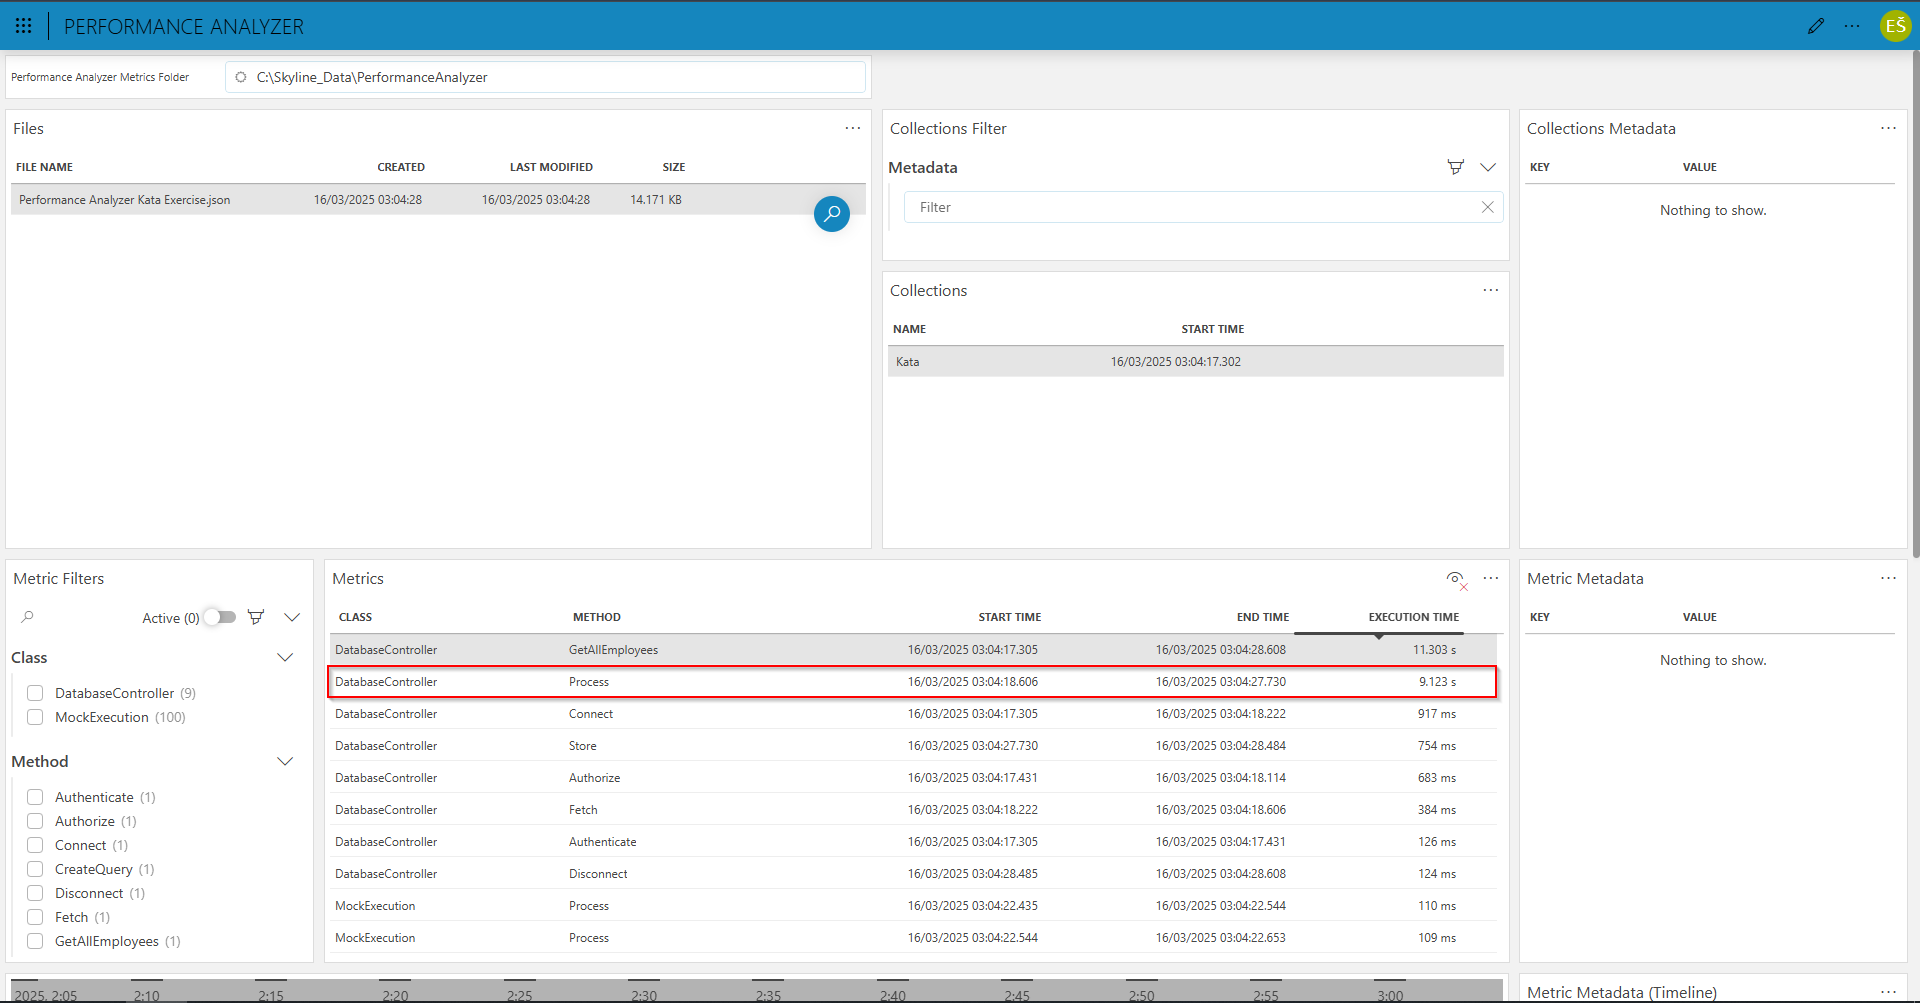
Double click the DatabaseCollector.Process row.
You will see that the processing is happening sequentially. This means that the performance of your app could be improved by processing employees in parallel instead.
Step 6: Improve the implementation of the Process method
Note
If you do not have Visual Studio, you can skip the steps below and instead deploy the exercise_2 branch of the example solution, where this improvement has been implemented:
- Go to Tutorial - Introduction to Performance Analyzer.
- Go to the Versions tab and click the Deploy button for the 1.0.1-exercise2 branch.
Open the solution in the same way as in step 1.
Update the
DatabaseController.Processmethod:private List<Employee> Process(List<Employee> employees) { using (var tracker = new PerformanceTracker(collector)) { var processedEmployees = new ConcurrentBag<Employee>(); Parallel.ForEach(employees, employee => { using (var threadTracker = new PerformanceTracker(tracker, nameof(MockExecution), nameof(MockExecution.Process))) { threadTracker .AddMetadata("Thread Id", Convert.ToString(Thread.CurrentThread.ManagedThreadId)) .AddMetadata("Employee Id", employee.Id) .AddMetadata("Employee Name", employee.Name); var processedEmployee = MockExecution.Process(employee); processedEmployees.Add(processedEmployee); } }); return processedEmployees.ToList(); } }Publish the GQIDS in the same way as in step 1.
Step 7: Analyze the collected data again
Follow the same steps as in step 5 to analyze the collected data again.
You will notice that the table loads significantly faster now, and in the Performance Analyzer app you will see that the execution time of the DatabaseController.Process method has been reduced from ~9 s to ~500 ms.
Congratulations, you have successfully identified and resolved the issue with the performance of your low-code app!
Step 8: Exercise for DevOps Points (optional)
In this step, you can do an optional exercise to earn DevOps Points.
Update the solution to the exercise_3 branch:
- If you have Visual Studio, pull branch exercise_3, and then publish the GQIDS like before.
- Otherwise, deploy branch version 1.0.1-exercise3 of the tutorial package.
Identify the user for which the processing causes performance issues.
Send a screenshot to devops@skyline.be or upload it on the Kata page on Dojo.
Note
The Performance Analyzer NuGet is open source. If you want to contribute, you can do so by creating a pull request on the Skyline.DataMiner.Utils.PerformanceAnalyzer repository.