Manually creating a ticket in DataMiner Cube
Tickets can be created directly from the DataMiner Cube Alarm Console. This allows operators to quickly create tickets linked to alarms without leaving the monitoring environment, based on an interactive automation script that makes use of the Ticketing API Helper.
The tickets will be automatically linked to the relevant alarms, elements, and/or services. If the Asset Manager app is installed, they will also be linked to the relevant assets.
To manually create a ticket for an alarm in Cube:
Right-click the alarm in the Alarm Console, and select Create Ticket.
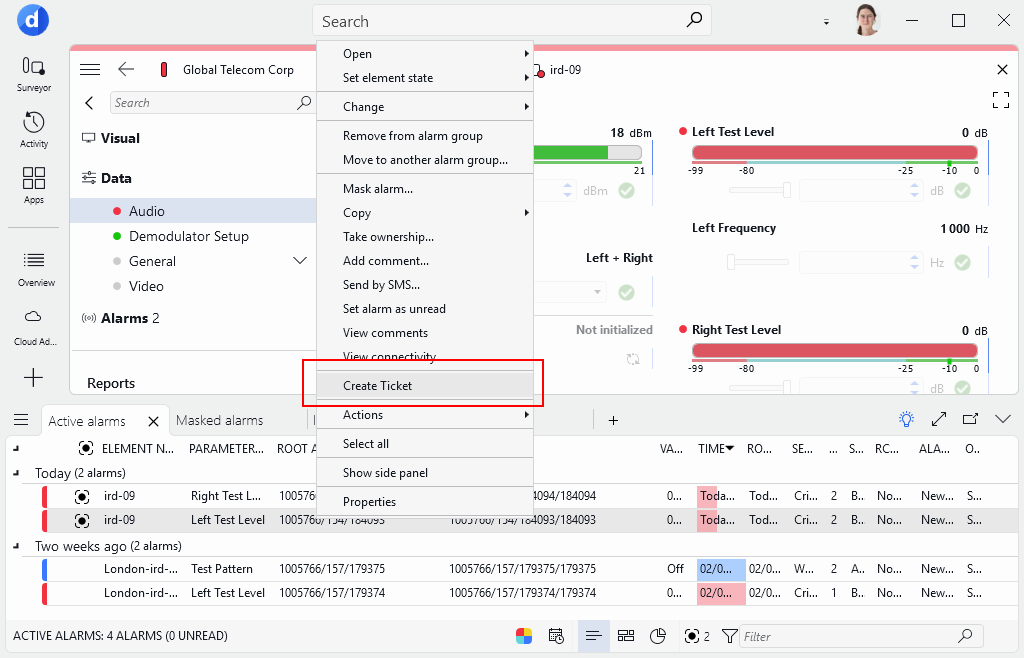
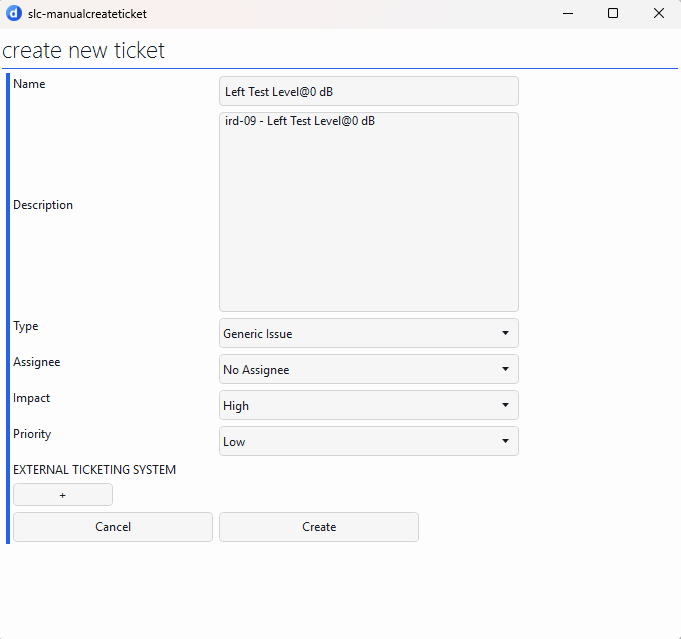
This will open a pop-up window where a name and description will be suggested based on the alarm.
In the pop-up window, adjust the name, description, type, assignee, impact, and priority as needed.
Tip
To make sure tickets can be assigned to DataMiner users, the user accounts must be mapped to People & Organizations contacts.
Note
For information on the external ticketing system integration, refer to External ticketing system integration or specifically the ServiceNow integration example.
If you selected a ticket type that requires the configuration of additional fields, click Next and configure those fields.
Click Create.
A confirmation message will be shown, which will contain the ticket ID, name, severity, and priority. For example:
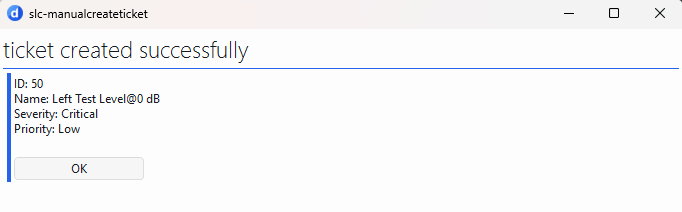
Click OK.
The Ticket ID property of the alarm will now be set to ID of your new ticket, and the Incident Status property of the alarm will be set to Acknowledged.
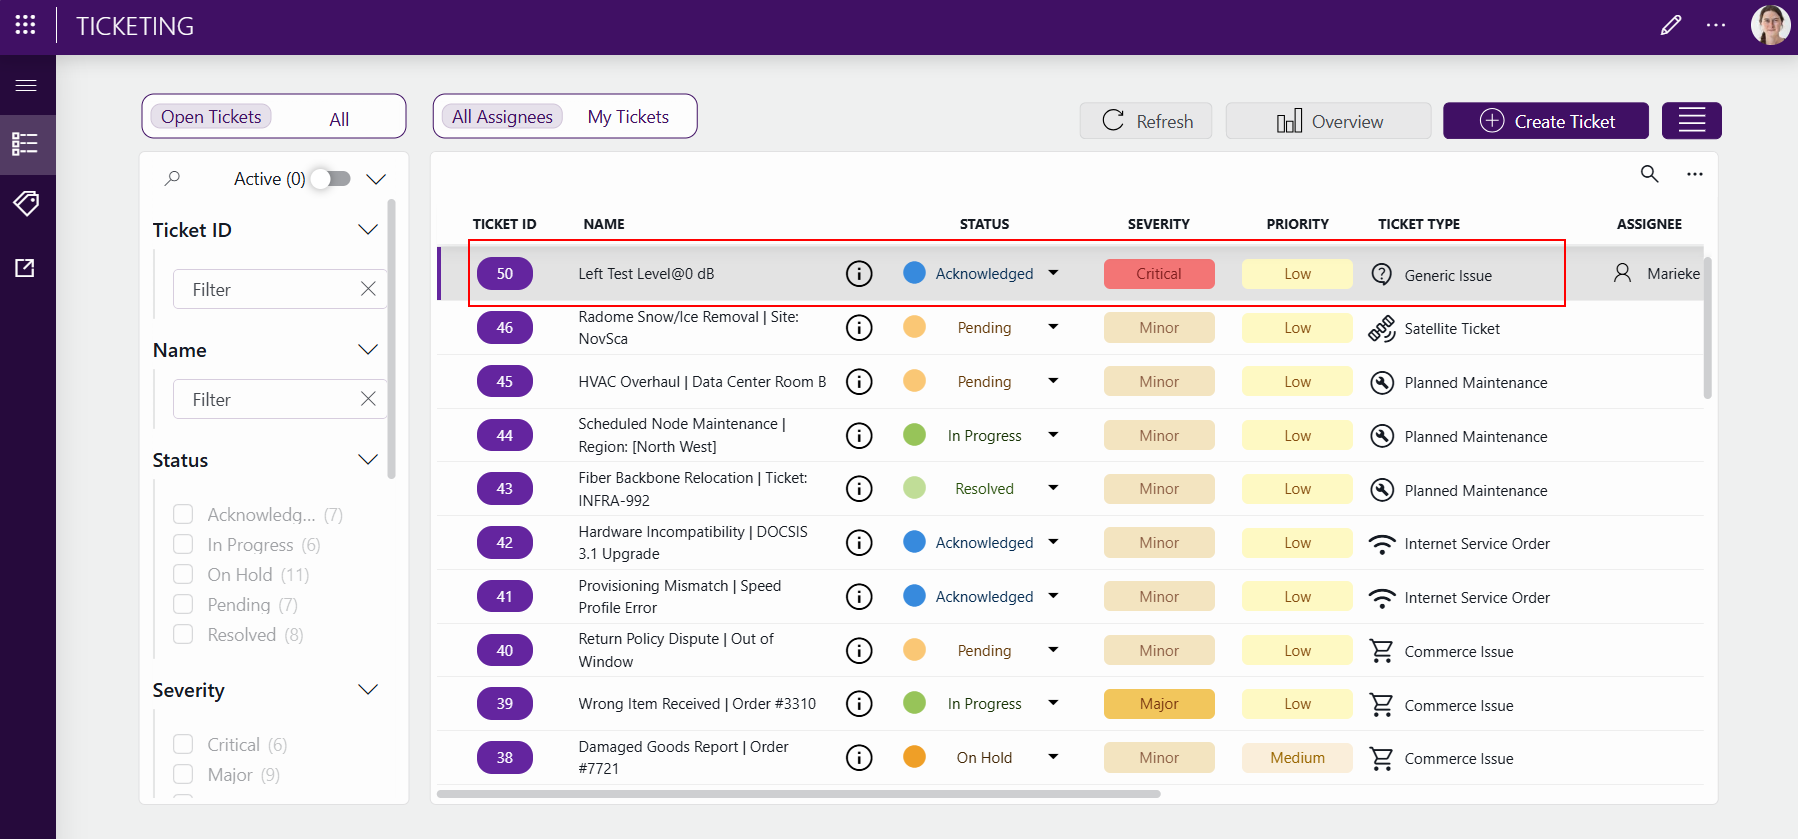
In the ticketing app, you will be able to see your newly created ticket. For example:
Tip
Ensure that the related alarm properties (Ticket ID and Incident Status) are displayed in the Alarm Console so users can view this ticket-related information for each alarm in DataMiner Cube.