Styling a table component
This tutorial demonstrates how you can style an order arrival table in a low-code app.
Expected duration: 30 minutes.
Tip
See also:
- Using the Template Editor
- Kata #14: Transform your tables with templates on DataMiner Dojo

Note
This tutorial uses DataMiner version 10.4.1.
Prerequisites
DataMiner 10.4.1/10.5.0 or higher.
Download the JSON reader from Github, or deploy it directly to your DataMiner System via the Catalog.
Tip
For information on how to deploy a package, see Deploying a Catalog item.
Overview
Step 5: Add conditional coloring to the 'Fulfillment' column
Step 6: Add a table column that indicates which row is selected
Step 1: Configure the query
In this tutorial, you will use an ad hoc data source, which can retrieve data from a JSON file.
Add the following data to a JSON file.
{
    "Columns": [
        {
            "Name": "Order ID",
            "Type": "string"
        },
        {
            "Name": "Created",
            "Type": "datetime"
        },
        {
            "Name": "Customer",
            "Type": "string"
        },
        {
            "Name": "Fulfillment",
            "Type": "string"
        },
        {
            "Name": "Total",
            "Type": "Double"
        },
        {
            "Name": "Profit",
            "Type": "Double"
        },
        {
            "Name": "Status",
            "Type": "string"
        },
        {
            "Name": "Updated",
            "Type": "datetime"
        }
    ],
    "Rows": [
        {
            "Cells": [
                {
                    "Value": 149384
                },
                {
                    "DisplayValue": "Nov 3, 2023",
                    "Value": 1699009200000
                },
                {
                    "Value": "Sebastiaan Dumoulein"
                },
                {
                    "Value": "Unfulfilled"
                },
                {
                    "DisplayValue": "$604.50",
                    "Value": 604.50
                },
                {
                    "DisplayValue": "$182.50",
                    "Value": 182.50
                },
                {
                    "Value": "Authorized"
                },
                {
                    "DisplayValue": "Today",
                    "Value": 1698966000000
                }
            ]
        },
        {
            "Cells": [
                {
                    "Value": 153322
                },
                {
                    "DisplayValue": "Oct 28, 2023",
                    "Value": 1698487200000
                },
                {
                    "Value": "Abbas Melendez"
                },
                {
                    "Value": "Fulfilled"
                },
                {
                    "DisplayValue": "$307.70",
                    "Value": 307.70
                },
                {
                    "DisplayValue": "$68.20",
                    "Value": 68.20
                },
                {
                    "Value": "Paid"
                },
                {
                    "DisplayValue": "Today",
                    "Value": 1698966000000
                }
            ]
        },
        {
            "Cells": [
                {
                    "Value": 148826
                },
                {
                    "DisplayValue": "Oct 25, 2023",
                    "Value": 1698228000000
                },
                {
                    "Value": "Harmony Franklin"
                },
                {
                    "Value": "Unfulfilled"
                },
                {
                    "DisplayValue": "$528.35",
                    "Value": 528.35
                },
                {
                    "DisplayValue": "$90.50",
                    "Value": 90.50
                },
                {
                    "Value": "Authorized"
                },
                {
                    "DisplayValue": "Today",
                    "Value": 1698966000000
                }
            ]
        },
        {
            "Cells": [
                {
                    "Value": 146178
                },
                {
                    "DisplayValue": "Oct 22, 2023",
                    "Value": 1697968800000
                },
                {
                    "Value": "Sahil Middleton"
                },
                {
                    "Value": "Pending Receipt"
                },
                {
                    "DisplayValue": "$62.60",
                    "Value": 62.60
                },
                {
                    "DisplayValue": "$10.10",
                    "Value": 10.10
                },
                {
                    "Value": "Paid"
                },
                {
                    "DisplayValue": "Yesterday",
                    "Value": 1698879600000
                }
            ]
        },
        {
            "Cells": [
                {
                    "Value": 142115
                },
                {
                    "DisplayValue": "Oct 20, 2023",
                    "Value": 1697796000000
                },
                {
                    "Value": "Elijah Copeland"
                },
                {
                    "Value": "Fulfilled"
                },
                {
                    "DisplayValue": "$905.50",
                    "Value": 905.50
                },
                {
                    "DisplayValue": "$206.75",
                    "Value": 206.75
                },
                {
                    "Value": "Paid"
                },
                {
                    "DisplayValue": "Yesterday",
                    "Value": 1698879600000
                }
            ]
        },
        {
            "Cells": [
                {
                    "Value": 137265
                },
                {
                    "DisplayValue": "Oct 18, 2023",
                    "Value": 1697623200000
                },
                {
                    "Value": "Philip Acosta"
                },
                {
                    "Value": "Fulfilled"
                },
                {
                    "DisplayValue": "$657.35",
                    "Value": 657.35
                },
                {
                    "DisplayValue": "$264.55",
                    "Value": 264.55
                },
                {
                    "Value": "Paid"
                },
                {
                    "DisplayValue": "Yesterday",
                    "Value": 1698879600000
                }
            ]
        },
        {
            "Cells": [
                {
                    "Value": 133255
                },
                {
                    "DisplayValue": "Oct 15, 2023",
                    "Value": 1697364000000
                },
                {
                    "Value": "Sian Vaughan"
                },
                {
                    "Value": "Pending Receipt"
                },
                {
                    "DisplayValue": "$365.40",
                    "Value": 365.40
                },
                {
                    "DisplayValue": "$58.00",
                    "Value": 58.00
                },
                {
                    "Value": "Authorized"
                },
                {
                    "DisplayValue": "Oct 15, 2023",
                    "Value": 1697364000000
                }
            ]
        },
        {
            "Cells": [
                {
                    "Value": 112025
                },
                {
                    "DisplayValue": "Oct 06, 2023",
                    "Value": 1696586400000
                },
                {
                    "Value": "Haaris Carroll"
                },
                {
                    "Value": "Pending Receipt"
                },
                {
                    "DisplayValue": "$259.50",
                    "Value": 259.50
                },
                {
                     "DisplayValue": "$80.20",
                     "Value": 80.20
                },
                {
                    "Value": "Paid"
                },
                {
                    "DisplayValue": "Oct 06, 2023",
                    "Value": 1696586400000
                }
            ]
        }
    ],
    "Version": 1
}
Save the file under the name Orders.json in the
C:\Skyline DataMiner\Documents\GQI data sourcesfolder.
Step 2: Add a table component
You can now create the query using the Orders.json file as the data source.
Create a new low-code app. See Creating low-code applications.
In the Data pane, select Queries and click the + icon to add a new query.
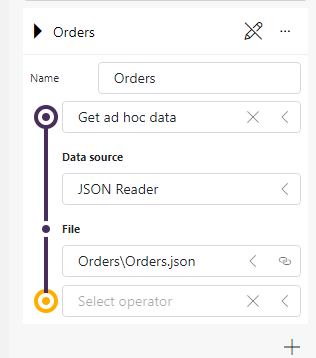
Provide the necessary information:
Give the query a name, e.g. "Orders".
In the dropdown box, select Get ad hoc data.
Select JSON Reader from the Data source dropdown list.
Select Orders.json from the Filter dropdown list.
 .
.
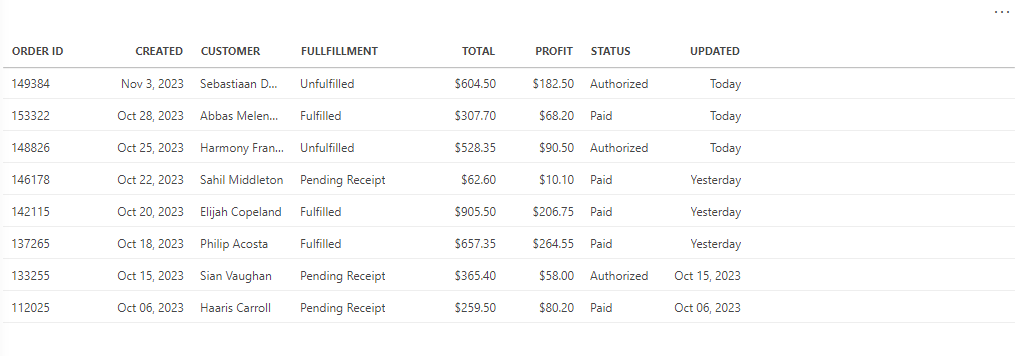
Drag the ad hoc data feed onto an empty section of the low-code app page.
Hover the mouse pointer over the component and click the
 icon.
icon.Choose the table visualization.
Step 3: Configure a hyperlink
Now that the table component is configured, enable the first table column, Order ID, to act as a hyperlink, opening a webpage in a new tab when clicked.
Make sure the table component is selected, and navigate to Layout > Column Appearance.
Select Order ID from the dropdown list.
A preview of the column's appearance is displayed. By default, this is set to Left.
Click the preview and select Hyperlink from the list of available presets.
To specify the webpage this hyperlink redirects to, configure an action in the Template Editor:
In the Column Appearance settings, click the ellipsis button ("...") and select Customize preset to open the Template Editor.
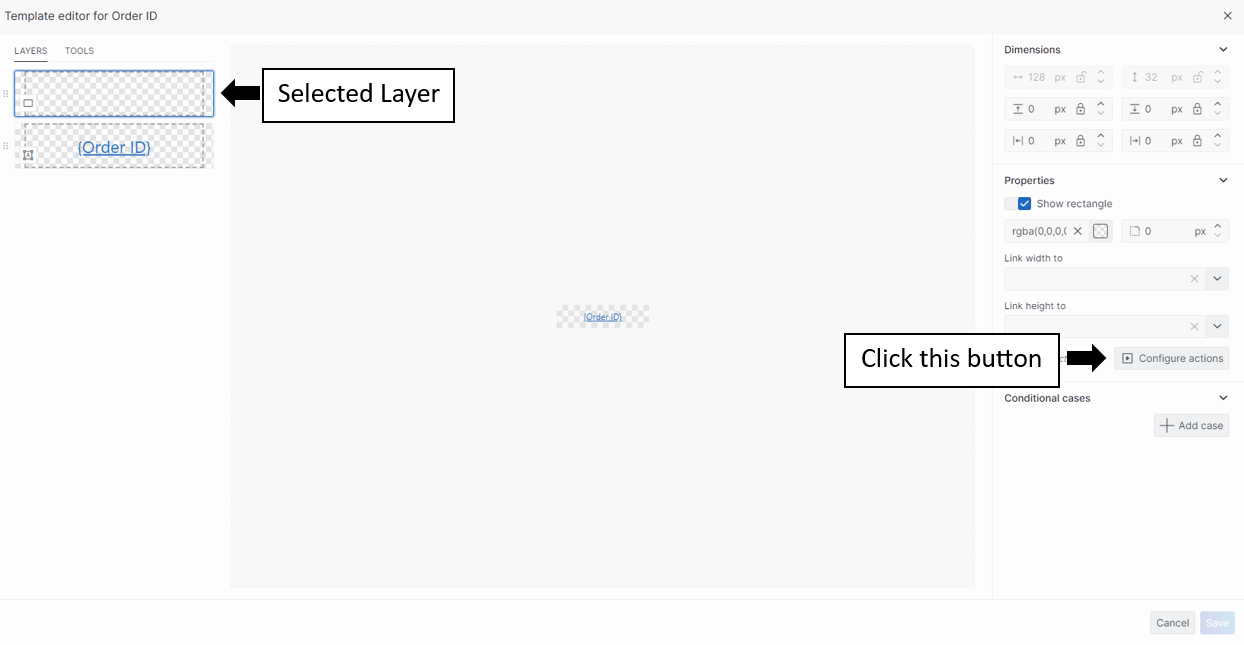
In the Layers tab, select the rectangle layer and click Configure actions in the Settings pane.
Tip
You can recognize the type of layer by the symbol displayed in the lower left corner. For a rectangle layer, a rectangle icon is displayed.
Because you used the Hyperlink preset option, a Navigate to a URL action is already configured, redirecting the user to
http(s)://[DMA name]/{Order ID}when clicking the shape.To edit this hyperlink, expand the configuration section by clicking the sideward arrow. Replace the URL with the following link:
https://www.google.com/search?q={Order ID}.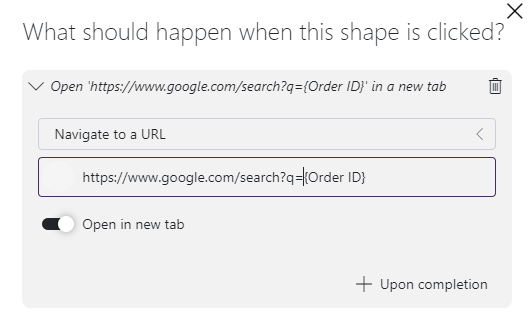
To save the new hyperlink, click Ok in the lower right corner.
To save all changes, click Save in the lower right corner of the Template Editor.
Once the app has been published, when you click a table cell in the Order ID column, a Google search page opens with results for that order ID.
Step 4: Style the 'created' column
For the second column, Created, ensure a more visually appealing styling by centering the date, making the text bold, and changing the text color.
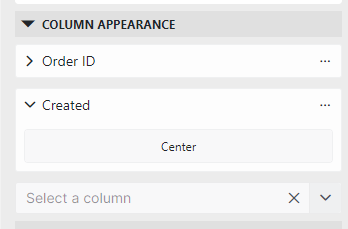
Make sure the table component is selected, and navigate to Layout > Column Appearance.
Select Created from the dropdown list.
A preview of the column's appearance is displayed. By default, this is set to Right.
Click the preview and select Center from the list of available presets.
Click the ellipsis button ("...") and select Customize preset to open the Template Editor.
In the Layers tab, select the text layer.
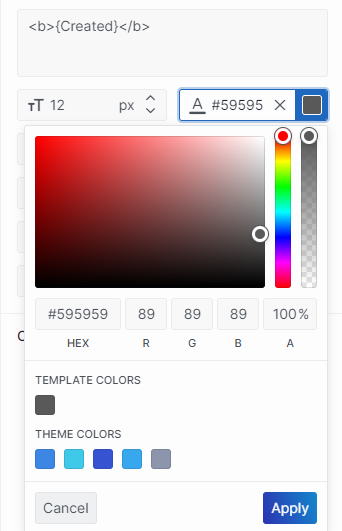
In the Properties section of the Settings pane on the right side of the preview, enclose the text by HTML <b> elements to signify bold text.
To modify the text color, use the color picker box and select Apply.
To save all changes, click Save in the lower right corner of the Template Editor.
Optionally, you can repeat these steps for the Profit column to apply similar styling.
Step 5: Add conditional coloring to the 'Fulfillment' column
For the fourth column, Fulfillment, follow these steps to incorporate conditional coloring based on the column value.
Make sure the table component is selected, and navigate to Layout > Column Appearance.
Select Fulfillment from the dropdown list.
Click the ellipsis button ("...") and select Customize preset to open the Template Editor.
In the Layers tab, select the text layer.
In the Properties section of the Settings pane on the right side of the preview, set the horizontal padding to 10 px and the vertical padding to 2 px.
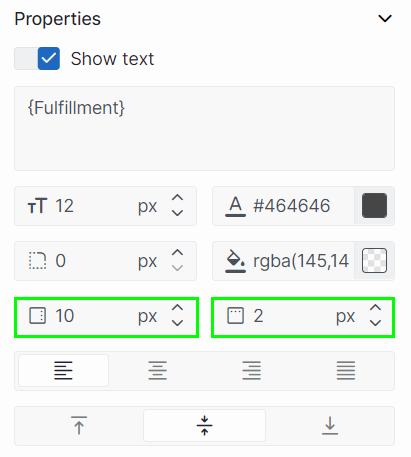
Adjusting these padding settings allows for a clearly visible background color.
Add conditional cases
When the value in the Fulfillment column is set to Pending Receipt, the background color should be purple.
In the Conditional cases section of the Settings pane, click Add case.
Select Fulfillment from the dropdown list.
Enter "Pending Receipt" in the Filter text box.
The configured action will now only be executed when the value in the Fulfillment column is set to Pending Receipt.
To configure the text layer's behavior when the condition is met, follow these steps:
Enable Show text.
Click Background and use the color picker box to adjust the background color to purple. Make sure the opacity is set to 100%.
Click Apply to save these changes.
When the value in the Fulfillment column is set to Fulfilled, the background color should be green.
Click Add case to add another conditional case.
Select Fulfillment from the dropdown list.
Enter "Fulfilled" in the Filter text box.
Configure the following settings:
Enable Show text.
Click Background and use the color picker box to adjust the background color to green. Make sure the opacity is set to 100%.
Click Apply to save these changes.
When the value in the Fulfillment column is set to Unfulfilled, the background color should be red.
Click Add case to add another conditional case.
Select Fulfillment from the dropdown list.
Enter "Unfulfilled" in the Filter text box.
Configure the following settings:
Enable Show text.
Click Background and use the color picker box to adjust the background color to red. Make sure the opacity is set to 100%.
Click Apply to save these changes.
To save all changes, click Save in the lower right corner of the Template Editor.
Optionally, you can repeat these steps for the States column to apply similar styling.
Step 6: Add a table column that indicates which row is selected
To add a column indicating the currently selected row, follow these steps using GQI and the Template Editor.
Add a new column using GQI:
In the Data pane, go to Queries.
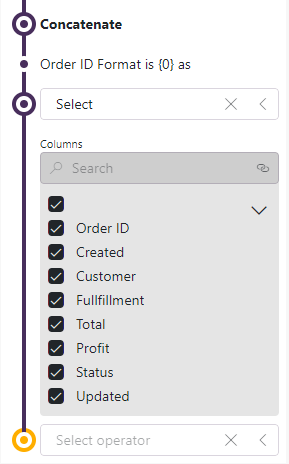
Click the pencil icon next to Orders. Configure as follows:
Operator: Column manipulations.
Manipulation method: Concatenate.
Columns: Order ID.
Format:
{0}.New column name: Enter one space.
Add Select as a second operator.
To stop editing the Orders query, click the pencil icon.
Select the top row of the new column and drag it from the far right to the far left side of the table.
Customize the column appearance in the Template Editor:
Make sure the table component is selected, and navigate to Layout > Column Appearance.
Select your new column from the dropdown list.
Click the preview and select the Icon icon from the list of available presets.
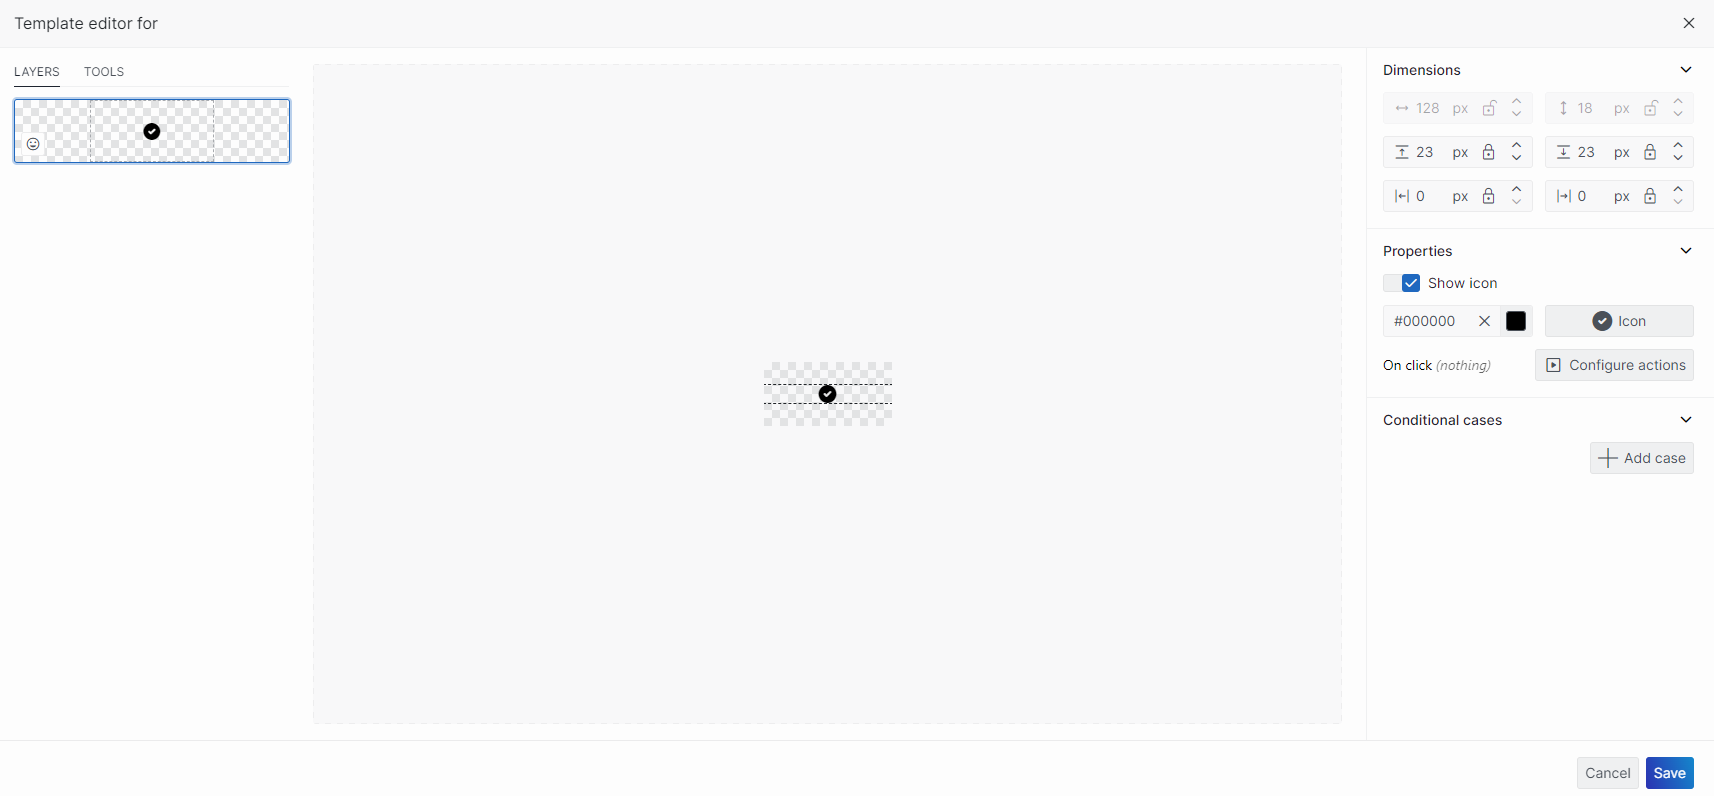
Click the ellipsis button ("...") and select Customize preset to open the Template Editor.
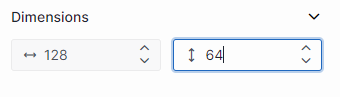
Make sure no layers are selected. In the Settings pane, change the height to 64 px to adjust the height of the table rows.
In the Layers tab, select the icon layer.
In the Properties section of the Settings pane, click Icon and change the icon to a checkmark.
Adjust the icon to fit the template nicely.
In the Conditional cases section of the Settings pane, click Add case.
Choose Is selected from the dropdown list.
Select Yes.
Configure the following settings:
Enable Show icon.
Click color and use the color picker box to adjust the text color to green.
Keep the Template Editor open, as you will need it again in step 7.
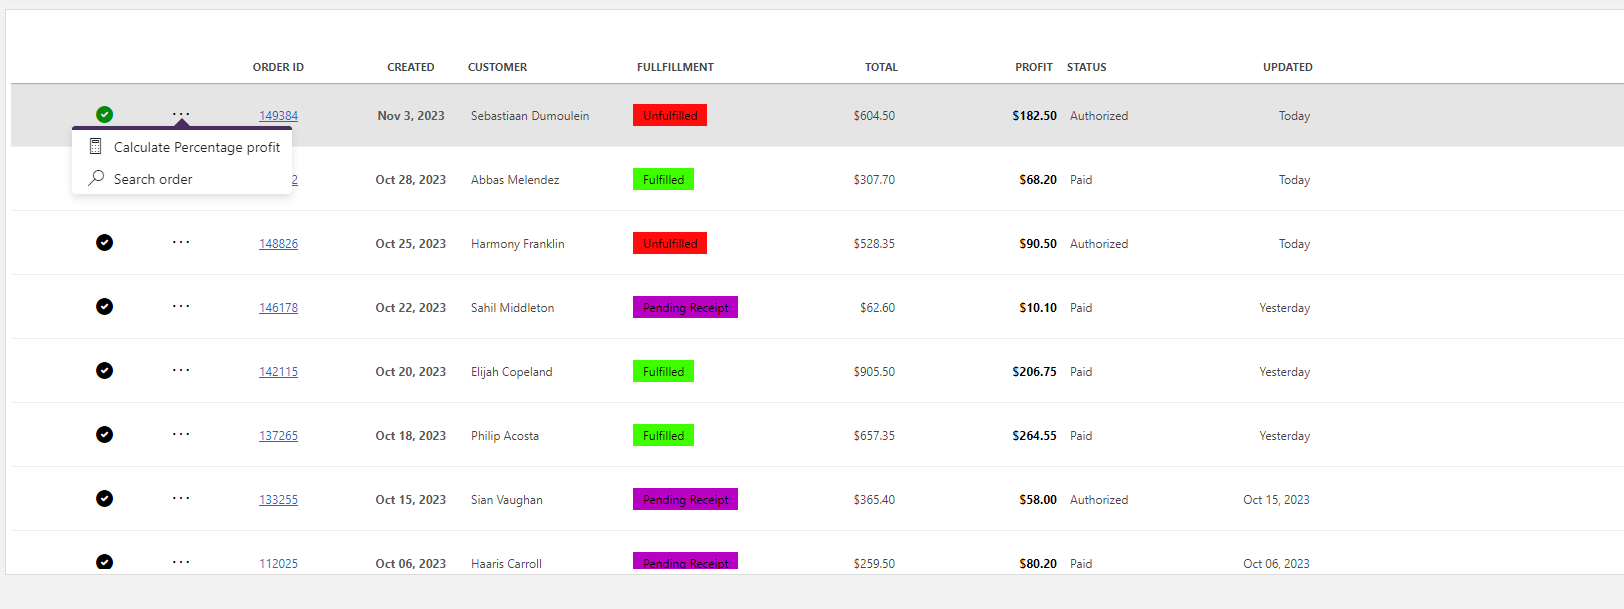
Step 7: Add a context menu
To conclude this tutorial, incorporate a context menu into the table.
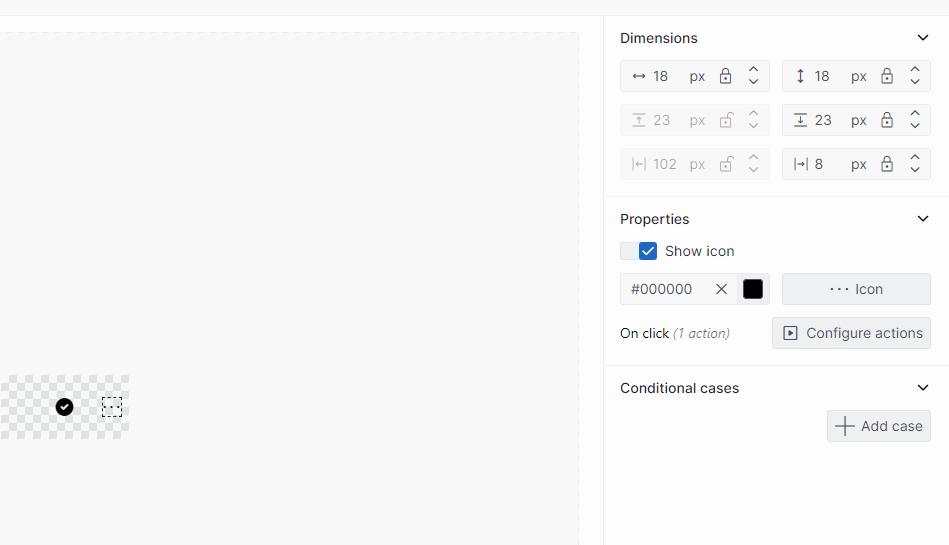
In the Tools tab, click Icon.
Within the preview, press and hold down the left mouse button to define the area for your new icon layer. Release the mouse button once you are satisfied with the size and shape of the icon.
In the Properties section of the Settings pane, click Icon and change the icon to an ellipsis ("...").
Tip
To locate this icon more efficiently, enter "More" in the filter box at the top.
Make sure the new icon layer is selected in the Layers tab and adjust the icon to fit the template nicely.
Click Save in the lower right corner to briefly exit the Template Editor.
Select a row in the table component.
Navigate to Layout > Column Appearance and re-enter the Template Editor for the same column.
Make sure the icon layer with the ellipsis icon is selected, and click Configure actions in the Properties section of the Settings pane.
In the pop-up window, select Show context menu from the dropdown list.
Configure the different menu items:
Add a menu item to divide the Profit column by the Total column:
Click the empty gray square to the left, and enter "Calculator" in the filter box at the top to add a calculator icon.
In the Label box, enter "Calculate percentage profit".
Configure an action for this menu item:
Click the
 icon.
icon.Select Navigate to URL from the actions dropdown list.
Enter the following URL:
https://google.com/search?q={Profit}%2F{Total}.Replace
{Profit}with the complete path to the Profit column by clicking TAB to use IntelliSense suggestions, e.g.{FEED.Page."Table 1"."Selected rows"."Query rows".Profit}.Replace
{Total}with the complete path to the Total column by clicking TAB to use IntelliSense suggestions, e.g.{FEED.Page."Table 1"."Selected rows"."Query rows".Total}
Important
IntelliSense will only provide suggestions if a table row was selected in the low-code app edit mode.
Tip
For more information on how to create feed references inside textual settings, see Dynamically referencing feed values in text.
Add a menu item to google the order ID:
Click the empty gray square and enter "Search" in the filter box to add a magnifying glass icon.
In the Label box, enter "Search order".
Configure an action for this menu item:
Click the
icon.Select Navigate to URL from the actions dropdown list.
Enter the following URL:
https://google.com/search?q={Order ID}.Replace
{Order ID}with the complete path to the Order ID column by clicking TAB to use IntelliSense suggestions, e.g.{FEED.Page."Table 1"."Selected rows"."Query rows"."Order ID"}
Click Ok in the lower right corner to save the context menu.
To save all changes, click Save in the lower right corner of the Template Editor.
Publish the low-code app and test the result.
Select a row. The checkmark in that row will now be green.
Click the ellipsis in the first table column to open the context menu and select Calculate percentage profit. A new tab will open with the Google search results for the division of the profit and total column.
Open the context menu and select Search order. A new tab will open with the Google search results for the order ID.