Timeline
Important
The timeline component is in preview until DataMiner 10.4.1/10.5.0. If you use the preview version of the feature, its functionality may be different from what is described below. For more information, see Soft-launch options.
Available from DataMiner 10.4.1/10.5.0 onwards. Prior to this, the component is available in soft launch from DataMiner 10.1.10 onwards, if the soft-launch option ReportsAndDashboardsScheduler is enabled.
This component allows you to visualize and manage bookings, events, and other time-bound data (e.g. appointments and project timelines).
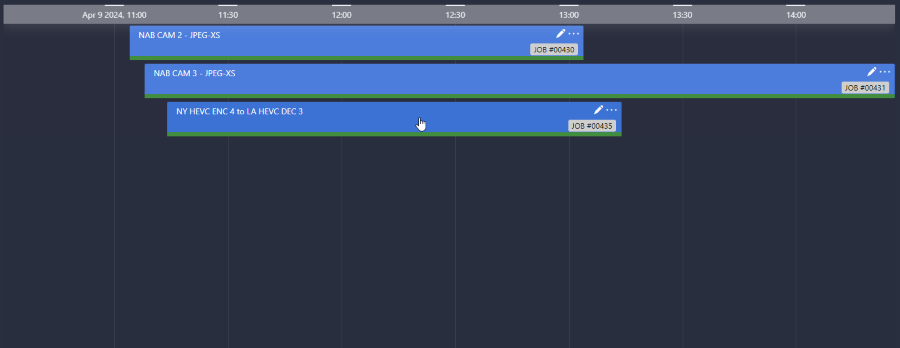
Timeline component in DataMiner 10.4.5
Configuring the component
Add data to the component. The timeline component should always be configured with Queries data input.
Optionally, hover the mouse pointer over the component and click the
 icon. In the Data pane on the right, any data that cannot be added will become unavailable. Data that is compatible will be marked with the following icon:
Optionally, add groups to the timeline component, so that you can group items on the timeline based on one of the columns in your data:
Hover the mouse pointer over the component and click the
 icon.
icon.In the Data pane on the right, any data that cannot be added will become unavailable. Data that is compatible will be marked with the following icon:

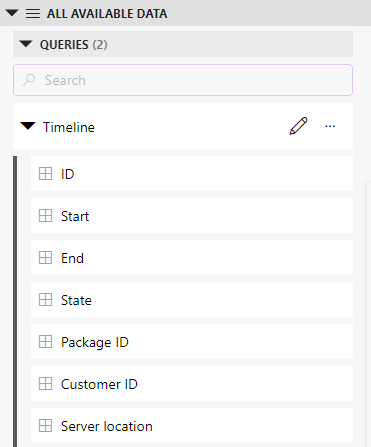
Data pane in DataMiner 10.4.1Drag compatible data onto the component.
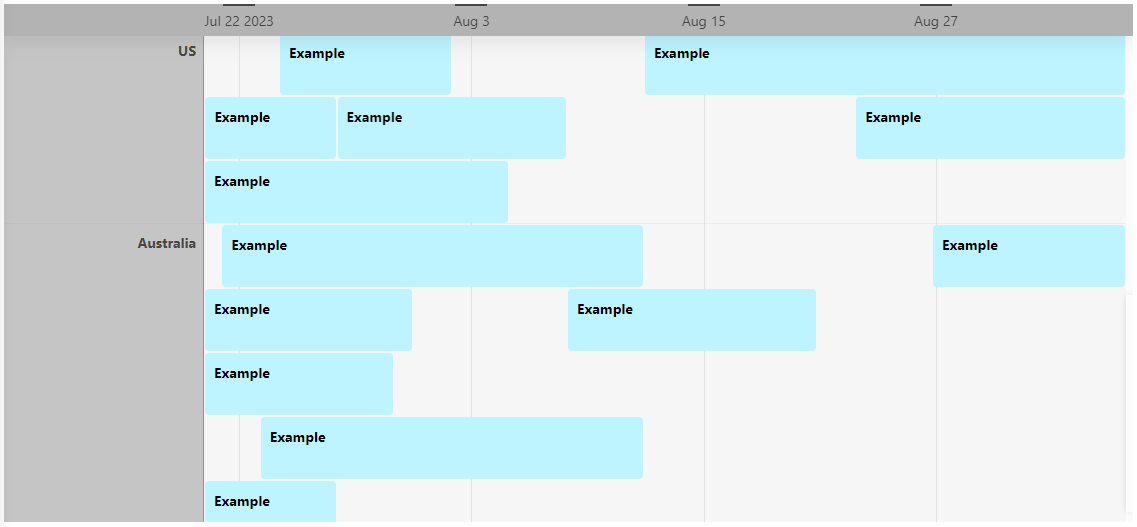
All groups are now displayed in a gray column to the left of the timeline. The timeline items are displayed next to the group they are part of.
Note
If a group is empty (i.e. there is no start and end time), it is still displayed in the timeline component.
To make sure users can see which group is selected, you can add a table component displaying the selected group:
Go to Components > Timeline # > Selected groups > Tables in the Data pane, and drag it onto an empty section of the dashboard or low-code app page. Prior to DataMiner 10.3.0 [CU21]/10.4.0 [CU9]/10.4.12, use Feeds > Timeline # > Selected groups > Query rows in the Data pane instead.
Hover the mouse pointer over the component and click the
 icon.
icon.Select the table visualization.
To make sure users can see which item is selected, you can add a table component displaying the selected item:
Go to Components > Timeline # > Selected items > Tables in the Data pane, and drag it onto an empty section of the dashboard or low-code app page. Prior to DataMiner 10.3.0 [CU21]/10.4.0 [CU9]/10.4.12, use Feeds > Timeline # > Selected items > Query rows in the Data pane instead.
Hover the mouse pointer over the component and click the
icon.Select the table visualization.
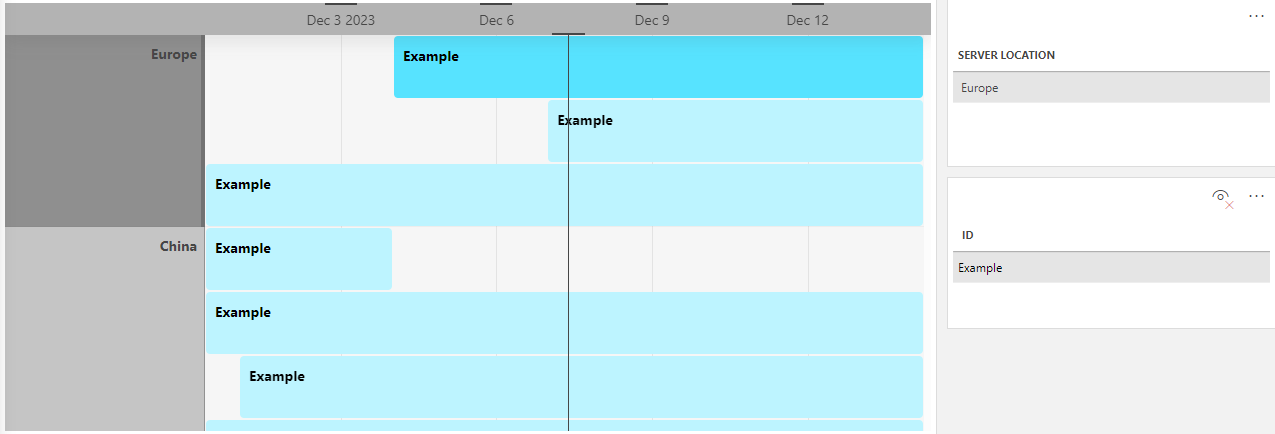
Timeline and table components in DataMiner 10.4.1If you want to display the name of the column the data was grouped by, make sure the Advanced > Style > Grouping by setting is enabled in the Layout pane.
Optionally, customize the following component options:
WebSocket settings: Determines whether the websocket settings configured in the page/panel settings should be applied to this component. Enabled by default.
General > Timeline: Allows you to configure the start and end times of the timeline component. When you add a new timeline component, this is automatically configured.
General > Override dynamic units: Disables parameter units from changing dynamically based on their value and protocol definition. Disabled by default.
General > Use dynamic units: When the Override dynamic units option is enabled, this option will allow you to determine whether parameter units will change dynamically based on their value and protocol definition.
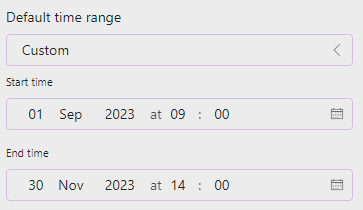
General > Default time range: Allows you to select an option with a particular time to zoom to this time on the timeline, e.g. Today, Last 7 days, Next hour, etc. The options are divided into the following categories: Still busy, In the past, Near future, Recently, Long run, Starting from now, and Distant future. Set to Still busy, This week by default.
If you select Custom, you can set a custom start and end time.
Settings timeline component in DataMiner 10.4.1Note
The component has a minimum time range of 5 milliseconds and a maximum of 10 years.
To synchronize the time range of the timeline with that of another component in the dashboard or low-code app, click the
 icon next to Link time range (Prior to DataMiner 10.3.0 [CU21]/10.4.0 [CU9]/10.4.12: Link time range to feed) and select the component from the dropdown list, such as a time range component.
Modifying the default time frame for this component will automatically synchronize the time range for any linked timeline component as well. The timeline will dynamically adjust to the selected time range of the linked component. For example, if you switch the time range in the linked component to This week, the timeline will automatically update to display the corresponding time frame.
From DataMiner 10.4.0 [CU10]/10.5.0/10.5.1 onwards, a timeline linked to other data can be identified by the
 icon displayed next to Link time range. To unlink the timeline, click this icon and select Unlink.
Note
To add a time range component to the dashboard or low-code app that displays the time range configured for the timeline component:
- Select Timeline # > Viewport > Timespans in the Components section of the Data pane. Prior to DataMiner 10.3.0 [CU21]/10.4.0 [CU9]/10.4.12, this data source can be found in the Feeds section of the Data pane.
- Drag it onto an empty section of the dashboard or low-code app page.
When you manually adjust the time range by zooming in or out, or by moving across the timeline component, the time range displayed in the time range component will automatically be adjusted.
Note that modifying the time range displayed in the time range component will not update the time range displayed in the timeline component, unless it has been linked to that time range component in the Default time range settings.
Data retrieval > Update data: Allows the component to be updated in real time, if the data supports this (see Query updates). Disabled by default.
Note
If you enable this setting, real-time updates will only be applied for the data sources and operators listed on the Query updates page. Prior to DataMiner 10.4.0/10.4.3, data will only be updated every 30 seconds, and this will only be applied for GQI queries using the Get parameter table by ID data source.
Events: See Configuring events and actions.
Highlight range > Use highlighting: Determines whether a configured time range in the timeline component is highlighted. When this option is enabled, the section of the timeline that falls within the set time range receives a different background color determined by the dashboard theme or the low-code app theme. Events that (partially) occur within this set time range are displayed with normal opacity, while those outside the time range are displayed with lowered opacity. Disabled by default.
Timeline component in DataMiner 10.4.1To link the time range of another component in the dashboard or low-code app to the timeline component, click the
icon next to the Time range dropdown box, and select the desired component from the dropdown list. Adjusting the highlight time range of this chosen component will automatically synchronize the time range for the linked timeline component as well.From DataMiner 10.4.0 [CU10]/10.5.0/10.5.1 onwards, a timeline linked to other data can be identified by the
icon displayed next to the Time range dropdown box. To unlink the timeline, click this icon and select Unlink.
Fine-tune the component layout. In the Component > Layout pane, the following options are available:
The default options available for all components. See Customizing the component layout.
Filtering & Highlighting: Available from DataMiner 10.1.11/10.2.0 onwards. Allows you to configure a number of filtering and highlighting options. However, note that the filtering options require the Query filter component, available from DataMiner 10.3.9/10.4.0 onwards.
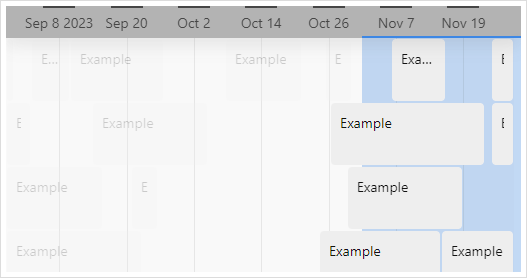
Highlight: When this option is enabled, the items that match the filter will be highlighted. Enabled by default.
Opacity: When the Highlight option is enabled, this option will allow you to set the level of transparency of the items that do not match the filter.
Note
When you disable the Highlight option, the items that do not match the filter will no longer be displayed and the remaining items will be reorganized.
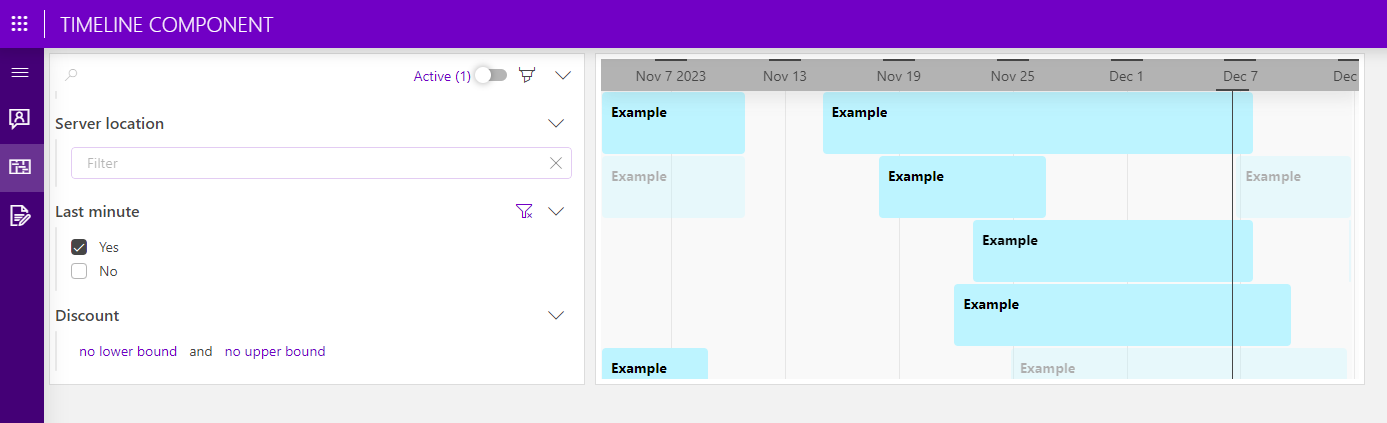
Query filter and timeline components in DataMiner 10.4.1Advanced > Empty result message: Available from 10.3.11/10.4.0 onwards. Allows you to specify a custom message that is displayed when a query returns no results.
Tip
See also: Displaying a custom empty component message.
Advanced > Style: Allows you to edit the style of the timeline component. The following options are available:
Grouping by: Determines whether the name of the column the data was grouped by (optionally) is displayed in the timeline component. Disabled by default.
Segment lines: Determines whether segment lines are displayed in the timeline component. Enabled by default.
Lock timeline to now: Determines whether a "now" indicator is set at a fixed position on the timeline. When this option is enabled, users can zoom in and out on the timeline, but are restricted from panning past the indicator. Disabled by default.
Item templates: Allows you to freely customize the appearance of the timeline component items using the Template Editor.
To access the Template Editor, click Edit next to the pencil icon.
Tip
For more information on how to use the Template Editor to customize the appearance of component items, see Using the Template Editor.
To reuse saved templates for components in the same dashboard or low-code app, click Browse templates next to the
 button. Prior to DataMiner 10.4.0 [CU13]/10.5.0 [CU1]/10.5.4, click Reuse template next to the
  button instead.
Note
Prior to DataMiner 10.4.0 [CU13]/10.5.0 [CU1]/10.5.4, the option to reuse a template is only available when another timeline component in the dashboard or low-code app is configured with a custom template.
Using the timeline component in read mode
In read mode, you can manipulate the timeline component to navigate through the scheduled events, bookings, or time-bound data.
Adjusting the displayed time range:
From DataMiner 10.4.0 [CU10]/10.5.1 onwards, the zooming method depends on the Advanced > Hold Ctrl to zoom setting in the Settings pane:
When this setting is enabled: Hold the Ctrl key while scrolling up or down to zoom in or out.
When this setting is disabled: Scroll up or down to zoom in or out. This is the default option.
Prior to DataMiner 10.4.0 [CU10]/10.5.1:
To zoom in on the timeline component, press Ctrl while scrolling up.
To zoom out, press Ctrl while scrolling down.
When you are using a mobile device, you can zoom in on the component by placing two fingers together on the screen and moving them apart. To zoom out, use a pinching motion, starting with your fingers apart and bringing them together.
Note
The component has a minimum time range of 5 milliseconds and a maximum of 10 years, setting the zoom limit.
To move left or right across the timeline component, click the timeline and drag the mouse. When you are using a mobile device, you can move left or right by sliding one finger across the component.
Note
If you have enabled the Lock timeline to now setting, you will be unable to pan past the "now" indicator.
If the number of items exceeds the size of the component, a scrollbar appears when you hover over the component, allowing you to navigate up or down through the items.
From DataMiner 10.4.0 [CU13]/10.5.0 [CU1]/10.5.4 onwards, when you select an item in the timeline, it will by default be highlighted with a blue border and a light-blue background. This can for instance be useful when the timeline's component data (i.e. Components > Timeline # > Selected groups / Selected time ranges) is used in a linked component, clearly indicating which data is driving the content in the linked component.
Configuring events and actions
From DataMiner 10.3.0 CU14/10.4.0 CU2/10.4.5 onwards, in the component options for a timeline component in a low-code app, you can configure the following events to trigger actions:
On Range select: Triggered when a section of the timeline is selected using the right mouse button.
On item resize: Triggered when an item on the timeline is resized.
On item move: Triggered when the time slot of an item on the timeline is changed.
On group change: Triggered when an item on the timeline is moved to another group.
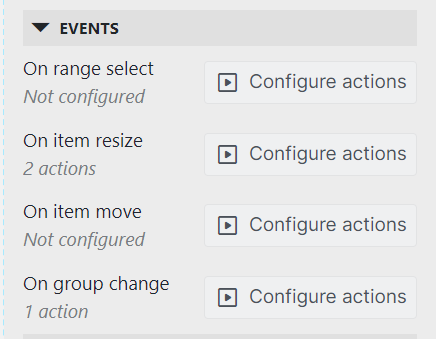
Events setting in DataMiner 10.4.5
Note
- These events can only be triggered when they have actions configured. For example, an item will only be resized when at least one action has been configured for the Item resize event.
- While the On range select event is timeline-based, other events can have a different configuration for each query on the timeline. For example, if there are multiple queries on the timeline, and you move an item belonging to a certain query, the timeline will look at the configuration of actions for the On move event of that specific query to decide which actions to execute.
You can configure the following component actions to be triggered by these events:
Fetch the data: Fetches the data for the component. This action is already available as from DataMiner 10.2.10/10.3.0 for all components using query data as input.
Highlight time range: Highlights a range on the timeline component. The highlighted section will expose data in the form of a Timespan object. If multiple sections are highlighted, the data will contain an array of Timespan objects.
Clear highlights: Clears all highlights set by Highlight time range actions.
Set viewport: Sets the viewport of the timeline to a certain time range.
Note
Prior to DataMiner 10.3.0 CU14/10.4.0 CU2/10.4.5, highlights can be configured using the Highlight range setting. This setting is still available in later DataMiner versions and can be used in combination with highlights set by actions. Its behavior remains the same: a highlight set by the Highlight range setting will not expose data and it will not be cleared by the Clear highlights action.
The value of input for events can be configured to be linked to data. From DataMiner 10.3.0 CU14/10.4.0 CU2/10.4.5, you can also link the input to information provided by the event itself. All timeline events expose information relevant to the event in question. The following information is provided for each event:
Range select: Provides a from and a to property, both of type Timespan.
Item resize: Provides an old and a new Timespan pair, indicating the start and the end of the item before and after the resize event. It also provides information about the resized item in the form of a Query row object.
Item move: Provides the same information as the Item resize event.
Group change: Provides information about the current state of the item and the new state, both as Query row objects.
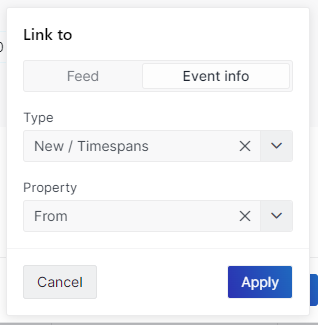
Event editor in DataMiner 10.4.5
Tip
When interacting with the timeline, from DataMiner 10.3.0 CU14/10.4.0 CU2/10.4.5 onwards, you can use the following keys:
- ESCAPE: When you press this key while interacting with an item on the timeline, you will cancel the interaction and move the item back to its original place.
- SHIFT: When you keep this key pressed while moving an item on the timeline, the movement will be more precise.
- CONTROL: When you move an item horizontally, a larger movement is needed to also make it move vertically (and vice versa). If you want to override this default behavior and move the item with precision, both vertically and horizontally, keep this key pressed.